How to change email format in WHMCS
Email templates in WHMCS allow you to customize the messages you want to send to your customers for operations performed in whmcs, for example, joining the user portal and sending a welcome message and invoicing. You can customize the emails you send each process to contain useful information or products related to each user.
The current WHMCS templates allow you to notify your customers or employees immediately and automatically. You must pay attention when you install the WHMCS System by default on the host through training. Once you install the domain, all emails and texts of these System emails will be in English.
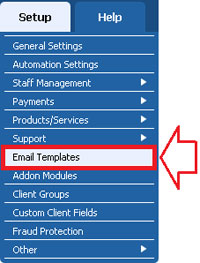
To view email templates in WHMCS, go to Setup > Email Templates.
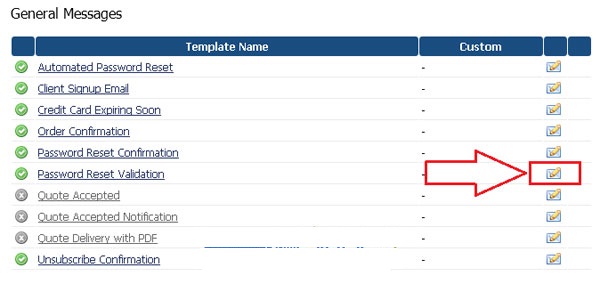
To edit any of the templates in front of the name of the email template you want, click on the Edit icon as shown in the image to open the corresponding email template in editing mode.
You can also combine simple texts with HTML pages in the editor in email templates.
How to create custom templates in WHMCS :
You can create customized templates for welcome emails and the registration of new services. For this purpose, follow the steps below:
Go to Setup > Email Templates
2. Use the Create New Email Template at the top of the page to create a new email template.
3. You can choose manual options from the Type section, such as General, Product, Domain & Invoice.
4. It would help if you chose a unique name for the email template’s name so that when you want to send the desired email, its name is distinct and recognizable in the drop-down list of emails.
Click Create to create a new template.

5. You can use the Format editor to edit the email title and Format.
After saving the new email template, its title will appear in the email list. Also note that for the email templates you create, do not choose the name “Mass Mail Template” because it is reserved for whmcs and is used when sending mass emails.
Add an attachment to the email.
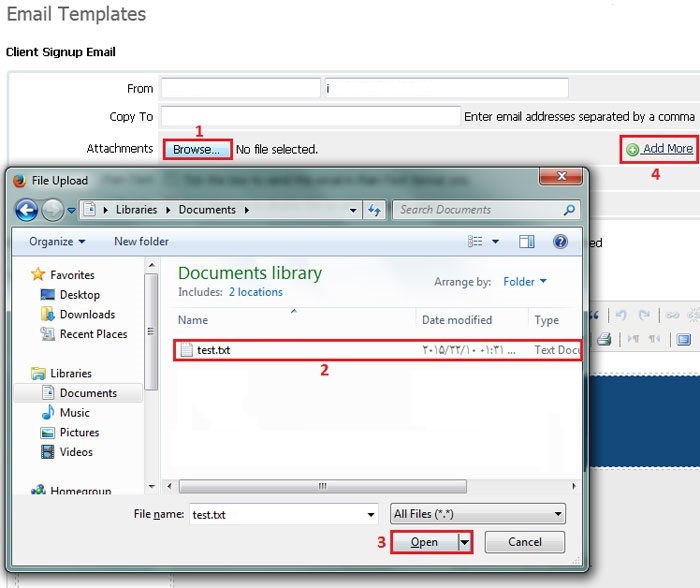
You can specify an attachment File for your emails, so the attached File is also sent with the email every time you send an email to your customers.
For this purpose, go to Setup > Email Templates and open the desired template in edit mode.
Then, click the Browse Button from the Attachments section and select the desired File on your computer. If you need to add more attachments, click Add More.
After clicking Save Changes, the desired File will be uploaded to the downloads folder.
Adding headers and footers for WHMCS email templates:
You can also define headers and footers for email templates so that all emails are sent this way. The title is displayed at the top of each shipped email, and the Footer is at the bottom.
To set this section, you should go to Setup > General Settings > Mail tab and select the following areas as custom:
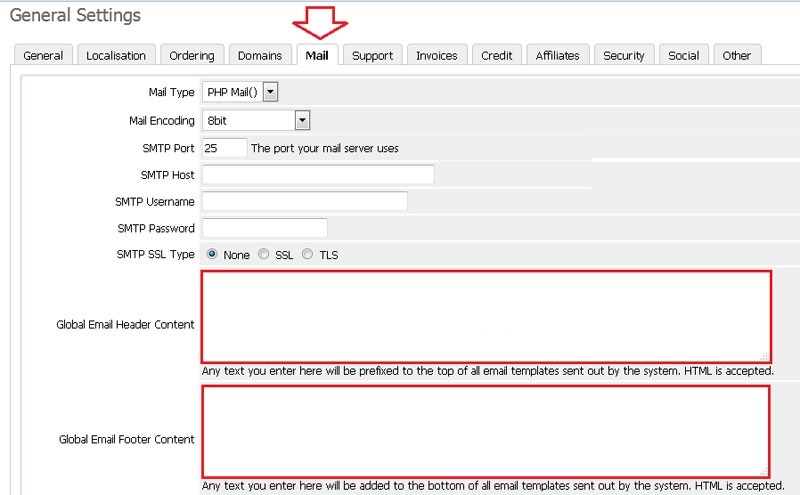
- Global Email CSS Styling
- Global Email Header Content
- Email Template Content
- Global Email Signature
- Global Email Footer Content
Disabling WHMCS templates:
You don’t want emails to be sent to customers in some situations. For example, when creating a bill or when services are blocked. For this purpose, you can follow the following steps:
Open the email template you want to disable in edit mode.
Activate the check box opposite the Disable option at the top of the screen. Click on Save Changes.
Disabling WHMCS templates:
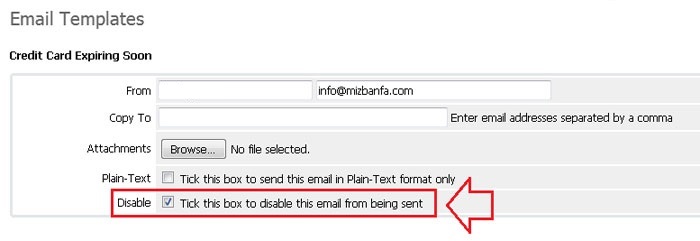
In this case, no email will be sent until this email Format is activated again.
Translation of email templates in WHMCS:
By default, in the path Setup > Email Templates > Edit, the email templates are according to the language you selected in Setup > General Settings > Localization. You can translate the templates according to the languages you want, and whmcs will send emails according to the language chosen by the users during order registration. Follow the steps below to create templates in other languages:
At the bottom of the Setup > Email Templates page, select the desired language from the Add drop-down list and click Submit.

In this case, email templates are opened in secondary pages using the selected language for editing.
As previously explained, users who select a new language will receive emails in this Format.
WHMCS MERGE FIELDS:
You can use Merge Fields in email templates. When emails are sent, the relevant parts will be filled with helpful information.
For example, using the Client Name field in each email template section, you can enter the name of the user to whom the email is sent. Merge fields are different based on the type of email.
For example, an email related to customers will have customer-related fields, and an email related to products will have areas about products and customers. The Available Merge Fields section at the bottom of the email text provides a detailed list of sites used in each email. Clicking on any fields will insert them wherever the mouse pointer is.

In emails, you can also enter custom fields for users, products, etc. For this purpose, you can use the integration field. Use {$client_custom_fields_ field name here} for custom client fields.
The field name here is the name of the custom field. For example, the tax field is set as {$client_custom_field_vatnumber}.
You can also use {$service_custom_fields_fieldnamehere} for custom product fields. The field name here is the name of the custom field. To create a loop to display all custom fields, you can use the for each loop as follows:
{foreach from=$service_custom_fields item=customfield} {$customfield.name}: {$customfield.value}{/foreach}Display conditionally:
There are situations where you want specific data to be displayed in the email if that situation exists.
For example, you want specific information to be sent in emails related to sales department tickets so that you can enter the following commands in the text of the Support Ticket Opened email template:
{if $ticket_department eq "Sales"}The sales department is open 9-5 pm Monday-Friday so you will only receive a response between these times. We thank you for your patience. {/if}You can also use equivalent phrases in all types of emails for other cases and set more conditions and rules for sending emails and their information. If you use this tutorial, you can adjust your email settings. You are fully configured in whmcs. Congratulations.