
How to Install Linux on a USB Flash Drive (Portable & Persistent)
Installing Linux on Flash Has Many Applications, But There Are Different Ways To Implement It, and we will discuss some of them below.
You must have seen in some movies that a hacker can access files by connecting a USB flash drive to a computer without having the operating system password and can delete, copy, or transfer them, apart from the leading technical methods and the dynamic cinematic approach that may be felt with this depiction.
In general, sometimes people have to start another operating system to access their files and make backups without creating the primary operating system on the computer or laptop. This is especially true when even the primary operating system’s Safe Mode is not responsive, and the user needs a clean boot.
Also, someone might want to try out a variety of Linux distributions before doing a complete installation, despite the five reasons for installing Linux on a laptop; they also don’t want to remove their current operating system before making a final decision. Also, maybe someone else always wants to have a portable operating system and run it on any computer.
In other situations, a person needs applications of a particular operating system.
At the same time, he does not use that operating system, and he does not agree with this method because it takes up space by installing two operating systems side by side.
Therefore, one of the proposed solutions will be installing Linux on a flash memory, which is not particularly complicated and seems almost as easy as learning to install Linux on an Apple MacBook. However, the ways to achieve this goal differ; everyone may be comfortable with a particular method.
To install Linux on a flash memory, you must first know that, like bootable Flash, all the information inside the flash memory will be deleted for installation.
However, the difference between bootable flash memory and installing Linux on Flash is that, in the first case, the user can run and install system files on the memory in the desired partition through Flash. Installing Linux on Flash means installing the operating system on flash memory, which can be booted on any laptop or computer.
Another critical point to note about installing Linux on Flash is its shortcomings and weaknesses, including the inability to remove changes made in the operating system on Flash.
In this way, the user can install the desired software on that operating system; however, it returns to its first state every time it is restarted.
Unlike the operating system on DVD Live, which only runs the operating system and the user cannot install software, it is also possible to install the program when using Flash. Still, in some installation methods, these changes are not permanent.
The non-permanence of programs and changes in the operating system installed on Flash can be considered an advantage and a strength. For example, you want to do your financial process and banking work in an operating system that does not store anything, and by using this method, you create more security for yourself.
In the following, we will first discuss installing Linux on Flash through the Windows operating system and then check how it is installed in the Linux operating system.
Installing Linux on Flash in Windows
By now, you must have encountered portable software in the Windows environment. In this tutorial, we want to create a mobile operating system example on Flash. For this purpose, we need the image or ISO file of the desired operating system and install a live and executable version of the operating system on a USB flash drive.
To install Linux on a flash drive, prepare a drive with at least 4 GB of memory (8 GB is better). Of course, choose a drive with more memory if you want to install many programs on the operating system. Connect it to the USB 3.0 port and follow the step-by-step tutorial.
Installing Linux on Flash in Windows and Rufus software
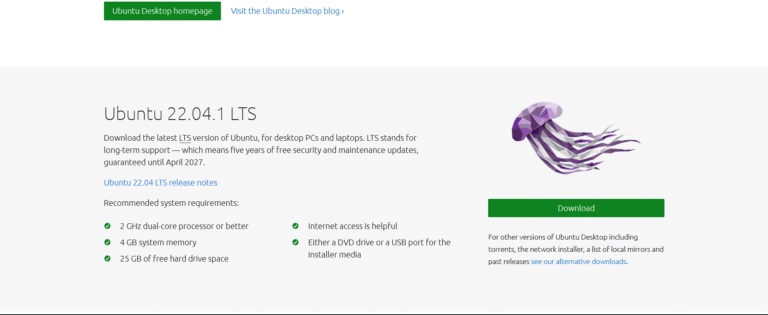
First step: Download the desired Linux operating system image or ISO file, which is free from the official website. After installing Linux on Flash, choosing the 32-bit operating system version to run it on any system is better.
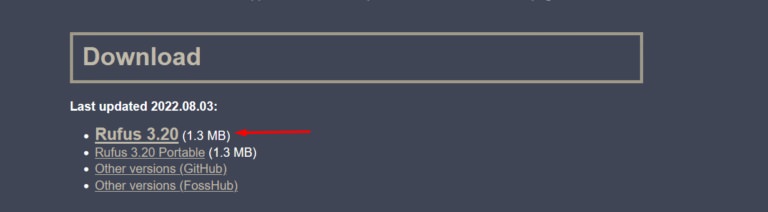
Second step: Rufus software is a practical tool for creating bootable and live Flash, which must also be downloaded and installed.
Step 3: Run Rufus
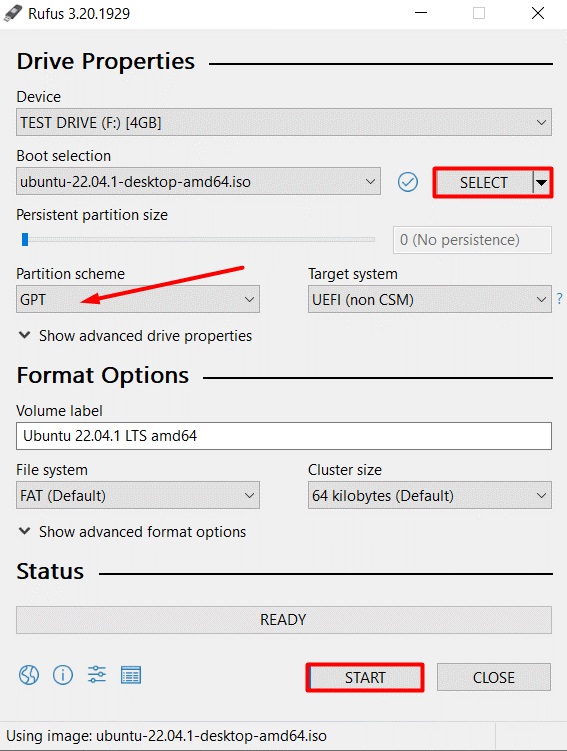
After downloading and installing the Rufus program, run it, press the SELECT button in the image, and choose the ISO file from the opened window. Set the Partition Scheme option to GPT mode. Of course, if your system’s BIOS mode is Legacy, you must select the MBR option in this section.
Press the Windows key and R to run the Run program to ensure BIOS Mode. Type cmd in the box, press Enter to open Command Prompt, type msinfo32, and press Enter. The System Information window opens; look for BIOS Mode to identify its mode, select the appropriate option in the Partition Scheme section, and press the START button.
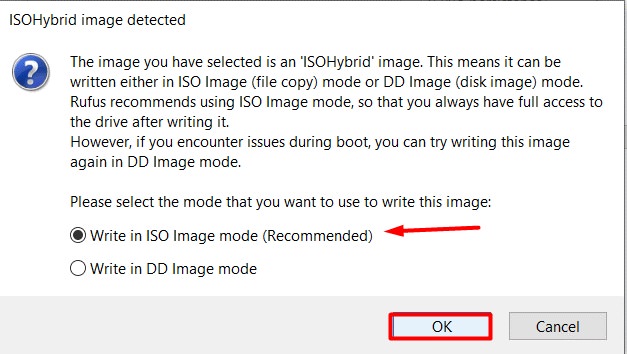
Now, a message with two options will appear. The Write in ISO mode option should be selected and confirmed.
Then, a warning will appear that all data on the flash drive will be lost. To continue, confirm and wait for the process to complete. The waiting time depends on the system’s available hardware resources.
Step 4: The flash drive is ready and can be used as Ubuntu 22.04 Live, for example. Please restart the computer to test its performance.
You must enter the boot menu after rebooting and displaying the motherboard logo. Depending on the motherboard, you can press one of the F10 or F12 keys on systems such as HP, Dell, or Lenovo several times to enter the boot menu. Then, press the Enter key to select the USB flash drive from the suggested options.
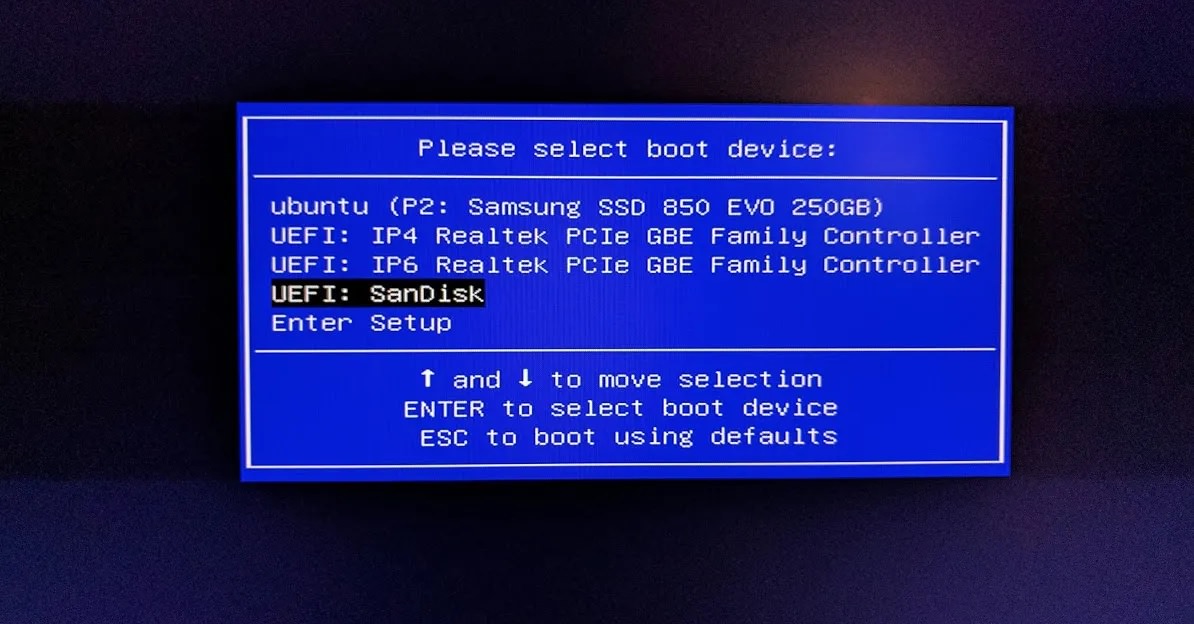
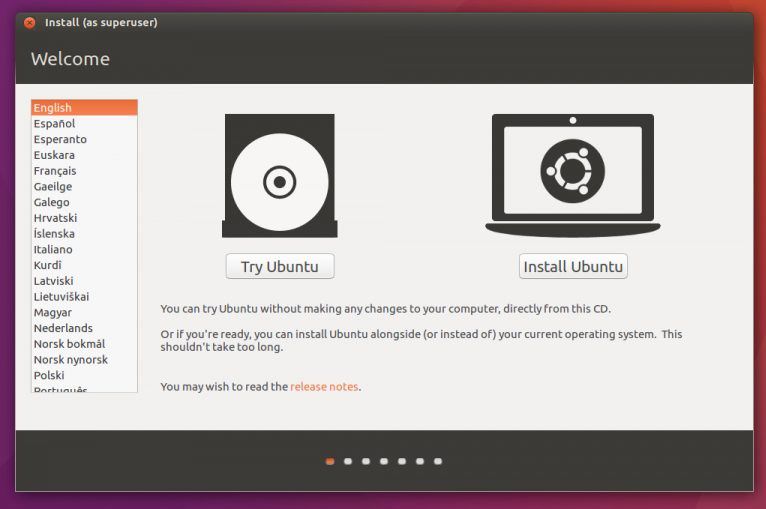
You will be directed to another menu where you should select Try or Install Ubuntu.
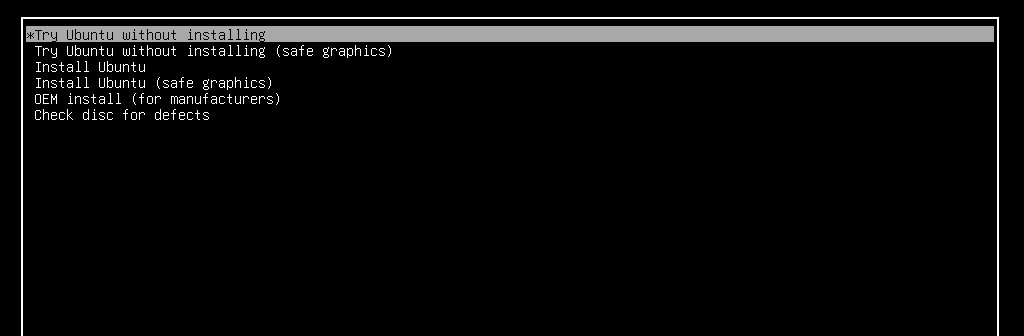
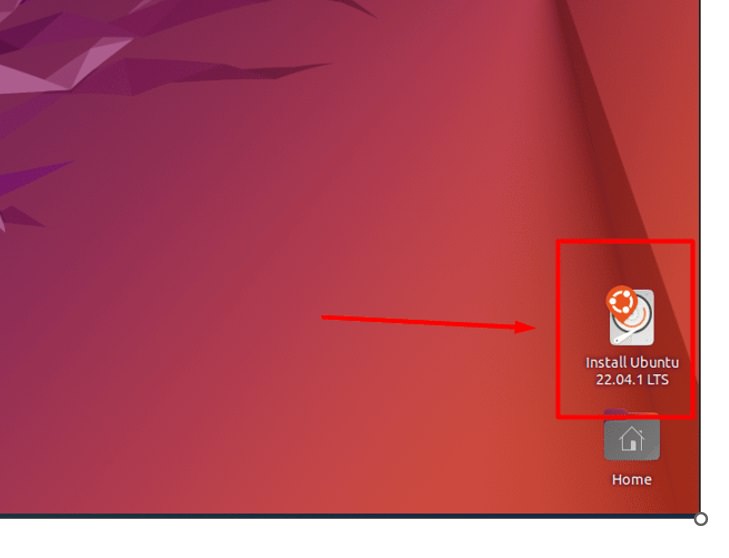
After a few seconds, the computer will be loaded with the Ubuntu operating system in USB Live mode, and you can enjoy the operating system on the Flash. You can also install the operating system by running Install Ubuntu 22.04 LTS.
If you remember, at the beginning of the article, it was mentioned that the changes applied to the operating system installed on the Flash would be deleted after rebooting. To solve this problem, you can use flash memory with a larger volume, go to the Rufus program to set the Persistent Partitions Size option, and specify part of the flash capacity exclusively for the operating system.
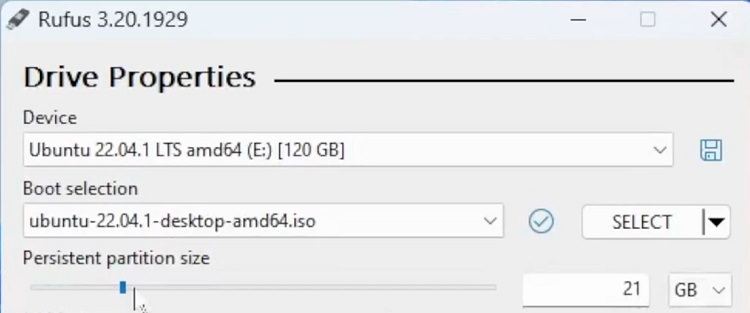
For example, if you have 120 GB of flash memory, you can select 90 GB of it in this section to be considered for the operating system, and thus, the changes applied will not be deleted after starting.
Another method is installing Linux on Flash in Windows using the open-source program Etcher, which can also be used in Linux and macOS. Therefore, due to its similarity, we will install Linux on Flash in a Linux operating system.
Installing Linux on Flash in Ubuntu Linux
It can be said that installing Linux on a flash drive is not much different from installing, for example, Ubuntu on a hard disk. Instead, some details that should be considered may seem strange to some who do not understand the whole issue. After all, in the open-source world of Linux, there are many ways to reach a destination, so choose whichever method you think is most convenient.
Installing Linux on Flash with Etcher
Rufus is not supported on any Linux distributions, but other tools are available to install Linux on Flash and create a live Linux operating system. One of these tools is called balenaEtcher or Etcher. This free and open-source program is available on Windows, Linux, and macOS platforms and has a similar mechanism on these platforms.
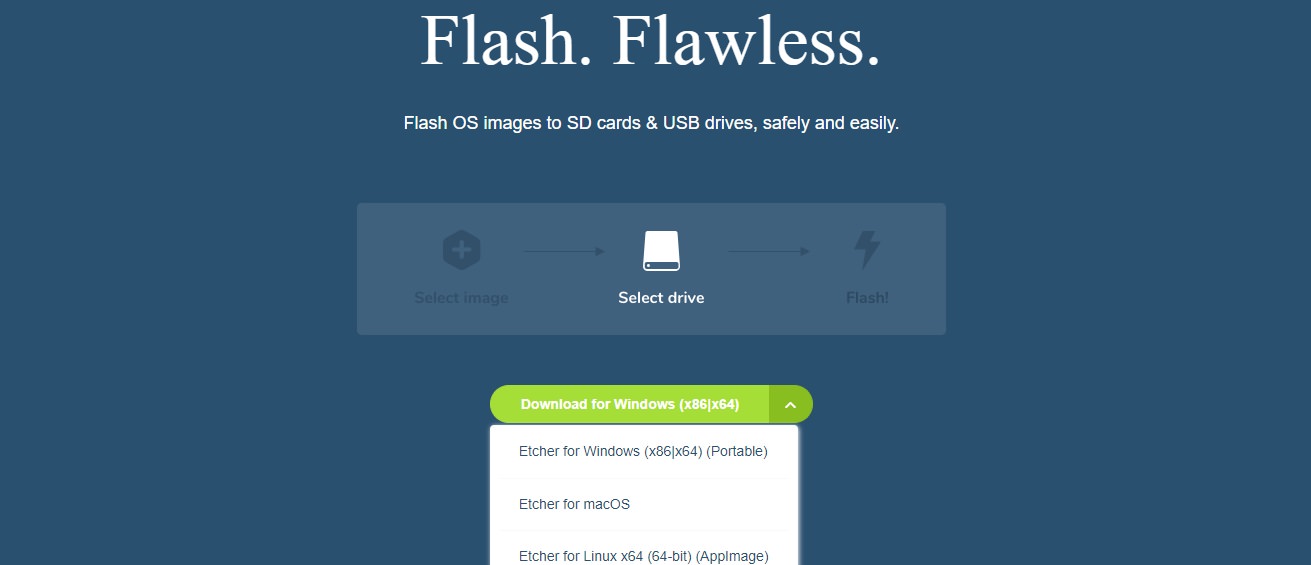
First step: First, download the Etcher software from the official website.
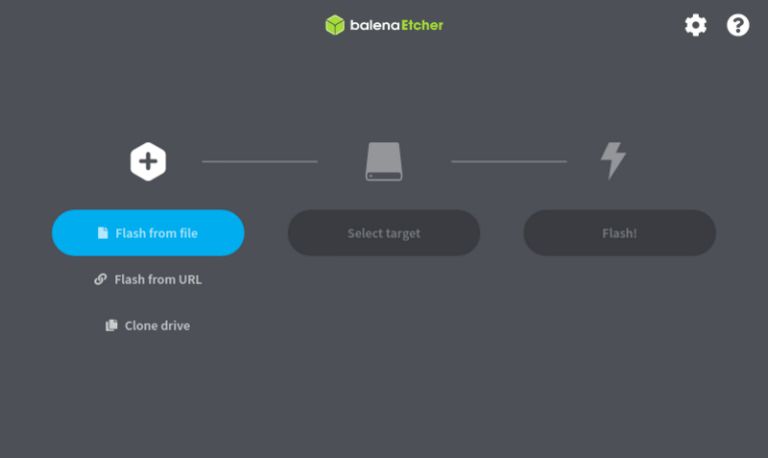
Second step: Connect the flash drive to the system and run the Etcher program. Select the Flash from Flash button and select, for example, the Elementary OS distribution ISO file. The program window is displayed as follows.
Step 3: Select the Flash with the Select Target button and press the Flash button to start the process. Then, it asks the user for a password.
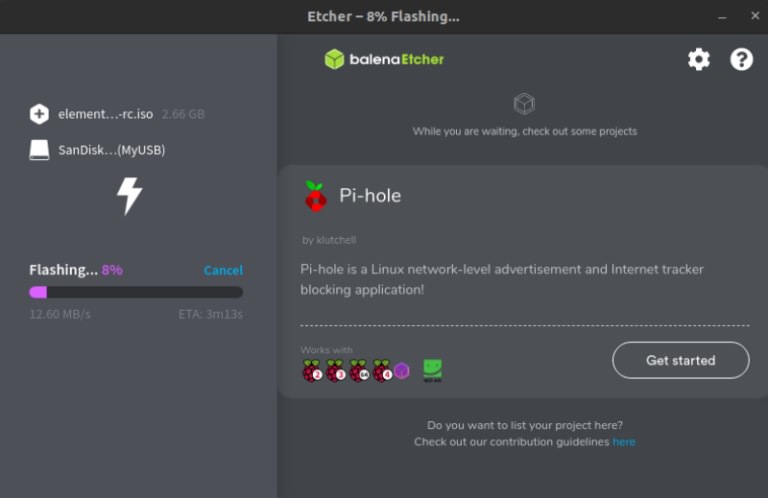
After going through the live flash process, it will be ready to use with Elementary OS.
Installing Linux on Flash with Startup Disk Creator
When installing Linux on a flash drive in a Linux environment such as Ubuntu, installing third-party programs such as Rufus or Etcher is unnecessary. For example, the Ubuntu distribution has a pre-installed Startup Disk Creator tool. Using this program, flash memory and DVD can be bootable and live.
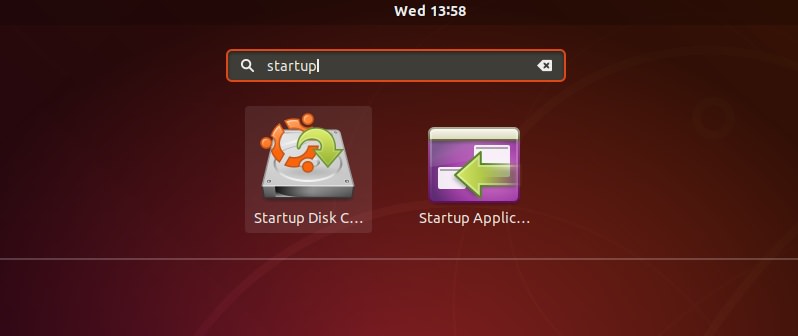
Step 1: Insert the Flash or DVD and look for Startup Disk Creator in the search section.
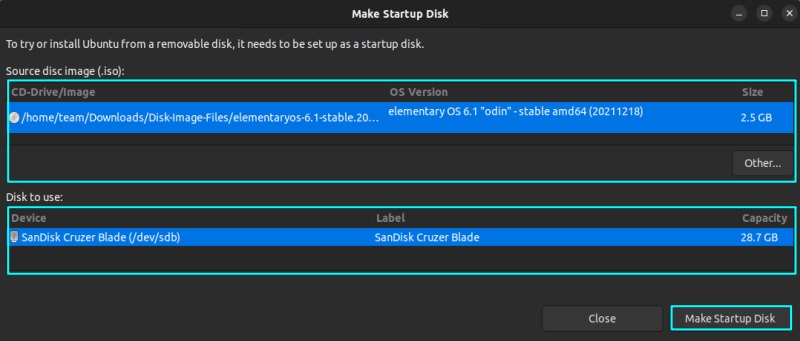
Second step: As soon as the program is launched, it intelligently detects the “Disk Image” file on the system; if it is only an image file, it will automatically add it to its list to prepare for installation on Flash or DVD. In addition, Flash or DVDs will also be detected automatically.
In some cases, this process may not be automatic. Therefore, manually find and add the image file storage location after running the program. Then, you can click Make Startup Disk.
Installing Linux on Flash in Ubuntu is simple. After 3 to 4 minutes, Flash can connect to other computers to start Ubuntu.
It can be installed on a laptop or another computer. A separate operating system can be used by changing the boot settings in the BIOS and choosing to boot from the flash memory. If desired, the user can also install the working system Flash on the Flashter in the same environment.
Installing the full version of Linux on Flash
Installing Linux on a flash allows the user to create a portable version of the Linux operating system wherever he is, only needing a laptop or computer to run it. Unlike the previous process, this method of converting the operating system on the bootable Flash to a full Flash does not lose the changes applied to the operating system after restarting.
In the first step, the user will need more memory, and 8 or 16 GB flash is not helpful for this because the full version of the operating system is supposed to be installed and used permanently. You can get a flash drive or, if you have more budget, an SSD hard drive with a capacity of 128 GB for this purpose.
Another problem that should be considered when installing the operating system on Flash is compatibility issues with different hardware. In fact, in this method, Linux is installed on Flash, so the Flashaller considers the flash drive flash memory like the hard drive on the system. Therefore, hardware optimizations are performed according to the current system hardware. However, if this Flash is to be flashed on another system, the hardware issue may cause problems. As a result, open-source drivers can be used instead of proprietary drivers to reduce errors.
Another problem we should mention that is missed in many Linux Flash installation tutorials is the Bootloader.
There are solutions to the Bootloader problem that some users may encounter on UEFI systems.
The bA bootloader is a computer program that starts the computer. It is stored in the ESP partition and often works automatically without user intervention. However, the ESP partition is one of the challenges of installing Linux on Flash that some users face, and it is difficult to discover.
The user can remove the hard disk to solve the Bootloader problem in the desktop computer. Still, this method is not applicable for laptops, and besides, it doesn’t look professional at all, and it’s not foolproof in terms of safety. The general workaround is not to let the installer know that an ESP partition has already been created.
The easier way is to remove the ESP flag from the ESP partition before installing Linux on the Flash and reflash it to the previous state after installation. In this way, the Ubuntu installer is tricked into not finding the current ESP partition and automatically creates a new one on the flash memory. Of course, rest assured that the original ESP partition on the hard drive will remain intact and won’t cause any problems.
Essential tips for installing Linux on Flash in this way
- Two USB flash drives, one as a bootable live flash for installation and the other as a memory for a complete Linux installation on it
- You can consider 4 GB for the bootable Flash; the main Flash must have at least 32 GB of space.
- It is recommended that both flash drives be of the USB 3.0 type to speed up the installation. Even if you use USB 3.0, be aware that installation is time-consuming. So, manage your time and be patient.
- Remember that booting the operating system from Flash is slow, compared to booting from the hard disk and SSD.
First part:
Installing Linux on the Flash should be considered the final stage of creating a live bootable Flash in which the operating system cannot save the changes. Therefore, a bootFlashLinux flash must be made using the previous methods to install Linux fully on Flash. For example, download Ubuntu from the official website and perform operations on Flash with a Flasher volume by installing Linux in a moment with Etcher. This bootable Ubuntu flash can be used to install it at another full moment.
The second part:
WetTrash has been converted into a live Ubuntu operating system. We want to make it a permanent operating system that can be portable and used on any computer.
Step 1: Connect flash drives to the computer and restart the system to boot the operating system installed on the first flash drive. When it’s finished loading and you’re in its environment, select Try Ubuntu.
Second step: To disable the flags from the ESP partition, press the Windows key on the keyboard and type Gparted. This will open the GParted partition manager that usually comes with Ubuntu.

If Gparted was not in the version you installed, install it by running the following commands in the terminal:
sudo apt update
sudo apt install GParted
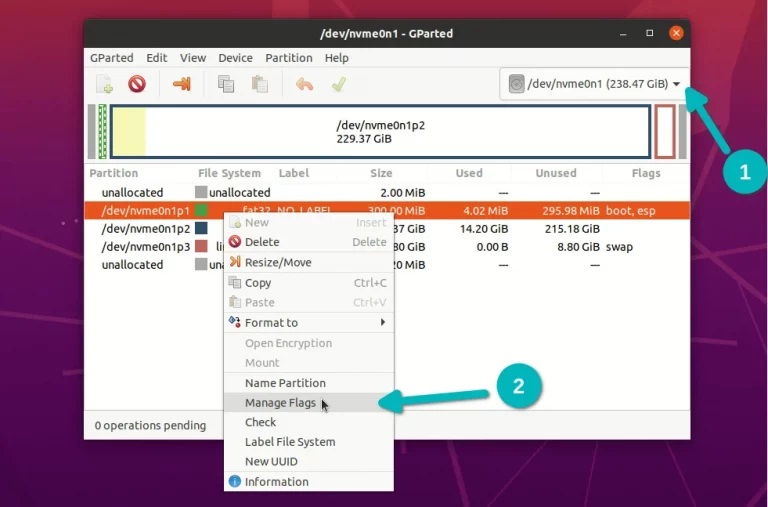
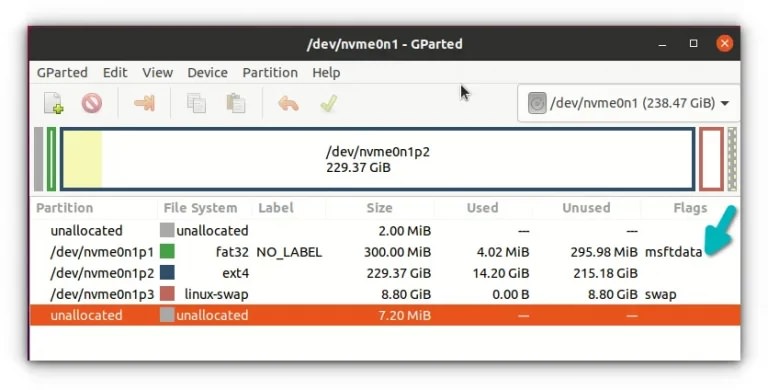
In the Gparted program, select system memory on the top right (number one in the image) and look for a partition between 100 and 500 MB with an ESP flag. Then right-click it and select Manage Flags (number 2 in the picture) from the opened menu.
In this section, the esp and boot flags should be active, and you should remove the tick on esp. If more flags are selected, take a screenshot of the selected options before the changes so you can return them to the previous state after completing the installation process.
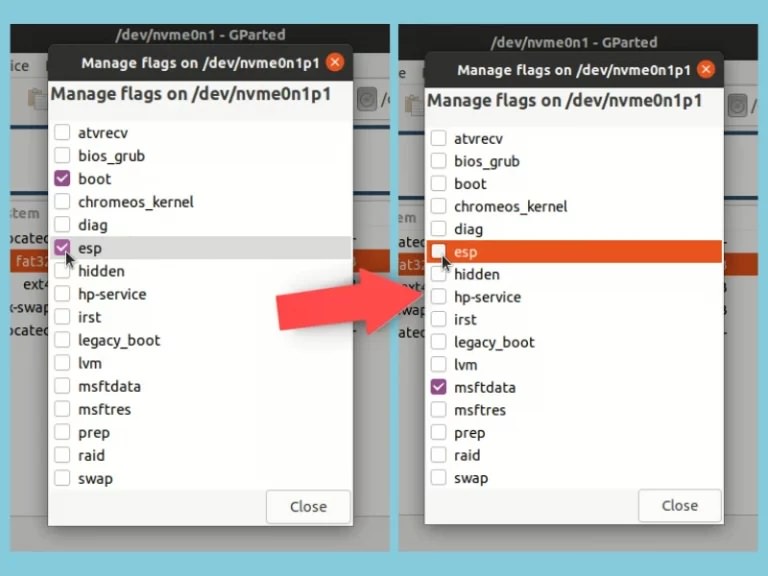
Removing the ESP flag will usually enable the MSFT data flag, so leave it as is and close the window to save the changes.
No, the operating system on the bootable Flash will no longer find the esp partition; Flashou can quickly start the complete installation of Ubuntu on the Flash.
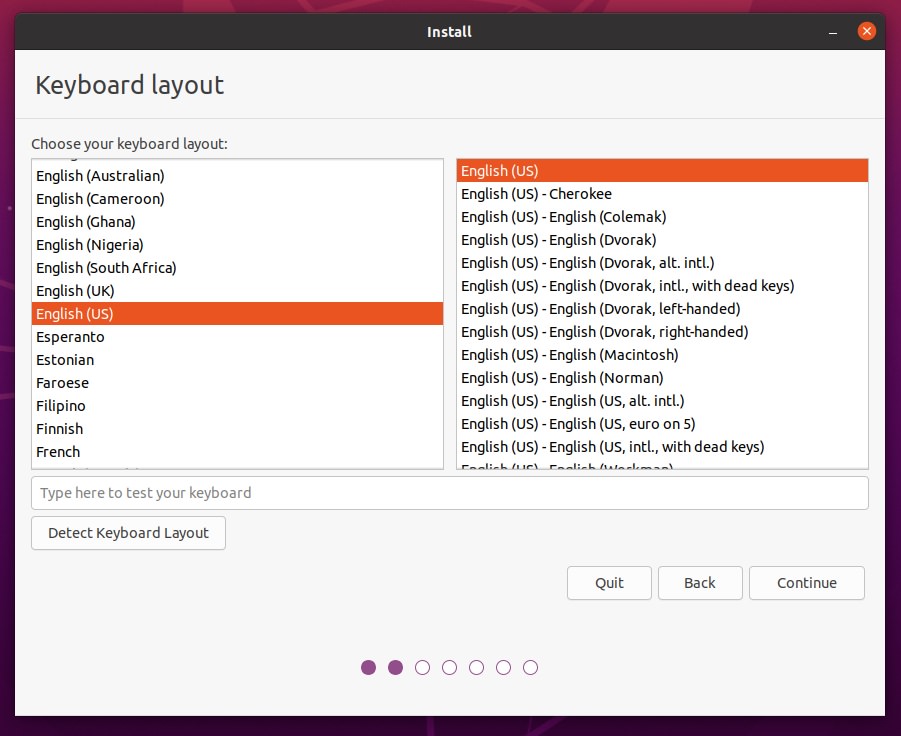
Step 3: Ensure the higher volume Flash inside the USB port. Click on the Install Ubuntu icon on the desktop. The installation process starts, and you can go through the initial stages of choosing the keyboard layout and language.
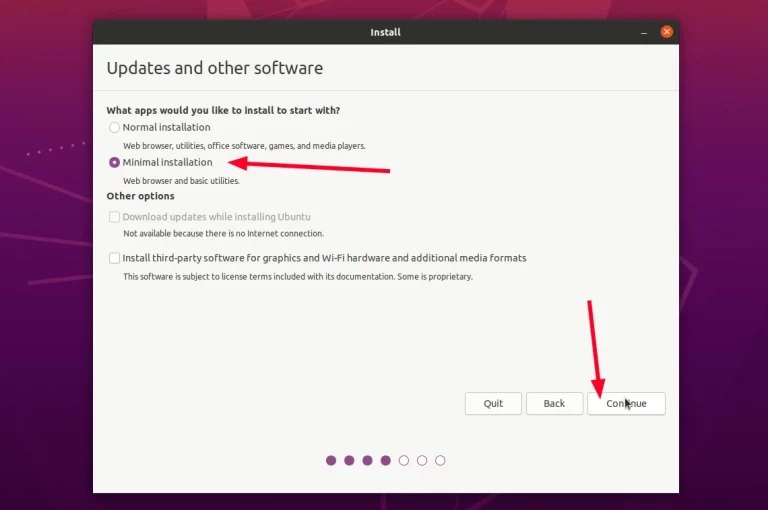
To reduce the operating system installation time, you can choose Minimal Installation, according to which essential tools and a browser are installed. Other programs, such as Office and multimedia players, are installed later. Click the Continue button to go to the next page.
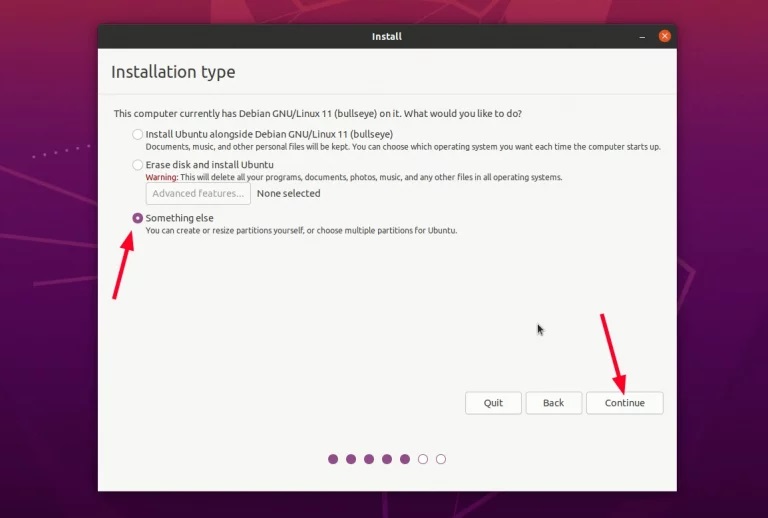
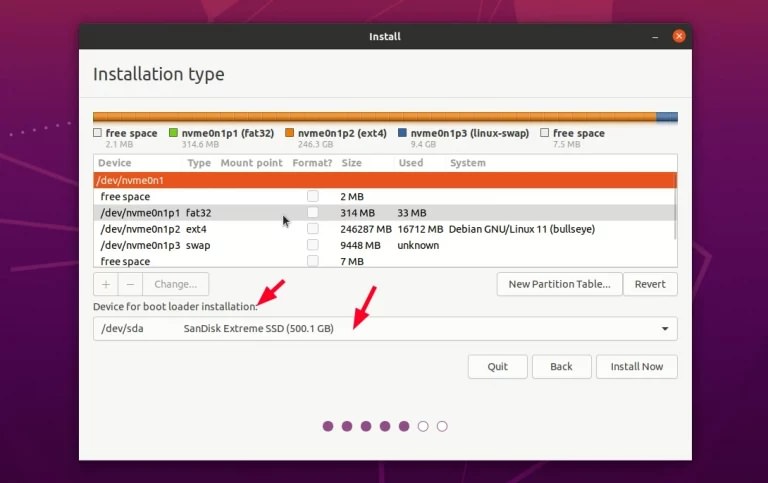
On the next page, select Something Else and continue.
The following section lists all the hard disks. According to the change in iFlash settings, there is no news about the ESPN hard disk partition. Select the desired Flash (larger Flash) in the “Device for bootFlashr installFlash” section. For example, a 500 GB external SSD connected to the laptop via Thunderbolt is selected in the image.
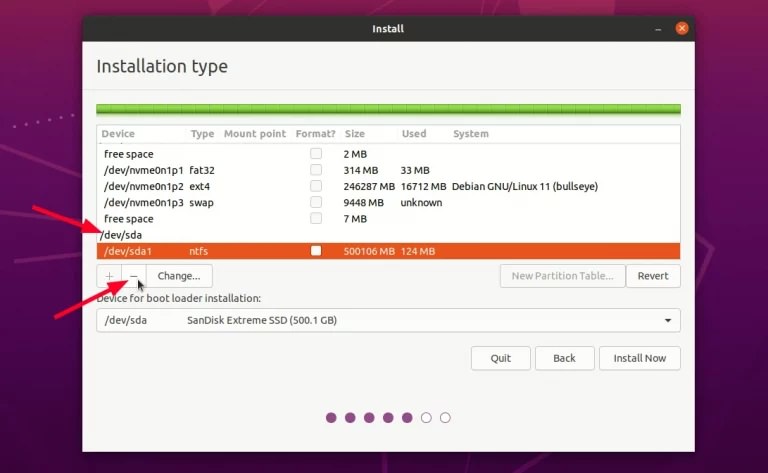
Now, in the upper section, as shown in the image, select the giant arrow and then click the negative button to delete all the partitions and ultimately free up the memory space.
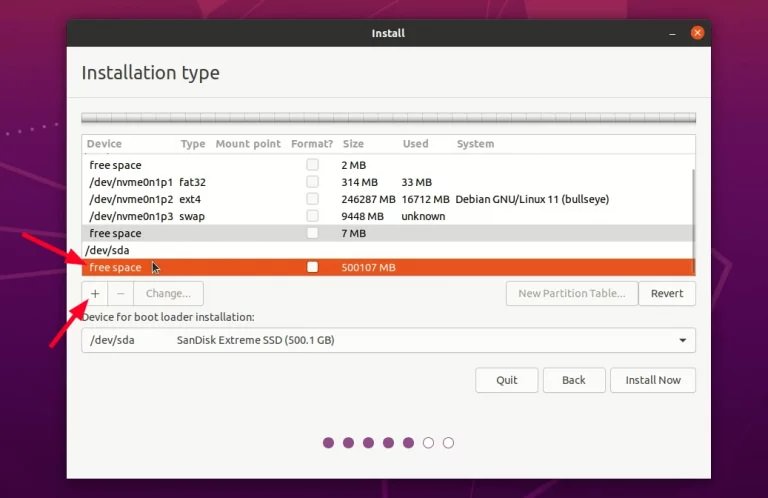
When selecting Flash, click the plus button to add a new Flash.
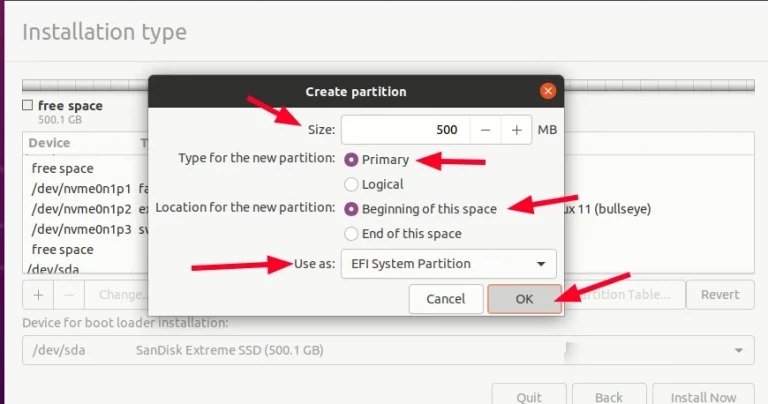
Set the first partition as ESP for Bootloader.
Select the remaining free space according to the image below and configure the system files of the root partition with Ext4. You can also create root, swap, and home sections separately, but it is recommended that you put everything, even the exchange, in the root partition.
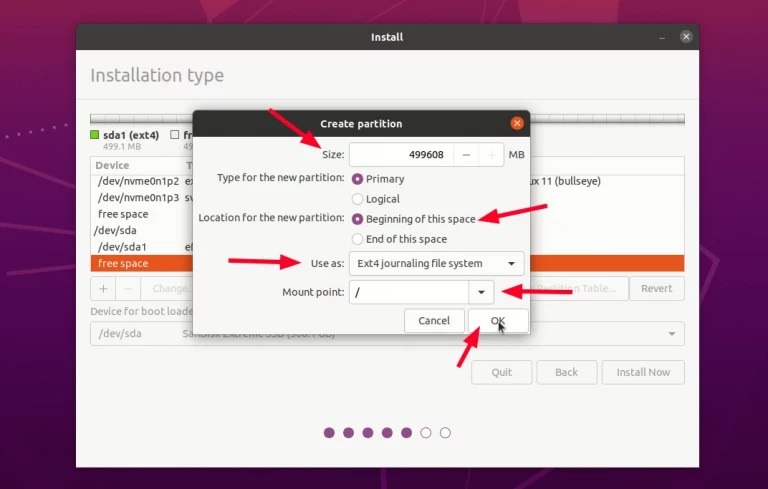
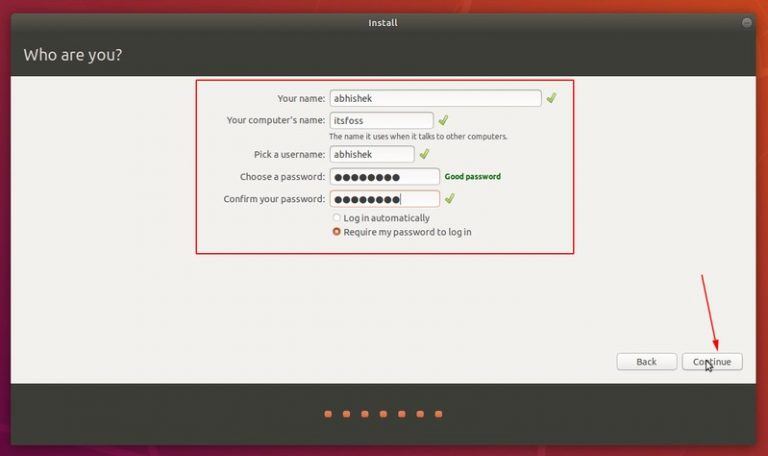
To be sure, after configuring the partitions, check again that the desired Flash or external memory is selected as the Flashoader installation location. Then click the Install button to be redirected to the Timezone settings page, where you can choose your time zone. Then, you need to define the username and password and click continue to start the installation officially.
If you’ve ever installed Ubuntu, you’ll notice that this method is much slower than usual. In any case, wait for the operation to complete. Upon completion of the installation, a message will appear indicating that the options Continue Testing and Restart Now will be available.
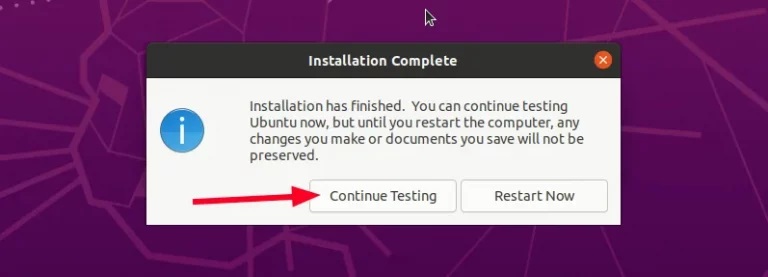
Do not click Restart Now. Before restarting, we need to reset the ESP partition settings. Tap on Continue Testing.
Step 4: You can re-enable the ESP flag in the primary partition. So, run the Fparted program and select the previously enabled ticks. There is nothing to worry about if you accidentally restarted the system before re-enabling these ticks on the primary ESP partition.
In this case, because the computer does not have an ESP partition, its operating system will not boot without the Flash you created. This method can also make the operating system complex for other people. However, you can restore the original ESP partition flags after rebooting. Finally, a full version of Ubuntu is installed on the Flash; now, the live OS can be turned off.
Flash part: Since the flash memory is partitioned in this method, it is not possible to restore it to its previous state and use it for data transfer by formatting it directly by the operating system in most cases.
This program has also been published for Windows, macOS, and Linux. Therefore, using this GParted software to restore Flash with the live operating system is better. With iFlashlp, delete all partitions and create a new section with FAT32 or NTFS formats.
Installing Ubuntu on Flash with mkusb
As mentioned, there is a big problem with installing Linux on a flash drive; as soon as the system is rebooted, all changes applied to the operating system will be deleted because all data is processed in the live working system environment in the RAM.
Therefore, in addition to the previous method of installing a full version of Ubuntu on Flash, if a user wants the operating system on Flash to be able to save changes, they can also use the mkusb bootable tool in Ubuntu. This tool is often used to install Ubuntu or Debian on Flash.
By creating a permanent Flash Live, the user can use it like an operating system installed on a computer or laptop. In this case, without worrying about deletion, you can install desired programs, save files, customize the design, and access them after restarting, and have a portable operating system. Like the previous method, a flash memory of at least 64 GB or higher is required in this method.
The mkusb program is not installed by default on Ubuntu, and to install it, you must first add the Universe repository to the system.
Thus, enter the following command in the terminal:
- sudo add-apt-repository universe
- Then, the following command:
- sudo add-apt-repository PPA:mkusb/PPA
- sudo apt update
- Then, press Enter to rerun the command and continue the installation process.
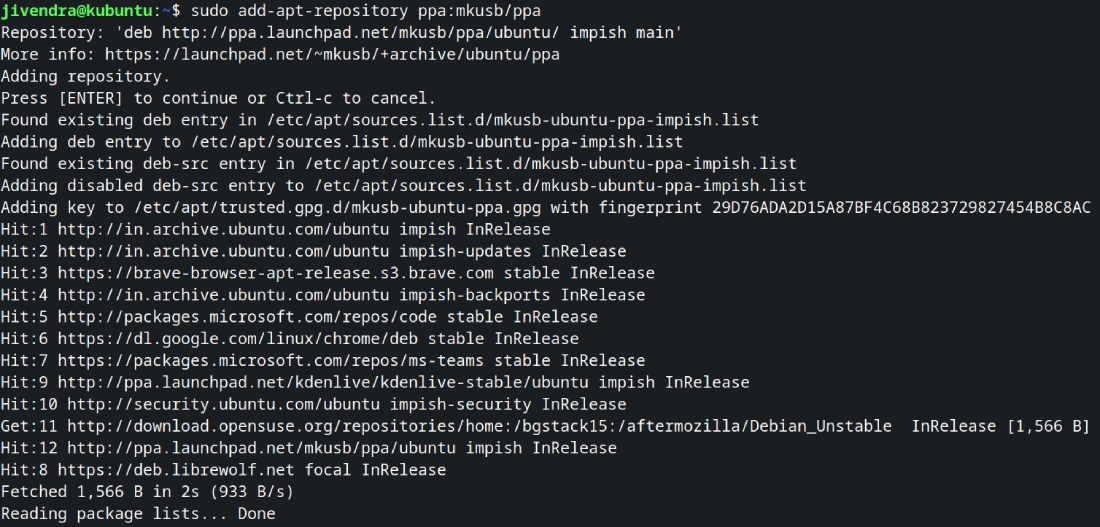
mkusb can now be installed from the PPA with the following command:
sudo apt install –install-recommends mkusb mkusb-nox USB-pack-efi
After installing this program, you can install Ubuntu on the Flash and create a permanent live flash. ConFlash the Flash and follow the steps.
Step 1: Run the Flash program. An image similar to the photo should appear.
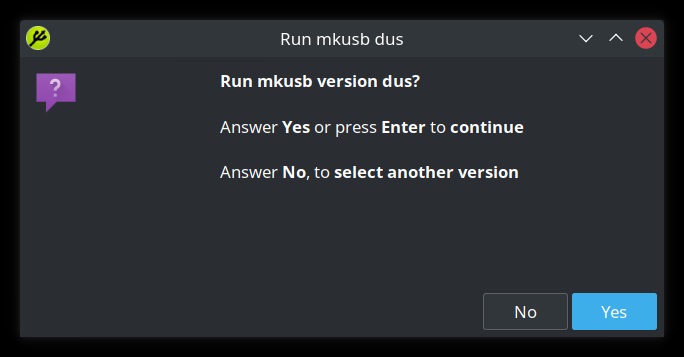
You must click on the Yes option based on the message that appears. After that, a password will be requested to confirm permission to perform the ISO installation process in Flash.
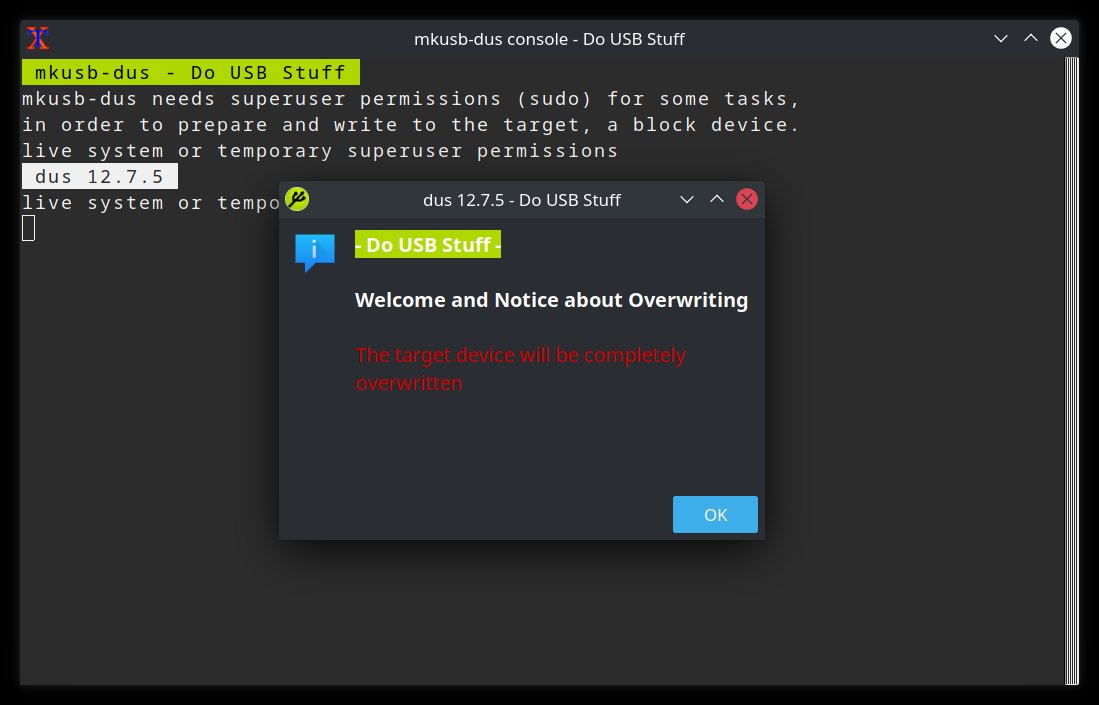
A warning will appear that all current Flashlash data will be lost; click OK to continue.
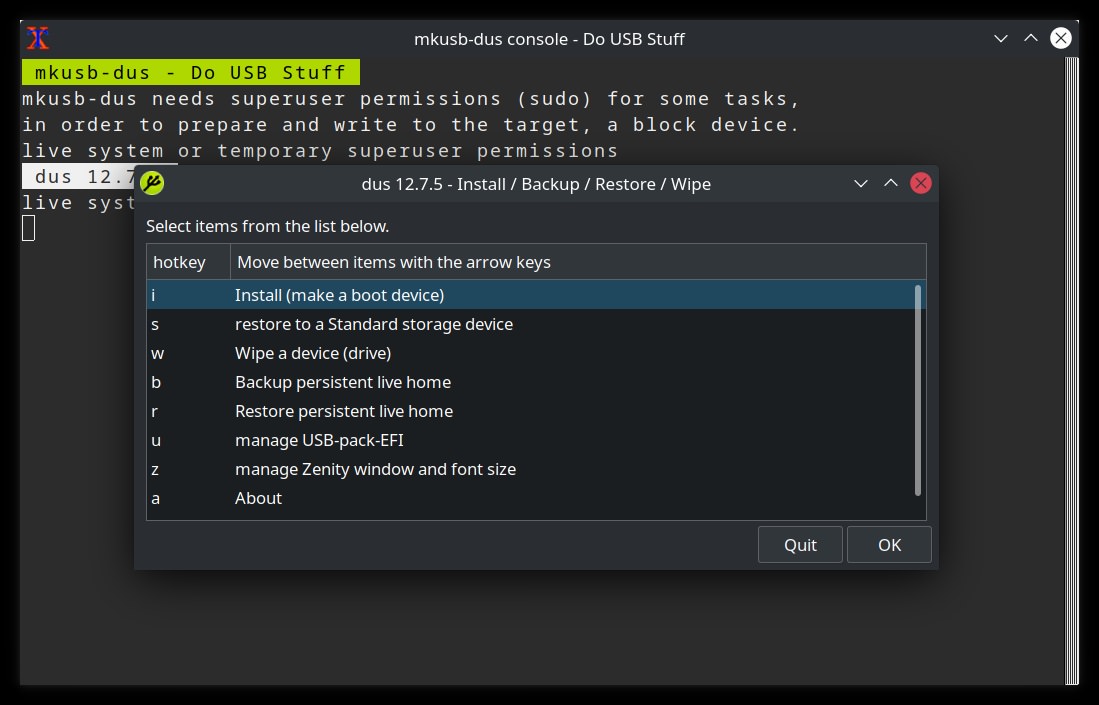
The second step: here, the tasks that mkusb can do are shown, and the user must choose an option. Select and confirm the Install (make a boot device) option.
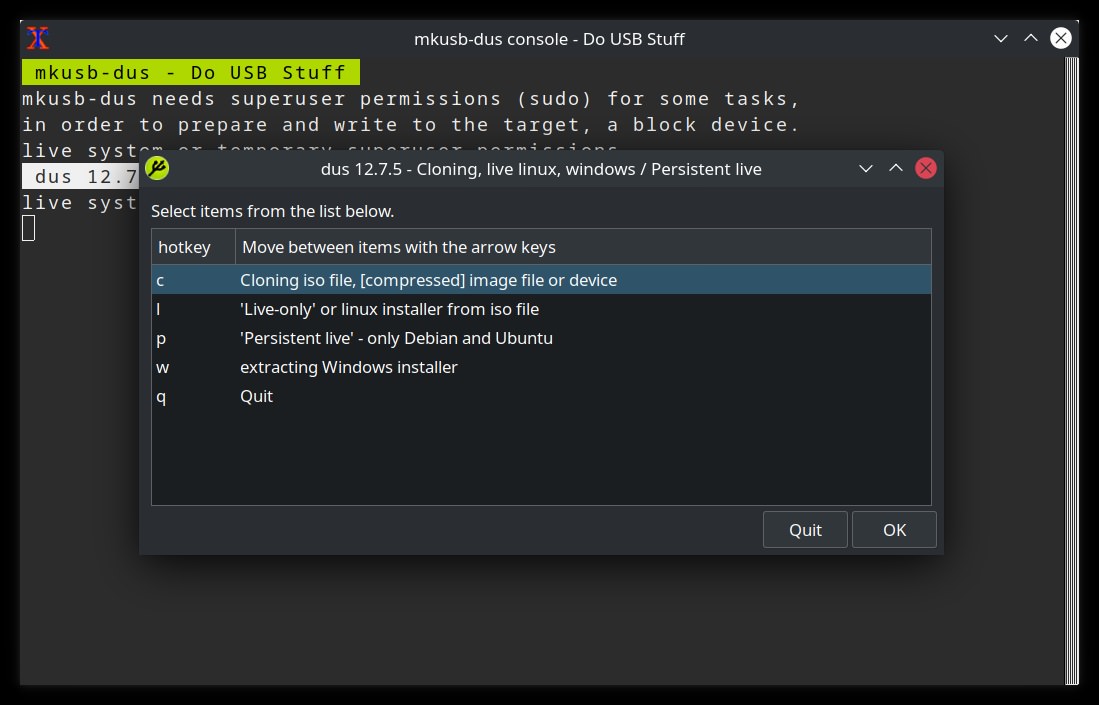
Third step: In this section, select and confirm the Persistent Live option to permanently install Linux Live on the Flash.
You will then be prompted for a useFlashsword, which you must enter to continue.
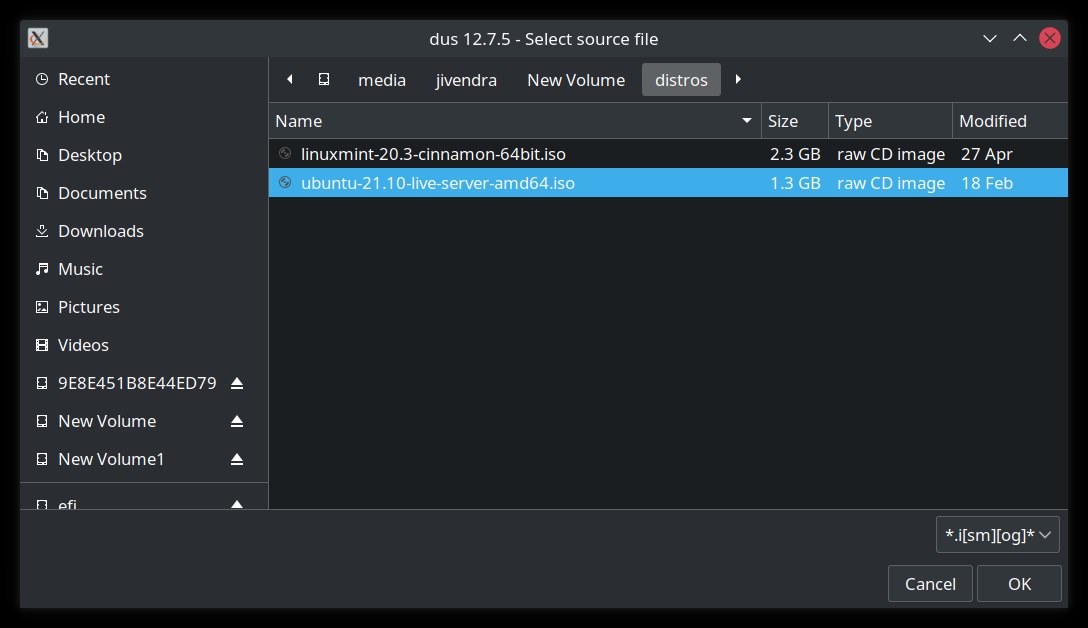
Step 4: Select and confirm the ISO file of the Linux distribution you want to install.
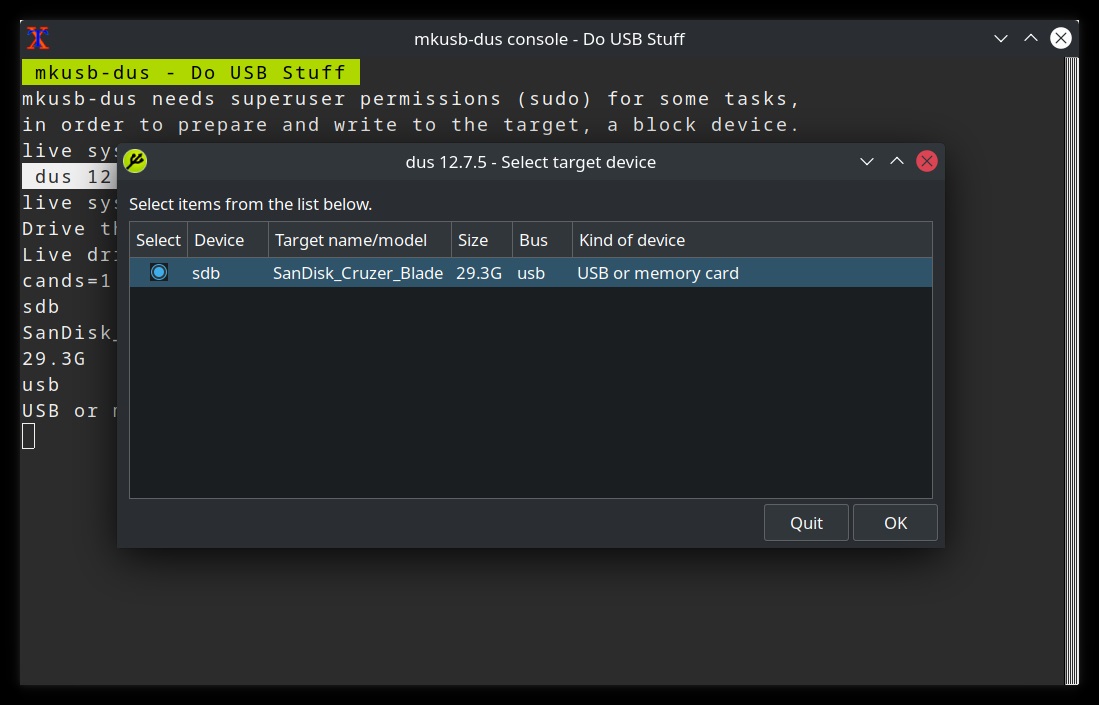
First, select the Flash on which the operating system will be installed and bootable.
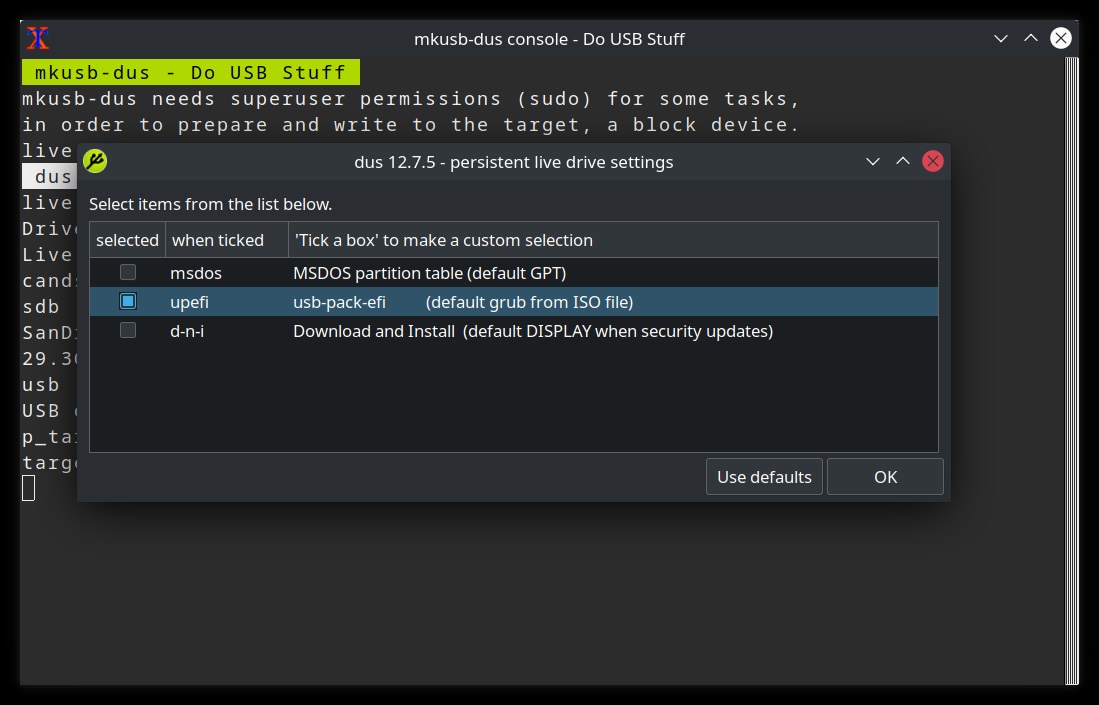
Step 6: In this step, select the UEFI option and click OK. This option supports the EUFI BIOS with Secure Boot mode; however, the BIOS of some systems in Secure Boot mode may prevent the operating system from booting even in this way, and you need to disable Secure Boot altogether in the BIOS settings.
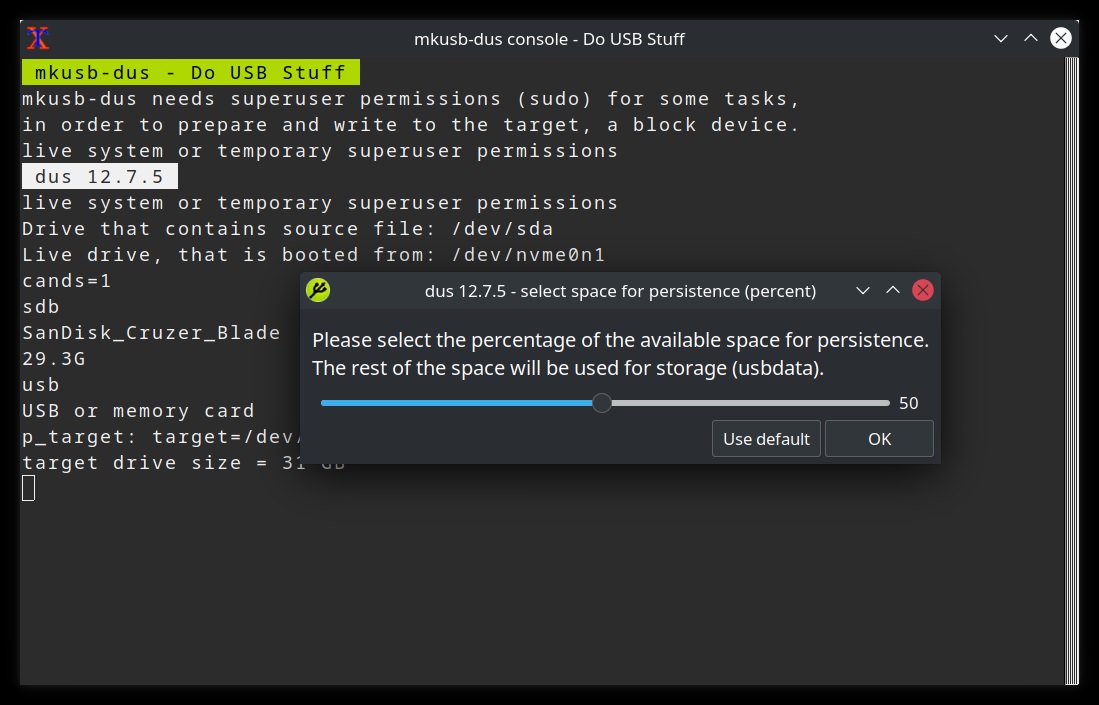
Seventh step: Determine the percentage of memory considered permanent space. Adjust and confirm the amount of permanent memory based on your needs.
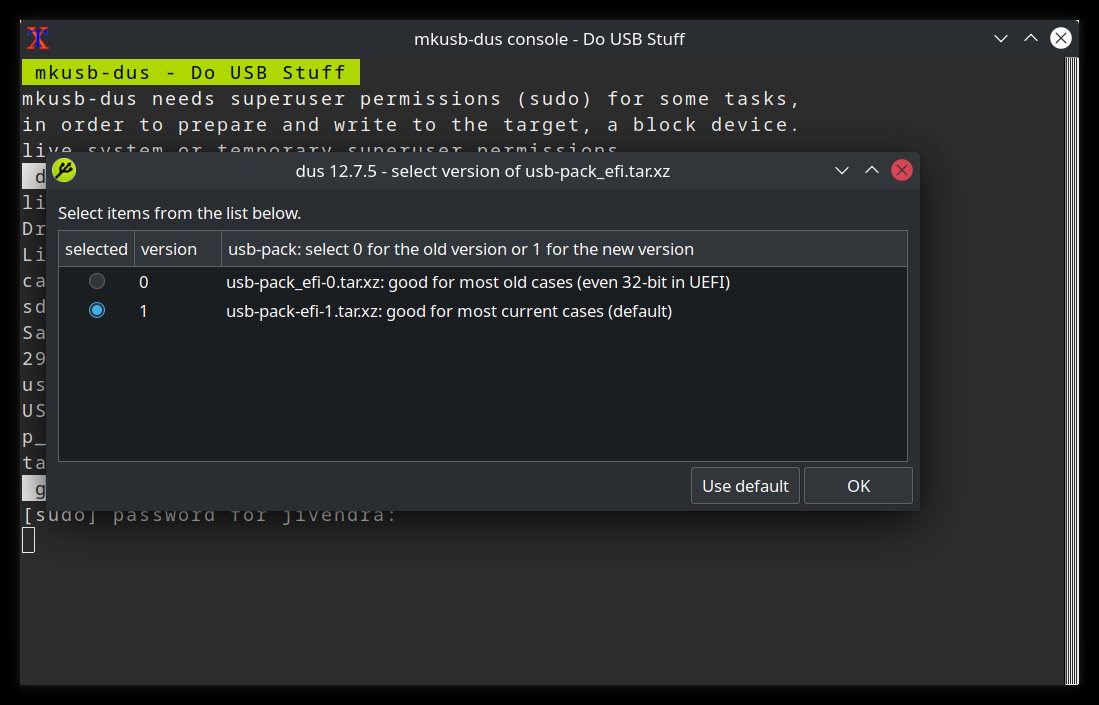
Step 8: Enter the password in the terminal, and select and confirm the default option in the window.
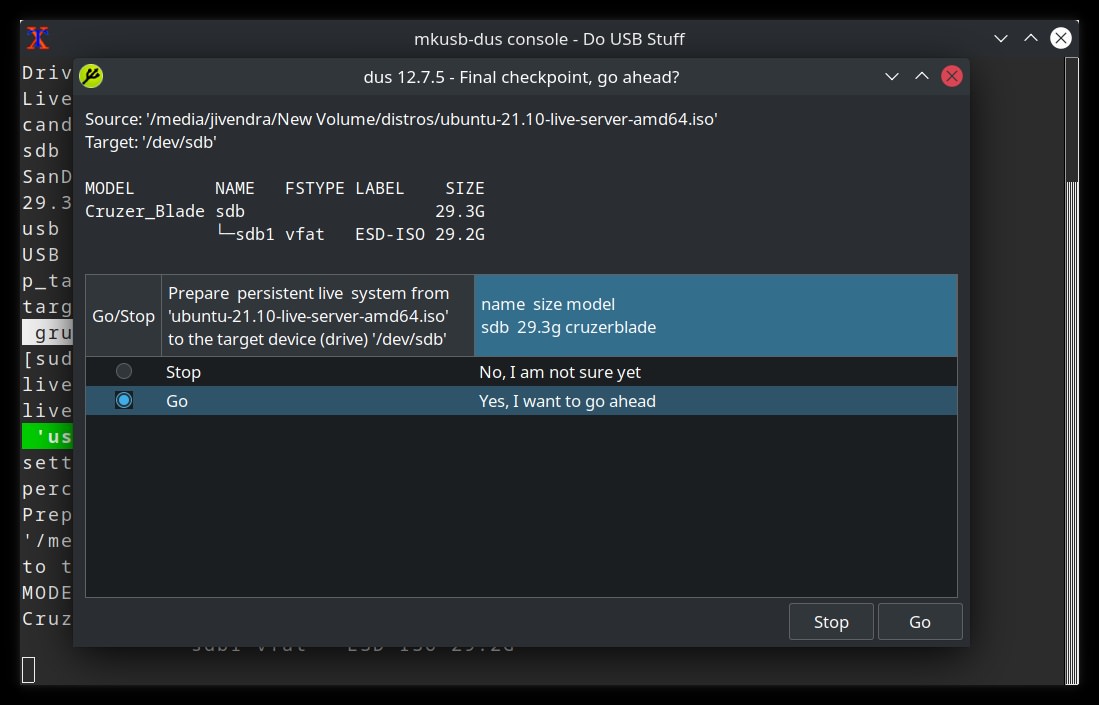
Step 9: Finally, the user will be asked if they want to continue creating the permanent flash live bootable. Click on the Go button to start the process.
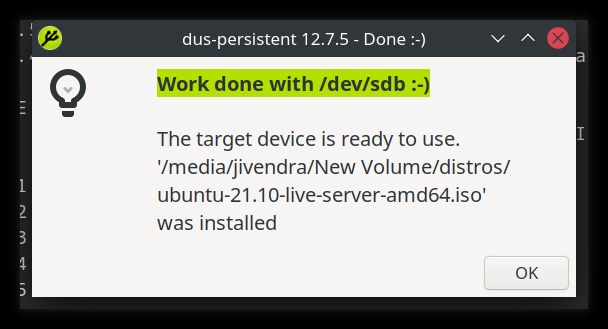
After starting the process, wait until the operation is completed. A message will be displayed when the procedure is finished; click OK.
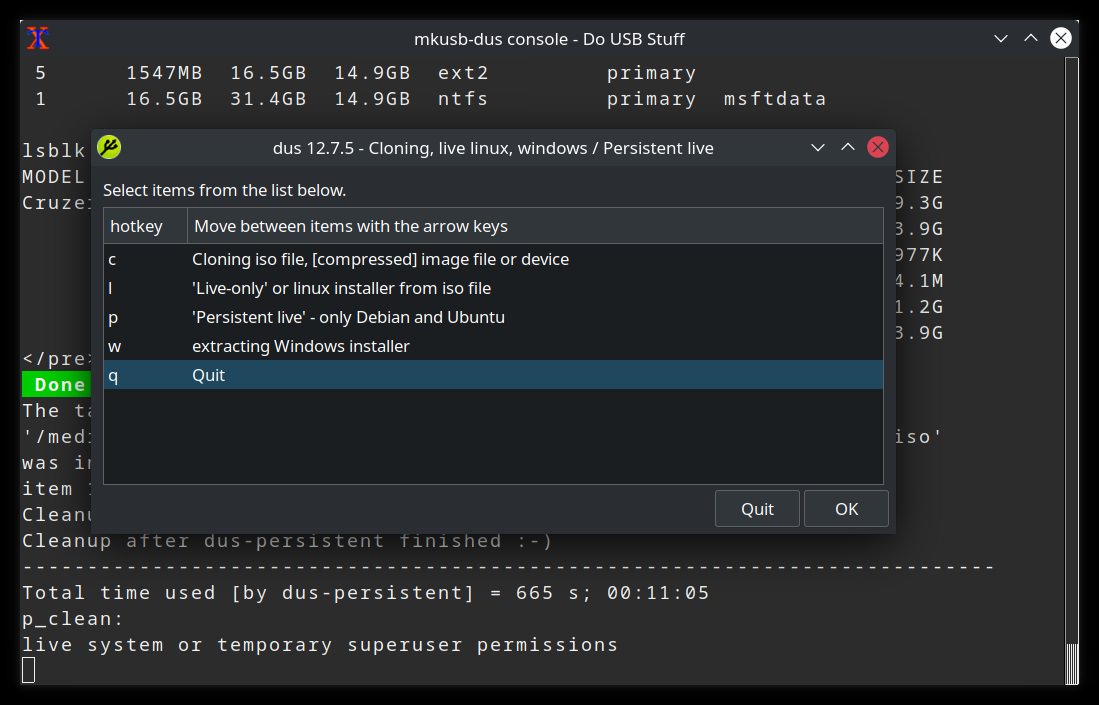
Step 10: In the new window in the picture, select the Quit option, click the Quit button at the bottom, and finally, press the Enter key in the terminal to exit the mkusb program.
Now, you have a live bootable flash of your desired Linux operating system that can be used permanently.
FAQ
What do I need to install Linux on a USB drive?
You’ll need a Linux ISO file, a USB flash drive (recommend 8 GB+), and a tool like Rufus or Etcher.
Should I create a live USB or install Linux fully on the flash drive?
If you want changes to persist, do a full install to the USB; for testing or temporary use, creating a live USB is simpler.
How do I make the USB drive bootable with Linux?
Use a boot-creator tool (like Rufus, UNetbootin, or Ubuntu’s Startup Disk Creator) to write the ISO to the USB, then reboot your PC from the USB.
Conclusion
Various methods can still be introduced to install Linux on Flash, and these methods are not limited to those in the open-source Linux platform. For example, in another way, you can back up your current Linux operating system, boot that backup saved in image mode (ISO file) on a flash using software, and create a portable version of the operating system on a computer with all programs.
As mentioned, we need access to the BIOS settings to run the operating system installed on the Flash. To prevent this intrusion, some people flash the BIOS, which the user must enter at the beginning of the working system boot.
Passing it will not be difficult for experienced hackers and professional users when they have physical access to the device. For example, they can remove the small battery on the motherboard.