How To Install New Windows 10 Without Losing Files?
In Some Cases, the Windows Operating System Crashes And No Longer Works Properly. Sometimes, Things Get So Bad That “Repair” No Longer Works, And You Have To Change Windows.
Windows 10 users switch to Windows, all files and programs are lost, and the system must completely restart from scratch. However, there is an “in-place upgrade” method to save files when changing Windows.
You may be familiar with this method’s name and confuse it with the “Reset this PC” method. In the Reset this PC method, files are lost, and Windows is entirely new, but all files and programs remain intact in the Windows system upgrade.
The in-system upgrade process can be done by running the Windows setup.exe file and installing Windows from a bootable drive of the Windows 10 operating system or through the Windows Media Creation tool.
This process takes about half an hour. Since an in-system upgrade will not delete a file from the system, you will naturally have less resistance to doing so than a complete installation of the new operating system.
Preparing to upgrade the system
Windows Accounts Menu
Remember that you will not upgrade within the system if you can not boot the Windows installation environment. In addition, you must have a Windows account on the system with “Administrator” access. If you do not have access to the admin account, you will be prompted for the admin account password during the installation process.
To check if your account has admin access, search for “Change account type” in the Start menu or go to Control Panel / User Accounts / User Accounts / Manage Accounts / Change an Account / Change Account Type. Here, you can see the list of all active accounts of your operating system.
Accounts with admin access are marked with the word “Administrator.” To change the account status, double-click on the account you want and select “Change the account type.” Then, change the account status from Standard to Administrator.
Other ways to change account access
You can also follow the above steps by searching for “Netplwiz.exe” in the Start menu. Select the account you are looking for, select your account, and enter “Properties.” Then, change the account status from the “Group Membership” page.
If you can not access your account as an admin, the Windows operating system disables it by default.
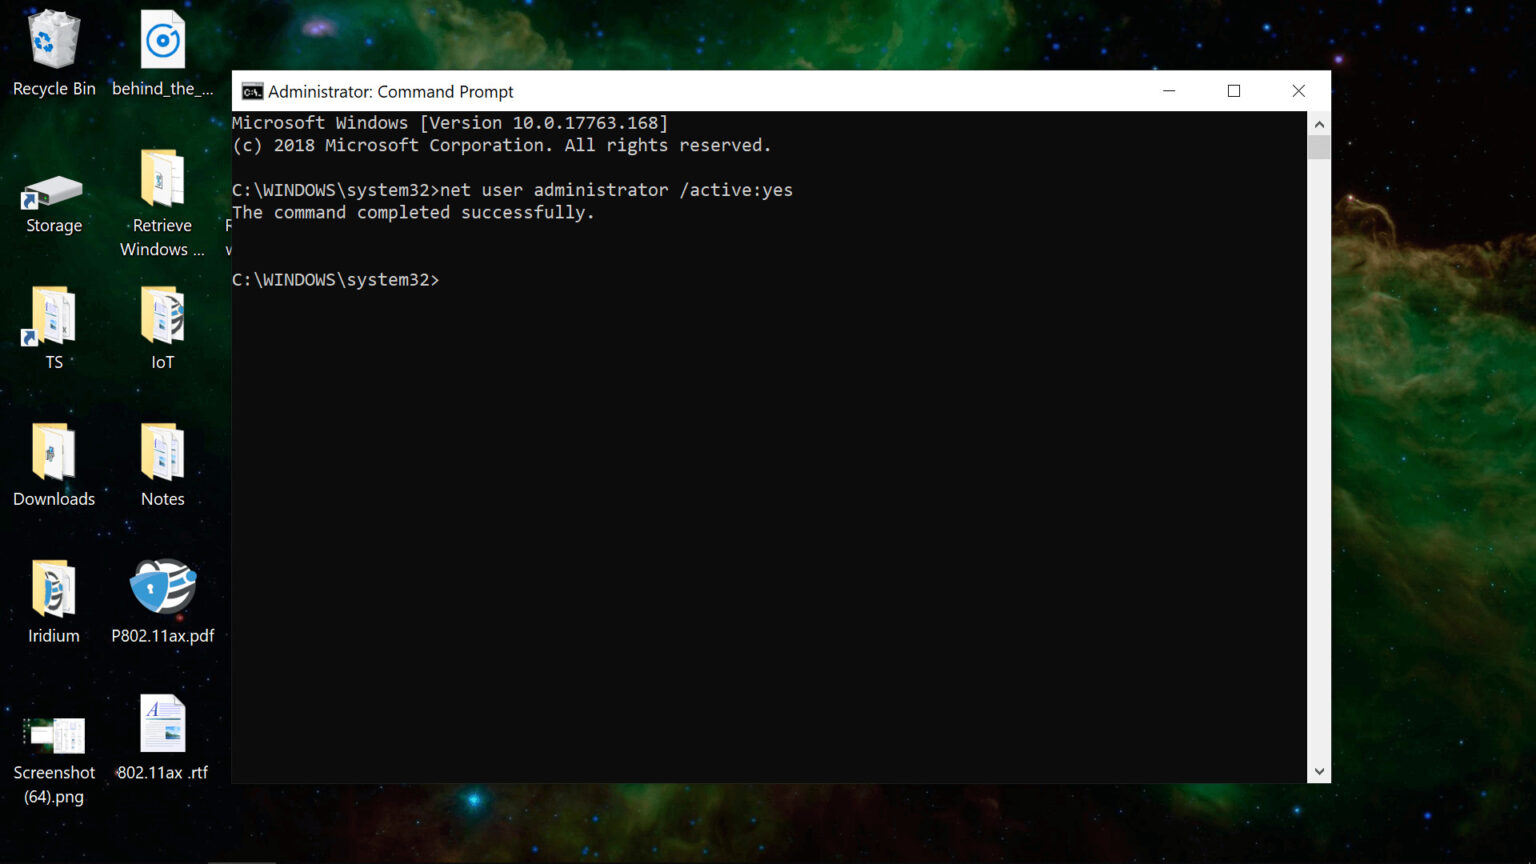
To activate it, open the CMD software and activate it with the following commands:
- net user administrator / active: yes (activates admin account)
- net user (shows the list of all accounts with their status)
 Activate the admin account via CMD
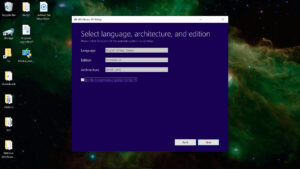
Another prerequisite for an in-system upgrade is an ISO file or bootable drive from the Windows 10 operating system or Media Creation Tool. The file or drive must be the same type of Windows you currently install (Home or Pro or…), the same or newer version, and compatible with it (32-bit / 64-bit). You also need at least 8 GB of free space on your Windows drive to upgrade within the system.
This process will save all your files and software, but it will also clear some custom fonts and icons and store network information.
After this process, a folder called Windows. Old is created, which contains the contents of your old Windows system files. We will explain how to delete this folder in the following section.
Note: If your motherboard BIOS is UEFI and its Secure Boot feature is enabled, we recommend that you re-enable it to boot into an inactive system after the process is complete.
Performing an in-system upgrade process
Enter the Windows 10 installation environment via the setup.exe file on the Windows ISO or USB drive. By default, Windows 10 can open ISO files as a virtual drive. You can also right-click on the ISO files and click Mount. There is a third way, and that is to enter the following command in PowerShell software (if the Mount process is not run through File Explorer):
- Mount-DiskImage-ImagePath “C: /FileName.ISO
 Open the setup.exe file via PowerShell.
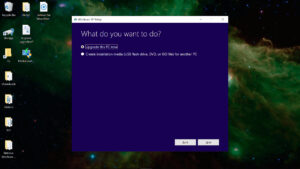
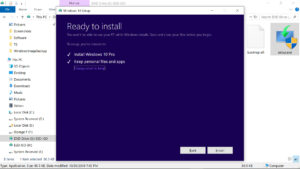
After opening the setup.exe file or Media Creation Tool, select “Upgrade this PC now” to perform the in-system upgrade process. You may have to download an update to access this option. The Windows installer automatically performs a series of scans and settings and asks if you want to save your files or install a new operating system.
If you want to transfer your current files to a repaired/upgraded Windows, ensure that software is selected in addition to the files. Select the “Keep personal files and apps” option.
The in-system upgrade process is automated and takes about half an hour.
During this half-hour, your system may turn off and on several times, but you will not need to take any unique action. When the process is complete, you return to the same operating system environment from which you started it; the only difference is that the failure of the previous Windows no longer causes any strange behavior.
After upgrading the system
Disk Cleanup tool
As mentioned earlier, in-system upgrades protect all your personal files, software, and settings, creating an old Windows folder containing the old Windows system files. This folder contains many files and cannot be easily deleted through File Explorer and a simple Shift + Del., but the Windows Disk Cleanup tool can easily delete it.
In addition to the Windows. Old folder, the Disk Cleanup tool can also delete temporary files created for the upgrade process. Run “Disk Cleanup” in Start Search. Click “Clean up system files” to perform a secondary scan to find additional system files.
In the system for which we did this process, the Disk Cleanup tool found and deleted 3.61 GB of previous Windows files and 225 MB of Windows upgrade files.
If you have a severe lack of space, it is better to try the “Wise Disk Cleaner” software. This software opens up more space for you than the Disk Cleanup tool.
Difficulties in the system upgrade process
After completing all of these steps, you may have to delete your Wi-Fi network information and sign in again. In addition, if you have not used the latest version of Windows to upgrade, you need to download updates as well. However, these tasks are among the difficulties of the Windows repair process through in-system upgrades and are not very difficult!
We hope you find this helpful tutorial. We look forward to hearing from you. If you encounter a problem while performing any of the steps in the system upgrade process, share it with us in the comments section.