How to Select the Default Microphone in Windows 10
Default Microphone in Windows 10: Most Windows 10 users these days have to manage multiple microphones. These include built-in microphones, webcams, headsets, and podcast microphones.
For many users, a microphone may be the default in their Windows 10. If you are one of these users, then we suggest that you do not miss the rest of this article.
You can select the default microphone in some applications
Before we begin, please note that you can choose your default microphone in specific applications. Note that your choice is independent of the sound settings in Windows 10.
You can also select the microphone for each app by navigating to the App Volume and Device Preferences menu in Settings. However, if you want to choose a single microphone as the default for all your Windows devices, follow the steps below.
How to select the default microphone in Windows 10 using the settings menu
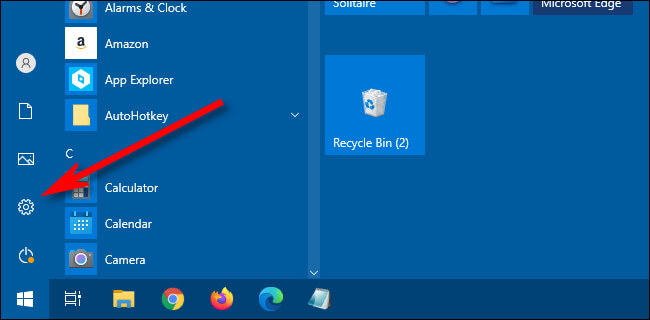
In the Settings menu, you can easily set your default microphone in Windows 10. To do this, go to the Start menu and select the Settings icon (represented by a gear icon) on the left. You can also do the same by pressing the “Windows + i” key combination.
In addition to the above method, you can right-click the speaker icon on the right side of the Taskbar and select “Open Sound Settings”. Next, the “Sound Settings” window will open.
In the “Settings” window, you must click on “System”.

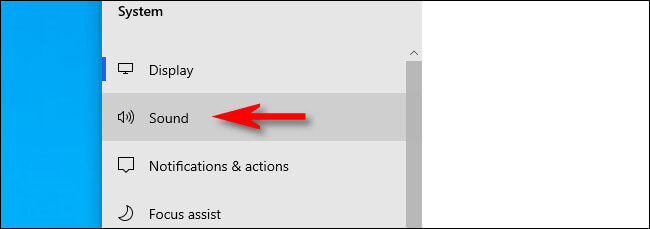
You need to click on the “Sound” menu in the sidebar of the “System” window.
In the “Sound” window, navigate to the “Input” section. In the “Choose your input device” drop-down menu, select the microphone you want to use by default.
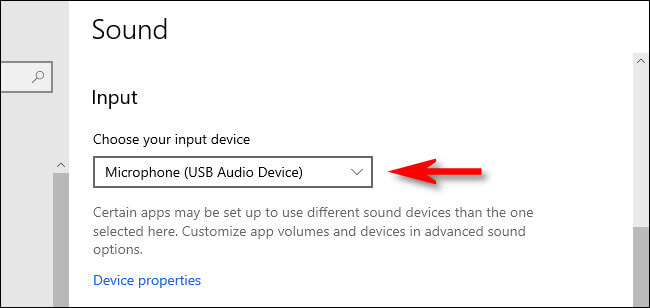
After selecting the desired device from the drop-down menu, Windows will also consider it as your default microphone. Next, close the settings window.
Select the default microphone using the control panel
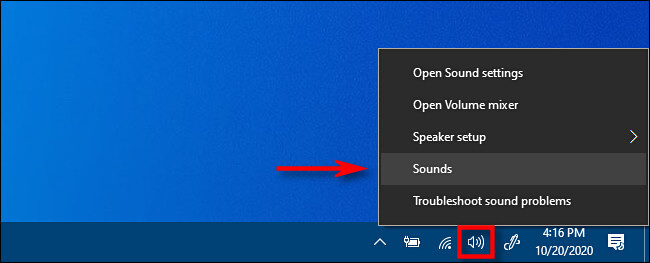
You can also select your default microphone using the classic control panel. You can also access this menu via the speaker icon on the right side of the Taskbar.
Right-click on the speaker icon on the right side of the Taskbar and then select “Sounds” from the menu that appears.
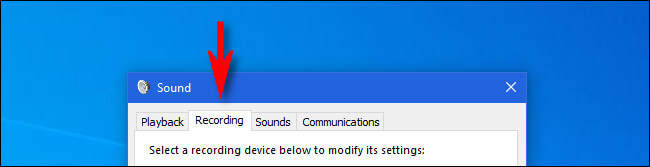
In the “Sound” window, you must click on the “Recording” tab.
Below is a list of recorders identified by your System. One of these devices is your microphone. Select the microphone you want, then click “Set Default”.
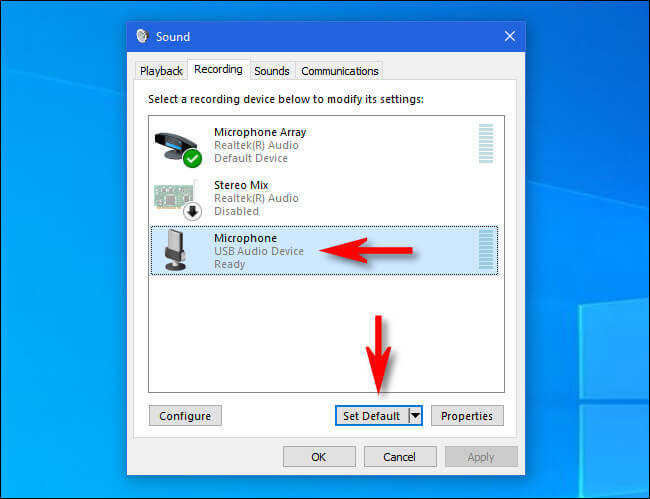
After that, a green tick will appear next to your default microphone, indicating that you have selected this device as your default recording device.
In addition to the green tick, you can also see the phrase “Default Device” at the bottom of your default speaker.

Clicking “OK” will close the “Sound” window. If you still want to select your default microphone, follow the steps above.
FAQ
How do I change the default microphone in Windows 10?
Open Sound Settings, find the Input section, and select the microphone you want to set as default from the list.
Why can’t I see my microphone in Windows 10 settings?
It may be disabled, not connected properly, or you might need to update or install its drivers.
Will changing the default microphone affect all applications?
Yes, setting a default microphone applies system-wide, but some apps can override it with their own input settings.