How to Enable the Virtual Keyboard in Windows 11
One Of The Features Of Windows 11 is the new virtual keyboard, which has changes such as theme support compared to Windows 10.
Virtual Keyboard In Windows 11: In This Article, We Will Teach You How To Enable And Disable The Virtual Keyboard.
A virtual keyboard is essential if you run Windows 11 on a tablet or PC with a touch screen. In Windows 11, you can access the virtual keyboard icon in any environment. Go to the Settings section of Windows 11 and go to Personalization > Taskbar.
- On the page that opens, select the Taskbar Corner Icons option.
![]()
- After opening the Taskbar Corner Icons menu, select the Touch Keyboard option.
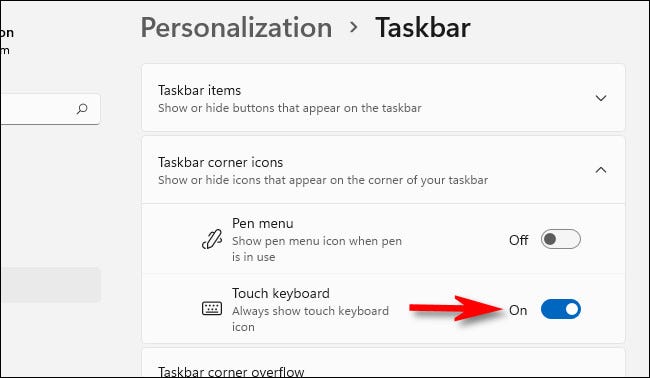
- You will immediately notice a small keyboard icon in the lower right corner of the taskbar.
![]()
- If you click on the virtual keyboard icon in the taskbar, a virtual keyboard will appear at the bottom of the screen, just above the toolbar.
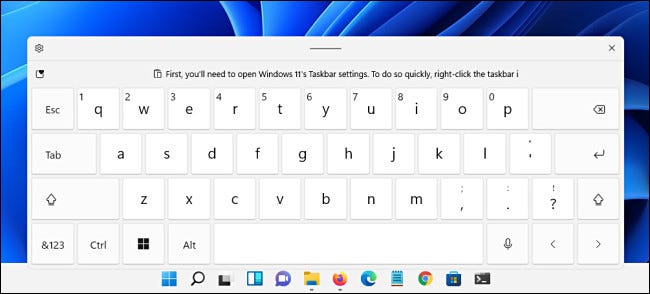
You can use the virtual keyboard in any application, like a real keyboard. In the virtual Themeard set theme, you can change the size and theme. When you have finished typing and want to hide the keyboard, click the X button in the upper-right corner of the keyboard window.
Change the theme of the Windows Themertual keyboard
In Windows 11, users are free to change the look of the virtual keyboard. To change the appearance and size of the Windows 11 keyboard, click on the gear icon at the top right of the keyboard.
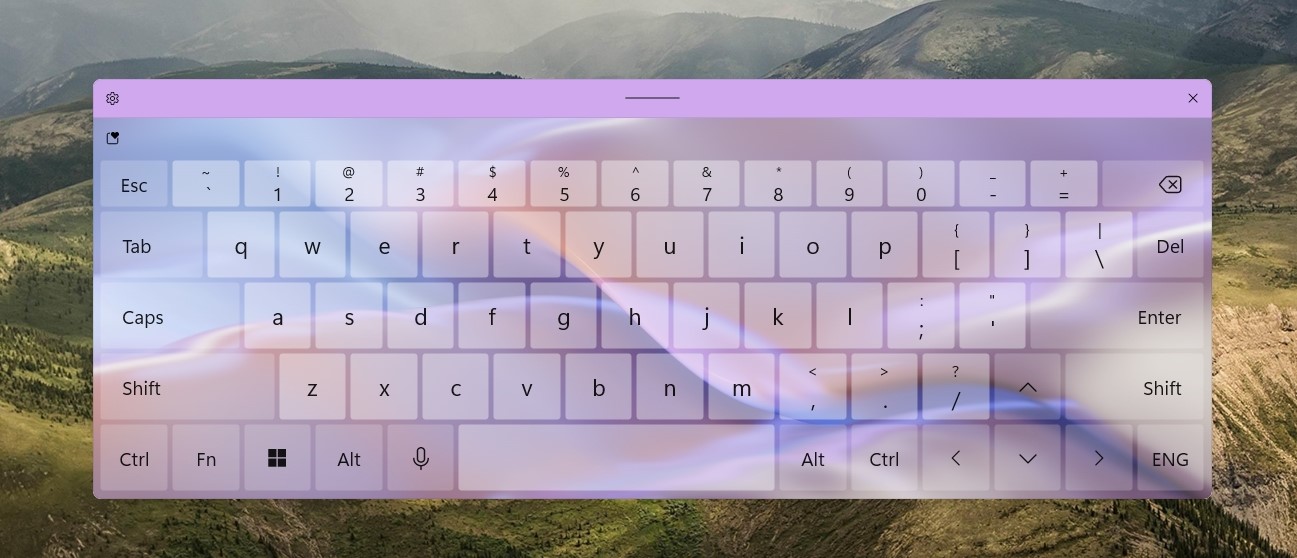
Select the theme and resize the themes to open the following window.
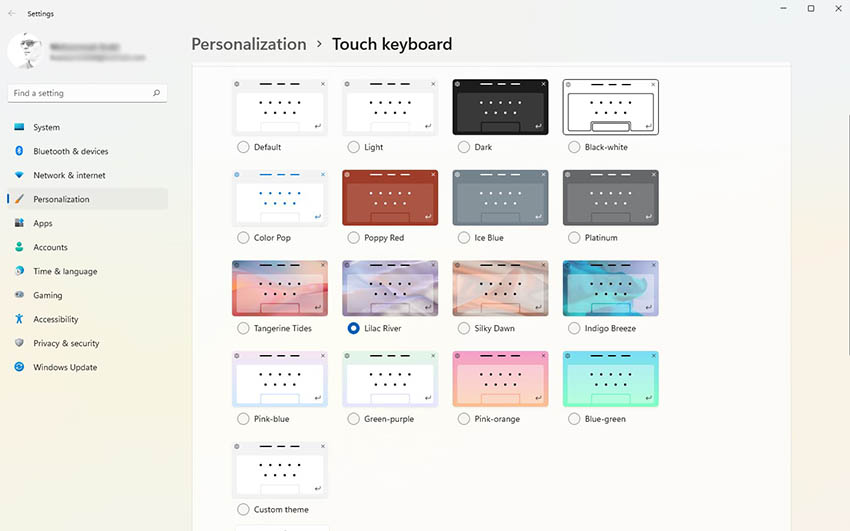
In this section, you can choose your favorite theme.
How to turn off the Theme of Windows 11 Virtual Keyboard
If you do not want to use the Windows 11 Touch Keyboard, you can turn it off. First, right-click on the taskbar and then select Taskbar Settings.

Now go to Personalization> Taskbar, select Taskbar Corner Icons, and turn off the Touch Keyboard.
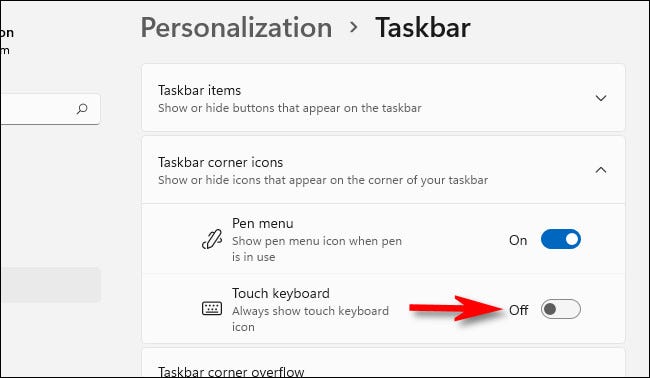
After turning off the Touch Keyboard, the virtual keyboard icon will be removed from the taskbar.
To keep the Windows 11 touch keyboard button visible at all times, follow these steps:
- Access Taskbar Settings: Right-click on the taskbar and select Taskbar Settings. This opens the Settings app, which is titled Personalization > Taskbar.
- Locate Taskbar Corner Icons: Click on Taskbar Corner Icons to expand the menu options.
- Enable Touch Keyboard Icon: Find the switch labeled “Touch Keyboard” and toggle it to “On.” This activates the touch keyboard button on your taskbar, which appears in the lower-right corner.
- Use the Touch Keyboard: Tap or click the keyboard icon on the taskbar to bring up the virtual keyboard. It will appear just above the toolbar.
- Typing with the Virtual Keyboard: If you have a touchscreen, you can type directly on the virtual keyboard or use your mouse to click the keys. To reposition the keyboard, drag the handle located at the upper center of the keyboard window.
- Closing the Keyboard: When you’re done, tap the “X” button in the top-right corner of the keyboard window to close it. You can always reactivate it by tapping the taskbar keyboard icon.
To remove the Windows 11 touch keyboard icon from your taskbar, follow these steps:
- Access Taskbar Settings: Right-click the taskbar and select Taskbar Settings. This opens the Settings app, which is titled Personalization > Taskbar.
- Locate Taskbar Corner Icons: Click on Taskbar Corner Icons to expand the menu options.
- Disable Touch Keyboard Icon: Find the switch labeled Touch Keyboard and toggle it to “Off.” The keyboard icon in the far-right corner of your taskbar will instantly disappear, leaving your taskbar neat.
If you’re using a touchscreen PC with Windows 11, the on-screen virtual keyboard is invaluable for tablet-style functionality. Adding its icon to your taskbar lets you quickly access the touch keyboard whenever you need it.
FAQ
How do I open the On-Screen Keyboard in Windows 11?
Press Win + Ctrl + O to toggle the On-Screen Keyboard on or off.
Can I pin the On-Screen Keyboard to the taskbar?
Yes, you can pin the On-Screen Keyboard to the taskbar for quick access.
How do I enable the Touch Keyboard in Windows 11?
Go to Settings > Personalization > Taskbar. Under "Taskbar corner icons," turn on the "Touch keyboard" toggle.
