


How to restrict users from entering the site management only with specific IPs in C Panel
But how are we going to do that? The simple answer is through IP technology. You must be asking what IP is? It has its exclusivity, for example, the specific IPs address of our computer is 31.29.33.229, which may change with each connection to the Internet, and in general, there are two types of IPs:
- Static IPs: These IPs are always the same and never change.
- Dynamic IPs: These IPs always change each time we connect to the Internet, and each time we connect to the Internet, our computer is assigned a specific IP.
But now, what we want to do to increase the security of our site is to identify the IPs of our employees’ computers inside the company and apply settings inside the host so that only those IPs and those computers can access our site management. Of course, this feature is not only used by large companies. Even if you are the only administrator of your site, you can make it possible to access the management of your site only with your personal computer and Internet, and no one other than you can access the management of your site, so continue with this practical tutorial with us. Be with me.
Restrict entry to site paths in C Panel
You first learned how to log in to C Panel host Cpanel and click on file manager in the files section. 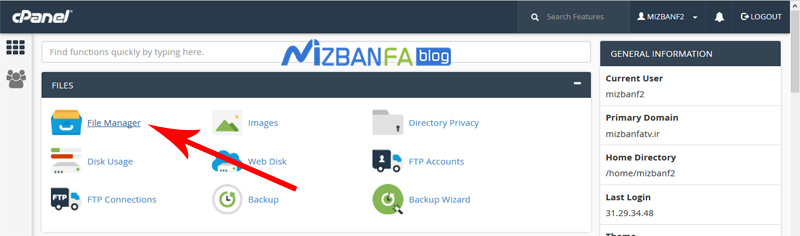 The contents you see in this path are your basic and structured files, and we recommend that you never change any of these. You should put all the works and settings in the public_html directory where the executable files are located. This is your site, so to do this, find public_html from this section and double-click the method.
 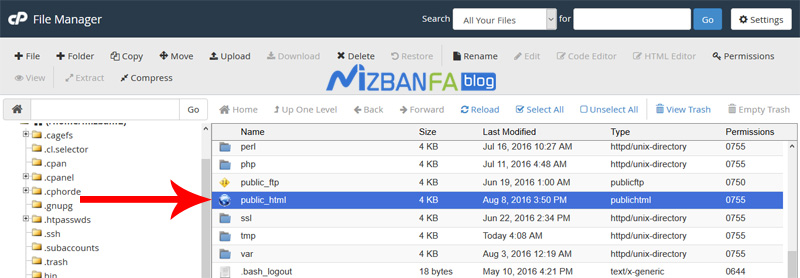 To enter this section.
Allow access to the WordPress admin login form only with a specific IP
Well, these are the files and contents of our WordPress website, now considering that the domain address of our website is mizbanfatv. Ir, if we want to enter the management of our WordPress site, we type mizbanfatv. Ir/wp-admin in the browser and enter. Until the WordPress admin login page opens for us, now note that if anyone around the world enters this URL into their browser, they can view our site admin login page. 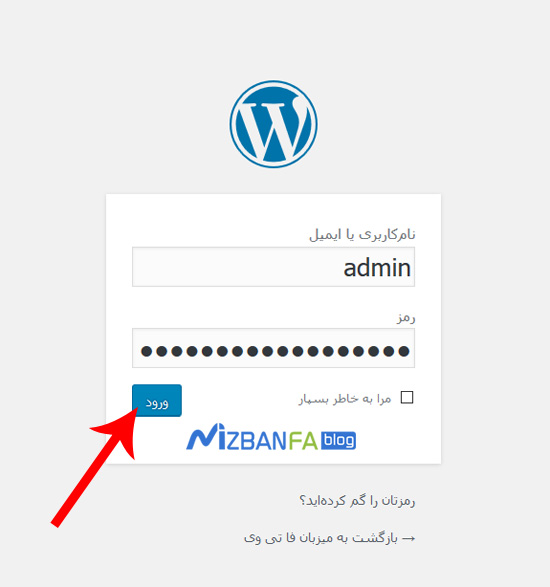 And if it can also find the username and password to log in to the webmaster, which is very likely to endanger the information security within our webmaster seriously, now we want to make settings within the host that only this If the computer has access to this page from our site, to do this, we will enter our host file again. Become a wp-admin folder. To do this, select this folder according to the image. And we double-click the method to enter it.
Learn how to restrict IP access to WordPress admin
To do this, we need to put a series of codes in the htaccess file of this site folder because the .htaccess file is a file that determines the level of access to the site paths, so if we want to have access, people to the site administration paths. To create an IP restriction, we need to configure this file. If there is a .htaccess file in this folder from your site, but you cannot see it, please watch the instructional video on how to view hidden files in C Panel in full, as well. You see, this file is in front of us that we selected. Now, to add the code we want to this file, we must be able to edit it. Suppose you are not familiar with how to do this. In that case, we recommend you watch the instructional video on how to edit files in C-Panel before the Continuation of this tutorial. If you do not have the .htaccess file in this path of your site, then with the instructional video on how to create a new file in C-Panel, download this file in this path from your host. Create and right-click according to the image and the edit button Let’s play. 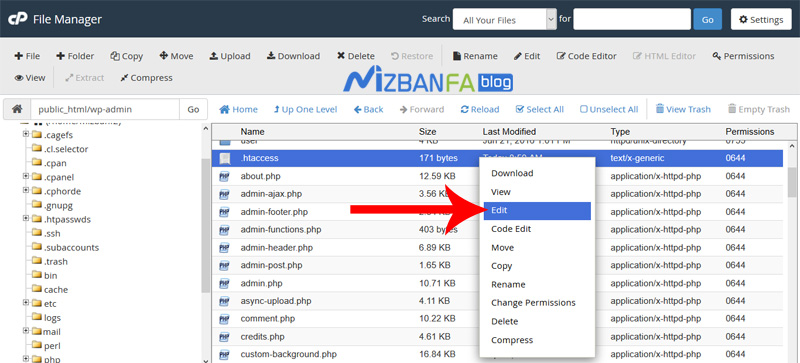 To enter it.
As you can see, a series of codes are already included in this file. We have nothing to do with these codes, and we put the codes we want in the next lines. We have put the code needed to put this file in the article related to this video in full, and you can easily copy them.
Order deny,allow
Deny from all
Allow from 46.224.25.35
But we decide to type these codes ourselves to allow certain IPs to enter this path from our site, so we start writing and typing Order deny. This line of code means that the commands To do this, we have two modes, one deny means no access and the next to allow means access, and now in the next lines must be those who want to access this path from the site and those who want not to access this path from the site. Let’s specify, then in the next line, we type Deny from all, meaning that all the people of the world can not access this path from our site to ease our minds, and now we come to the next line and say that we said correctly that not everyone has access to this path from the site But other than these IPs that we say and belong to us, so to access this path from the site by another computer we come and type Allow from 46.224.25.35 This line means the computer with the IP address 46.224 .25.35 has access to this path from the site and now our work is finished and click on the save changes button Half.  Now to see the final result of the work, we type mizbanfatv. ir/wp-admin in the browser, and as you can see, a 403 error or the same forbidden is displayed for us.
  This means that you access this route from the banned site, do you know the reason for this error? Yes, the reason is that we entered the IP address 46.224.25.35 into the .htaccess file on a trial basis, and this is not the IP address of our computer at all, so the code we entered is working properly and unauthorized computers have access to the path. Complete site management.
How to find a computer’s IP address on the Internet…
But now how can we get our computer’s IP address and put it in this file? Of course, there are different solutions to get a computer’s IP address, but the simplest and newest way is to go to the Google site to find the IP address of our computer and search in it whats my Ip means what is my IP address and then Click on the Enter button and search for this phrase, as you can see, Google opens a box for us in the first row of the displayed results, and inside it, the IP address of our computer, which consists of 4 parts, is displayed in full. gives, 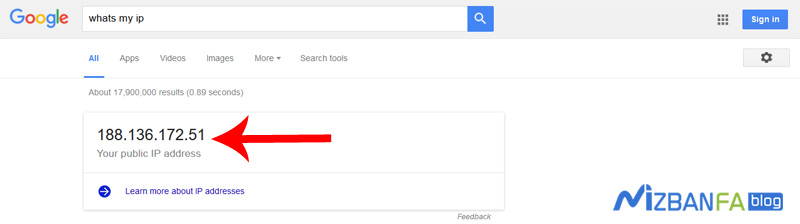 Now we copy this address completely and re-enter the .htaccess file of the path from our site where we put the code, and in the third line of code related to this work, we remove the IP address 46.224.25.35 Instead, we enter the IP address of our computer that we copied from the Google site. And we will make sure that we do not change anything else and we will click on the save change button above it again.
  And to see the final result of what we did, we re-type the address mizbanfatv.ir/wp-admin in the browser and press the Enter button, as you can see, our WordPress website management is now open for us, and the interesting thing is that now Only our computer with this IP can access the WordPress admin login page.
Access of multiple computers with different IPs to the site management path
Now, if we want to set the access of several other computers with several other IPs to this path from the site, what should we do? The answer is very simple, in the first step we have to re-enter the .htaccess file and refer to the last line that we put in that IP line, and now we copy this line completely from the beginning to the end and enter an entry to go To the next line, now in the next line, we paste the contents of the previous line that we copied and instead of the IP address of the previous line, we type according to the image of the IP address of a Digmon computer, for example, instead of the IP address of the previous We type 149.251.52.32 and in the same way we can put newer IPs in the next lines and give our other employees access to this path from the site with other IPs. 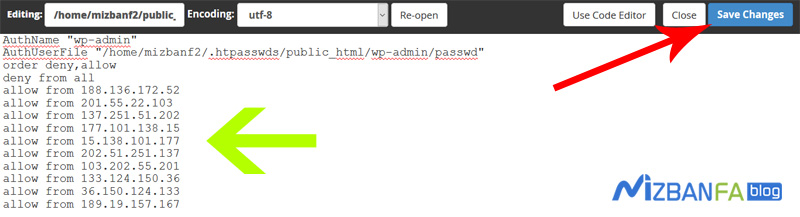 And now we click on the save changes button again.
Set variable IP to enter site management path
The important thing to note is that usually 90% of computers’ IP is dynamic, that is, with each connection to the Internet, your computer’s IP address changes, and in this case, after changing the ip, your computer is able to You are not viewing your site management page and there are two general solutions to this problem:
- The first way is to contact your internet service provider, for example, the same company from which you provided ADSL, and ask them to provide you with a static IP address, so that your computer’s IP address does not change after each time you log on to the Internet. And in this case, you can easily set only the address of a static IP that never changes in the .htaccess file, and after doing so, no one but you can even see the login page of your site management.
- The second way is that if you do not decide to get a special IP from your ISP and your computer’s IP address changes every time, put your computer’s fixed IP in the .htaccess file, for example, if now the IP address is 148.251.29.39 After turning your computer off and on, your IP address becomes 148.251.21.43 This means that only the last two parts of your IP address change, and the first two parts of your IP address are always fixed, so you can Instead of the full IP address of your computer, put the two parts that do not change in that file, for example, if you are sure the first two parts of your IP address will never change in the .htaccess file instead of the full IP address 148.251. And that means letting any IP that was first 148,251 enter the site admin page and not caring about the last two parts of the IP whatever it was, yet the security of your website will still increase significantly. It works because there are very few computers in the world whose first IP address is 148.251, but if the security of your website is very important to you, we suggest that you use the first method, ie providing a static IP from the service company