How to clear Cache on Windows 11
How to clear Cache on Windows 11
Clearing Windows 11 Cache regularly improves the speed and overall performance of the device. A cache on a computer stores temporary files and data recently accessed from the hard disk to be reused by programs, applications, and processes on the computer.
The cache is used when the main memory cannot meet the application’s requests. Cache increases data access speed by reducing latency and improving input/output (I/O). The cache method increases application performance because virtually all application workloads rely on I/O operations.
While this improves the overall speed and performance of apps, the computer’s cache eventually becomes clogged with old files and slows down the device.
Files stored in the cache may get damaged or corrupted over time, resulting in improper application performance and other problems on the device. As a result, it is necessary to delete all temporary files and cache from the computer, especially if it is running slowly or experiencing problems.
In this post, we’ll explore five different ways to clear system caches to maximize your system’s performance.
Before continuing the article, if you need to buy a virtual server, go to the Ded9.com website and see the great plans at great prices.
1. Clear the cache of temporary files using Disk Cleanup
The built-in Disk Cleanup tool in Windows 11 is the easiest way to delete cached data on a Windows device.
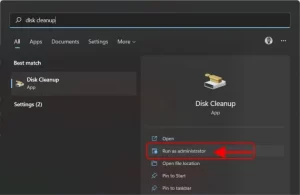
Enter “Disk Cleanup” in the Windows Start menu and select “Run as administrator” in the right pane of the Windows search results:
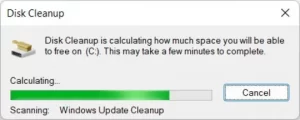
After selecting the operating system drive, Disk Cleanup begins to calculate the amount of space that you can free up on the operating system drive:
Scroll down and check the “Temporary Files” box. You can also delete files from other folders, such as Recycle Bin or Download. After you’ve decided what you want to remove, click “OK”:

A warning will be displayed asking you to confirm that you want to delete the data permanently. Select “Delete Files”:
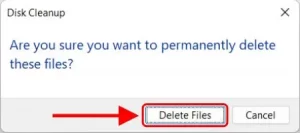
Now Disk Cleanup will remove any junk files from your computer. This procedure may take several minutes.
2. Delete temporary system files
The operating system creates temporary files for various programs running on the computer. Temporary files can grow over time and slow system performance if not removed.
To remove temporary files, use Windows key + R to enter the Run dialog box, then type %temp% and press OK:
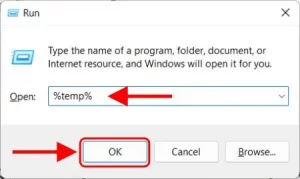
After that, use Ctrl + A to highlight and then delete everything in the folder:

If the temporary files contain an active running program, you will see the following notification:
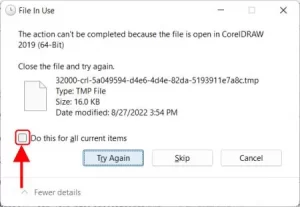
You can check the “Do this for all current items” box and then click “skip” or “cancel” the operation to delay closing open files and folders.
3. Clear the DNS cache
If you want to clear the DNS cache of your Windows 11 PC, open Command Prompt as administrator. To do this, type cmd in the Windows Start menu and select Run as administrator on the right side of the Start menu:
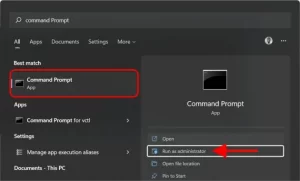
Then run the following command:
ipconfig/flush DNS

When the command is processed, you will see a message titled “Successfully flushed the DNS Resolver Cache.”
4. Clear the Windows Store cache
To clear the Windows Store cache, open “Run” by pressing the Windows key + R on your keyboard. The “Run” window will appear. In the text box, type WSReset.exe and then click OK:
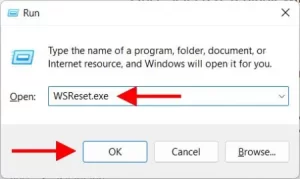
After selection, a blank window will appear. There’s nothing you can do here, so wait a few seconds for it to clear the cache:

After the blank screen disappears, the Windows Store will open on your computer.
5. Clear the browser cache and cookies
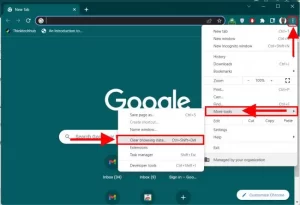
To delete cache and cookies in Chrome, go to the settings menu. To get there, click the three-dot icon in the top-right corner of the screen, then go to “More Tools” and select “Clear Browsing Data.”
You may have seen in the image above that there is a shortcut key that you may use. To directly access the page where you can clear your cache and cookies, hold Ctrl + Shift + Delete keys at the same time:
The first step is to set a time to delete cookies and cache. Click the arrow next to “Time Range” to expand the menu, then select the desired time range. This range is set to “All Time” by default:

Then, check the boxes next to “Cookies And Other Site Data” and “Cached Images And Files.” You can also delete your internet history from this page. When all the boxes are checked, click the “clear data” button:

After a few moments, your Windows 11 cache and cookies will be deleted. I hope you found this blog post helpful. If you have any questions, please share with us in the comments section.


