


MikroTik Hotspot with User Manager
Hotspot in Mikrotik
You have probably read Mikrotik-related materials by now—no need to log in or set up. You can use Mikrotik as a powerful router to increase boot speed and provide automatic operation. You can install the Mikrotik server-based Linux kernel on a PC. In this article, you will learn how to install and manage a hotspot in Mikrotik.
Hotspot installation and management training in Mikrotik
Stay with us to see the concept of Hotspot and how to configure it in the Mikrotik router. You can set up a hotspot for any environment. Note that it is better to use the Wizard mode to set up the Hotspot to maintain your access to the router. In the rest of this article, you will read about TLS certificates. Also, you will understand why SMTP Server and DNS Server are defined and what structure should be used to define DNS names. Stay with us until the end of the article to see the parts that are dynamically created after the Hotspot is activated.
How to set up a hotspot server in Mikrotik
This section will examine how to set up a hotspot server with different profiles. First, you need to configure the interface connected to the WAN.
/ ip address add address=192.168.1.5/24 network=192.168.1.0 broadcast=192.168.1.255 interface=ether1
While one interface is configured and connected to the WAN, you can configure the second interface for your local network.
Both your interfaces are now configured and working. So, you can set up your Mikrotik ROS as a DNS server, which is a very good way to set up a DNS server.
How to configure Hotspot in Mikrotik
We use hotspots for quick and easy access to the Internet. To access Hotspot, go to IP > Hotspot.
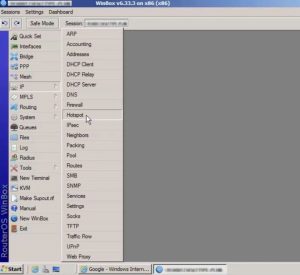
When you choose Hotspot Setup and not manual mode, it helps ensure that the router remains accessible because you won’t miss any important steps.
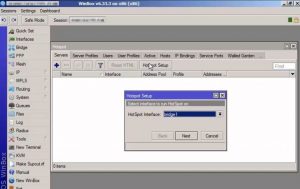
First, you will be prompted to select the interface on which you want to set up the Hotspot. Therefore, you can choose your internal network or local interface.
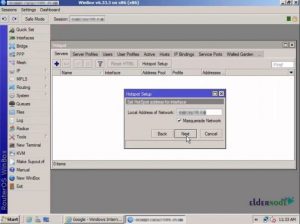
In the next step, you need to enter the local address of the network and, by default, put the IP of the local interface. Here we do not change it. Also, check the cube if you prefer to cover the grid.
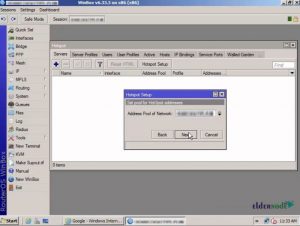
You will now be prompted to set the pool for the Hotspot address.
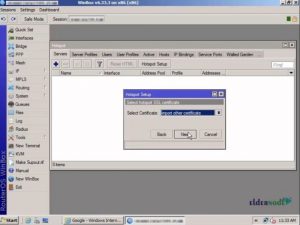
At this point, you need a TLS certificate if you want to secure the Hotspot with HTTPS. If you have a TLS certificate, add it as follows:
Next, you need to add the IP address of the SMTP server. If you have an SMTP server or email server on your network, add an address so that all email requests are directed to your desired SMTP server.
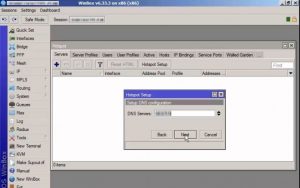
Next, a DNS server is required. The DNS server is assigned to your Hotspot clients.
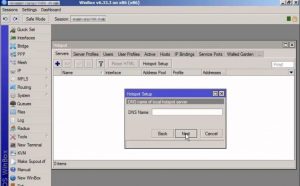
In this step, you will be asked for the DNS name. Hotspot DNS name must have an FQDN structure.
Note that the FQDN structure is two parts separated by a dot. for example:
Ded9.com
After the above steps, you will add the name of your first local Hotspot user. You can choose anything you want. By default, the name is “admin,” and no password.
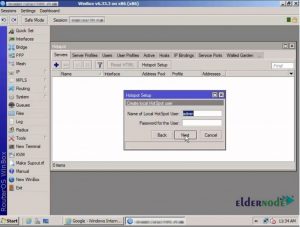
By clicking the Next button, the Mikrotik hotspot will be created.
After the Hotspot is activated, you will no longer have access to the Internet. If you check it, the Hotspot login page will open.
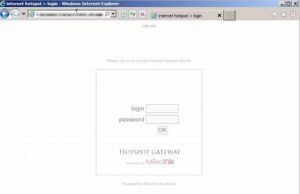
In other words, users’ access to the hotspot interface will be lost when the Hotspot is created. And they must be authenticated to access the Internet again.

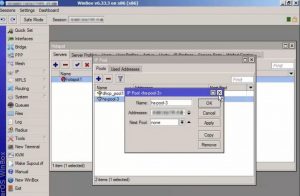
Some fields are added to the settings as the Hotspot is being created.
IP Pool is added dynamically where you can see your recently selected network’s IP Pool address range.
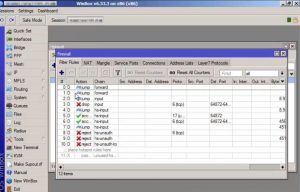
Another additional part is the “firewall” that some rules dynamically add to the Filter Rule and NAT tabs.
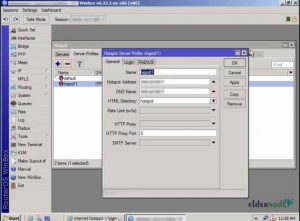
In the Server Profile tab, a profile is created for the Hotspot.
The User tab contains the user’s name. You have added a name in the corresponding step. You can see it here.
In this article, you learned how to install and manage Hotspot in Mikrotik. For more information, you can see the articles related to Mikrotik in the Ded9.com blog.