


How to upload and manage hosting files by phpstorm
Managing a website is one of the main actions people have taken to improve their business conditions. In this regard, people buy a suitable hosting and domain and then try to manage their website better. To manage the files and folders on the host, you can do it directly through the management panel such as cpanel or direct admin. But besides that, there are other methods that you can use if you wish. One method is connecting phpstorm to the host and managing the website remotely. This way, you can have all your files and folders remotely using the PhpStorm program on your system and manage them in this way. In this article from the FA host knowledge base, we decided how to connect phpstorm to the host. So if you want to learn more about this program and how to connect phpstorm to the server, stay with us until the end of this article.
The topics covered in this article are as follows:
- What is meant by connecting phpstorm to the host?
- How to setup FTP in phpstorm
- Viewing and managing information on the host with phpstorm
What is meant by connecting phpstorm to the host?
Maybe it has happened to you that you need to upload a large file on your host. In such cases, if you want to take action directly through the management panel of your host, you may have to wait a long time. In such a situation, you can use various side programs and interfaces known as IDE . There are FTP, Filezilla, and many other applications that you can use to upload your files to the host with the highest speed and accuracy. The phpstorm program is one of these programs that acts as an interface and helps you manage your hosting remotely. In the following, we will tell you how you can connect phpstorm to the host and use this program to manage your host remotely.
How to setup FTP in phpstorm
In the first step of connecting phpstorm to the host, you must prepare the PhpStorm program from reliable download websites and install it on your system.
To install phpstorm software on your system, you can use the following link:
Download phpstorm software
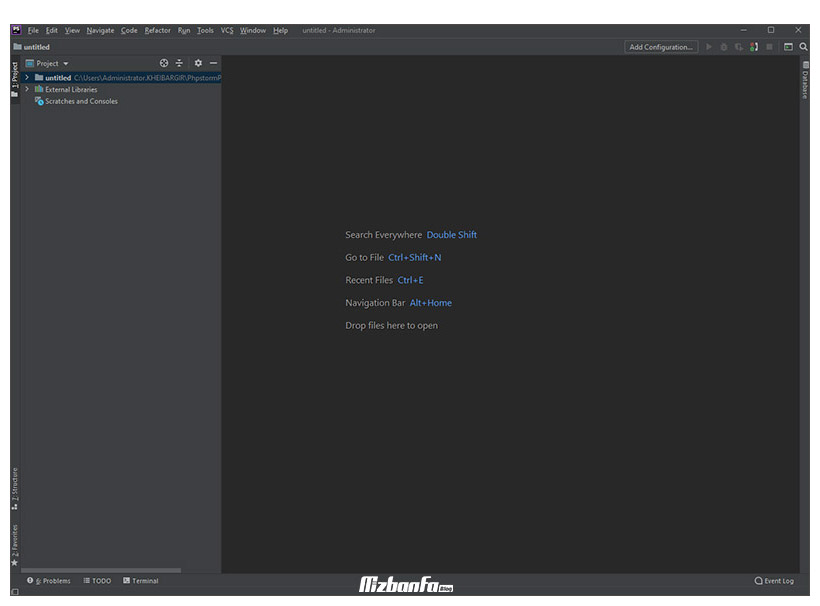
- After installing and creating a new project, you will see a screen like the one below.
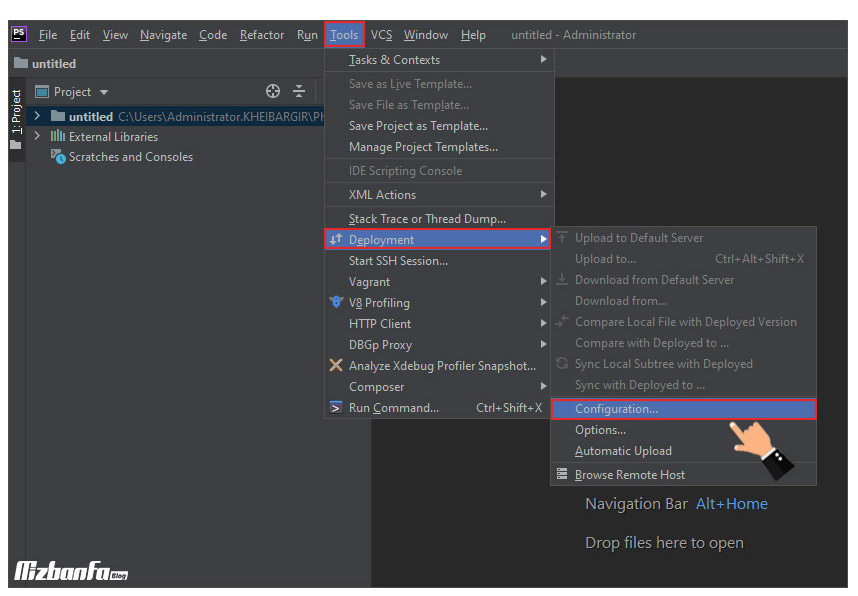
- A menu will be visible at the top of this page from the available options Tools. Then, from the sub-menus that will be displayed to you, select the option Deployment and finally click on the option Configuration.
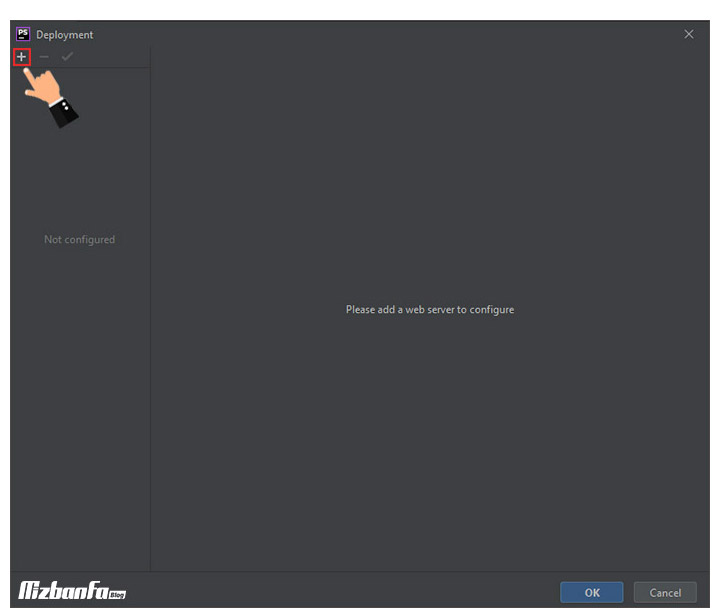
- Now a new page will be displayed as a pop-up. Sign + on the left side of the page.
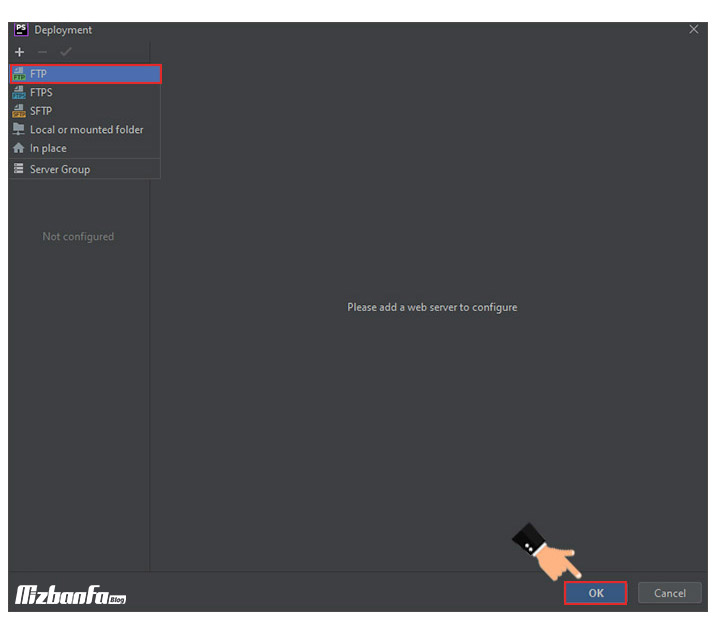
- Then a menu will be displayed to you, in which you must select FTP and then click on the OK button.
- At this stage, a pop-up page will be displayed asking you to specify the name of the new server. In this section, enter the desired name, such as the name of your website, and click the OK button.
- At this stage of the process of connecting phpstorm to the host, a new page will be shown to you, where you must enter the information about your FTP host accurately. which we have described in detail in step 7.
If you have not yet created an FTP account, depending on the type of your host’s control panel, get help from the tutorial on creating an FTP account in Direct Admin or how to create an ftp account using the FTP accounts tool in CPanel.
- Finally, it’s time to enter the information about your host in the specified empty fields, so apply the necessary configurations according to the following description:
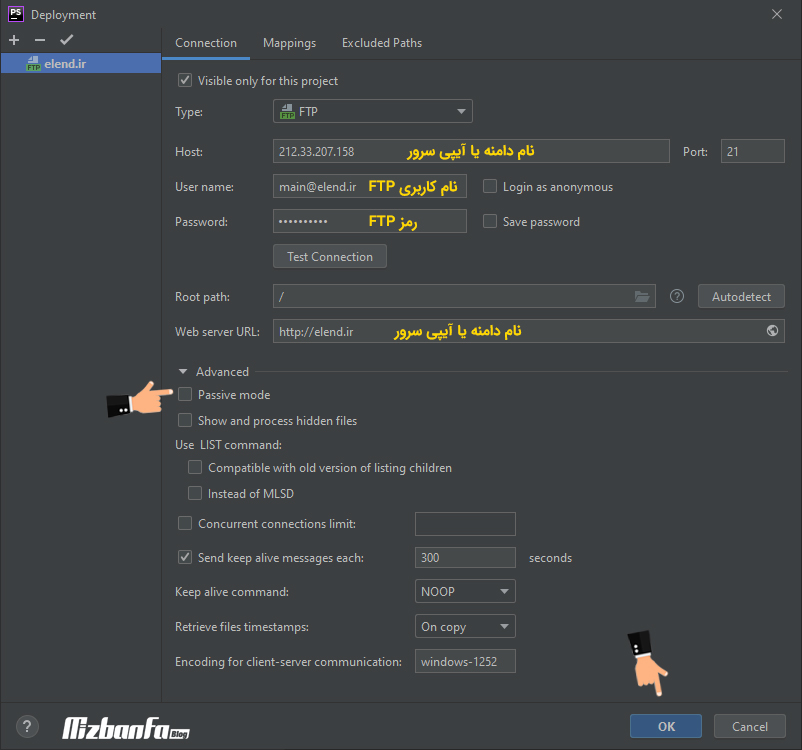
- Type: Select the FTP option from this drawer.
- Host: Enter the domain name or IP address of your host server.
- User name: Enter the username of your FTP account.
- Password: Enter the password of your FTP account.
- Root path: The path can be displayed for administration, which is referred to the root by entering the / character.
- Web server URL: Enter the domain name or IP address of the host server in the field.
Very important tip: Passive mode option to inactive mode