


How to set up a site with the site publisher tool in C Panel
- Once you have purchased the host and domain and activated it, you do not yet have a plan to launch your original website.
- When your website is being designed and launched and hosting and domain are activated, you want to let your users know that you are in a state of repair or offline.
Before starting the training process, be sure to note if your site is currently active. Its design is complete, do not test this C-panel hosting feature on your website because as soon as the site publisher tool is activated, a series The file and directory will be added to the main root of your host and may waste all your efforts. This tutorial is useful for people who have purchased their web host and domain and are now active and want to read before the website is activated. The original, to unveil a simple version of their website, so stay tuned for the rest of this handy tutorial.
First, by learning how to enter C-Panel, we enter the C-panel host of our website, scroll down a bit to reach the domain section, and from here, click on the site publisher icon to enter it. 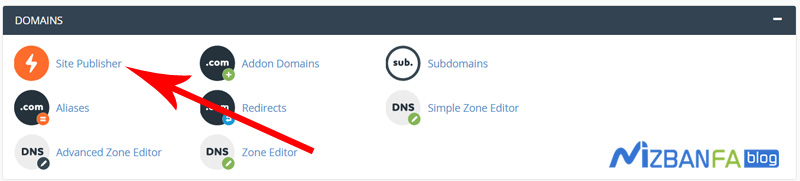 As here, the mizbanfatv. Ir domain attribute is selected by default, and after using this tool, our website will be activated on the same domain. Still, suppose you have a subdomain and a domain on your site. In that case, you can choose that This site is ready to be activated for which of your domains, so in this tutorial, because we do not have domain and subdomain admins on our website, the ready site will be activated on our main domain, in the special template section, we can prepare ready-made templates. Let’s see the panel, which fortunately is increasing every day. Some of them are useful for setting up a simple contact page, some of them are suitable for informing them when you see your website, but some of them. They are suitable for you to set up a simple personal site with them and introduce yourself with contact details. We decided to use the format cart: dev, which is used to introduce web developers or introduce a character Click once to select the method template.
  To be led to the third step, i.e., customize and publish, and now to complete the appearance of our site in these fields, we must enter our details in full. Enter that we start typing, in the third field we have to write our side that we write developer, in the fourth field we also start typing our contact number, the fifth field is related to the fax number that we do not have, in the sixth field the address We type our email and in the seventh field we start typing the address of our work place, in the eighth to the thirteenth field we can enter our profile address in social networks, from the Primary Color and Accent Color section we can use the default colors Edit inside the template, in the Background Image field we can enter the desired image address to be applied to the template background, which we set to remain the default, Background Color is related to the background color of the template and Text Color is related to the color of the text inside Is the template, in the Button T field ext We can enter a text or title for the orange button in the template that we write website, and in the Button Link field we can give a link to our button that we start typing: https://Mizbanfa.net, inside the Portrait field We are able to enter the path of our personal photo that shows the photo of the engineer or the owner of this site that we put it in the default state, and in the Biography section we can give a description of ourselves that we already have an English text and paste it here , In the Google Analytics Tracker ID field, we are able to enter our Google Analytics account ID so that we can later have an accurate statistics of visits to this page in Google Analytics, and we will leave this field blank and to finalize the installation of the template and Launch the site Click on the blue publish button below.
And as you can see, we see the message You successfully published your website to, and now we click on this link to see our ready website. 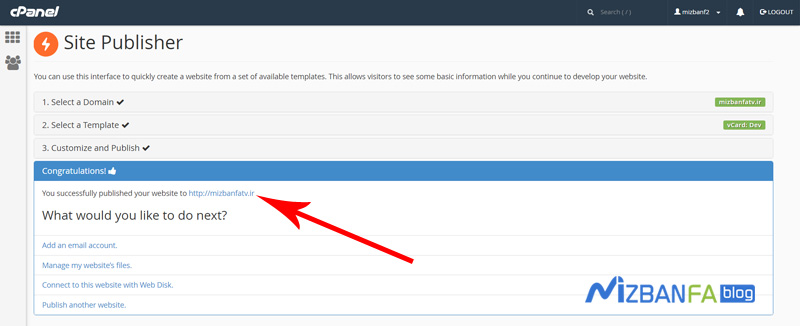 Yes, as you can see, our site is exactly according to the settings, and if we click on this button, we will be directed to our main website, which we linked, according to the image.
 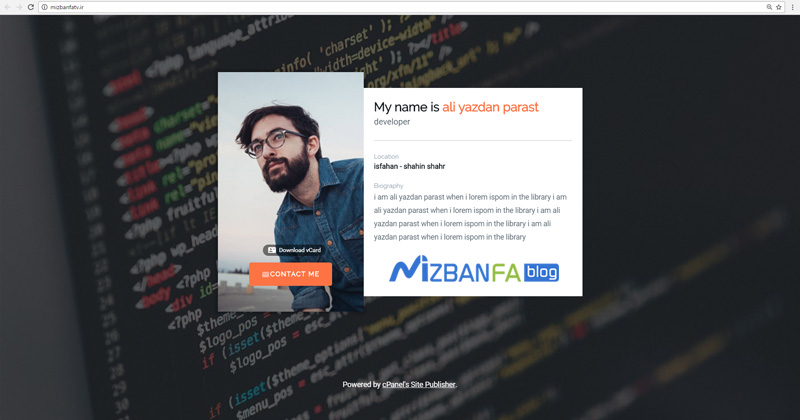 And now, if we go back to the site publisher and click on the same template, we can edit and re-customize the entered specifications according to the image, and to save, we have to click on the publish button again.
How to remove the site created by site publisher C Panel completely?
To do this, click on the C-panel icon from the top to be directed to the main panel of the control panel. 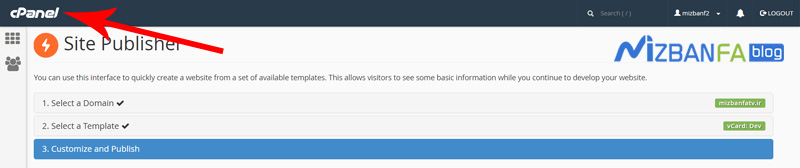 Now from the file section, click on the file manager tool to enter the file management section of our website.
 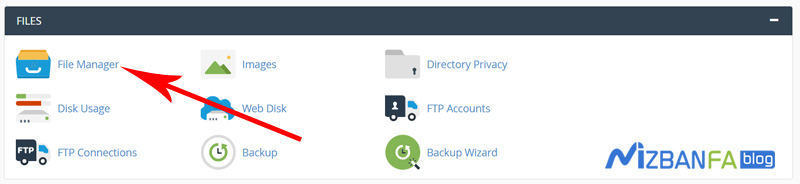 Click on the public_html icon from here to enter it.
 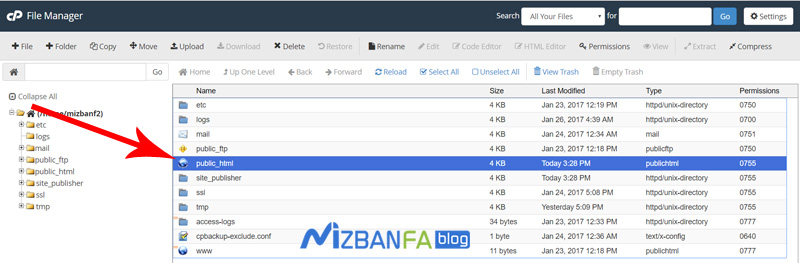 These two folders and this file are exactly related to the site created by C Panel, so we select all of them with the select all tool and click on the delete button from above, and in this window, this section is checked. Ensure that the files are not saved in the waste of our website host, and then click on the confirm button.
 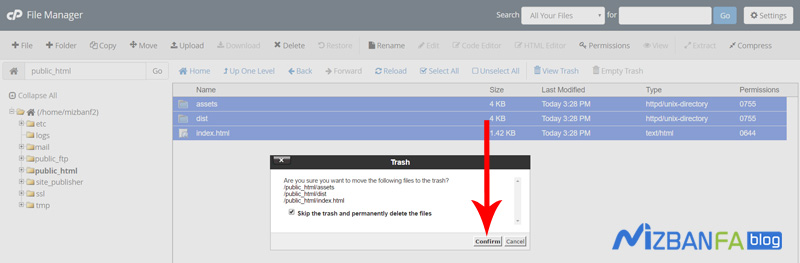 We can easily remove the site created by site publisher C Panel from our web host.
In the next tutorial video, how to connect another new domain to the C-Panel host so that you can then domains and connect them to the same host of your website, so stay tuned and To see more tutorials about C Panel, which is one of the most popular control panels of host management, please visit www.mizbanfa.net or follow us via Twitter and follow all our tutorials. Use for free.