


How to output database information in C-Panel host
Imagine you are the manager of a website, and you launched your site through a content management system like Joomla or WordPress, and now you decide to move your site from a local host to a host or from your current host to another host. The first step is to transfer your website files to the new host, which is done through the file manager. Still, the next step is to transfer the information and tables of your site database to the new host, and to do this, you should be able to get an output with the .sql extension, which is the database extension, from the information of your current database host, and then import it into the new host, and in this tutorial, we will teach you how to output database tables using the PHPMyAdmin tool. Yes, so stay tuned for the rest of this practical tutorial.
First, by entering the C-Panel tutorial, we enter the C-Panel host of our website; then, from the databases section, we click on the PHPMyAdmin tool and wait to be redirected to our PHPMyAdmin host.  Of course, navigating this page may take some time, so wait 5 seconds for the page to fully load. Well, now, on the PHPMyAdmin main page, we click on the name of the database we want from the left side of the page. Fully loaded.
 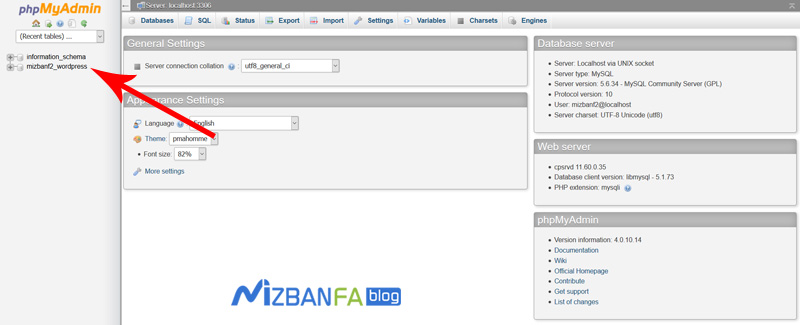 The information you see here is the database tables of our WordPress site, and now we want to get a complete output from all of this. And to do this, we click on the Export option from the top tabs.
 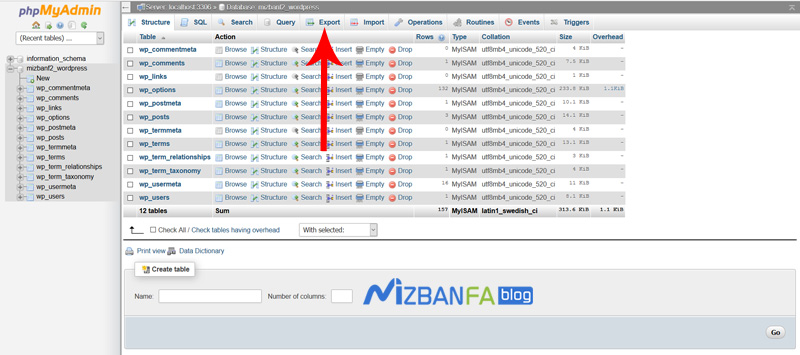 To enter the Exporting tables page, now in this page from the Export Method section, there are two available modes for outputting from database tables:
- Quick display only the minimal options, which can be used to output all the tables of this database in SQL format as easily as possible and without any special settings.
- Custom display all possible options, which can be output from database tables by applying special settings such as not outputting from some tables or outputting with special encodings with many settings.
We recommend using the first mode, and the second mode can be used for specific scripts or specific MySQL servers. With this option, you can output the database information of your website host with the most compatible mode with the destination host. While We selected the first option from the format section, we made sure that SQL was selected, and now we click on the go button below to download the output file. 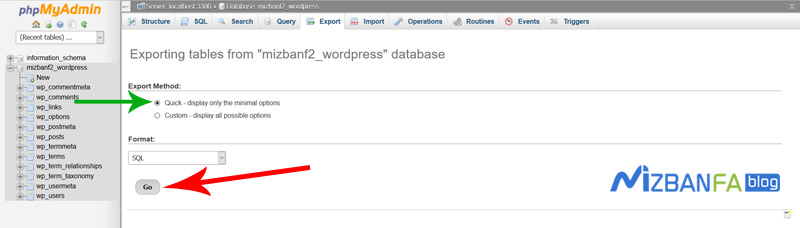 And as you can see, a window opens, and we click on the ok button to download the file.
 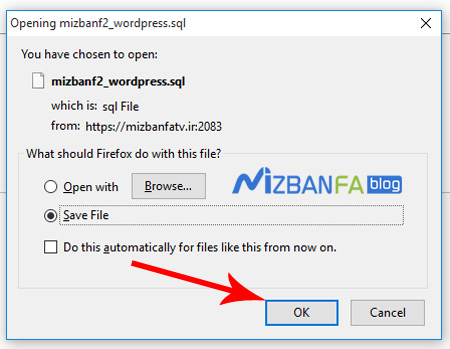 The more information you have and the heavier your site is, the longer it will take to download this file. As you can see, our file has been successfully downloaded, and now we put it on our computer desktop to use whenever needed. Let’s use it.
Getting output from database hosting information is not only used to transfer this SQL output file to another host. Our hosting database is where all the articles, views, and textual information of our website are stored. Somehow it can be said that this file from which we output can even be backed up from the database information of our website. Well, of course, if our site articles are deleted, or we lose a part of the textual data of our website, we can import our database file to our site. Let’s go back to the original state. Of course, in addition to database backup, if you add new files and images to your site, you must also have your host manager backup file, which in the tutorial video, how to do backup from C-panel, do this in full. We gave.
In the next tutorial video, how to import information into the C-Panel hosting database so that you can import the .sql output files from your current hosting database into the new host as easy as possible, so stay tuned. And to watch more instructional videos about C-Panel, which is one of the most popular control panels of host management, please visit the Mizbanfa.net website or follow us on Twitter and get all of our tutorials for free. use