


How to Fix Upside Down or Flipped Images in WordPress
How to Fix Upside Down or Flipped Images in WordPress
Do you want to fix upside-down images in WordPress?
When you upload images from mobile devices, they may appear upside down or upside down in the WordPress media library.
This seems to happen most often when you upload images from an iPhone or other iOS device.
This article will show you how to fix upside-down images in WordPress.
If you are interested in buying WordPress hosting at a reasonable price, visit the Ded9.com website and choose the right plan.
Why does WordPress display images upside down?
From version 5.3 onwards, WordPress looked at the metadata embedded in each image and then rotated the image based on that data.
If you have WordPress version 5.3 or higher installed, WordPress should usually rotate images upside down or automatically flip images.
However, some users still see upside-down images in the WordPress media library:
If this happens to your WordPress blog, you can try a few solutions.
Method 1. Repair through media library
You can perform basic image editing in the admin area of your WordPress website, including rotating images or flipping them vertically.
This allows you to fix inverted images in WordPress without installing additional plugins.
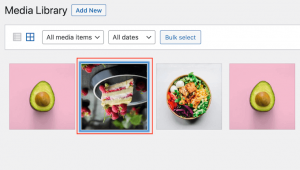
To rotate or flip an image, open the WordPress Media Library by clicking Media » Library in the left menu:
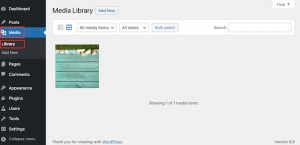
Then you can click on the inverted or flipped image you want to rotate.
WordPress now shows some basic settings you can use for image editing, such as adding title attributes to images in it or adding image alt text.
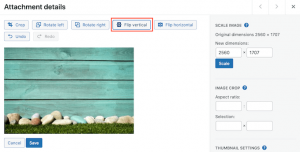
To rotate the image, click on the Edit Image button:

Just click on the “Rotate right” to rotate the image clockwise.
To rotate the image counterclockwise, click the ‘Rotate left’ button instead.
Another option is to flip the image vertically.
To do this, click on the “Flip Vertical” button:
The live preview updates automatically, so you can play with the settings until you’re happy with how the image looks.
When you are done, click the “save” button at the bottom of the image to save your changes.
If you make a mistake while editing an image, you can click the Undo button to undo any changes until you’re happy with how the image looks:

Already saved the image? You can restore the original image by selecting it and then clicking the “Edit” button, exactly as described above.
However, click on “Restore Original Image” to expand this section.
Finally, it’s time to click on the “Restore image” button:

After a few moments, you will see a message that the image was successfully restored.
Method 1. Repair automatically
If you get a lot of upside-down images, fixing each image in the WordPress media library can be time-consuming.
With this in mind, you may want to rotate your images using the Fixed Image Rotation plugin automatically.
When you take a photo, smartphones usually create an orientation value for that image. This plugin looks at the Orientation value and rotates the image if needed. All this happens automatically, saving you time and effort.
Do you want to see the metadata used by “Rotate Fixed Image”?
Many editing software programs allow you to check image metadata. For example, you can check image orientation information using the Mac Preview app:
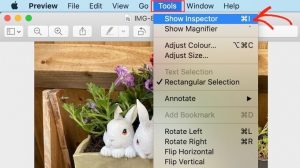
In the window that appears, click on the “General” tab.
Now you can see the Orientation value for this image. This is the information that Fixed Image Rotation uses to fix any inversion in the photo.

To fix the inversion of these images in WordPress, you first need to install and activate the Fixed Image Rotation plugin.
After activation, the Fixed Image Rotation plugin starts working automatically, and there are no settings for you to configure.
Now you can upload any image from your phone, and WordPress will automatically return that image when needed.
We hope this article helps you learn how to fix upside-down images in WordPress. Good luck!