


How to design and manage error pages in cPanel
When a site’s content is not normally available, an error message often appears for it. If the host is unavailable, the displayed messages are determined and displayed from the browser side. But if the host is fully or partially available, the displayed messages are from the site’s error pages. These error pages are usually displayed in the default form of the web server, but you have the option to customize them to your liking. In this article from Fa Host’s knowledge base, we decided on how to customize and manage error pages in cPanel.
- Error pages in cPanel
- Training on customizing error pages in cPanel
The ability to change the appearance of error pages in cPanel
Web server error messages are available by default for sites located on that server. This means that your users will be faced with a specific and predetermined error page when any of the reasons that lead to the display of error pages occur. But regarding the messages that are not related to the occurrence of problems in the host, you can customize the error pages related to your website in cPanel. To do this, just click on the error code displayed in the “Common Error Codes” section and enter the editing page of this page. In the following, we will teach you how to customize and manage error pages in cPanel.
Training on customizing error pages in cPanel
To access the management of error pages in cPanel, you need to follow the following path exactly.
- In the first step, you must enter your cPanel management panel by entering your username and password.
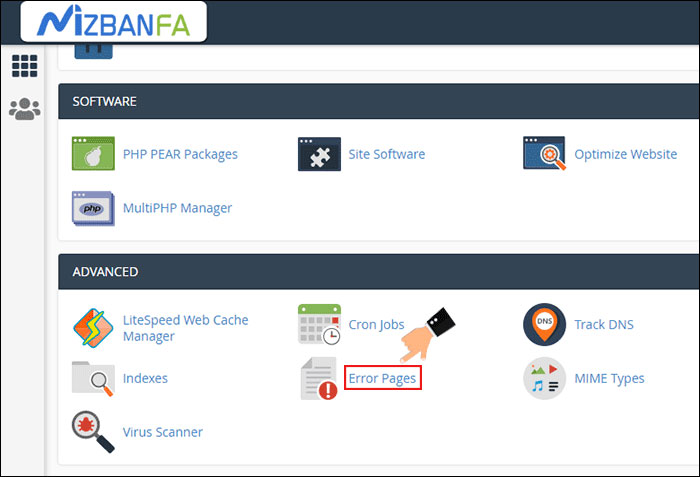
Teaching how to enter the control panel of the CPanel host - Then click on the ” Error Pages in the ” ADVANCED picture.
- At this stage, a page will be displayed for you through which you will be able to customize and manage error pages. On this page, you should follow the following in order:
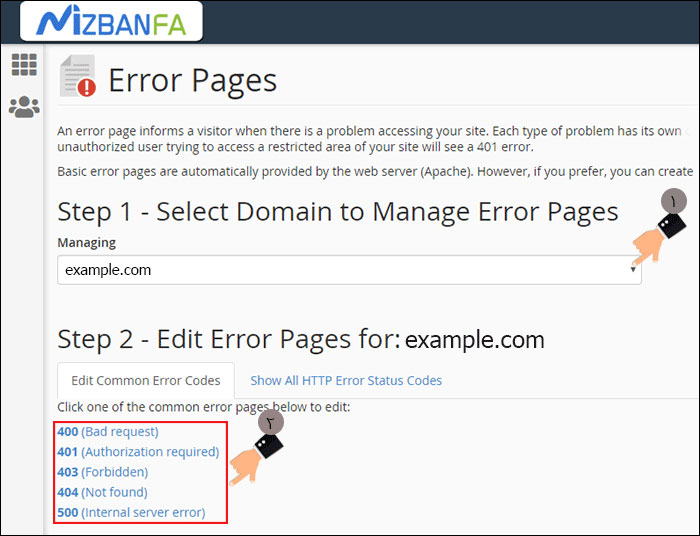
- In the first step, you must select the domain in which you intend to manage the error pages through the specified part in the image.
- Then, in the second step, you will come across the two tabs ” Edit Common Error Codes ” and ” Show All HTTP Error Status Codes “. Using the first one, you can edit common error pages such as error 400, error 401, etc. By using the second tab, you can view and edit all the errors that may be displayed on your website at different times. The most common error pages that are placed in the first tab are:
- Error 400: Invalid and incorrect request error – Unacceptable request
This error is usually displayed when there is a problem in confirming your request from the server side. - Error 401: Login error – The login details for this path are not correct.
This error is usually displayed when you have entered incorrect information to enter the protected path. - Error 403: Inaccessibility error – access is not possible.
If there is no permission to access and view the route, such an error will be displayed to the users. This can be consciously considered for management paths in order to increase security. According to the default or custom configuration, this message can also be displayed for routes without content. - Error 404: No Content Error – There is no displayable content.
If there is no content to display, users will encounter this message when trying to enter a specific address. - Error 500: Error and structural problem of the website with the web server
This error is usually shown to users when the web server cannot display the site’s content. This issue does not mean a problem in the web server and dozens of factors such as the presence of unauthorized codes in the htaccess file can also cause such an error.
Select the desired error through one of these two tabs and click on it to enter the page related to customizing and managing error pages in cPanel for the selected error.
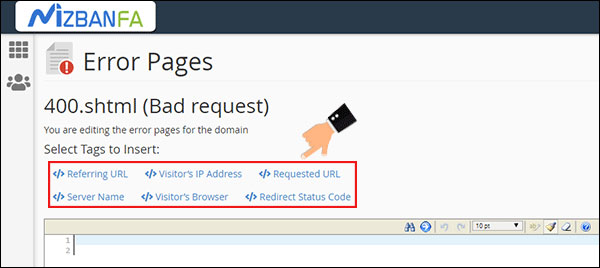
- On this page, you have the possibility to manage error pages in cPanel according to your needs. In fact, you will see a blank page that you can adjust according to your needs. You can also enter tags such as URL address, visitor IP address, requested URL, server name, visitor browser and redirection status code.
For example, for this tutorial we will edit the 403 message. This message on Lightspeed and Apache web servers is as follows.
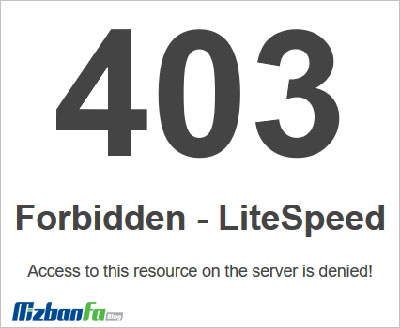

If you want to customize the page related to this error, you should proceed as above to enter the page related to editing error 403.

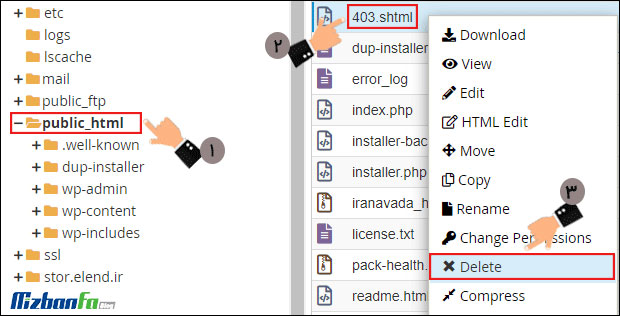
As you can see, the 403 file with the HTML extension is available for you to edit and you can customize it as you wish. After making the necessary changes and clicking the ” Save , the 403.shtml file will be created in the public_html path of the desired domain. If you want to return everything to the default state, just delete the created file. If the created file has no content, a white page without a message will be displayed for visitors. To delete the file, proceed as follows:
- Enter your cPanel management panel.
- From the ” FILES ” menu File Manager.
- Enter your public_html directory.
- Then, as shown in the image below, find and delete the file related to the customized error page.
The beauty and eye-catching news of the pages of a website plays a very important role in attracting the attention of users. Error pages are no exception. You can draw the attention of your users when they encounter an error on your website by designing a unique error page. In this training from Fa Host’s knowledge base, we have tried to teach you how to customize and manage error pages in cPanel. In this way, you can personalize the error page that is displayed at different times and for different reasons according to your needs and according to the taste of your characters.