


6 ways to Take a screenshot on a Mac
There is no Print Screen button on a Mac keyboard similar to Windows to take a screenshot of the screen, and it seems harder to do on a Mac than on Windows. But there are several ways to take a screenshot on a Mac, with or without a keyboard.
This tutorial will show you how to take a screenshot of the entire screen, windows of a specific application, or selected areas of the screen in MacScreen.
before start
Before reviewing the various screenshots on the Mac, remember that after taking a screenshot, you may notice that additional screenshots quickly fill up the internal memory.
Don’t worry; you can always use MacKeeper to clear your Mac storage with just a few simple clicks. The Safe Cleanup feature performs an in-depth scan to remove unwanted files and body use and is an easy way to free up more Space for screenshots.
How to take a screenshot on a Mac using keyboard shortcuts
The fastest way to take a screenshot on a Mac is to use one of the keyboard shortcuts. Fortunately, it’s easy to remember them all, but if you do not want to memorize shortcuts, we will explain how to use the Screenshot program in the next section.
Full-screen Screenshot on Mac
Press Shift + Command + 3 on the keyboard to take a screenshot of the entire screen.
A preview of the image is displayed in the lower-right corner, which you can click and make an instant change. Otherwise, wait for the Preview to disappear and the screen image to be saved as a PNG file.
Take a screenshot of a selected area of the screen
If you want to take a screenshot of a specific screen area, press Shift + Command + 4. The shape of the pointer changes. Now click on the screen to select the desired area, drag, and finally release the mouse after selecting the area. This will take a picture of the selected area.
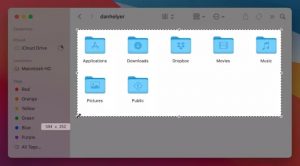
If you change your mind after selecting the area, press the Esc key on the keyboard to cancel the selection and start again.
Take a screenshot of a specific application window
To take a screenshot of a specific application window on your Mac, press Shift + Command + 4 and tap Space. The cursor changes to the camera icon. Hover over different windows to highlight them, then click to take a screenshot.
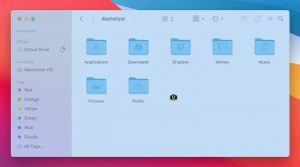
This option takes a screenshot separate from the program window, including a shadow and a clear background so you can place the photo on anything you want.
In addition to screenshots of application windows, you can also use this shortcut to take screenshots of the menu bar, desktop, and any drop-down menu that opens.
How to take a screenshot on a Mac without using the keyboard
If the Mac keyboard does not work or you do not like to use shortcuts, you can take a screenshot of the screen without using the keyboard.
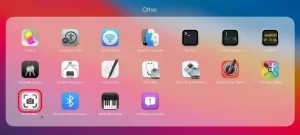
To do this, open the Screenshot app. To find the Screenshot app, go to Applications> Utilities in the Finder, open the Other folder in the Launchpad, or search for it with Spotlight.
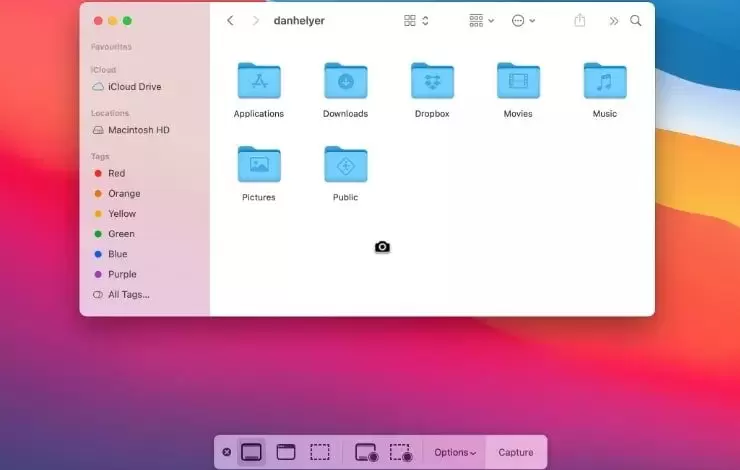
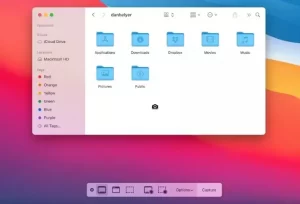
If the keyboard works, you can open the Screenshot app by pressing Shift + Command + 5.
After opening the Screenshot app, click on the icons at the bottom of the page to select one of the following:
- Full-screen photo
- Photo from the selected window
- Photo of the selected part
Then use the cursor to take a screenshot or click on the desired part of the page.
The Screenshot app also has options for capturing video from the screen or part of it, and these options are located at the bottom of the screen.
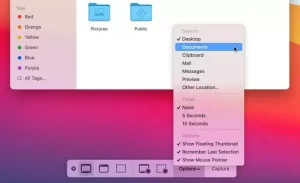
You can also open the Options menu for various Screenshot settings, such as selecting a storage location, setting a timer, or deciding whether to display the mouse pointer in screenshots.
Use Preview to take a screenshot of the screen.
If for any reason, you do not like the Screenshot app, you can use Preview to take screenshots on your Mac.
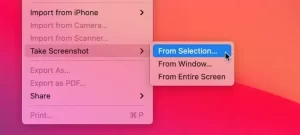
Open this app as you normally would with Finder, Launchpad, or Spotlight. Then go to File> Take Screenshot from the menu bar.
After choosing between one of the three options, “click” or “click and drag” to take a screenshot of the screen:
- Screenshot of the selected area
- Screenshot of the window
- Screenshot of the entire screen
Frequently Asked Questions
How to change the default page storage on Mac?
Mac screenshots are stored on the desktop by default, so when multiple screenshots are taken simultaneously, it will lead to clutter on the desktop.
To change the default storage location of photos to prevent the desktop from filling up, follow these steps:
1- Press Shift + Command + 5 keys to open the Screenshot program.
2. Open the Options menu.
3. In the Save to section, select the storage location, and click on Other Location to select the folder you want.
How to save copy screenshots in the clipboard?
Instead of saving all the screenshots on your desktop or elsewhere, you can copy them directly to the clipboard. This allows you to embed them in your desired document or web form.
This feature is especially useful when you do not want to save a screenshot and want to use it immediately.
Press Copy Control to copy a screenshot to the clipboard while taking a screenshot. Then press Command + V to place it in other programs.
How can we take a snapshot of the touch bar on a MacBook?
To take a screenshot of the touch bar on a MacBook, just press Shift + Command + 6. This Screenshot captures every button that appears on the touch bar.
Finally, now you know the best way to take a screenshot on a Mac. Many of these shortcuts are easy to remember – especially because they are so similar – but if you do not like this style, you can use Screenshot instead.