


Install and Configure Hyper-V on Windows Server
Install and Configure Hyper-V on Windows Server
Installing and configuring Hyper-V on Windows Server 2022 – Hyper-V is a hardware virtualization product developed by Microsoft. In fact, Hyper-V can create and run virtual machines, each virtual machine acts like a full computer. Hyper-V is a type 2 hypervisor that runs on the Windows operating system. A type 2 hypervisor runs inside the operating system of a physical host machine.
In this article, we will teach the following:
- Installing and configuring Hyper-V on Windows Server 2022
- Configure the virtual machine on Hyper-V
Training demo environment:
Operating system: Windows Server 2022 Datacenter
IP address: 192.168.3.10
Steps to install Hyper-V on Windows Server
- Open the Add roles and features Wizard
- Choose the type of installation
- Select the destination server
- Select server rules
- Select features
- Configure Hyper-V
- Confirm installation selections
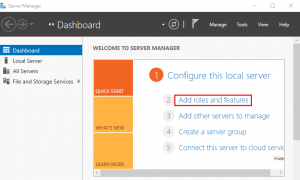
1. Open the Add roles and features Wizard
Open the Server Manager dashboard and click on Add roles and features.
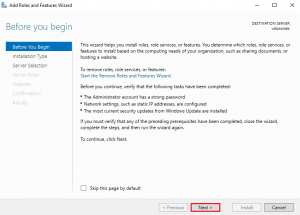
Click Next before starting.
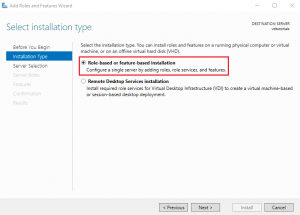
2. Select the type of installation
Select role-based or feature-based installation and click Next.
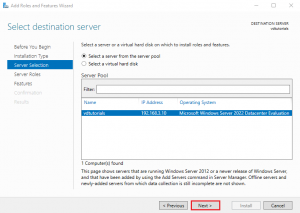
3. Select the destination server
Select the host you want to add to the service and click Next.
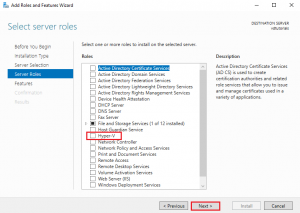
4. Selection of server rules
Select the Hyper-V box from the Server Roles page as shown below.
A new window will appear as soon as you select Hyper-V. Click on Add Features.
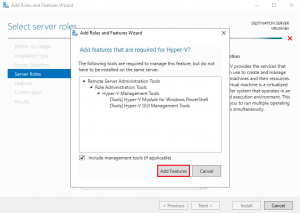
Click Next to continue.
5. Selection of features
In the Select features console, just click Next because we don’t need any additional features right now.

6. Configure Hyper-V
In the Hyper-V console, you can read brief information about the Hyper-V server. Click Next to continue.

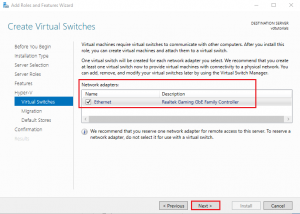
In Virtual switches, select a network adapter for the virtual switch and click Next.
The next section is about migration for virtual machines, in this tutorial keep it as default and click Next.
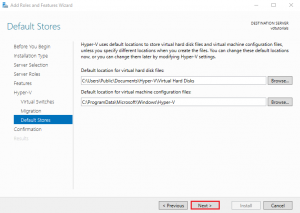
Specify the default location for the virtual hard disk files and virtual machine configuration files and click Next.
7. Confirm installation selections
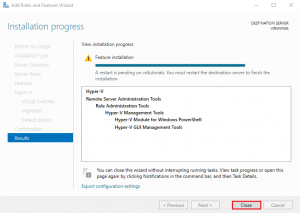
Confirm the installation selections and click Install to begin the installation process.
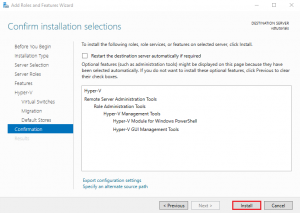
After the installation is complete, click Close and restart the server.
Virtual machine configuration steps in Hyper V
- Open Hyper-V Manager
- Run the new virtual machine wizard
- Specify name and location
- Specify the generation
- memory allocation
- Network configuration
- Virtual hard disk connection
- Configure installation options
1. Open Hyper-V Manager
Open Server Manager, click Tools, and select Hyper-V Manager.

2. Run the new virtual machine wizard
Right click on Hostname and select New and click Virtual Machine.

Click Next before starting.

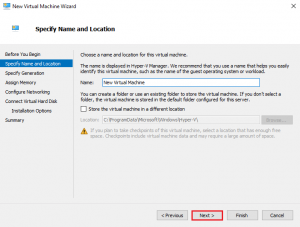
3. Specifying the name and location
Select the name of the virtual machine and click Next.
- Name: new virtual machine
- Location: Default location
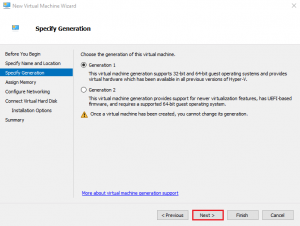
4. Specifying the generation
Generation: Generation1
Then click Next.
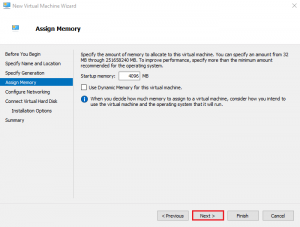
5. RAM memory allocation
Allocate memory for the virtual machine and click Next.
Memory: 4096
6. Network configuration
Select Virtual Switch to use the virtual machine network and click Next.

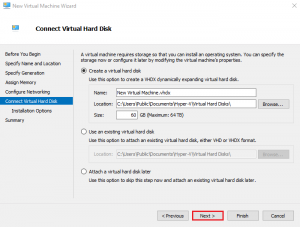
7. Connecting the virtual hard disk
Configure the virtual hard disk for the new virtual machine and click Next.
- Name: New Virtual Machine.vhdx
- Location: Default location.
- Size: 60GB
8. Configure installation options
Select Installation Options and click Next.
Installation Options: Install the operating system later

Click Finish to create the virtual machine and close the wizard.
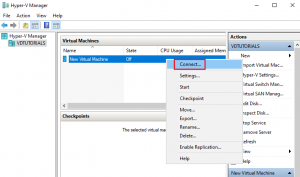
The virtual machine is created. To connect the Virtual Machine, right-click on the Virtual Machine and click Connect.
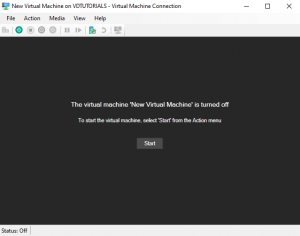
Select Start to start the virtual machine.
In this article, we learned how to install and configure Hyper-v on Windows Server For more information, you can read the contents of the virtualizer category of the blog.