


How to Change Screen Timeout Setting in Windows?
How to Change Screen Timeout Setting in Windows?
Leaving your computer screen on wastes energy and can make it easy for anyone to see what you’re working on. So keeping the screen on if you are doing something is inevitable.
The good news is that setting how long the screen stays on is easy, and you have various options. Let’s see how you can make that screen stay on for as little time as possible.
How to change how long the screen stays on in Windows 10
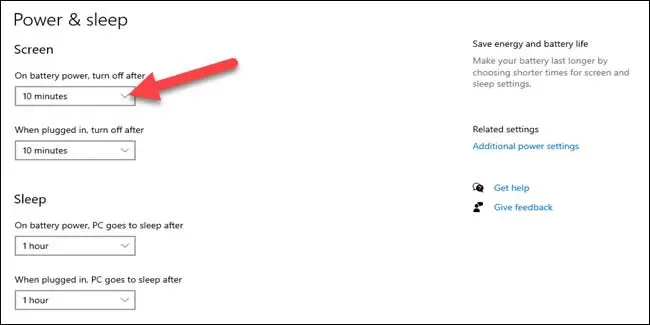
To change how long the screen stays in Windows 10, you must go to Settings. You can do this by clicking on the screen’s Windows icon at the bottom left. Click on the gear and click on Settings. Once in Settings, go to System, then select Power and Sleep.
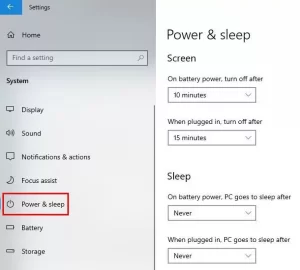
Power and Sleep Windows 10
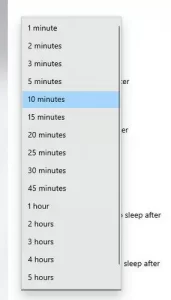
You will see two different options for setting the time. When you have connected your laptop to electricity and when it is working with battery charge, you can choose screen time or Screen time. Click on the drop-down menu on the side. You will have several time options to choose from.
You will also see options to customize sleep options. When your computer is asleep, it doesn’t mean it’s turned off. As you can see, reducing the time the laptop screen stays on is very simple. If it’s been a long time and you still can’t get back to your laptop, you can take comfort in knowing that Windows has turned off the screen for you.
Conclusion
Everything gets more expensive over time, and that includes electricity. You can save money by setting the time to turn off the Windows screen.