


The Most Important Points Of Photography At Night With A Mobile Phone To Achieve High-Quality Photos
When Daylight Disappears And Stars Appear In The Sky, A New World Comes To Life; The World Of Deep Shadows And Subtle Highlights, The World Of Photography At Night.
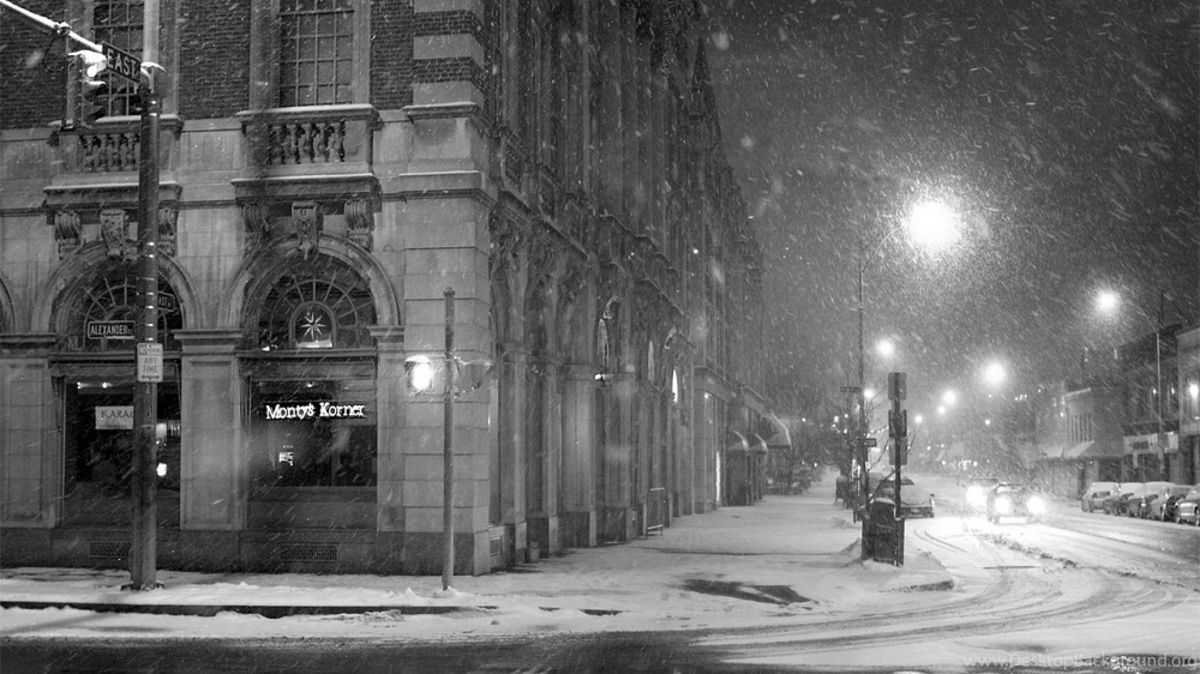
Night photography is so mysterious and stimulates your imagination that it can become addictive. The night is when everything is quiet, and you can be with yourself and create impossible images during the day.
After the sun goes down and the city lights come on, you have two choices: put your camera away until daylight returns, or take on the challenge of photographing in the dark. Shooting at night with a smartphone can be demanding as you encounter low light, harsh contrast, and annoying camera noise. But luckily, you can overcome these limitations with creativity and take beautiful photos of the night. In the following, we have mentioned 10+1 tips for photographing at night with a smartphone. We hope that by observing all these points and gaining experience, you will be able to achieve the photos you have always dreamed of.
What is night photography?
Night photography is a type of photography that is done without relying on high levels of light to create images. In night photography, instead of looking for bright light to reveal all the details and secrets of the subjects we photograph, we look for subtle light sources that show specific elements and hide the rest. In this way, we can tell a reality different from what we see in the day.
Even if we use the same essential equipment and techniques, night photography fundamentally differs from daylight photography in design and creative process.
At night, everything is slower; from the slower shutter speed, we need to capture images of the rhythm of life happening in front of us, and we seize it in our pictures.
Night photography is a more thoughtful type of photography where we are more interested in what is not shown and implied than what is seen. Night photography is full of symbols and mysteries, and we can use it in a poetic way to tell the story of an undiscovered world.
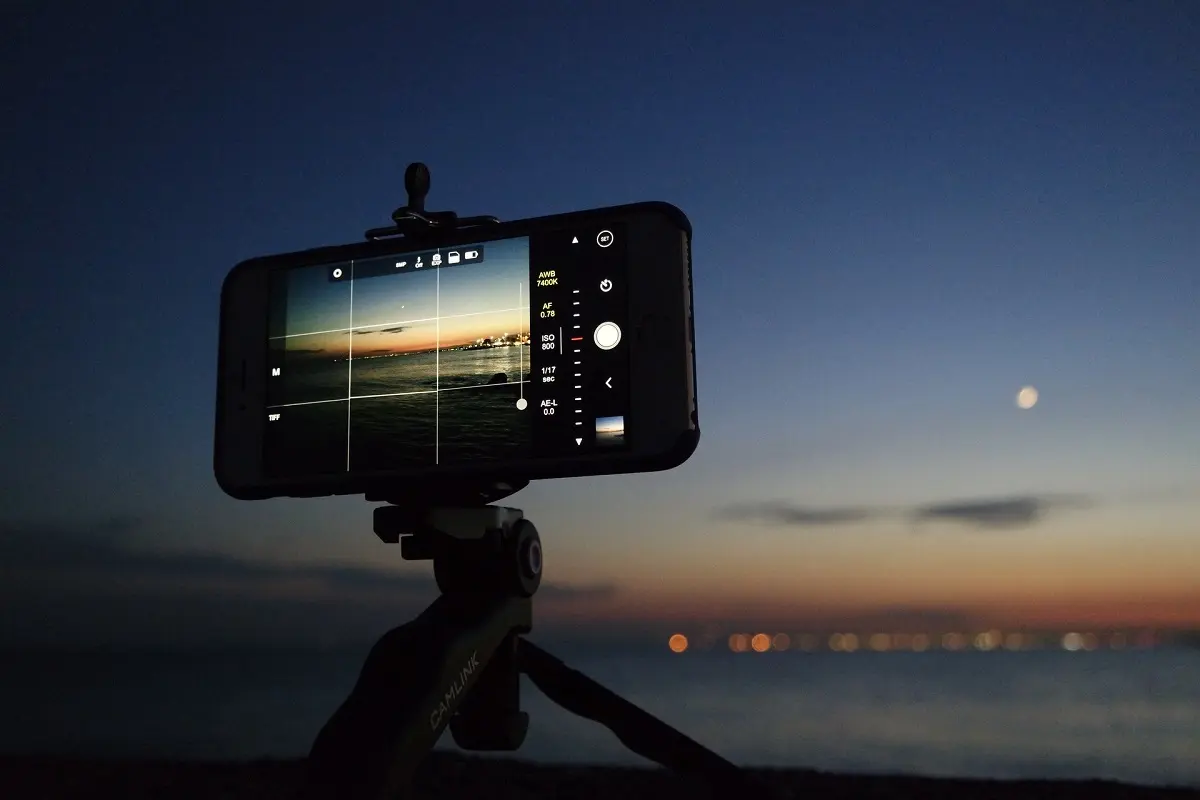
1. Hold the phone steady
You must fiddle with your camera settings when shooting in low light conditions. But most importantly, even with the best equipment, you must first keep your smartphone steady. The best way to avoid blur caused by phone shakes and to get a sharp photo during long exposures is to hold the camera steady. While you can use a flat surface, you’ll need to find a way to keep the phone steady.
Tripods and tripods are great options. The best way to avoid motion blur and get a sharp shot during long exposures is to hold the camera steady. Many camera tripods also can control a mobile device, But if you only have one phone you want to get the job done with, you can use smartphone tripods. When buying a tripod for your smartphone, it is better to base your choice on quality rather than price.
2. Activate the night mode on the phone
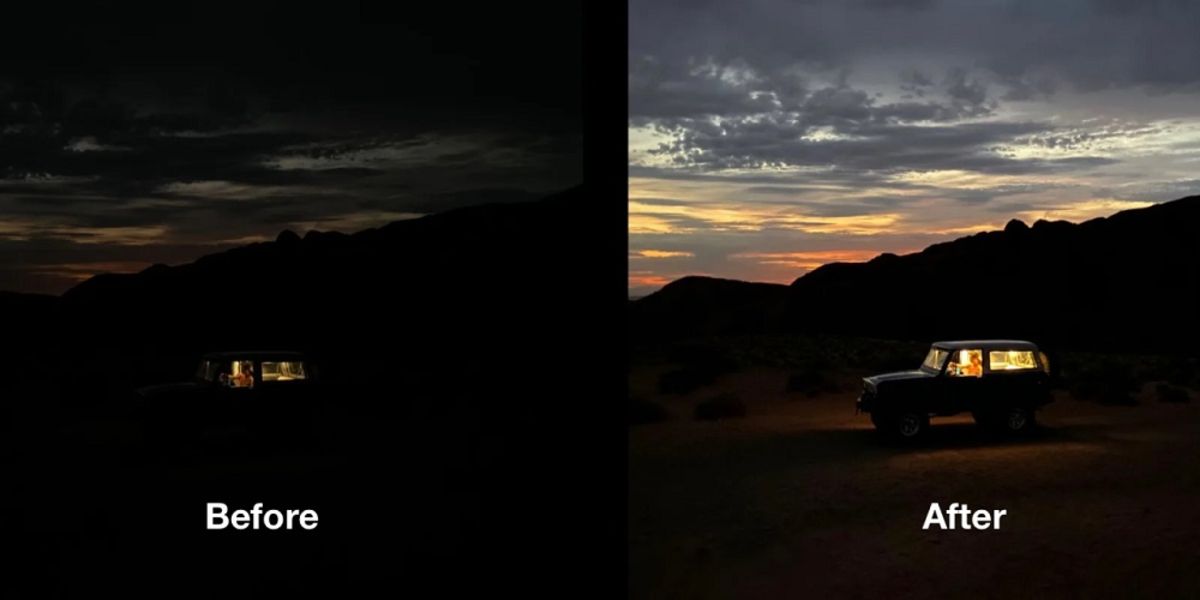
In some Android phones, you may find a special photography mode called Night or Night Sight. On phones like the iPhone, night mode automatically turns on when the phone detects you’re in low-light conditions. If your phone has a night mode, it’s essential to ensure it’s enabled before you start shooting.
Different phones may have other options, so if you’re unsure how to use your phone, a quick Google search for the phone model and Night Mode should answer your questions.
3. Use a higher shutter speed

When shooting low light and night photography with mobile, many of the same methods used for DSLR or mirrorless cameras still apply. With these cameras, you usually have to control the exposure triangle (aperture, shutter speed, and ISO). This often requires using a slower shutter speed. Using a faster shutter speed will allow more light to enter your camera, making it easier to take better photos at night.
Regardless of your smartphone, you should be able to change the shutter speed at least a little, or if you don’t have that option, get a good camera app. For example, the Manual app for Apple phones or Manual Camera for Android phones allows you to control how long the camera shutter remains open.
4. Do not neglect the flash of the phone
Many people turn to their smartphone’s camera flash when taking photos in low light conditions. When it’s dark, it helps to have some extra light on what you’re photographing. Phone flash is a good starting point to capture better images at night, But if you don’t know what you’re doing, using flash can sometimes make things worse.
When you use the flash tool on your smartphone, you will generate more light. As a result, you increase your chances of getting your desired image.
If you want to take a picture of an object close to you, a flash is usually useful; But if you’re shooting a landscape, the moment might not work either.
Since the flashlight is somewhat harsh and sharp, you need to adjust it according to your photo. Therefore, before taking a picture, try to put a tissue or paper on the flash to soften the light. On the other hand, you can use a color filter to give your photo a different feel.
5. Find an external light source
If you look at your favorite photos taken at night, you’ll notice that most of them used some outdoor lighting. Photographers often use the lights of buildings to get the images they want. Perhaps the best example is the photography of urban landscapes.
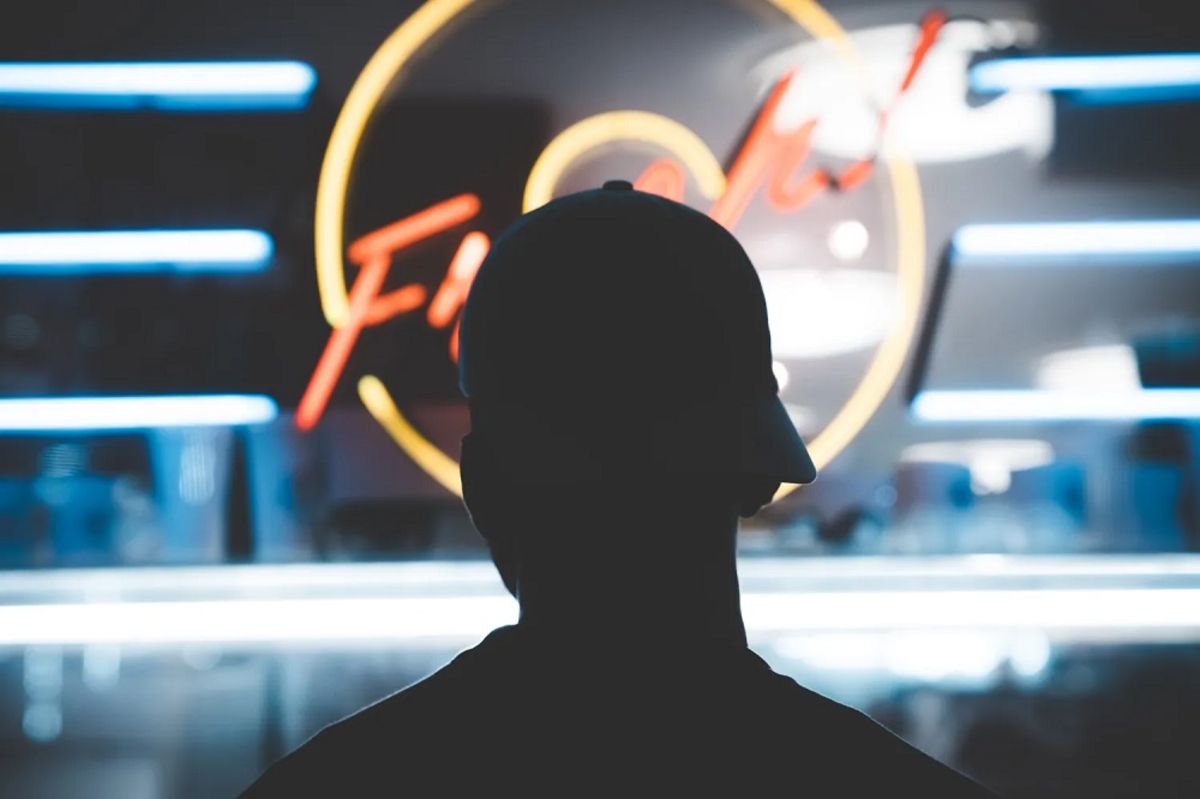
Smartphone photography in low-light conditions becomes much more accessible by finding an external light source.
You can look for external light for your pictures in different ways, but you have to ensure that this light is relatively strong. For example, you can look for neon signs often found outside restaurants and stores. You can also use street lights or vehicle lights. Buying ring lights for your phone might not be a bad idea, but don’t limit yourself to what you don’t have. Flashlights, lamps, bike lights, string lights, and many more are valuable tools for creating additional light when shooting.
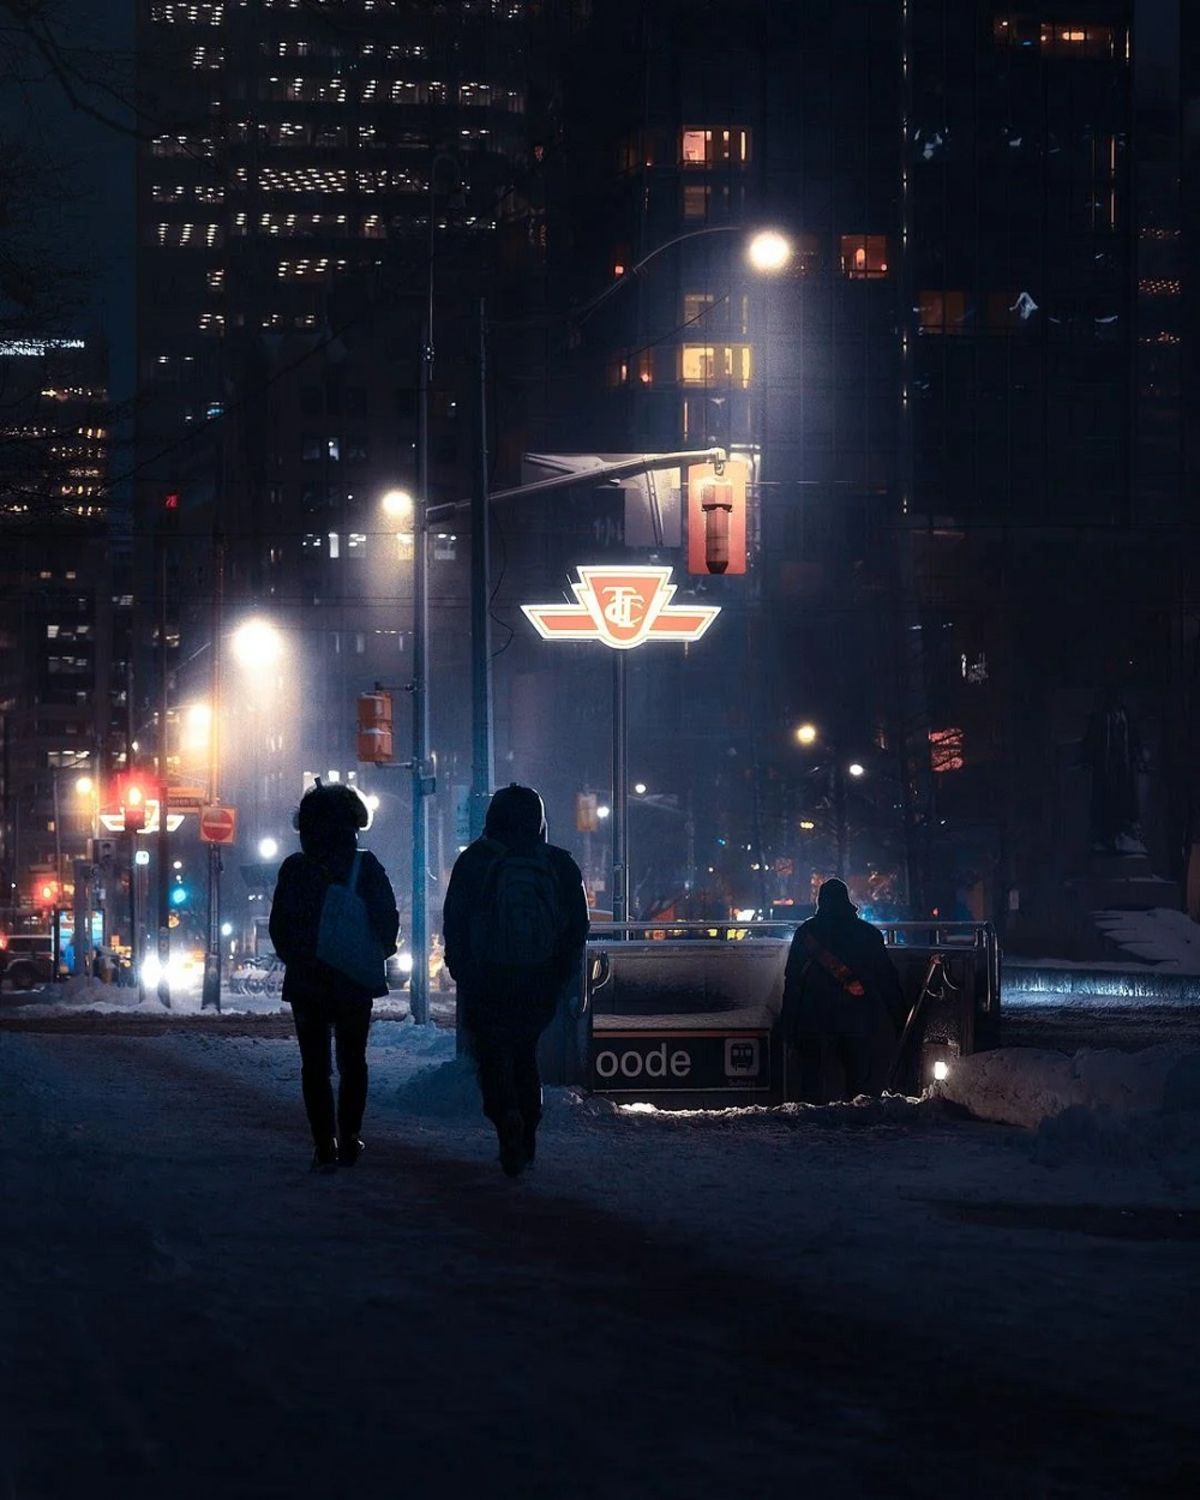
6. Use the backlight
Night can be a time to find extreme lighting situations. Backlighting is a great way to get a creative visual effect. Just focus and look for backlights in front of storefronts, street lights, or anywhere light easily shines behind your subject to capture a dark, black image against a bright background.
7. Don’t forget the filters
Many of the images you see online these days have been edited. Smartphones have many features in this regard. For daytime photography, a regular camera is good enough; But when the light level drops, things get a little more complicated than usual.
If you use a filter, you may be able to shoot at night more easily. Each filter has different effects. Your options will vary depending on the device you have.
If you are unsure which filter works best for you, experiment and choose the best option.
8. Get help from third-party apps
Some forms of night photography are complicated without the help of apps. Star photography is one of these examples. You will face challenges when capturing natural phenomena like the Northern Lights. But luckily, you can use third-party apps to get the desired results.
Depending on the type of photography you want to do, you can find an excellent third-party app to help you out.
9. Add style to your photo
Low light and high ISOs can cause noise in your photo. But a little bit of grain won’t ruin it. Edit your image to remove these imperfections. Photographers often consider graining because of its dramatic effect. If you have an idea that is too grainy and doesn’t have good colors, make it black and white. You can also lighten it up to imitate a classic photography style.
10. Edit your photos
When shooting in low light, adjusting exposure and contrast are your friends in the photo editing toolbox. You can try the editing tools in different image editing programs. Check out our photo editing article in Photoshop to learn everything you need to know to get started.