


Teaching how to retouch facial skin in Photoshop
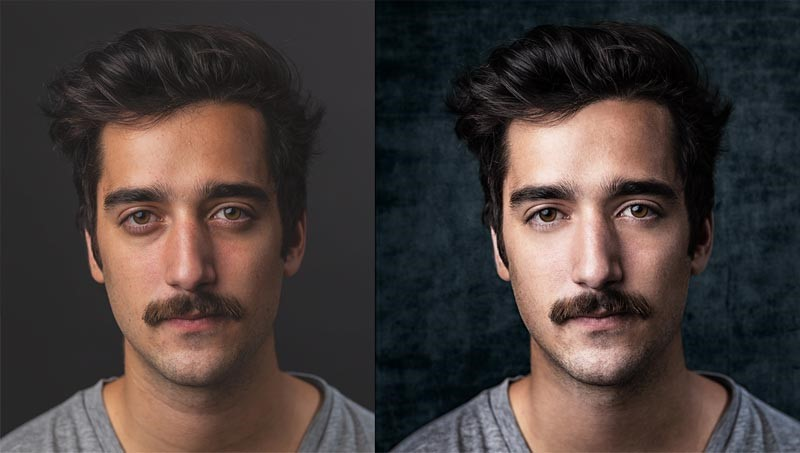
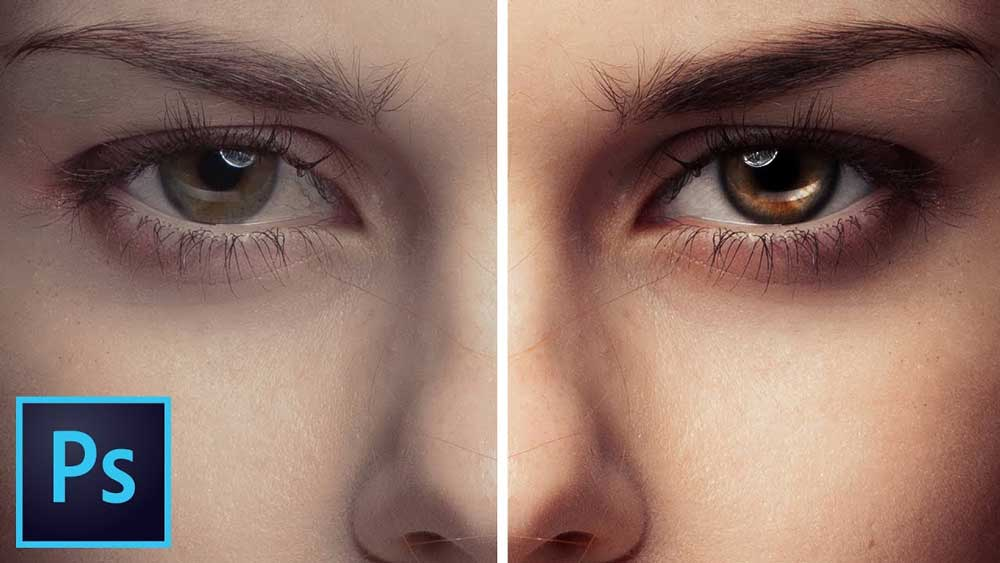
Facial skin retouching in Photoshop is a basic photography and graphic design skill. By using this technique, you can make the skin of the person’s face appear smooth and flawless and improve many details of it. Photoshop is a professional Android and system photo retouching program, but how to retouch in Photoshop? Facial skin retouching in Photoshop includes several steps, which we will mention below:
Color theme setting
To start retouching the skin of the face in Photoshop, first set the color theme of the skin using the Hue/Saturation tool. By changing the color theme, you can reduce the yellow and gray color on the skin and display the skin color more naturally.
Removing blemishes and pimples in facial skin retouching in Photoshop
In this step of facial skin retouching in Photoshop, remove spots and pimples on the face using the Clone Stamp and Healing Brush tools. Selecting the area you want to modify and clicking on a correct point will copy and place it in place of the desired point. “Study training and practicing Photoshop makes you grow in this field. To upgrade from a beginner to a professional, you must continue your efforts, follow-up, and continuous practice.”
Soften the skin
Use the Gaussian Blur tool to soften the skin and remove facial lines and wrinkles. You can make the skin look soft by choosing the tool and selecting the desired area. Gaussian filter changes the distance between pixels to soften the skin.
Adjust brightness and shade.
To retouch the skin of the face in Photoshop, you can adjust the brightness and shadows of the face using the Dodge and Burn tools. The Dodge tool is used to change the local brightness of the skin and increase the brightness, while the Burn tool is used to darken and create shadows.
Steps to edit facial skin in Photoshop
Facial skin retouching in Photoshop includes several steps, which we will discuss in more detail below.
Skin color correction in Photoshop
In this stage of facial skin retouching in Photoshop, improve the color theme of the skin using the Hue/Saturation tool. By changing the settings of this tool, you can make the skin look more natural and reduce the yellow and gray color of the skin.
Skin color correction is an important step in retouching facial skin in Photoshop. By using various advanced tools of this software, you can improve skin color and make the image more attractive. We will examine Photoshop’s steps to correct skin color in the following.
- Open the image
- First, open the desired image in Photoshop.
- Create a new layer
- Create a new layer using the New Layer button in the Layers panel.
- Select the Hue/Saturation tool.
- Click the Hue/Saturation button in the Adjustments panel to open a new window.
- Color adjustment
- To retouch the skin of the face in Photoshop, adjust the skin color more accurately using the sliders in the Hue/Saturation window. You can adjust the skin color more precisely by changing the various parameters of this window.
- apply changes
- After setting the skin tone, click the OK button in the Hue/Saturation window to apply the changes.
- Hide layer
Finally, use the Layer Visibility button in the Layers panel to temporarily hide the newly created skin tone adjustment layer. Take a look at the final image with the changes applied.
With this method of facial skin retouching in Photoshop, the skin color is set more precisely, and the image quality is improved.
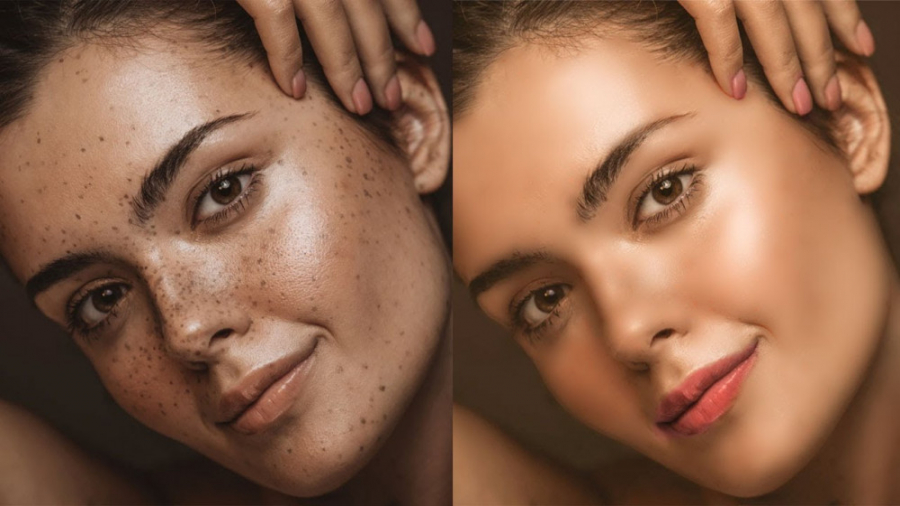
Removing blemishes and pimples in facial skin retouching in Photoshop
At this stage, retouch the skin of the face in Photoshop using the Clone Stamp and Healing Brush tools to remove blemishes and pimples on the face. Please copy and paste it into the desired area by selecting the area you want to modify and clicking on the correct point. Removing blemishes and pimples from images in Photoshop can be done using several different methods. In the following, we will describe the steps of these methods.
1- Content-Aware Fill method
Use Lasso, Magic Wand, Brush, or Pen tool to retouch facial skin in Photoshop. Click Edit and then select Fill. In the Fill window, select Content-Aware and click OK. Wait for Photoshop to fill the space using the Content-Aware Fill algorithm.
2- Clone Stamp method
Choose the Clone Stamp tool to retouch the facial skin in Photoshop. Using the Brush tool, select the desired size and transparency. Select the point you want to copy by clicking on it. Then, using the Brush, click on the place where you want the stain or pimple to be removed.
3- Spot Healing Brush method
Select the Spot Healing Brush tool. Select the desired size using the Brush. Click on the stain or pimple to remove it automatically. Photoshop is the best and easiest photo editing software.
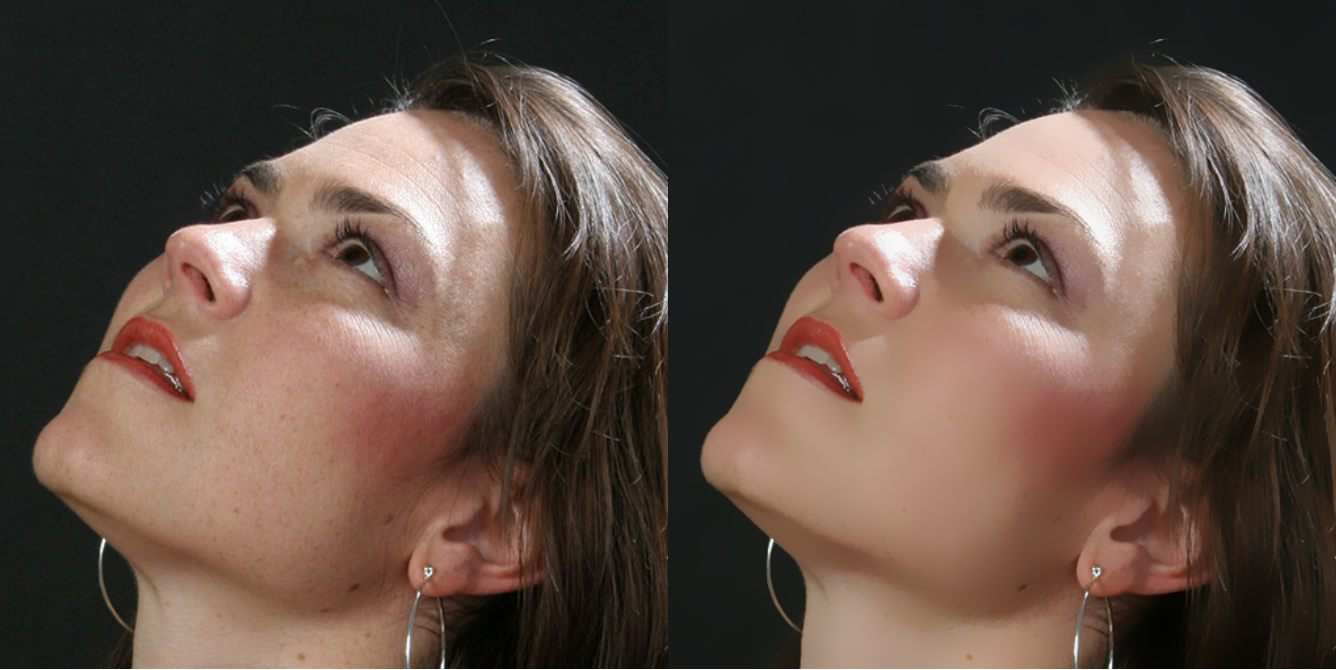
Adjusting skin smoothness in face skin retouching in Photoshop
In retouching facial skin in Photoshop, use the Blur or Smudge tool to soften the skin and remove facial lines and wrinkles. By selecting the tool and selecting the desired area, the Gaussian filter changes the distance between pixels to soften the skin. To adjust skin smoothness in Photoshop, you can use different methods. In the following, we will describe the steps of two common methods to adjust skin smoothness in Photoshop.
1- How to use the Gaussian Blur filter
To retouch facial skin in Photoshop, first, open the desired image. To create a duplicate layer of the image. In the Filter window, select the Gaussian Blur option. Adjust the Radius value to achieve the desired skin smoothness. Apply the filter by clicking OK. Adjust the layer’s Opacity to the desired level in the Layers window to obtain the skin’s smoothness.
2- How to use the Surface Blur filter
In this stage of facial skin retouching in Photoshop, first, open the desired image. In the Layers window, create a duplicate layer of the image. In the Filter window, select the Blur option, and then select the Surface Blur option. Adjust the value of the Radius and Threshold to obtain the desired skin smoothness. Apply the filter by clicking OK. Finally, adjust the layer’s Opacity to the desired level in the Layers window to obtain the skin’s smoothness.
Adjust brightness and shade.
To retouch the skin of the face in Photoshop, you can adjust the brightness and shadows of the face using the Dodge and Burn tools. The Dodge tool is used to change the local brightness of the skin and increase brightness, while the Burn tool is used to darken and create darker shadows. You can use different methods to adjust the brightness and shade of the facial skin in Photoshop.
1- How to use the Curves layer
To retouch facial skin in Photoshop, open the desired image. In the Layers window, create a duplicate layer of the image. In the Image window, select Adjustments and then Curves. In the Curves window, adjust the brightness and shading of the skin by dragging points on the graph. Apply the settings by clicking OK. In the Layers window, adjust the layer’s Opacity as desired to get the desired settings.
2- How to use the Levels layer
To retouch facial skin in Photoshop, open the desired image. In the Layers window, create a duplicate layer of the image. In the Image window, select Adjustments and then Levels. In the Levels window, adjust the brightness and shading of the skin by adjusting the Input Levels values. Apply the settings by clicking OK. In the Layers window, adjust the layer’s Opacity as desired to get the desired settings.
Adjust contrast and transparency.
For facial skin retouching in Photoshop, you can adjust the depth and intensity of the skin colors by changing the contrast and transparency settings. You can use different methods to adjust the contrast and transparency of the skin in Photoshop. In the following, we will teach you two common methods to adjust the contrast and transparency of the skin in Photoshop.
1- How to use the Brightness/Contrast layer
First, open the desired image. In the Layers window, create a duplicate layer of the image. In the Image window, select Adjustments and then Brightness/Contrast. In the Brightness/Contrast window, adjust the contrast and transparency of the skin by adjusting the Brightness and Contrast values. Apply the settings by clicking OK. In the Layers window, adjust the layer’s Opacity as desired to get the desired settings.
2- How to use the Levels layer
Open the desired image. In the Layers window, create a duplicate layer of the image. In the Image window, select Adjustments and then Levels. In the Levels window, adjust the contrast and transparency of the skin by adjusting the Input Levels values. Apply the settings by clicking OK. Adjust the layer’s Opacity to the desired level in the Layers window to optimize the settings.” Registration for hiring a photo editor is done online.
Shouldn’t we fix skin spots in photo editing?
In retouching facial skin in Photoshop, skin spots may be visible on a person’s face. You can remove them to improve the quality and smoothness of the image. In this regard, you can use tools such as Clone Stamp and Healing Brush in Adobe Photoshop. These tools remove skin blemishes. By selecting the desired area on the face, you can use the blemish-free area to replace the defective area. By doing this, the skin spots will be removed from the image, and the image will be improved. However, you should note that the removal of skin spots should be done naturally. It would help if you did not make unnatural changes in the color and texture of the skin. Photoshop professional face photo editing program offers very advanced tools.
The last word about facial skin retouching in Photoshop
Various advanced tools of this software can be used for facial skin retouching in Photoshop. Tools that improve the quality and beauty of a person’s face. By doing the correct and careful steps, you can remove spots, pimples, and fine lines of the skin and make the face softer and younger. However, it would help if you remembered that facial skin retouching should be done naturally, preserving the reality and physical features of the person. In this way, the character and charm of the character that belongs to him will be preserved. You can do the best retouching with Photoshop’s versatile photo editing program.