
How to Speed Up Windows 10 Boot Time — Proven Optimization Tips
Since computers have become essential to our lives, their speed and efficiency are critical to us. Especially the widely used Windows operating system, because of the time we allocate for setting it up, we expect to be able to work with it in the shortest possible time. Usually, many of those who work with Windows face this problem, i.e., lengthening the boot time. Of course, various methods help you increase the speed of Windows and boot faster. In this article, we will explore some tricks that will allow you to increase the speed of your Windows startup and have a better user experience. So stay with us.
Windows boot optimization tricks help with time efficiency, better user experience, system protection, and hardware longevity. These tricks will help you start your computer faster and spend more time on essential tasks.
Of course, we have used the Windows 10 version here; If you are interested in this version but do not have it in your system, you can have it by purchasing a Windows 2019 virtual server. Of course, there are different versions of Windows that you can buy depending on your needs.
Table of Contents
- Disable Fast Startup
- Configure virtual memory settings
- Shut down the Linux subsystem
- Update graphics drivers in Windows
- Shut down mandatory startup programs on startup
- Run an SFC scan to fix Windows slow boot issues
- Reset; the option is always on the table!
- Adjust your UEFI/BIOS settings
- Reduce startup programs
- Allow Windows Update to run during downtime
- Upgrade your system to an SSD hard drive
- Use Sleep Mode
Disable Fast Startup
The Fast Startup option is one of the problematic options that slows down your boot process. This option is usually enabled by default; it loads data before the computer shuts down and reduces the time it takes to start up. The effectiveness of this option is only at the time of shutdown and is not applicable at the time of restart.
Don’t be too fond of the Fast Startup feature because, with the features we have mentioned, it has also created problems for most people. Therefore, it is the first option that should be considered when Windows starts up slowly—settings related to Fast Startup. You are probably asking how to turn it off.
To turn off this feature, you first need to open the “Settings” section and go to “System > Power & Sleep.” Click “Additional power settings” from the opened page to open the “Power Options” menu in the control panel.
In this section, click the “Choose what the power buttons do” option on the left side of the sidebar. You need admin access to make changes on this page. So, click on the text at the top of the page: “Change currently unavailable settings.”
Now you need to remove the tick of the Turn on fast startup (recommended) option and then click on “Save Changes” to save the applied changes.
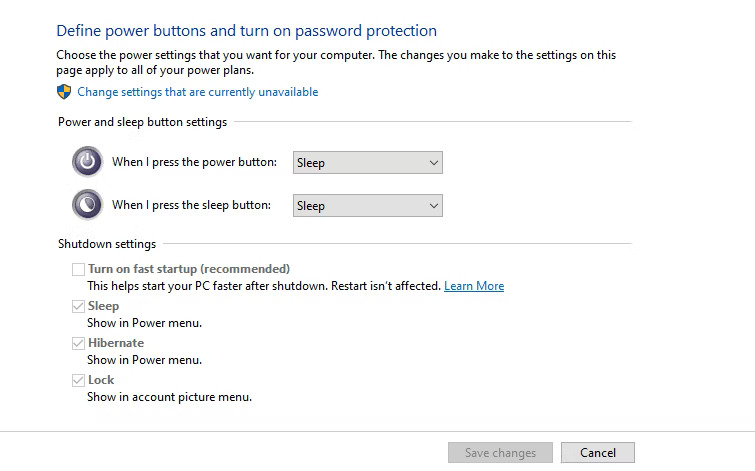
If you don’t see the “Fast startup” option here, the “hibernation” feature is not enabled on your system and, therefore, unavailable. To activate the “hibernation” feature, open “Command Prompt” or “PowerShell window” with admin access and execute the following command:
Powercfg /hibernate on
Then try again to turn off the fast startup option.
Configure virtual memory settings
Virtual memory, as a feature of Windows, allows the operating system to use a part of the hard disk space as temporary memory (RAM). This feature is known as Pthe aging File. Increasing the virtual memory allows you to run more software and tasks simultaneously on your system. If Windows has reached maximum physical memory usage, it will use virtual memory to support more jobs.
Some users have noticed that in Windows 10, the virtual memory settings are automatically changed, and this causes Windows to run slowly. To solve this problem, manually adjust the virtual memory settings.
For this purpose, follow the steps below:
First, open the Start menu and type “Performance”.
Select the “Adjust the appearance and performance of Windows” option.
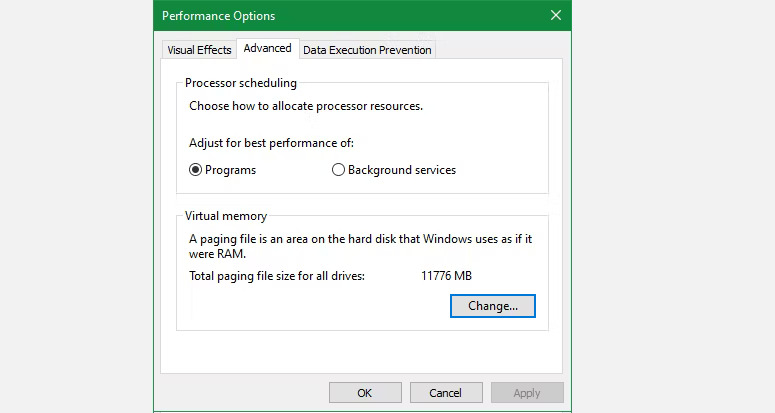
In the window that opens, click on the “Advanced” tab.
You can see the amount of virtual memory (Paging File) here.
To change the amount of virtual memory, click on the “Change” option.
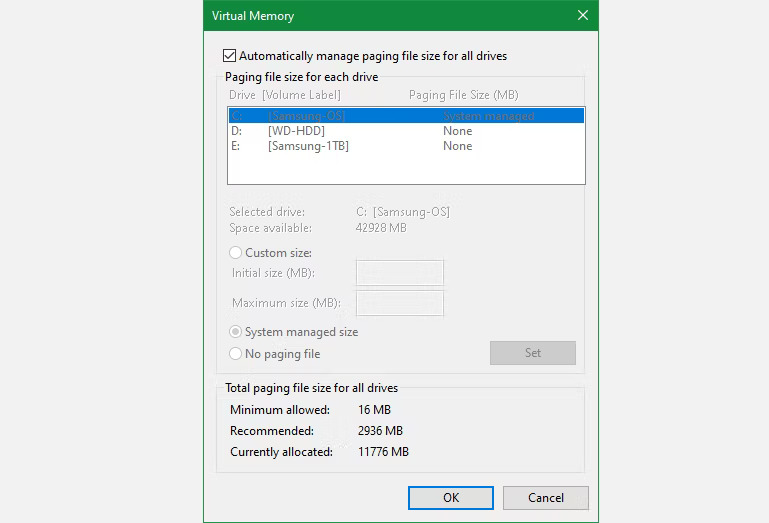
The new open page has a significant section at the bottom. You will see a Recommended amount and a Currently Allocated amount. Some users may find that the values in this section exceed the recommended values.
If you face the same problem, uncheck the “Automatically manage paging file size for all drives” option to apply the changes. Then select the “Custom Size” option and enter the recommended values for your system in the “Initial Size and Maximum Size” sections. Finally, restart your plan for the changes to take effect. This should improve the boot speed of Windows 10.
Shut down the Linux subsystem.
In Windows 10, in addition to the classic Command Prompt, it is also possible to access the Linux terminal. This feature is attractive to developers, but it may cause problems that ultimately slow down Windows 10. This feature is not enabled by default. So, if you’re unfamiliar with Bash, you probably don’t need to do this step. Otherwise, follow the steps below.
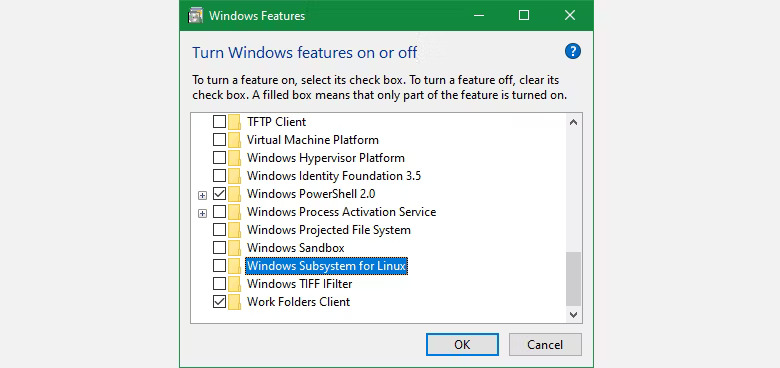
To turn off the Linux infrastructure, first type “Windows features” in the Start menu to open the “Turn Windows features on or off” menu. In the open window, scroll down to find “Windows Subsystem for Linux” and uncheck it. Finally, restart the system.
If these steps solve the startup problem but you still need a Bash terminal, you can use a new Windows terminal to perform your tasks.
Update graphics drivers in Windows.
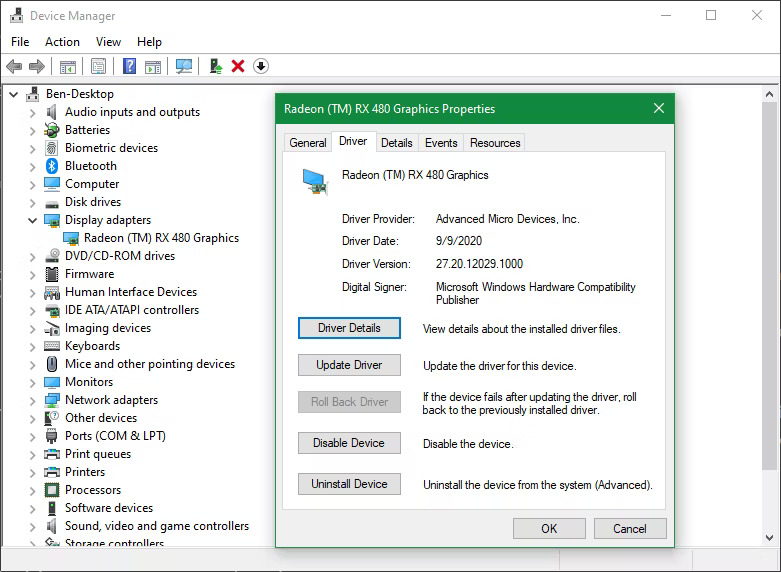
One of the essential steps to improve the performance of Windows 10 is to update the graphics drivers. Windows 10 often suffers from driver issues, which may cause slow system performance. Updating graphics card drivers can help resolve problems related to running Windows.
Right-click the Start button to get started and select the “Device Manager” option. Then identify your graphics card in the “Display adapters” section. In this section, one of the companies’ products, “AMD” or “Nvidia,” is usually displayed.
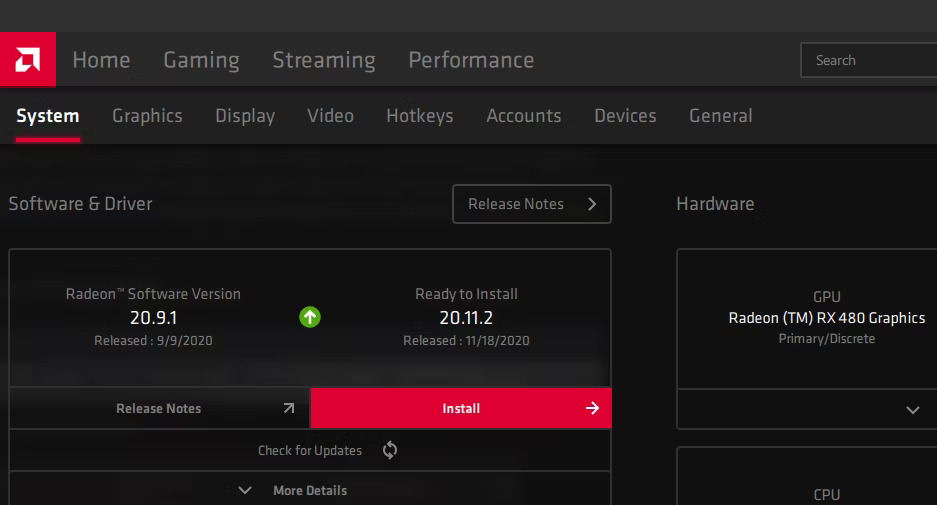
Also, you can use the software provided by your graphics card manufacturer on your PC. Nvidia and AMD companies offer free software for users to update system drivers with a few simple clicks. You can install the latest available updates and then restart your system.
At this point, it is suggested that you also consider updating Windows. To do this, go to “Settings,” then “Update & Security,” and finally, “Windows Update.” Then download and install the new update packages to update your Windows to the latest version.
Shut down mandatory startup programs on startup
You are probably looking for the causes of slow Windows 10 loading, and factors such as the software seen on the page above may not be the cause of this. However, if it takes a long time every time Windows loads, there are probably too many executables on startup to blame for the delay.
When you install and update software, many run automatically in the startup section. If you have installed software that needs to run when Windows boots, this may slow down the boot time. To fix this problem, you can do the following:
From the start menu, search for “MSConfig” or open the Run window by pressing the “Win + R” buttons at the same time and typing “msconfig,” and pressing Enter.
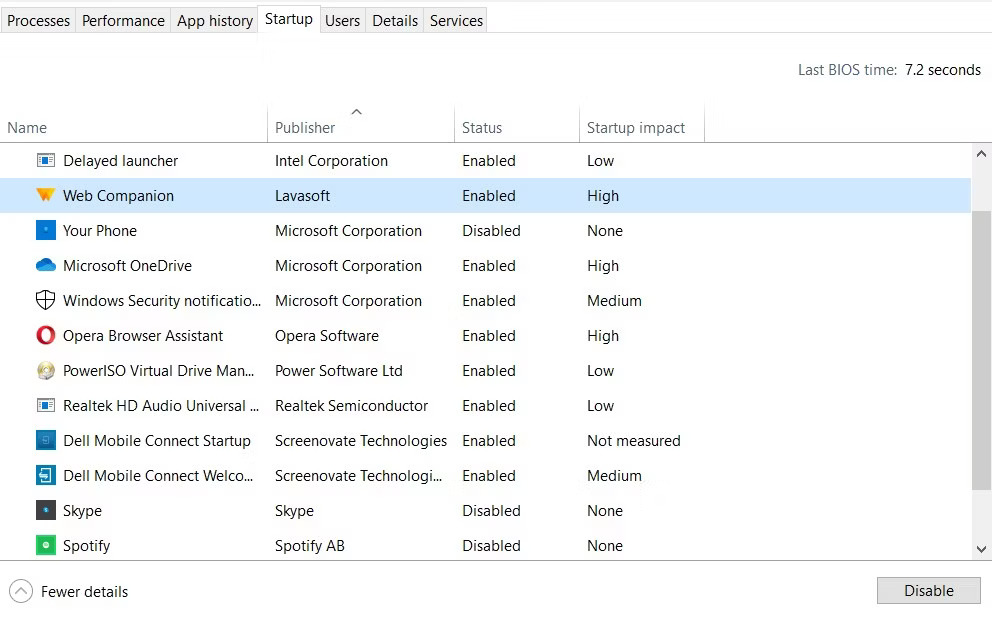
In the “System Configuration” window, as a Windows user, click on the “Startup” tab, which does not show a list of startup software. Alternatively, you can also go to the Startup tab from the Task Manager menu, which can be accessed by right-clicking on the Windows taskbar or pressing Ctrl + Shift + Esc.
By going to the “Startup” tab, you can view items by name, publisher, status (active/inactive), and impact on the startup (high, medium, low).
By removing the tick from the software that is unnecessary to run when Windows starts up, you can increase the speed of loading the operating system. At the same time, remember that to prevent this software from running when Windows starts up, you must also remove the check mark from the “System Configuration” section and save it. In general, unchecking apps means stopping them from running in Task Manager.
Note that some software must be running when the operating system is loaded. For example, antivirus programs such as Node32, Avira, and Kaspersky, services, drivers, and software related to wireless networks, sound, and touchpads (for laptops), should not be completely disabled. Also, software and drivers associated with Microsoft, Intel, AMD, and Nvidia graphics cards should be set correctly. Hence, the vital thing to remember is that only software and components that run automatically without your permission should be disabled.
Run an SFC scan to fix Windows slow boot issues.
You can use the System File Checker (SFC) tool to check for corrupted or damaged system files and repair them if necessary. This tool can facilitate the improvement of Windows boot performance.
Click What is a router? Getting to know the function and difference between ma odem and ra outer
First, we describe the concept of SFC. The SFC tool stands for “System File Checker.” When you run it, it activates a program that thoroughly checks Windows system files. This scan is performed to detect any corruption or errors in essential system files and, if necessary, replaces the damaged files with correct and newer versions.
Running an SFC scan is recommended if you’ve had the unpleasant experience of a slow Windows startup. This action will help you identify and fix problems related to corrupted Windows files.
We usually use an SFC scan when programs crash frequently or encounter error messages, including those related to missing DLL files. In some cases, we may experience the blue screen of death. To run the scan, you need to open Command Prompt with admin access and then type and run the following command:
sfc /scannow
After typing and executing this command, a full scan of your system will be performed. Any corrupted or missing files in this scan are repaired and replaced with healthy versions. It should be noted that this process may take a long time, but do not leave the Command Prompt window open during this process.
If you are only looking to scan and identify problems and do not need to repair system files, you can use the following command:
sfc /verifyonly
After the scan is complete, you may encounter one of the following three messages:
Windows Resource Protection found no integrity violations: This message indicates that no problems have been detected in your system files, and the pain does not originate from them.
Windows Resource Protection found corrupt files and successfully repaired them: This message indicates that several system files have been damaged but have been successfully repaired.
Windows Resource Protection found corrupt files but could not fix some of them: This message indicates that some system files have been damaged, but repairing them with the SFC tool is impossible. In such a case, running the tool in Safe Mode and using other tools like DISM, if necessary, is suggested.
Reset; the option is always on the table!
If all efforts fail, you can reset your device. If all the suggestions and solutions presented in this article do not reach the desired result, the best way to solve the problem is to reinstall a healthy version of Windows 10.
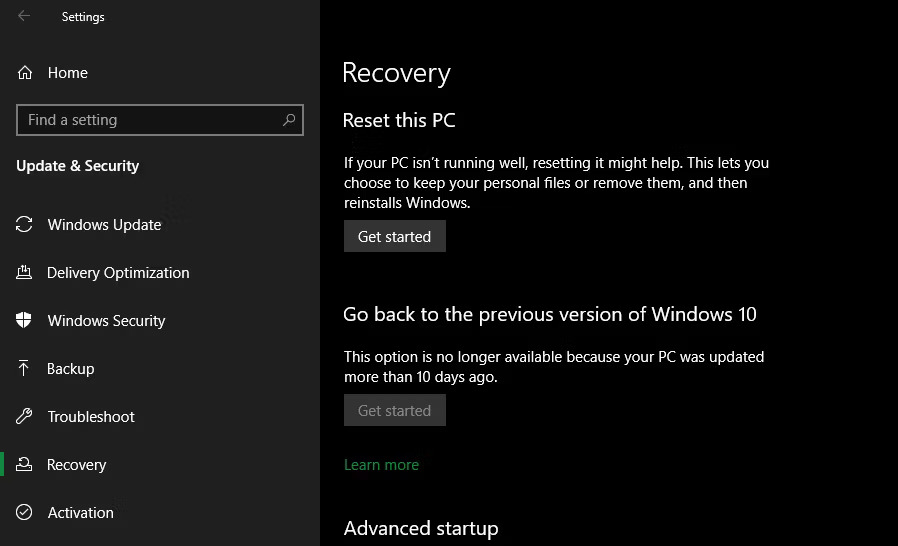
To reset your device, you have several solutions. One of the available options is the Refresh option, which is built into Windows and allows you to reinstall Windows without deleting any of your files. However, it’s best to back up your data before resetting. To start the device reset process, go to the Settings section, then to the Update & Security section, and in the Recovery section, select the Get Started option under the Reset this PC section. Select to begin the reset process.
Adjust your UEFI/BIOS settings.
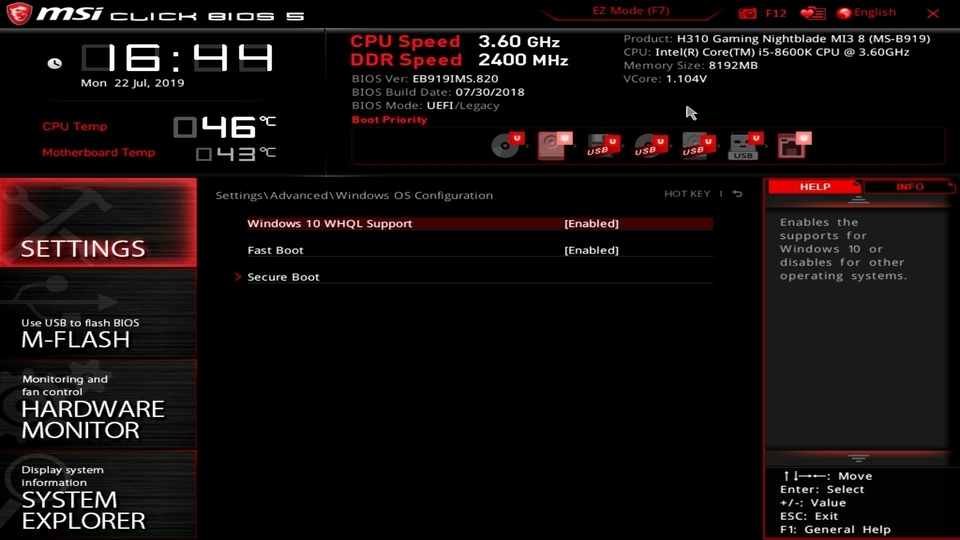
Some computers have a Fast Boot setting in the BIOS. Compared to Fast Boot in Windows, the Fast Boot setting skips some initial tests your computer performs when you turn it on. Anyone needing the BIOS regularly – such as overclockers – may want to turn this setting off, but if it’s not already enabled, most people can benefit from it.
To enable this feature, you must reboot your computer and press the same button on the startup screen that you would press to enter the BIOS settings. Exactly which control will be different depending on the type and model of your device? Search the menu and find the fast boot setting (or whatever it is called on your system) and enable it.
Every motherboard is different, so poke around in your UEFI/BIOS settings to see if other features can speed up or turn off the boot process. Some recommend changing your Boot Order priority to put your hard drive at the top instead of the DVD drive, or to boot from the network.
Reduce startup programs
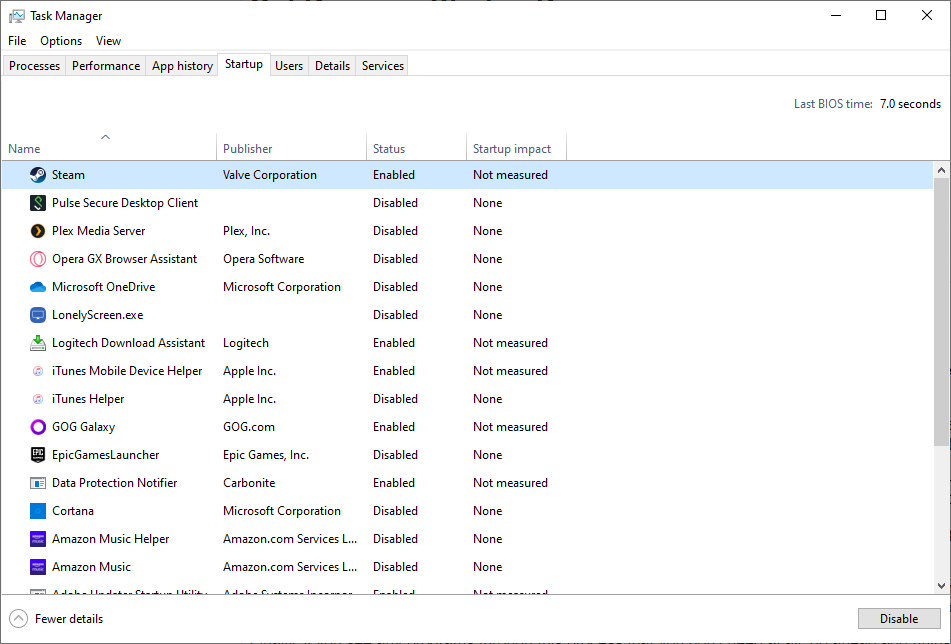
The more programs you have set up at startup, the longer it will take for your computer to reach a usable state when you start it up. Some programs that start at startup may need to run forever, but many probably don’t need to run at this time. To see what begins at startup, press Ctrl + Shift + Esc simultaneously to open the Task Manager.
Windows 10 users can click the “More details” option at the bottom, then go to the Startup tab. If you have Windows 11, click the Startup Programs category. A list of programs starting simultaneously as your computer is displayed, with Windows estimating how much they affect your startup time.
You’ll also see the last BIOS time in the upper right corner – this tells you how long it took for the BIOS to transfer control to Windows, so if it’s more than a few seconds, you might want to look at the BIOS settings again. Be. In some cases, your motherboard may be slow.
If you see a program on this list that you don’t need at startup—especially if it has a high startup impact—go to that program’s settings and disable the Run with Windows option. (Dropbox, for example, is worth running at startup because of its nice kick-start effect – but you probably don’t need it running at the same time as the PC for the Epic Games Launcher.)
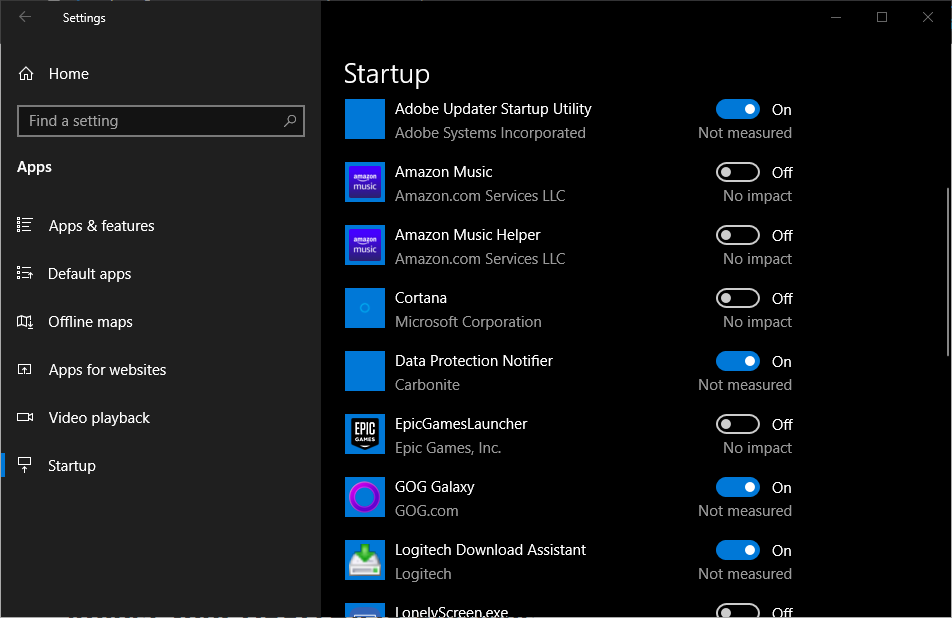
If you don’t see an option in the app’s startup settings, disable it from the Task Manager window to prevent it from running at startup. You can also go to Settings > Apps > Startup and turn off anything you don’t want to open at startup.
To access your startup folder, go to File Explorer and type “%APPDATA%\Microsoft\Windows\Start Menu\Programs\Startup” in the address bar. Any shortcuts added here will automatically run at startup – so if there’s anything here you don’t want to run at startup, remove it from the folder.
Allow Windows Update to run during downtime.
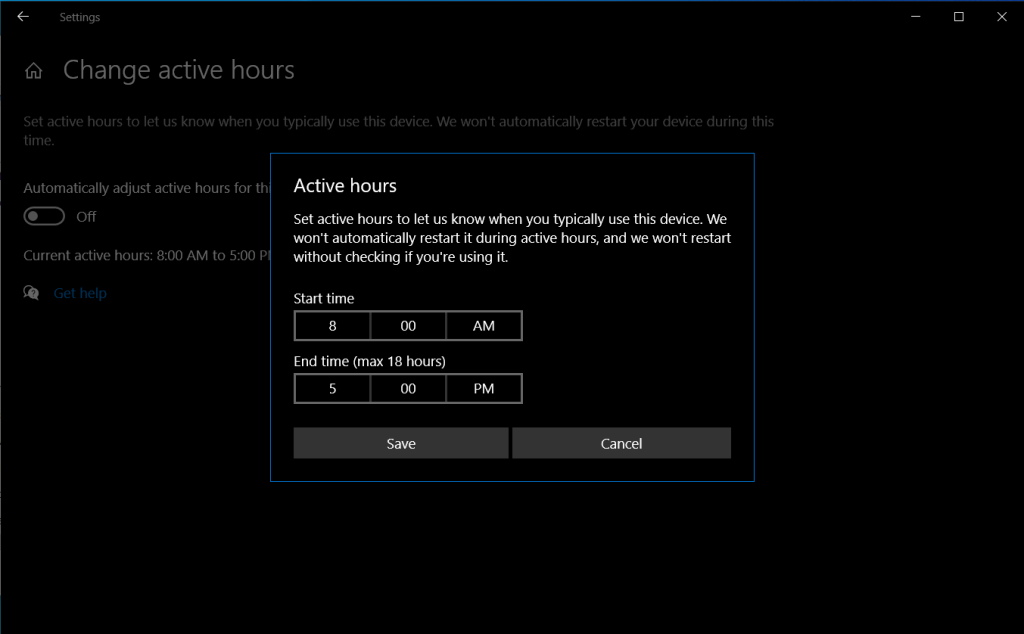
When Windows runs updates, it takes time to install them when the computer is shut down and often when it is turned on. If you’re tired of Windows getting ready for updates and want to play games, you should set up activity times so that Windows works when you’re not using the computer.
This means that you should allow your device to perform updates automatically. To set this mode in Windows 10, go to Settings > Update & Security > Windows Update > Change Active Hours, then click Change Activity. In Windows 11, go to Settings > Windows Update > Advanced options, then click Active hours and change the option to Manually.
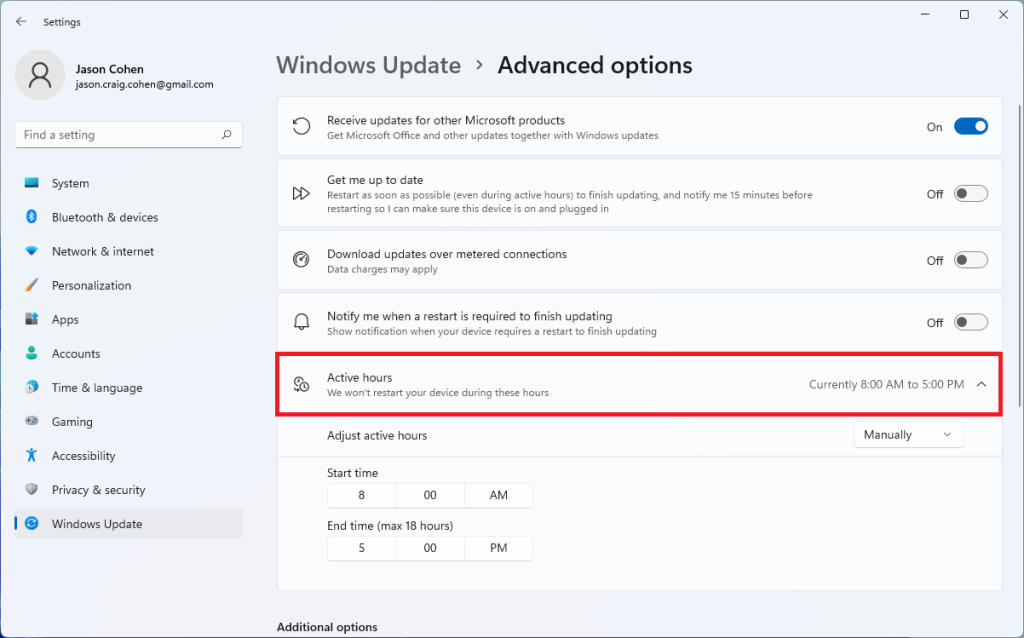
Tell Windows when you use the device the most – for example, from 9 to 5 – Windows will try to automatically perform updates and restarts when the system is idle, rather than disrupt you with a sudden launch.
Upgrade your system to an SSD hard drive.
Most computers now ship with solid-state hard drives, much faster than spinning mechanical hard drives. If you’re still using an old computer with a legacy hard drive, it’s time to upgrade your internals. Not only will programs run almost instantly compared to your old hard drive, but your computer will also start up much faster.
Almost any computer with a spinning disk can be easily upgraded. Our guide can help you copy your Windows installation to an SSD if you don’t want to start from scratch.
You should look up the instructions for opening your particular computer and replacing the disc, as this can vary from machine to machine. The good news is that most computers won’t need more than a screwdriver (and sometimes a Torx bit).
Use Sleep Mode
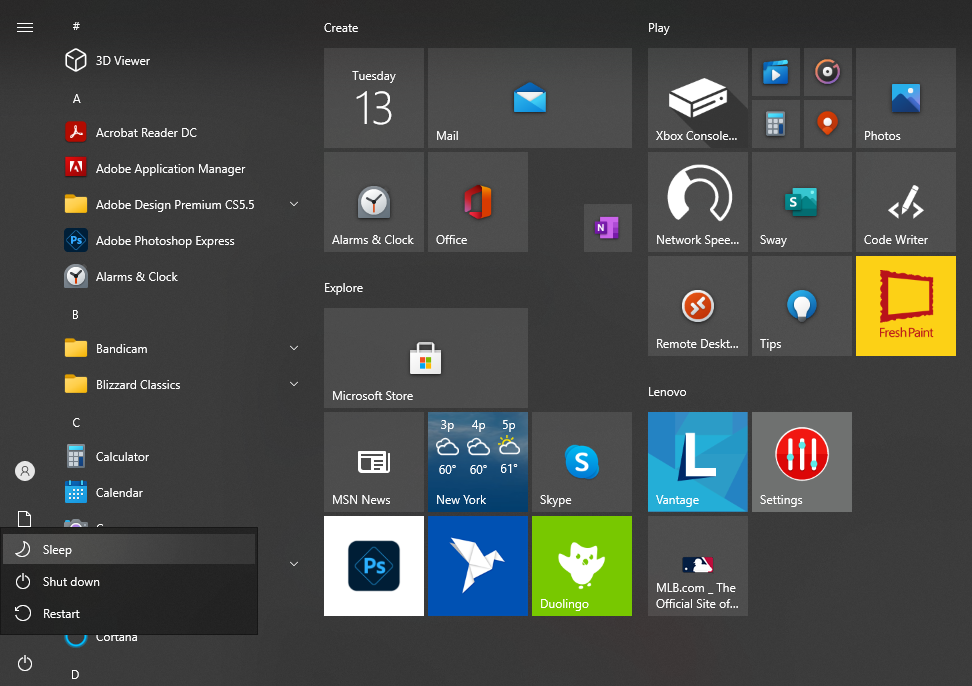
Here’s the thing: rebooting will always be slower than resuming from sleep. If you’re unhappy with your computer taking too long to boot, consider simply putting it to sleep instead of shutting it down.
“Sleep Mode” may use more power than turning it off completely, but the difference in power cost is minimal. Also, putting your computer into ‘Sleep Mode’ means that unwanted background programs may wake it up, but we’ve got a fix.
Of course, turning off still has its place. For example, if you leave your laptop in your bag for a few days, you’ll probably want to turn it off completely. However, the more you use Sleep Mode, the less you’ll worry about annoying start times.
Conclusion
In the end, by using the tricks introduced in this article, you can have a better experience of fast booting and increasing the speed of your Windows startup. These solutions will not only reduce your time and patience during setup but will also improve the overall performance of your system. Remember that by implementing these tricks, you can achieve and enjoy the speed and efficiency of your Windows. If Windows slows down after the update, you can visit our article and use our provided solutions.
FAQ
How can I reduce Windows 10 startup time?
You can enable Fast Startup, disable unnecessary startup apps, and keep your system optimized to reduce boot time.
Does disabling startup programs improve boot speed?
Yes. Fewer programs launching at startup allows Windows to load faster and reduces system strain.
Does upgrading to an SSD speed up boot time?
Absolutely. Switching from an HDD to an SSD significantly improves boot speed and overall system responsiveness.