


Story Motion: Training from zero to one hundred
Storyboards or motions are the best means to determine project order, narrative, and style. They’re also great for getting feedback from your team and the client before they go into production.
Many people are interested in storyboarding because it combines disciplines and techniques such as illustration, writing, and production. Storyboards are usually created with analog sketches, but with modern digital tools, photography, animation, color, and notes can be used to highlight characters, scenes, and key objects.
Whether you’re creating a storyboard for a TV commercial, animation, or YouTube video, this article will guide you every step of the way to streamline the process and create a modern storyboard.
First, we will explain the basic (professional) method for making story motions and then the software for quick training in making story motion on mobile phones and in Windows.
1- Identify the key scenes of the script
When creating a storyboard, knowing what story you are telling is very important. The best starting point is to separate the script or narrative you are working on and turn it into several parts.
Identify key parts of the story by highlighting important messages, locations, characters, narrative arcs, and plot points. This will help you shape the storyboard’s frames and understand how to move the story or narrative from one scene to another.

How to do it in Milanote:
1- Create a new board for your storyboard.
2- Add a note and paste a scene from your script.
3- Highlight key scenes with text highlighter.
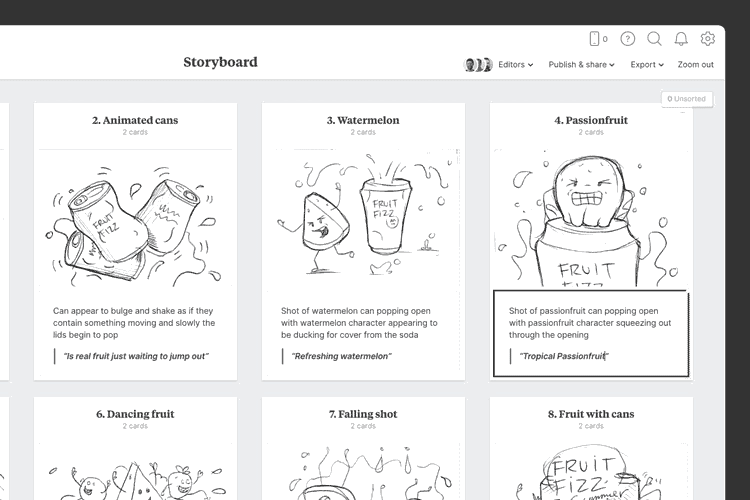
2- Specify the key scenes in detail
In the next step, draw the scenes you have identified in the script. Give each a number and a related title so that they can be easily identified with the overall story of the script. This is where you choose the order of your story. Don’t worry too much about the order of your scenes, you can easily change them on the fly.
 How to do it in Milanote:
1- Add a column for each frame.
3- Add pictures or sketches
Now is the time to visualize each scene. The images you use or create here do not need to be a complete work of art. It would help if you focused more on the story and structure than the fine details of the design.
Some storyboard designers may start with a pen and paper, but with modern storyboards, you can collect reference photos, images, screenshots, and other types of motion from anywhere.

How to do it in Milanote:
1- Drag the pictures on the columns.
4- Write an explanation for everything that happens in each frame
Although each frame is a still image, it is not bad to describe the mood of that scene as part of your entire motion story. Describe the style, mood, and behavior of each character. Consider how you are going to go from one scene to the next. Add audio details to help your team understand what you’re trying to convey.
How to do it in Milanote:
1- Add a note to describe each frame.
5- Share it with your team
When you’re ready, invite your team to review your storyboard and share their thoughts on it. This is the best time to find out what other people think of your point of view in the story.
It’s also a great opportunity to make any final changes. Adjust the order of your frames or edit the content based on everyone’s feedback. Remember that modifying the sequence and story in the storyboard stage is much easier compared to the design or production stage, where even simple changes may take days.
How to do it in Milanote:
1- Share the storyboard with your team.
2- Let other members comment.
3- In order to attract the attention of teammates, point out any point that is necessary.
Motion story training courses
Making story motion on the phone:
With cap cut and pixel lip app

With Snapchat

Creating a motion story on the computer:
with After Effects
 last word
Now that your storyboard is complete, you have a clear picture of your project! Remember that just as creativity and inspiration have no boundaries, ideas are also evolving. If you still get inspired, go back and edit your storyboard.