


How to change DNS on Android
If You Want To Learn How To Change The DNS Of Your Internet Connection On Android Phones And, In This Way, Solve The Sanctions, Restrictions, And Privacy Problems, Join Us For The Training On Changing The DNS On Android.
As Zomit users know, some time ago, we introduced you to how to change DNS in Windows 10. In this article, we will examine how to change DNS when connecting to the Internet through Android phones, So stay with us until the end of the article.
The previous educational article mentioned that the web, or what most Iranian users know as the Internet, uses a technology called Domain Name System (DNS for short). In a nutshell, DNS is like an Internet phone book that maps IP servers to their domain names. And in other words, the domain name system or DNS is a service that usually has no cost and allows the user to type the desired name in the web browser to load the desired web page.
Every computer connected to the network and the Internet needs an IP address to communicate with other devices, But it is not easy to remember these addresses. For example, the IP address is 104.18.189.55. This is where DNS becomes a mechanism for translating user-friendly domain names like zoom. Ir into computer-readable IP addresses.
Although most users use the default DNS of their Internet companies, there is also the possibility of changing DNS and using private servers, which can have advantages such as increasing the security of personal information and connection speed, or for Iranian users to avoid sanctions. If you want to learn more about this technology and its applications, read the article about DNS from Limit. In this article, we will learn about changing DNS in Android directly and through external applications.
How to change DNS in Android directly (Android 9 and newer)
First, you need to get your DNS address and save it somewhere. Several providers offer dedicated DNS services, which you can use by searching the Internet.
- In the next step, enter the settings of your Android phone.
- Search for Private DNS and open the option that appears.
- Select the Private DNS provider hostname option.
- Enter the address of your DNS service in the opened box and touch the Save button.
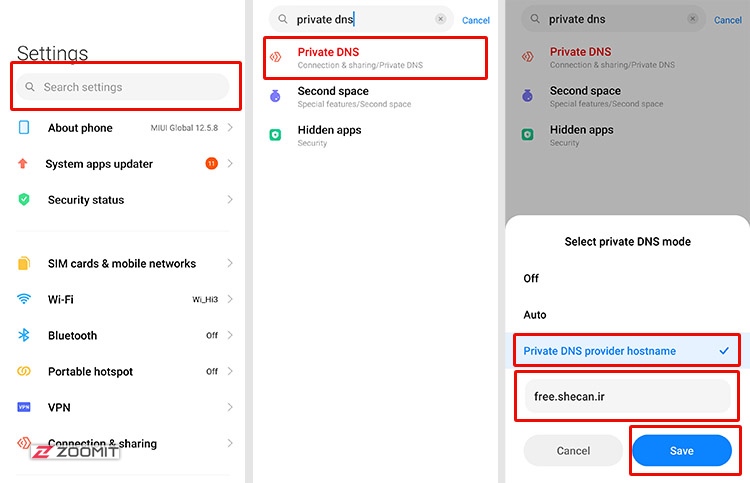
- Now, your DNS has changed.
Note that in this method, Android only accepts TLS addresses (such as example. zoom it. ir); Therefore, if your service provider provides dedicated DNS only in the form of an IP address or a set of numbers, it is not possible to use it. You need to use the following method.
How to change DNS on Android directly (Android 8 and older)
Another way to change DNS in Android is to define a dedicated DNS for each Wi-Fi connection separately, which is also possible in Android 9 and newer. Still, in previous versions of Android, the only way is to change DNS. Also, you can use this method on all Android versions if your DNS is numeric or IP. For this purpose, follow the steps below:
- Enter the settings of the phone.
- Enter the Network & Internet section or, on some phones, the WIFI section.
- Touch and hold the Wi-Fi connection you want for a few seconds and select Modify network from the opened menu.
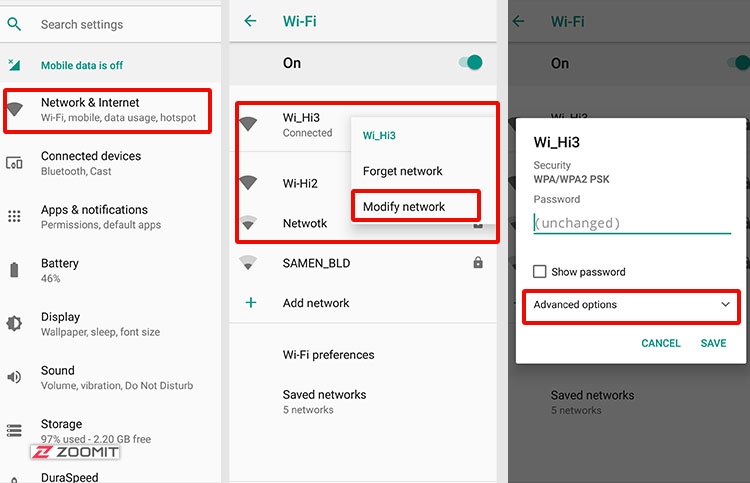
The way to open the link may be slightly different on different phones, which you can find with a little effort.
- In the opened box, touch Advanced options.
- Find and open the IP Settings option.
Now, enter the IP addresses of your DNS service in the DNS1 and DNS2 fields and touch the Save button.
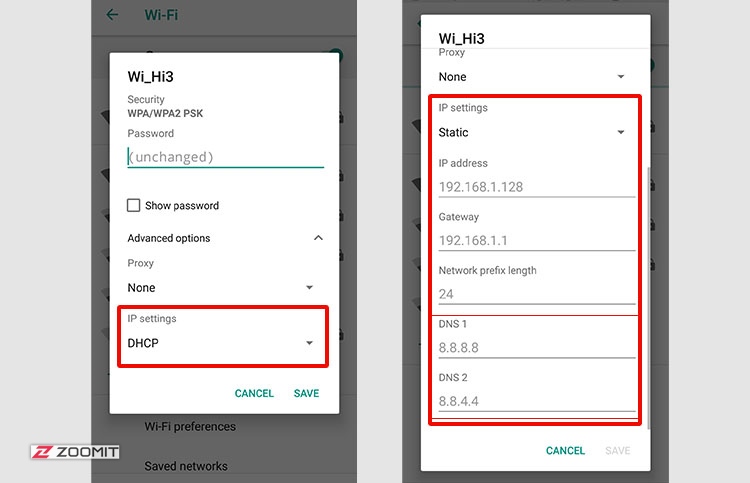
- Now your DNS should be set.
It should be mentioned that to use this method, you have to manually set your phone’s IP address and your modem’s input address, which may be difficult for some users. If you don’t want to do this, it is better to use the external applications we will introduce below. Also, you should know that Android does not allow changing DNS on a mobile internet connection.
How to change DNS in Android with external applications
Another way to change DNS in Android is to use external applications. You can find dozens of DNS changer apps by searching the Play Store, most of which can do this easily. However, the two applications, DNS Changer & Net Speed Test and DNSChanger for IPv4/IPv6, are among the best and most popular options available that you can use. Next, we will introduce you to how to work with the DNS Changer & Net Speed Test program and change the DNS of Android phones through it.
- First, download and install the DNS Changer & Net Speed Test application.
Download from Google Play Store
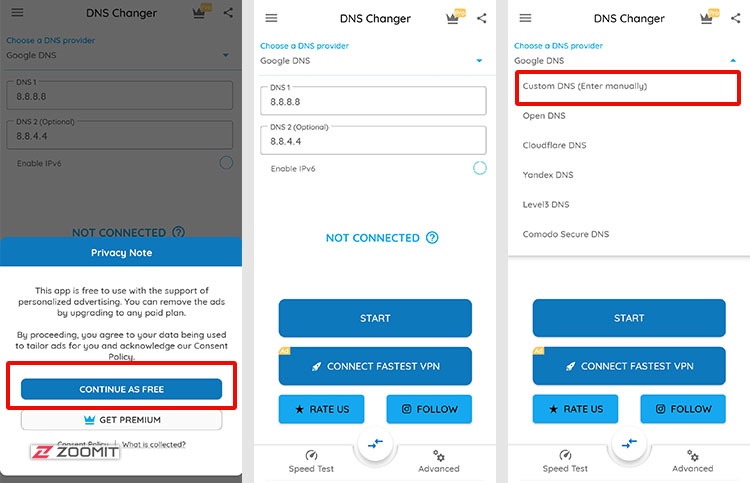
- After the first login to the application, confirm the terms and conditions of use of the application.
On the main page of the application, you can see several options. One of the features of the mentioned application is the use of famous DNS such as Google DNS, which you can view and change at the top of the page. However, if you plan to use your DNS, follow these steps:
- From the top of the screen, touch Choose a DNS provider.
- Select the option Custom DNS (Enter manually).
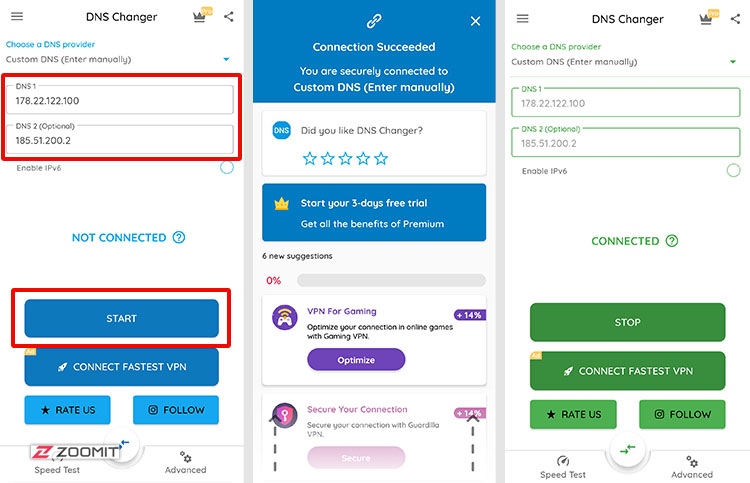
- Enter your DNS addresses in the DNS1 and DNS2 fields.
- Touch the START button and wait for a while.
If the DNS connects, you will see a Connection Succeeded message. To stop DNS also, you can touch the STOP button on the next screen.
Frequently asked questions
1. Is it possible to use VPN and private DNS service simultaneously?
Usually, by changing the DNS, the established connection is adjusted according to the entered DNS addresses and may interfere with the VPN operation. We suggest using only one of the mentioned services.
2. By changing DNS, I can’t open some websites and use some services. What is the problem?
This problem is every day; some services and websites may have blocked some DNS addresses in their network. If you encounter this problem, you should use another DNS or the default DNS when using that service.