


Delete Windows 10 temporary files
Delete Windows 10 temporary files
As their name suggests, temp files are temporary files that are created by certain programs when using Windows 10. These files can quickly fill up your hard drive space, so you may want to delete them. In this tutorial, we want to show you how to delete temporary files in Windows 10 to free up hard disk space, so stay with us.
Using Windows 10 Disk Cleanup
Disk Cleanup is a program in Windows 10 that allows you to quickly delete files that you do not need, including temp files.
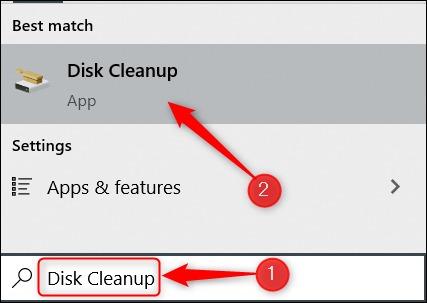
To open Disk Cleanup, you must type Disk Cleanup in the Windows search bar and click this program in the search results.
Using Windows 10 Disk Cleanup
After Disk Cleanup for Windows (C:) opens, check the checkboxes next to the names of the temp files, as shown in the image below, and then click the OK button.
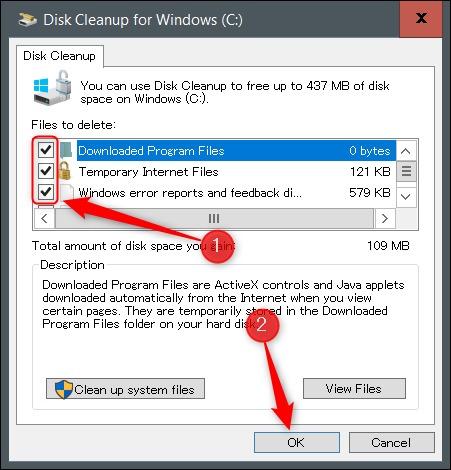
Disk Cleanup for Windows (C:)
Then a pop-up window will appear asking you to confirm the deletion of temporary files. Then click Delete Files.
By doing the above steps, the system will start deleting your files.
Delete temporary files or Temp Files from the settings section
You can also delete temp files from Settings section or Windows settings. To do this, click the Windows Start menu and click the gear icon on the left corner of the desktop to open the Settings section. As an alternative method, you can also use the shortcut key Windows+i.
After Disk Cleanup for Windows (C:) opens, check the checkboxes next to the names of the temp files, as shown in the image below, and then click the OK button.
After Disk Cleanup for Windows (C:) opens, check the checkboxes next to the names of the temp files, as shown in the image below, and then click the OK button.
Then a pop-up window will appear asking you to confirm the deletion of temporary files. Then click Delete Files.
By doing the above steps, the system will start deleting your files.
Delete temporary files or TEMP FILES from the settings section
You can also delete temp files from Settings section or Windows settings. To do this, click the Windows Start menu and click the gear icon on the left corner of the desktop to open the Settings section. As an alternative method, you can also use the shortcut key Windows+i.
Click the System option in the Windows Settings section.
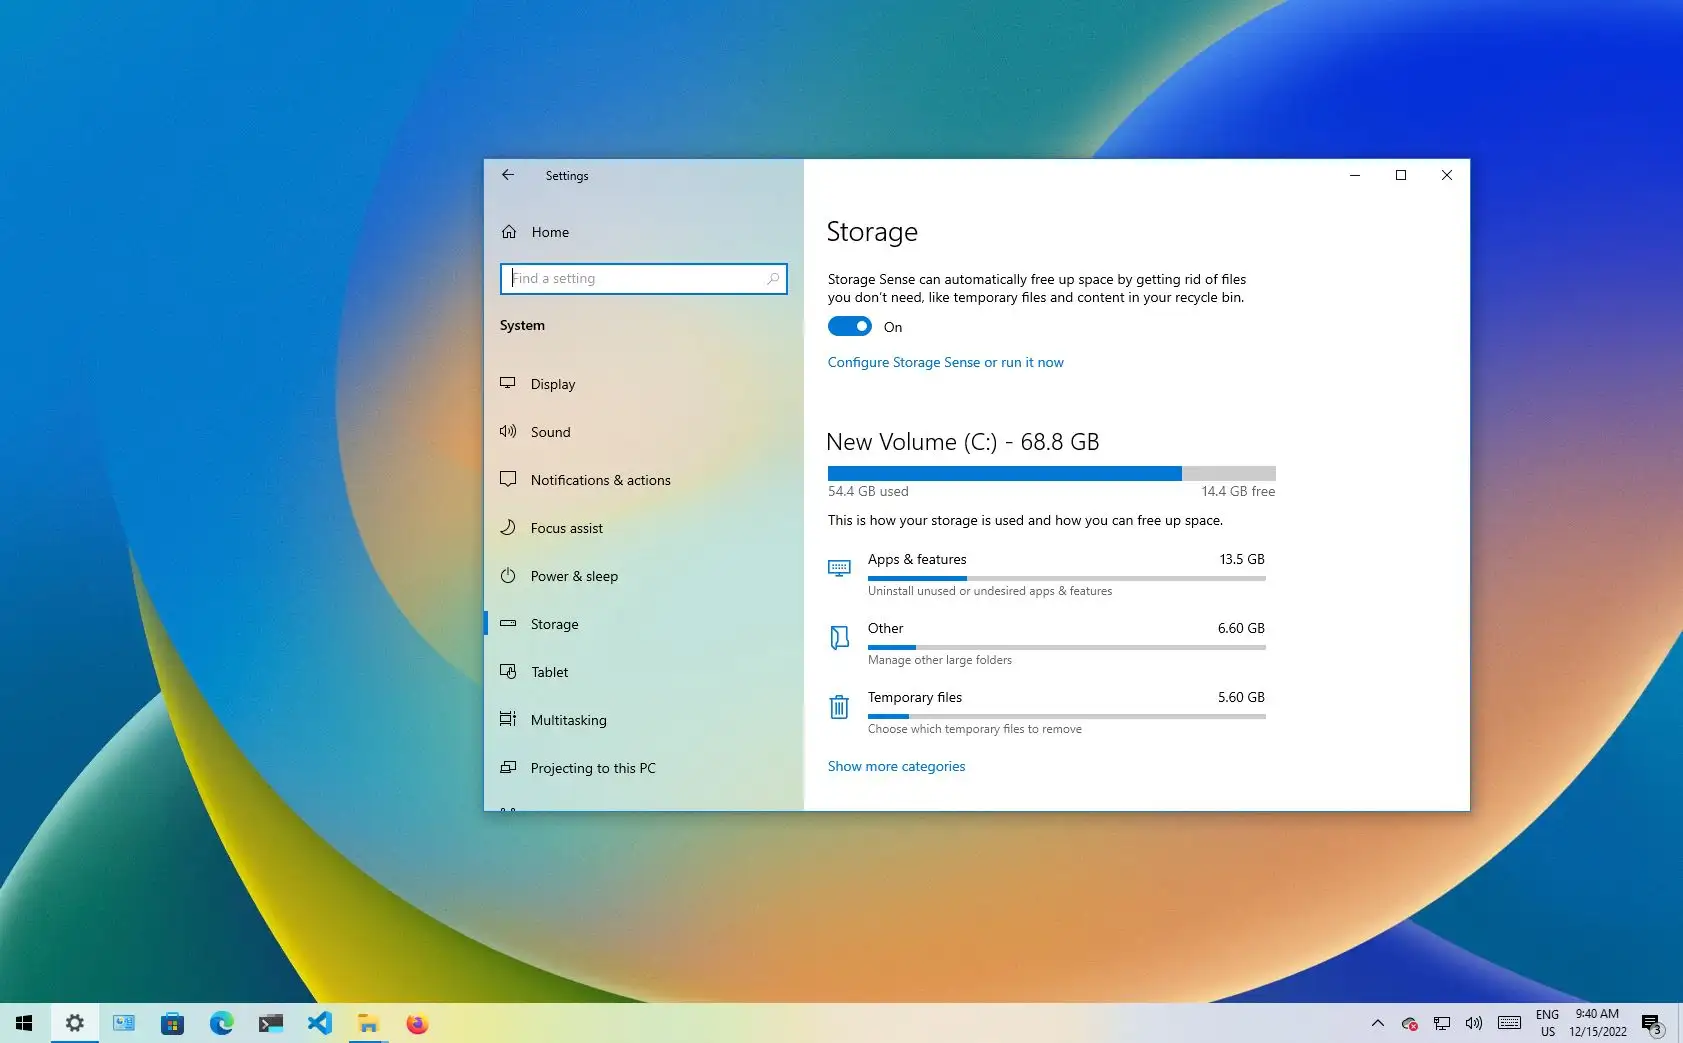
In the lower left column, under the System section, click Storage.
Delete temp or temporary files of Windows 10 to free up the hard drive
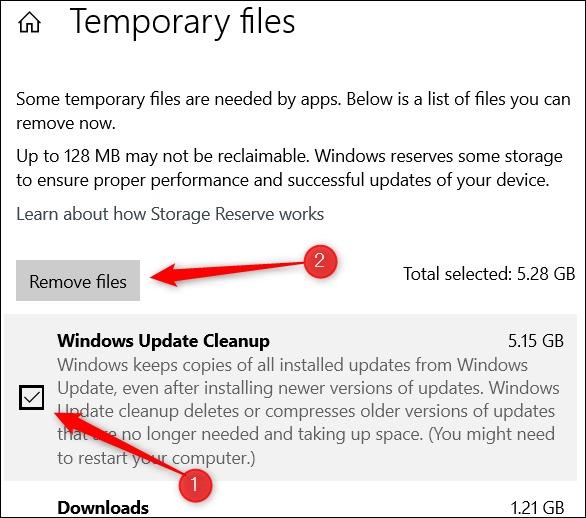
In the opened section, click Temporary Files under Windows (c:).
A list of your temporary files will appear. Then check the checkbox next to the desired files and then click Remove Files.
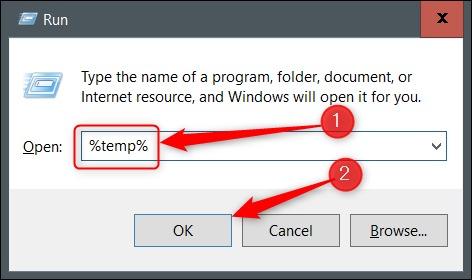
If you want to use the traditional method, you can delete the temp files yourself in the File Explorer section. But instead of opening several folders to reach the Temp folder, you can use a shortcut.
To do this, click Windows+R to open the Run program, and then type %temp% in its search bar and click the OK button or press Enter.
The Temp folder will open in File Explorer. Now select the files you want. You can select all options by pressing Ctrl+A. Your selected files will be highlighted in blue.

Right-click on the selected files and click Delete in the opened menu.
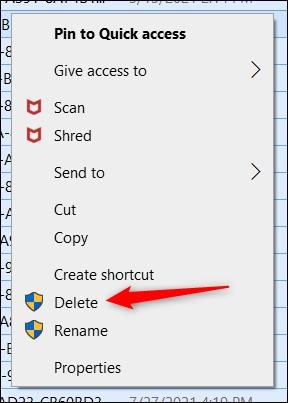
Windows will then start deleting temporary files.
Recover deleted notes of Sticky Notes program in Windows 10
Sticky Noties program for Windows 10 is a powerful tool for taking notes, but this program will not allow you to recover and restore deleted notes. Although this feature is not part of this program, there is still a way for you to get back your deleted notes.
Maybe you have accidentally deleted one of the sticky notes and that note contains very important information, but the program does not allow you to recover or even see that note. Here you can recover your deleted notes directly from your Microsoft Outlook account thanks to the feature of Sticky Notes synchronization with the cloud service.
Note: To use this feature, you will need to sign in to your Microsoft account on Windows. Also, the storage period of deleted files in the Microsoft cloud service is usually 30 days.
How to recover deleted sticky notes?
1. To get started, open your preferred browser in Windows and go to Outlook.live.com and log in to your Microsoft account.
2. After entering the account, scroll down the left side of the tab and click Deleted items.
3. After that, scroll through the list of files to find the note or item that you deleted. If you are looking for several items, you can add it to your list by ticking the bubble on the left side of each item. Then click the Restore button at the top of the window, whose icon is a back arrow. By doing this, your selected items will disappear from the folder. If you go back to the Sticky Notes app, nothing may have changed, as the syncing process will be a bit slow.
4. To add recycled notes to desktop, do it manually. In the Sticky Notes app, click the 3-dot menu on your recycled note, and then click the Notes List button.
5. By selecting the Notes List view, you will be able to easily search for them, delete them, or see everything in the list. Right-click the previously deleted note and click Open Note in the list that opens.
The problem of notes not appearing after retrieving them from the Microsoft cloud service
If for any reason your recovered note does not appear in the list of notes, click the gear icon in the upper right corner of the program to go to the settings section.
Go to the bottom of the settings section to see the Sync now button. Then click it.
Return to the list of notes and follow the previous steps again until you have your note in the desktop section at the end.