Connection of CPanel host to independent e-mail service
CPanel is one of the most popular control panels for hosting management and provides useful features, including the ability to send emails. By default, users use CPanel mail servers for their correspondence after ordering a secure hosting service, but in some situations, it is better to use independent mail servers. For example, it is better to equip your hosting service with an independent mail server to send promotional messages and special emails. In this educational article from the FA host knowledge base, we decide to how to connect the cPanel host to the independent e-mail service examine So stay with us until the end of this tutorial.
The topics that we discuss in this educational article regarding the connection of CPanel hosts to independent service mail are as follows:
- How to connect the email host to the main host
- How to set mx record
- Define A record in cPanel
- Review spf record
- Check DMARC records
- Problem connecting to the email host
- What is an FQDN?
How to connect the email host to the main host
In order to connect the main host to the email host, you must go through 4 steps in the main web hosting host, which are:
- MX record definition
- Definition of A records in cPanel
- Checking record SPF settings
- Email routing settings
Important points before connecting to an email host
- First, you need to get a reliable host such as a shared hosting service in Iran or an optimized WordPress or even a hosting service for an online store .
- In the next step, you must check whether the domain connected to these hosts is activated or not.
- Make sure that the half servers related to the main host are set up and published on your domain.
- E-mail hosting services must be prepared and active.
- Finally, you should check the steps mentioned below in your web hosting host, i.e. the source host.
How to set mx record (step 1)
As mentioned in the tutorial on setting domain dns records in CPanel , it is possible to define multiple records in CPanel, each of which has a specific task. In connection with the email service, you need to edit the MX records. MX record stands Mail for Exchange . Mail Exc hanger or the MX is a type of converter, in fact, the purpose of defining this record is to identify the mail server. By doing this, you specify from which server your emails will be sent and received.
mx record is the most important record that should be configured in the steps of connecting the email host. If this record already exists, you can delete it and create it again according to the mentioned steps:
- In the first step of connecting the cPanel host to the email host, you must define an MX type record in your host. So, of cPanel login tutorial to your management panel with
- From the D OMAINS click on the Zone Editor option.
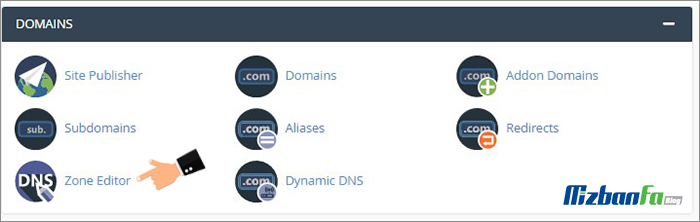
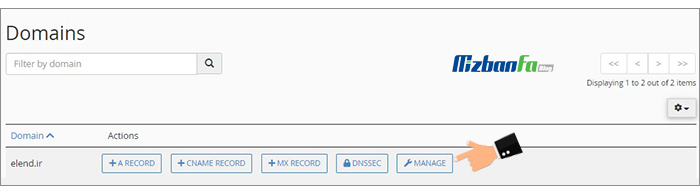
- In this section, you will see the names of all domains defined on your host. Click on the Manage button in front of the domain name you want to connect to the email host.
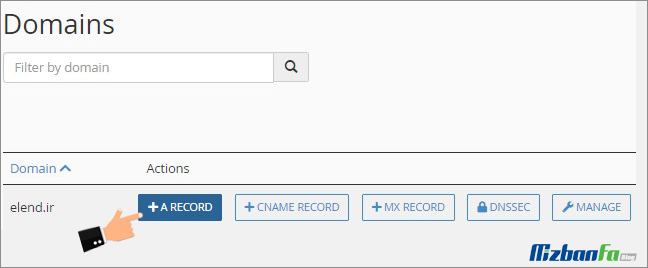
By clicking the MX RECORD+ button, a new MX record will be created in cPanel. If an MX record already exists, look for an MX record to edit it on the opened page.
- To quickly find this record, you can use the Filter field and search for the MX record.
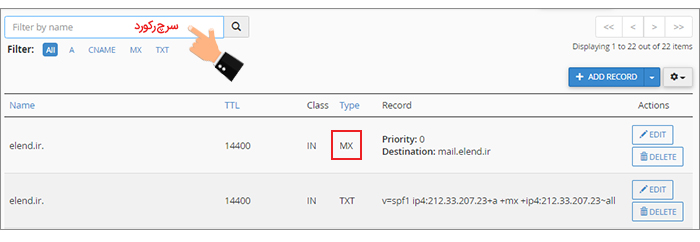
- After finding the desired record, click on the Edit button in front of it.
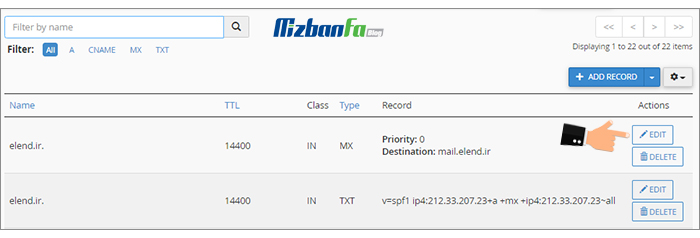
- A box similar to the image below will be displayed. In the Priority field, you must enter the corresponding values, the lower this number is, the higher the priority, so the number 0 has the highest priority. Enter the number 0 to connect the email host to the FA host.

- The next field you need to edit is called Destination. In this field, you must enter your domain in the .mail.yourdomain.com format. This format is called FQDN* . To know what is FQDN training section ? read the
- Leave the rest of the fields with default values. Finally, click the Save Record button to create your MX record with the relevant specifications.

🟢🔵 Important note: Be careful not to complete the Destination field with IP. You must enter the correct FQDN of your domain name as mail.yourdomain.com in this field. Answers to emails sent are received by this record.
Add record A in cPanel (step 2)
Be careful not to delete other existing A records in the Zone Editor section of your host. The next step to connect the email host to the primary host is to add the following 2 A records:
- Define an A record with the same name as .mail.yourdomain.com. In this record, the IP address of the destination server, that is, the email server is inserted. This will refer to the email server.
- We also need a record for webmail in the form of .webmail.yourdomain.com. In this record, the IP address of the email server must be entered.
For this purpose, you must follow the following steps:
- Section of your cPanel host Zone Editor.
- Then click on the blue A RECORD+ button to define record A in cPanel. If this record already exists, click the Edit button in front of it. (You may encounter an error at this stage, which we have explained a little below.)