4 Effective Ways to Hide Drives in Windows 10
To hide the hard drive on your Windows 10 computer, you can use methods to prevent others from seeing your personal files. In this article, we explain four easy methods to you.
Hiding drives in Windows only provides a local level of protection, and if someone with administrative access to your system, they might be able to fully access the drives. Therefore, to fully protect your information, it is necessary to use encryption methods and advanced access management.
You might want to hide your files on your Windows 10 computer for several reasons. For example, maybe you don’t want others to see your confidential files on your hard drive, or you don’t want others to access your important files. The best way to hide files is to hide the entire hard drive!
Do you know how to hide a drive in Windows 10? The best effect of hiding a hard drive in Windows 10 is that you can see it, but others can’t. Can you reach this goal? Ye,s you can! Using three built-in Windows tools: Disk Management, Registry Editor, and Group Policy, you can hide the hard drive in Windows 10.
In this article, we will show you how to hide the hard drive in Windows 10 using these three tools. So if you want to hide a drive, stay with us until the end of this article. Be careful that these methods work both on Windows desktop and Windows Server. If you don’t have a Windows server yet, you can buy it from the Windows virtual server purchase page.
How to hide a drive in Windows 10?
- Use Disk Management
- Use the registry editor
- Use Group Policy
How to hide a hard drive through Disk Management?
You can delete the drive letter of the hard drive and then mount the drive as a folder using Disk Management. Using this method, you know which folder is actually the drive, but others don’t.
Next, we bring you a comprehensive guide:
Step 1: Delete Drive Letter
Right-click on This PC and select Manage.
In the window that opens, select the Storage section in the Disk Management section. You can also use Windows Search to search for Disk Management and select the first result to open Disk Management directly.
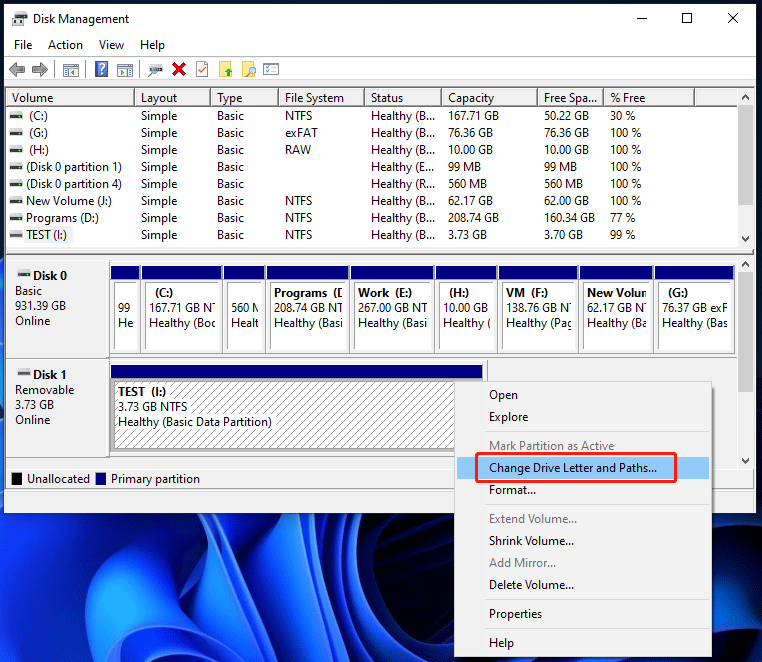
Right-click on the drive you want to hide and select Change Drive Letter and Paths
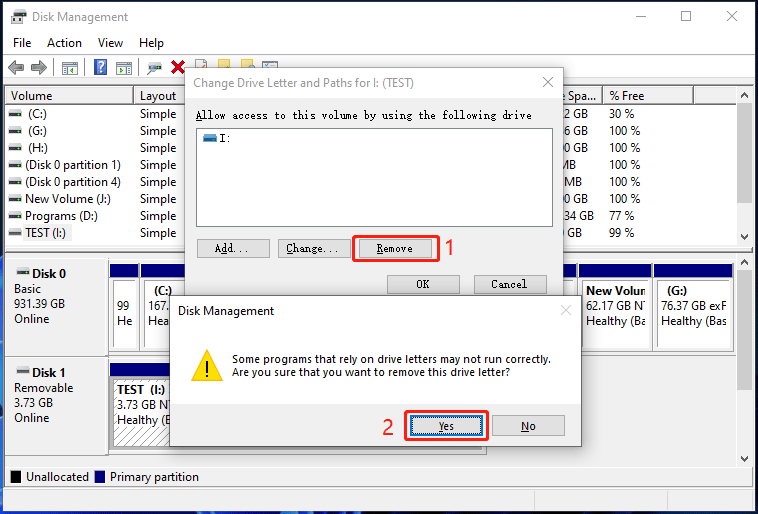
4. In the relationship that appears, click the Remove button to continue.
5. Another link will appear, warning you about the risk of deleting a drive letter. Click the Yes button to confirm the operation.
Step 2: Mount the drive as a folder
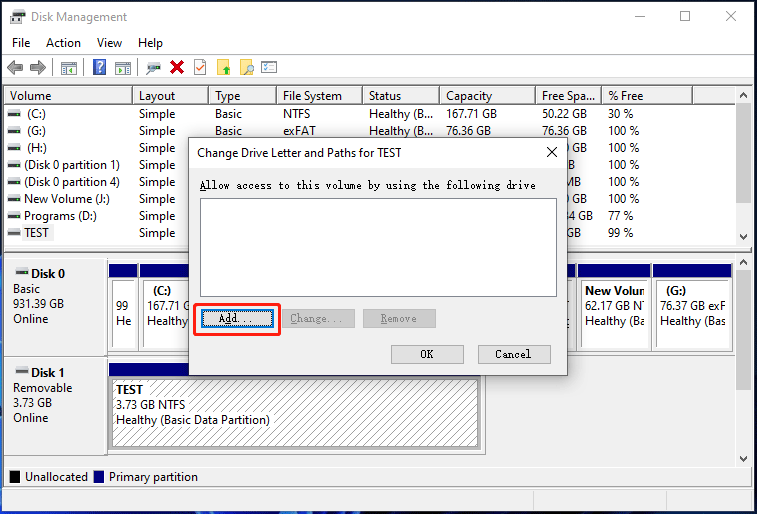
1. Now, you will be returned to the Disk Management interface. Again, you need to right-click on that drive and select Change Drive Letter and Paths.
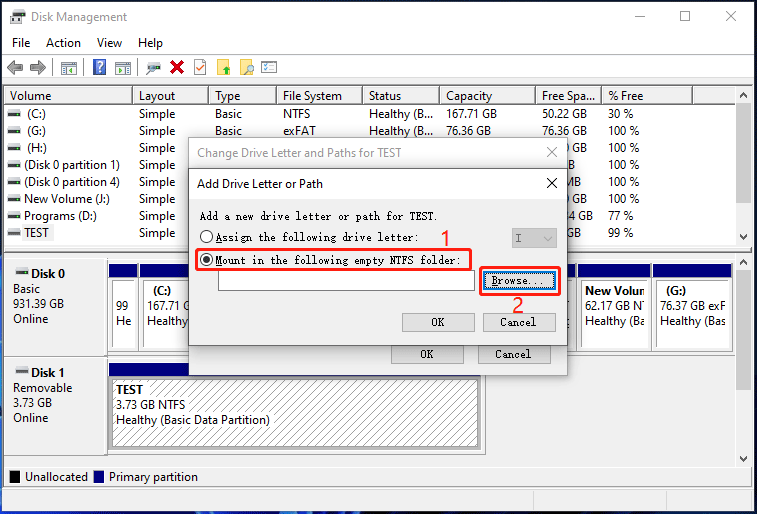
2. Click the Add button to continue.
3. Select the Mount option in the empty NTFS folder below.
4. Click the Browse button.
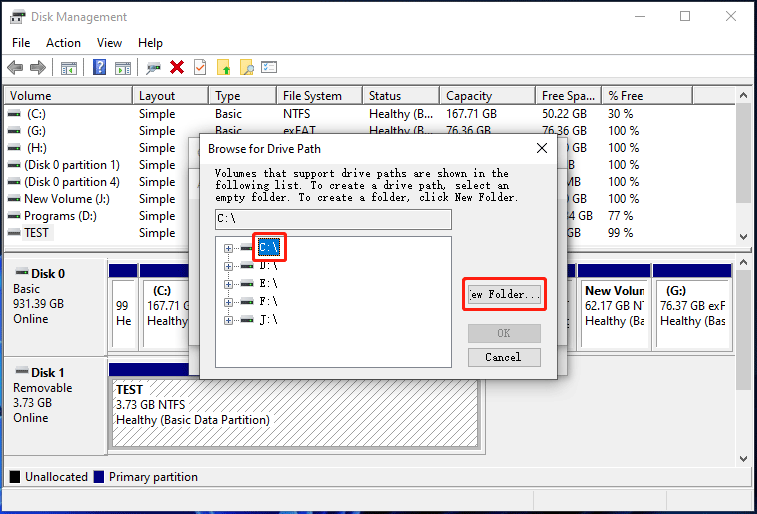
5. In the next section, make sure the C drive is selected and then click the New Folder button.
6. Give the newly created folder a name of your choice. Here, we name the folder secretdrive.
7. Click the OK button.
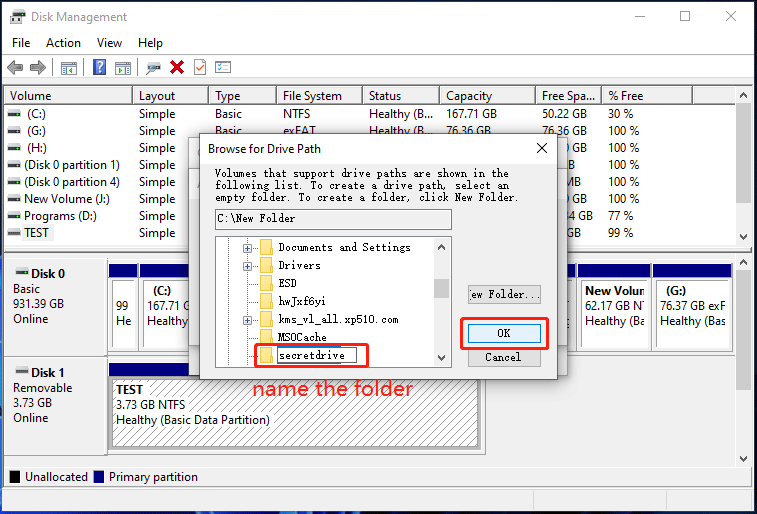
8. Click the OK button.
9. Now you need to go to drive C to find the newly created folder. But before that, it is better to click on the View option in the upper toolbar and make sure that the Hidden items option is not selected.
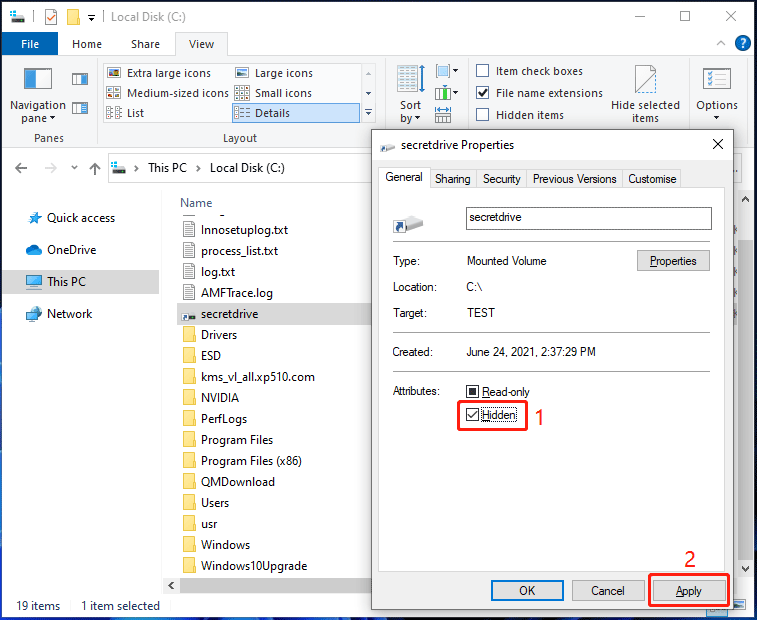
10. Right-click on the secret drive folder and select Properties.
11. Check the Hidden option in the Attributes section.
12. Click the Apply button.
13. When you see the following link, you must select the Apply changes to this folder only option.
14. Click the OK button to continue.
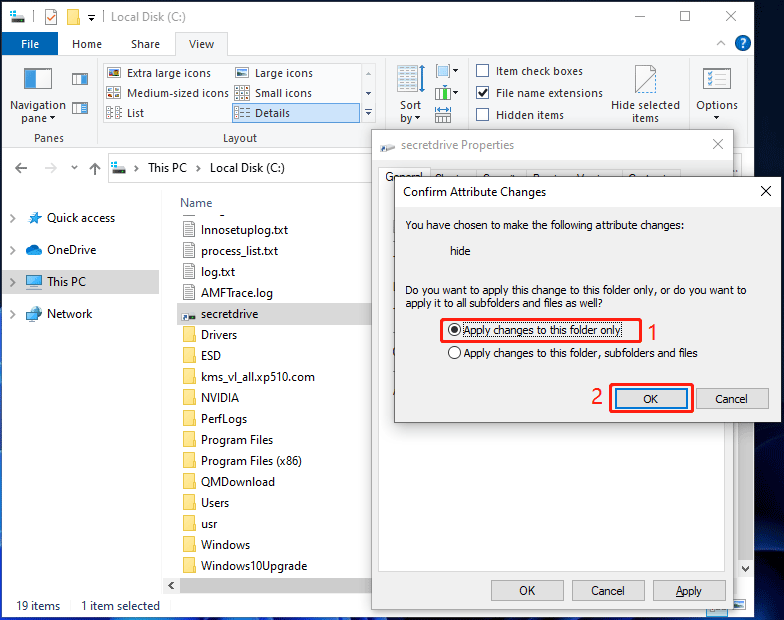
15. Go back to the previous settings and click OK to save the change.
The secret drive folder is now hidden. Because you don’t allow your system to show hidden files and folders, this folder is not visible in the file viewer. Only you know this secret. If you want to see that drive, you can deselect the Hidden option in step 12 to show that folder.
How to show hidden drives in Windows 10?
If you want to reverse the change and make the hidden drive visible, you can just add a Drive Letter for it.
1. Go to Disk Management.
2. Right-click on the desired drive and select Change Drive Letter and Paths.
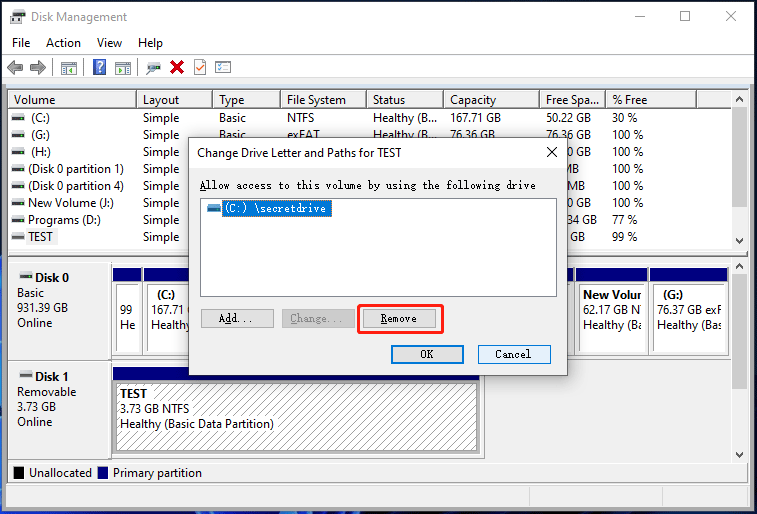
3. Since it is currently installed in folder mode, to remove folder mode first, you need to click the Remove button.
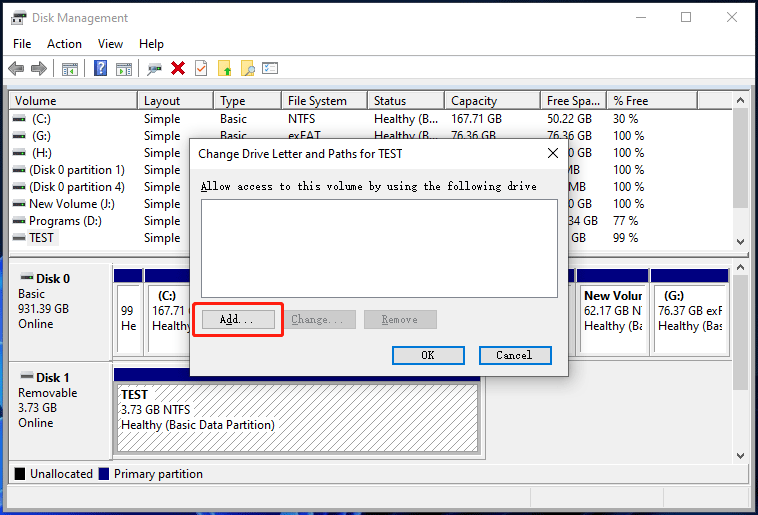
Right-click on the desired drive again and select Change Drive Letter and Paths.
Click the Add button to continue.
Assign a drive letter to that drive.
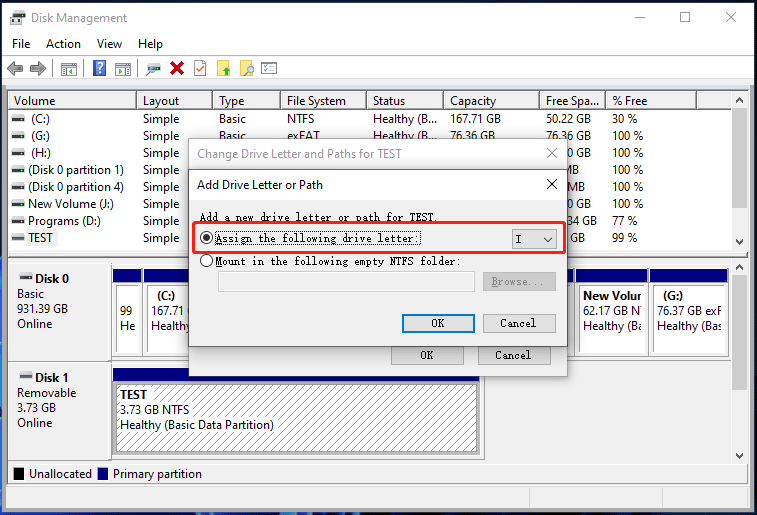
8. Click the OK button to save the changes.
Hiding the hard drive using the Registry Editor
You can also hide a drive through Registry Editor in Windows 10. Editing the registry incorrectly can cause permanent damage to your Windows installation. For this reason, it is better to back up your computer data before making any changes.
If you want to hide your hard drive using Registry Editor, you can follow these steps:
1. Press Win+R keys to open the Run window.
2. Type regedit and click OK to open the registry editor.
3. Go to the following path:
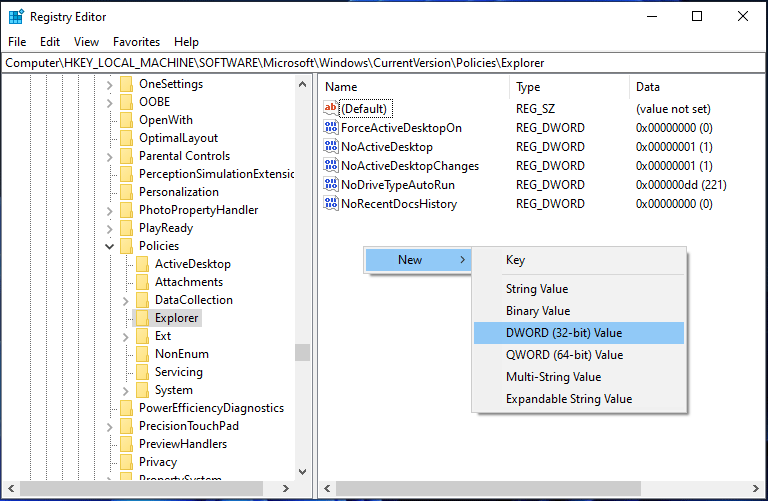
HKEY_LOCAL_MACHINE\Software\Microsoft\Windows\CurrentVersion\Policies\Explorer
4. Click on the empty space on the right. Then go to New > DWORD (32-bit) Value.
5. Name that new DWORD NoDrives and press Enter.
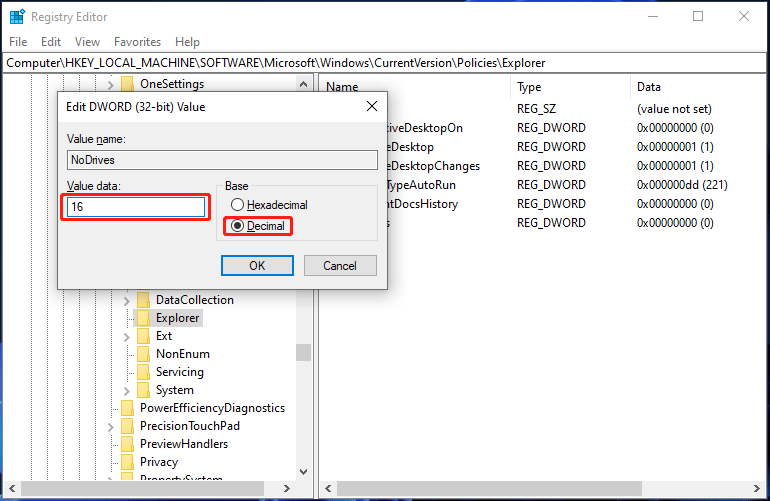
6. To open that new DWORD, double-click it.
7. Select Decimal in the Base field.
8. Enter the decimal number representing the drive letter you want to hide in the Value data box. For example, if you want to hide drive E, we type the number 16 in the Value data field. If you want to hide more than one drive, you must enter the sum of decimal numbers. For example, if you want to hide both drive E and drive F, you would enter 16 + 32. In other words, the number you need to type is 48.
9. Click OK to save the changes.
10. Close the registry editor.
After completing these steps, you need to restart your computer for all the changes to take effect. Then, to unhide your hard drive using Registry Editor, you can follow these steps:
Click OK to save the changes.
Close the Registry Editor.
After completing these steps, you need to restart your computer for all the changes to take effect. Then you won’t see the hidden drive in File Explorer. However, this does not indicate that the drive is inaccessible. You can access its location using the drive path in the address bar of the file viewer or through the Command Prompt.
How to revert changes?
If you want to show hidden drives, you can repeat steps 1 to 3 again and then delete the DWORD NoDrives. After that, you can restart your computer to save the changes and find the drive in File Explorer.
How to hide a hard drive using Group Policy?
If you’re using Windows 10 Pro, Enterprise, or Education, you can also use the Local Group Policy Editor to hide a hard drive in Windows 10. Unlike the previous two methods, using this method, you can only hide some drives.
Here are some tips for you:
1. Press Win+R keys to open Run.
2. Type gpedit.msc and click OK to open the Local Group Policy Editor.
3. Go to the following path:
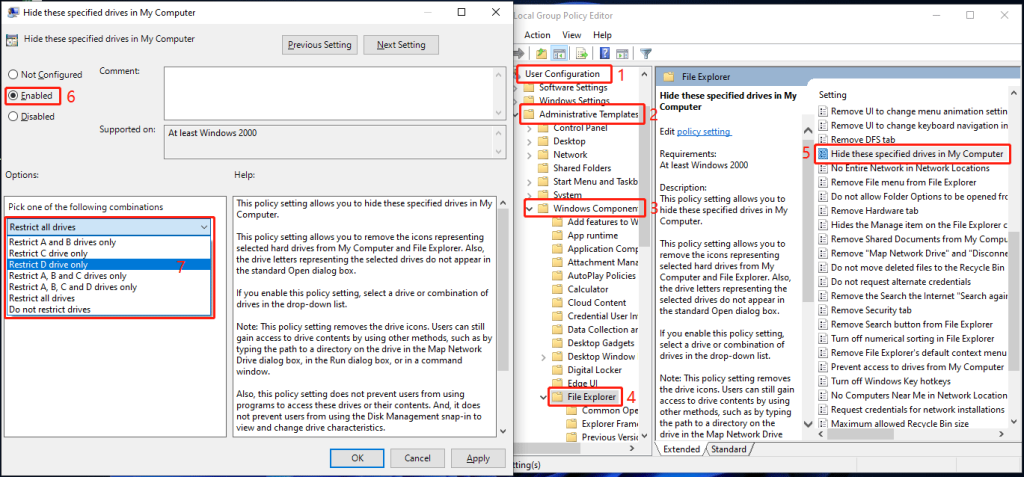
User Configuration > Administrative Templates > Windows Components > File Explorer
4. Scroll down to find the Hide these specified drives in My Computer policy suggestion and double-click it.
5. In the context of the pop-up window, select the Enabled option.
6. In the options section, select the combination of drives that you want to hide based on your needs from the drop-down menu. You can notice that only some drives can be hidden.
Click on Apply.
Click on OK.
There is no need to restart your computer using this method.
You can access that drive by entering the drive path in the file explorer’s address bar or using the manual command in the command window to open the drive.
How to revert changes?
If you want to restore a drive that is hidden using group policy, you can follow steps 1 to 4 and then select Not Configured.
There are three ways to hide the drive in Windows 10. You can choose one of them according to your needs.
How to recover data from a hidden drive in Windows 10?
For some reason, you may lose your important files in a hidden drive. So, is it possible to recover data from a hidden drive?
Of course there is. The drive is hidden, but the files are just like any other normal files. So, there are two ways to recover files from a hidden drive:
Recover deleted files from the Recycle Bin
- Use of third-party personal data recovery software.
- Recover deleted files from the Recycle Bin.
If the files are not permanently deleted, you can go to the Recycle Bin to recover them. It’s very simple:
Open the Recycle Bin.
Find and select the files you want to restore.
Right-click on the files and select the Restore option.
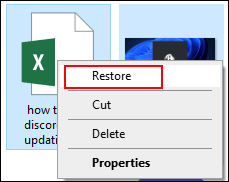
The selected files will be restored to their original location.
Data recovery using MiniTool Power Data Recovery personal data recovery software
If you can’t find your files in the Recycle Bin, they most likely have been permanently deleted. In cases like this, you should use third-party personal data recovery software to recover them. You can use MiniTool Power Data Recovery, which is a free file recovery tool.
This software is specially designed to recover data from all types of drives. This software is able to identify the hidden drive on your computer. With the free version of this software, you can follow these steps to recover your data:
1. Download the software and install it on your computer.
2. Open the software.
3. Select the drive you want to recover data from. You can identify the drive by its label (if available) and size.
4. Click on Scan to start the drive scanning process.
5. When the scanning process is finished, you will see the scan results, including the existing and deleted files. You can then select the files you want to recover.
6. Click the Save button and choose a suitable location to save the files. Be careful not to save the files on the main drive. Otherwise, deleted files may be overwritten and unrecoverable.
If you want to use this software to recover more files, you need to upgrade to an advanced version.
Hide a drive in Windows with the Diskpart command.
If you are an advanced user who prefers to apply your changes through the command line interface, you can use the diskpart command to hide a drive in Windows. Fortunately, it’s not as scary as it may seem.
To hide a drive in Windows using Command Prompt, follow these steps:
Press Win + X keys and select Terminal (Admin) from the menu that appears.
When the User Account Control (UAC) prompt appears, select Yes.
In the console, type diskpart and press Enter.
Enter the following command in the console and press Enter to display a list of drives connected to your system:
list volume
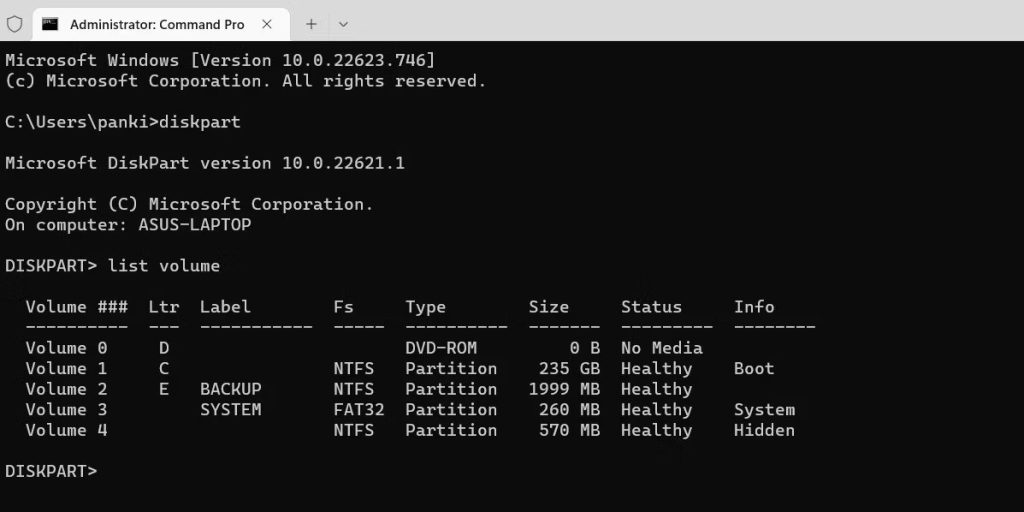
Note the drive letter you want to hide from the Ltr column.
Type the following command to select your drive. Make sure you replace X in the command with the drive letter you wrote down in the previous step.
select volume X
Finally, run the following command to remove the drive letter and hide the drive.
remove letter X
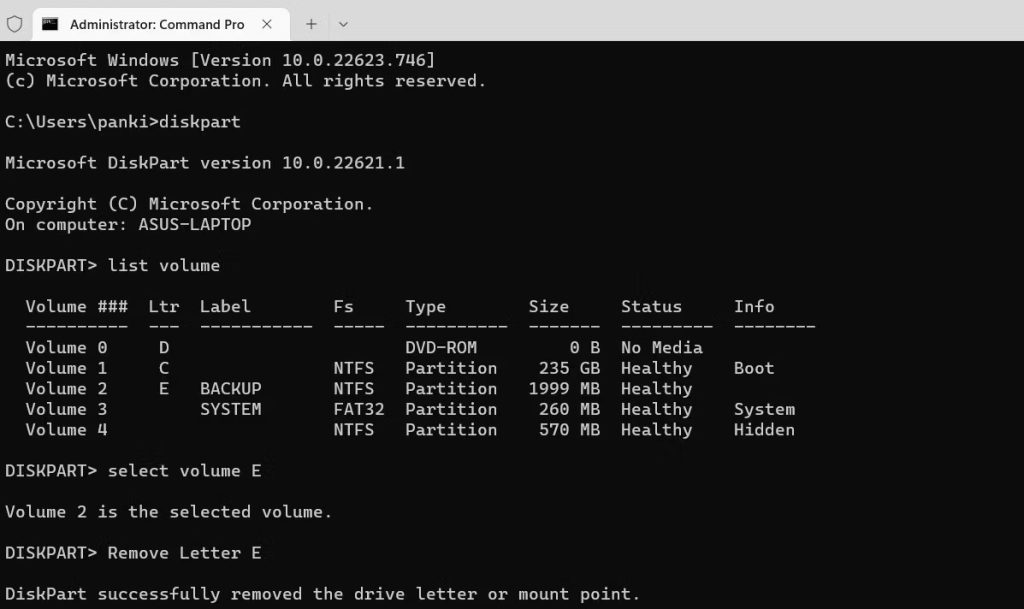
You should see a message saying that Diskpart has successfully removed the drive letter or mount point. After that, the drive will no longer show up on your computer.
Conclusion
In this article, we showed you how you can hide your drives in Windows, but sometimes it happens that you encounter the problem of the drive disappearing in Windows, and without making an effort to hide the drives, your drives are no longer available.
To solve this problem, you can get help from our article that we have written before in this regard. By using the Diskpart command in Command Prompt, you can easily strengthen the privacy and security of your data. This method is simple and usable for advanced users and can be very useful in cases where you need to hide files or confidential information. By following the training steps presented in this article, you can easily use this feature in your Windows and enjoy more peace of mind about your information security.
FAQ
How can I hide a drive in Windows 10?
You can hide a drive by removing its drive letter using Disk Management, configuring Group Policy settings, editing the Registry, or using Command Prompt.
Will hiding a drive make it inaccessible?
Hiding a drive prevents it from appearing in File Explorer but doesn't restrict access. Users can still access the drive by typing its path directly or using third-party tools.
How can I unhide a hidden drive?
To unhide a drive, you can assign it a drive letter again using Disk Management, modify Group Policy settings, edit the Registry, or use Command Prompt to restore its visibility.