


10 Ways to Troubleshoot If Your Laptop Battery Is Not Charging
10 Ways to Troubleshoot If Your Laptop Battery Is Not Charging
There are various reasons why your laptop battery does not charge even when connected to electricity. The first thing that comes to mind in these situations is the failure of the power outlet, charger, or the laptop battery itself, But in fact, there are other reasons for this that are not very clear at first glance.
So, without any introduction, let’s go to the solutions to this problem! Read this article to the end to learn how to solve the laptop battery problem of not charging.
Why is my laptop not charging even though it is plugged in?
Some of the reasons for the laptop battery not charging despite being connected to the Power include the following:
- Charger failure
- Power outlet failure
- Damage to the charging cable
- Weak charger
- Broken battery
- The charger is not original
- Driver failure
- Installing software that limits the charging mode
- Motherboard problems
In the following, we will examine these problems and how to solve them.
How to fix a laptop that is plugged in but not charging?
If your laptop still does not charge even when connected to a power outlet, you can use different methods to solve this problem. Remember that it is impossible to recommend a single and specific way for all users because the solution will be other depending on the reason for the laptop not charging. We recommend that you try all these methods to find the best solution.
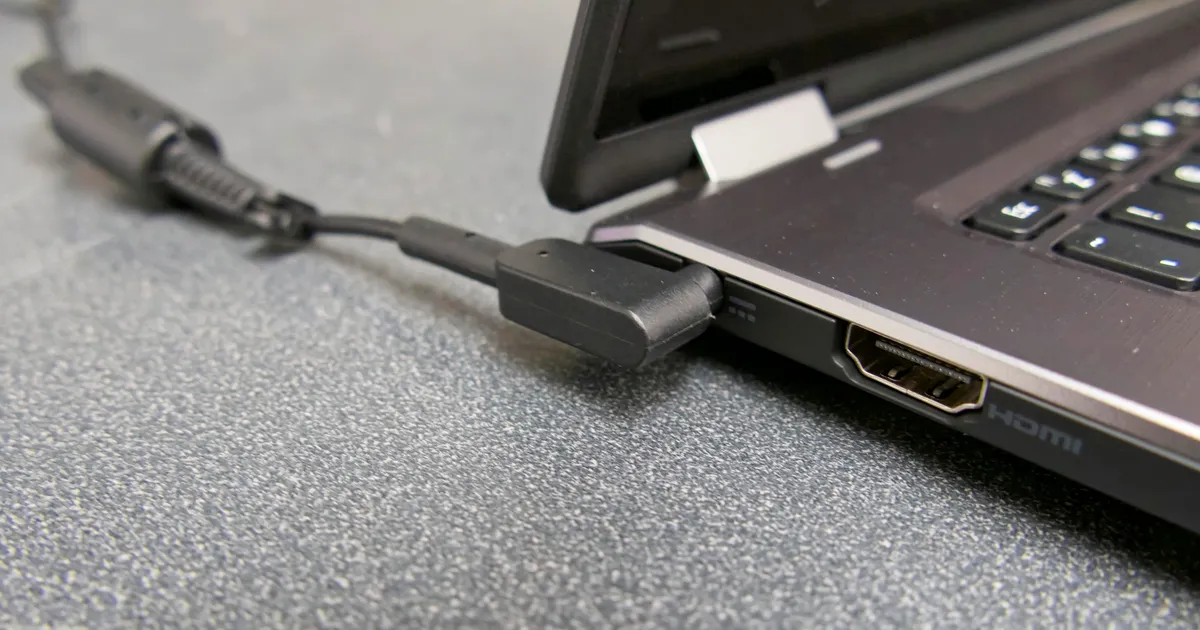
1- Check the charging cable
Your laptop charger cable has two ends, one connected to the charger and the other to your laptop. You should check the laptop’s outlet, charger, and Power plug to ensure that the problem is not that the computer is not charging from the charger. If you can’t find a problem, try another power outlet. If there were a problem with the outlet, your problem would be solved here. If not, follow our other solutions.
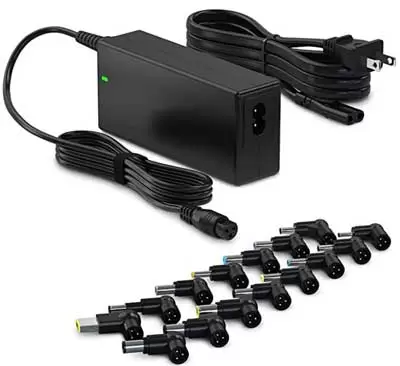
2- Change the charger
Sometimes the reason for the laptop not charging is the failure or damage of the charger. Sometimes the voltage of your charger may be lower than the amount required to assess the computer, or you may have bought an inappropriate charger.
- The charger is completely broken: A wholly broken and dead charger will not charge your laptop, but a faulty charger can fool you into thinking that the problem is not the charger when the battery is. It does not charge you.
- The Power of the charger is much less than the required value: If the wattage of the charger you use is less than the required value of your laptop, you will find that the computer does not charge even when connected to the power supply. So you should check your charger and see if it matches the specifications of your computer or not. If you use Power Delivery charging technology (USB-C PowerDelivery), ensure that the PowerDelivery value listed in your laptop’s specifications matches the capacity of the USB-C charger. In addition, if you have several USB-C ports,
- be sure to connect to the appropriate port for power delivery.
The charger is not original: Sometimes the charger is not authentic and not original is the main reason for your problem. If you use a fake and inappropriate charger, even though it is connected to electricity, your laptop will not charge.
The solution to all of the above is to replace your charger. Buy a new genuine charger and see if the problem persists.
3- Turn the laptop off and on
Sometimes temporary and sudden problems cause the laptop not to charge. In such a situation, you need to restart the power cycle of the computer. Sometimes the computer won’t charge due to a hardware problem. Resetting and restarting the device will resolve these hardware issues.
To do this, follow the steps below:
1- Shut down the laptop.
2- Unplug it.
3- Take out the laptop battery.
4- Press and hold the power button for 30 seconds.
5- Put the battery back into the laptop.
6- Reconnect the power adapter.
7- Turn on the device.
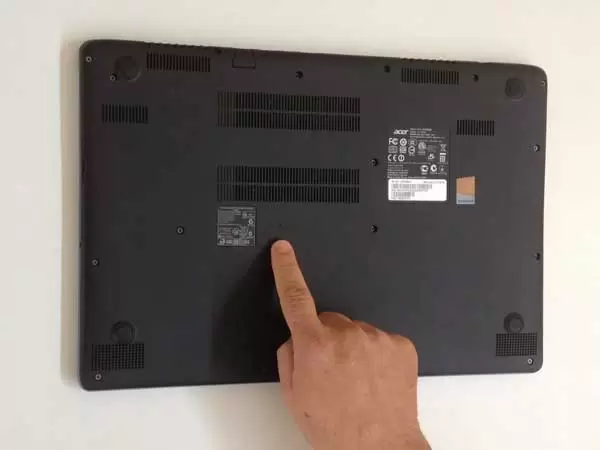
4- Use the battery reset button
Sometimes the batteries don’t work properly and cause problems. Some laptops have a battery reset button that allows the user to reset the battery. You should refer to your laptop’s manual to determine if your computer has a battery reset button.
If your laptop has this capability, first restart the laptop’s power cycle according to the steps we explained in the previous method, and then insert the unique pin in the designated part to reset the battery (to do this, refer to the instructions in the manual) Refer to your laptop manual).
5- Check the health of the battery
Sometimes the laptop’s battery may be exhausted, and it can no longer charge the computer. You can check the health of your laptop battery and see if it’s time to replace it.
To do this, follow the steps below:
1- Press Win + R. Type cmd and Ctrl + Shift + Enter to raise the elevated command prompt.
2- Type in the terminal:
powercfg /battery report/output %userprofile%\Documents\batteryhealth.html.
3- Press Win + R and type %userprofile%\Documents.
4- Double click on batteryhealth.html and scroll down to Battery Capacity History.
Now compare the value of Full Charge Capacity with Design Capacity. If the value of Full Charge Capacity is much lower than Design Capacity, it is better to change your laptop battery.
6- Use the Windows troubleshooter
The Windows Troubleshooter can check for battery and power management issues.
To launch the Troubleshooter in Windows 10:
1- Press Win + I to open Settings.
2- Go to Troubleshoot and then to Other Troubleshooters.
3- Go to the bottom of the page and click on Power, and then Run.
Follow the instructions on the page to troubleshoot.
7- Reinstall the battery drivers
It may seem strange to you, but sometimes laptop battery drivers can cause charging problems. Windows uses the Microsoft ACPI-Control Method battery driver to communicate with the laptop battery.
If this driver is damaged or corrupted, Windows will send the wrong sign nails to the charge controller, which will stop charging the laptop. In fact, after updating this driver, many users have solved the problem of their computers setting up despite being connected to electricity.
1- Press Win + R and type devmgmt. msc to launch Device Manager.
2- Open the Batteries option. In this section, you will see two entries: Microsoft AC Adapter and Microsoft ACPI-Compliant Control Method Battery.
3- Click on Microsoft ACPI-Compliant Control Method Battery and select Uninstall device.
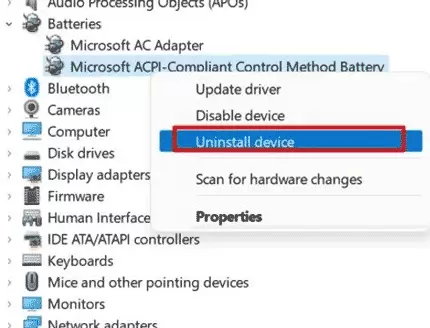
4- Now right-click on Microsoft AC Adapter and select Uninstall.
5- With this, your laptop will restart automatically.
Windows will automatically reinstall this driver after restarting. If the problem of your laptop not charging is due to the driver, it will be solved with this method.
8- Check the battery management software (if you have it)
Some programs installed on the laptop will stop charging when the battery is set to a certain percentage (usually around 50%) to extend the laptop’s battery life. Although this feature is considered excellent and valuable, it isn’t enjoyable at certain times, such as when traveling when you need to charge your laptop entirely.
Check and see if such a program is installed on your laptop or not. If there is such a program, disable its settings.
9- Update the BIOS
Some laptop manufacturers include the feature of limiting the battery charge in the hardware of the device. You can access and control this feature through BIOS. To solve the problem of the laptop not charging when connected to the Power, you must start the BIOS of your device and check the available options. To update the BIOS, you must go to the laptop manufacturer’s website (for example, Lenovo), enter the exact model of the laptop, and download and install the new BIOS file. Of course, every laptop and manufacturer has its way of updating the BIOS. It is better to search on Google. For example, how to update the BIOS of a Lenovo laptop of a particular model.
10- Check the motherboard
The last solution on our list today is motherboard troubleshooting. Since the battery charging circuit passes through the motherboard, failure of any tricky parts will cause the device not to trust.
If none of these methods worked and the problem persists, it may be due to circuit failure, defective battery sensor, etc. In this case, you need help from an expert.