


How To Use Multiple Programs (Split Screen) On Macbook
You can run multiple applications on MacBook and Windows and easily switch between apps.
One of the main reasons people prefer the desktop system over any other platform is that they can have a larger display.
Mac and Windows also have the Split-Screen feature. Thanks to this feature, you can run two applications on your Mac at the same time. Follow us to learn how to use the MacBook split-screen…
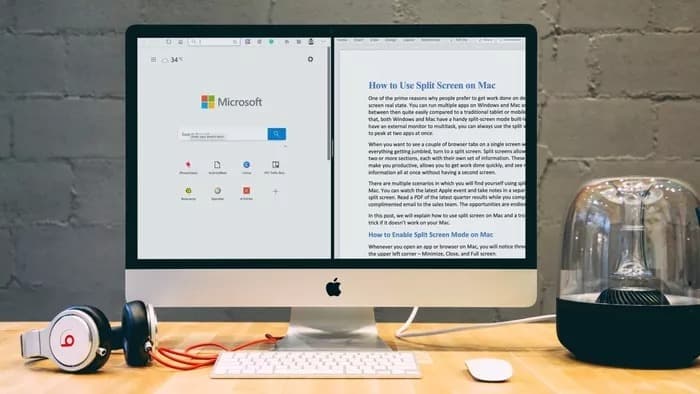
Split-screen feature on multiple Macs
The Split-Screen feature allows you to run two different sections together with their own specific information. So you can do things much faster without having to have a second system.
You can use the Split-Screen feature in several different scenarios. You can watch video content and take notes at the same time. You can also write an email while reading a PDF!
In this article, we will teach you how to use the Split-Screen feature on your MacBook.
How to enable Split-Screen mode on Mac
When you run a browser on a MacBook, there are three options at the top left of the screen:
- Miniaturize
- to close
- fullscreen
Mac users typically use the fullscreen option. Hold the mouse pointer over the full-screen icon to see three options. These three options include the following.
- Enter full-screen mode
- Move the window to the left of the screen
- Move the window to the right of the screen
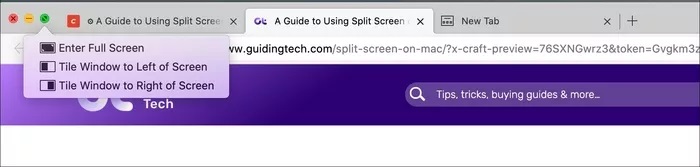
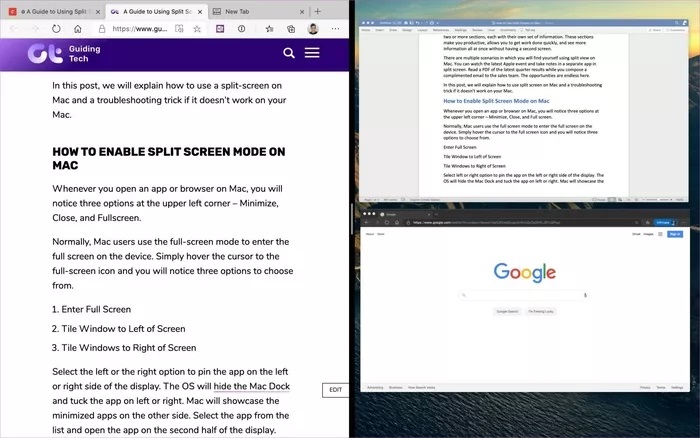
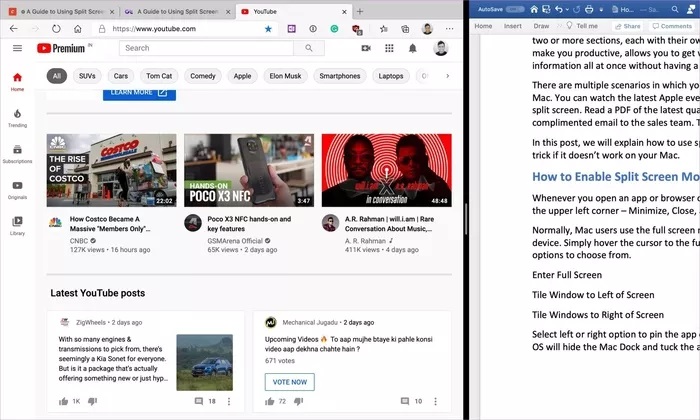
By selecting left or right, the program is pinned in one of these two sections. The Mac also shows other programs scaled down on the other side of the screen. Select one of them to fill the other side of the screen.
How to get out of split-screen mode
Getting out of Split-Screen mode on a Mac is very easy. To do this, just click on the Escape button to get everything back to normal.

Of course, if the Escape button is used differently in one of the programs, the situation will be slightly different. In this case, to exit this mode, you must click on the green circle in the corner of the apps.
How to change the location of apps?
Sometimes you may need to relocate apps to make better use of them.

To do this, instead of closing the apps and running them again, you can grab one of them and move it to the other side of the screen.
How to set Split-Screen mode on Mac?
Sometimes an application may need more space in Split-Screen mode. You can easily set this up.
To do this, just hold the mouse pointer on the program separator line and move it left or right. Keep in mind that some programs may require as little space as possible and not allow you to do so.
The split-Screen mode does not work
The Split-Screen feature should normally work well on a Mac. If you do not enable it, you will need to follow the steps below.
Step 1: Click on the Apple icon at the top left (left).
Step 2: Open the System Preferences menu.
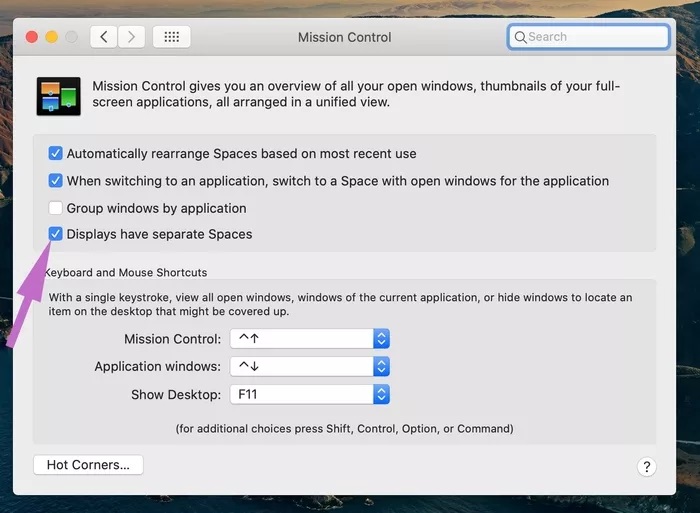
Step 3: Enable the Displays to have a separate Spaces option.
Split Screen Mode Limitations on MacBook
The Split Screen feature on the Mac currently has limitations that we expect Apple to address soon.
- There are no shortcuts to activate the Split Screen on the keyboard.
- The Split Screen feature does not support more than two applications.
Simultaneous Connection Of iPhone With Several Macbooks Without Data Loss
Simultaneous connection of iPhone to several MacBooks is possible through iTunes, but it has a major problem! This problem is related to the deletion of information and files such as music and video. In this article, we are going to teach you how to connect iPhone to several MacBooks at the same time without losing data.
An introduction to connecting an iPhone to multiple MacBooks at the same time
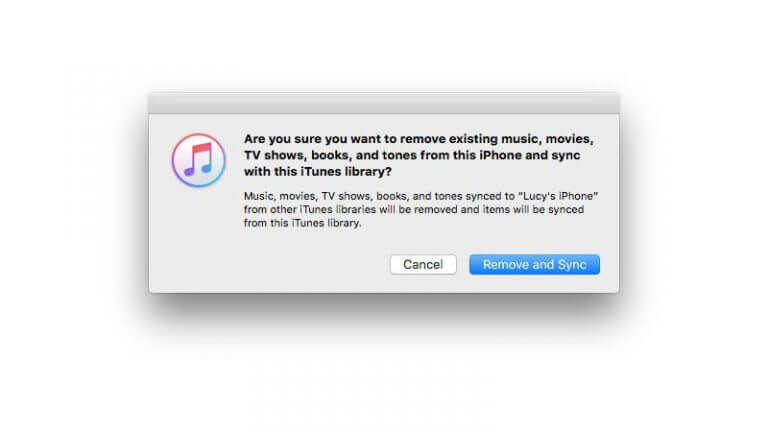
Simultaneous connection of iPhone to several MacBooks is a major problem. This problem is related to your deletion of device information. Whenever you try to connect your iPhone or iPad to a new MacBook, you get a message saying “Do you want to erase this iPhone and sync with this iTunes library?”
And appears on the MacBook screen as shown below. In this case, if you click on Remove and Sync, the connection between the new MacBook and your iPhone will be established, but the previous information stored on your iPhone, such as videos, music, and. Will be deleted. Apple has provided this platform to make sure your iPhone only connects to a MacBook.
So connecting the iPhone to multiple MacBooks at the same time is a big problem, and this has caused concern among many users. But isn’t it really possible to connect the iPhone to multiple MacBooks without losing prior information?
Fortunately, you can do this with two special tricks.
These two tricks involve using third-party applications such as AnyTrans or using a unique manual method. In the continuation of this article, we will explain both mentioned methods to you dear ones.
This will allow you to connect your iPhone to multiple MacBooks at the same time without losing any previous data. If you need more information about each of the sections and steps described, you can contact the experts of the mobile support unit through the available numbers and ask them for more detailed guidance. Stay tuned with Mobile Help.
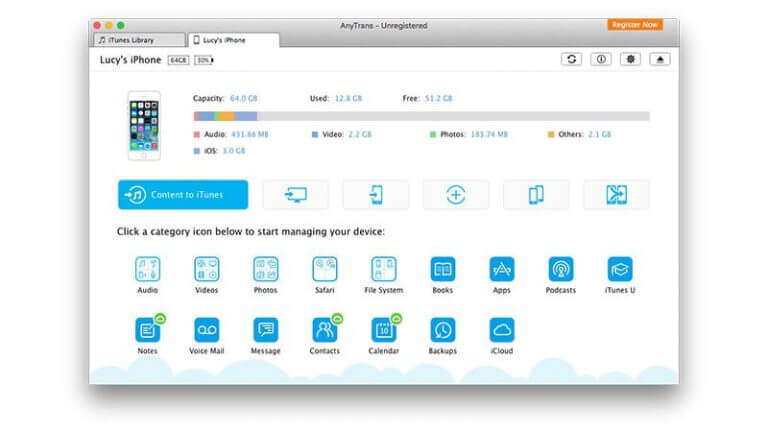
Simultaneous connection of iPhone to several MacBooks through AnyTrans application
AnyTrans allows you to easily connect your iPhone to multiple MacBooks at the same time. By using this program and replacing it with iTunes, you can avoid the problem of deleting previous information by synchronizing the iPhone and a new MacBook.
If you remember, we have already taught you how to use the AnyTrans program to exchange files between iPhones and computers in an article entitled “Introducing the best file manager program for iPhones and iPads (replacing iTunes)”.
We recommend that if for any reason you want to connect your iPhone to multiple MacBooks at the same time, be sure to use the AnyTrans app and forget about the iTunes interface.
Now we want to briefly describe the steps of using the AnyTrans program. Keep in mind that for more detailed information on how this program works, be sure to use the article provided in the previous paragraph with a link.
The steps for using the AnyTrans application are as follows:
- You must first download the AnyTrans app and install it on your MacBook. Then run this program. You may need to go to System Preferences and then Security & Privacy and select Open Anyway.
- Connect your iPhone to the MacBook using the interface cable.
- In this case, the process of uploading files and content of the iPhone by the AnyTrans program begins. Let this process be complete. This may take some time depending on the amount of information stored on your iPhone, so be patient.
- Hover over the icon, which looks like an iTunes arrow. In this case, the phrase Content To iTunes will appear. Click on it.
- Check the box next to the options you want to move.
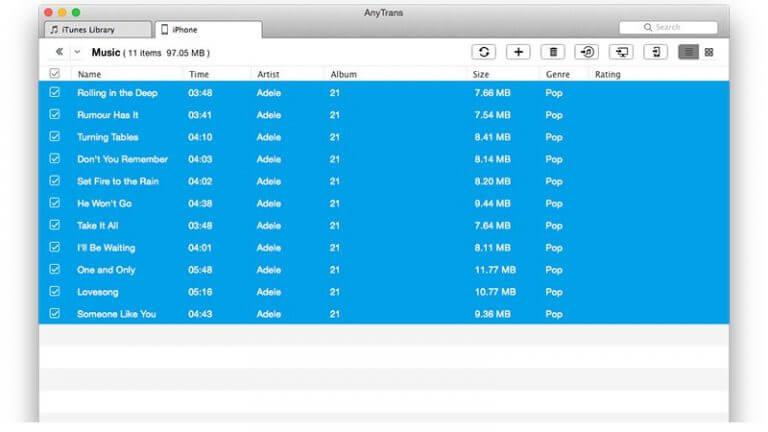
- Now click on the Start Transfer option.
- Wait for the process to complete successfully. The files are then copied from the iPhone to the iTunes Library.
Using the method we mentioned, you will be able to bypass the limit of the simultaneous connection of a MacBook to iPhone in iTunes via AnyTrans. So using the AnyTrans app is one of the best tricks available to connect your iPhone to multiple MacBooks at the same time without losing data. Note that for more information, you can contact the experts of the mobile support unit through the available numbers and ask them for more detailed guidance.
Simultaneously connect iPhone to multiple MacBooks using manual data management trick
By manually managing the information stored on your iPhone, you will also be able to prevent deleting previous device information and connecting the iPhone to multiple MacBooks at the same time. Apple mentions in its official explanation that this is the official way to connect the iPhone to several MacBooks at the same time, and in this case, the user must manually manage his data.
The only problem with this method is the iPhone’s first connection to the MacBook, which causes the device to wipe or delete all media files. Also, when you click on the “Manually manage music and videos” option, all the contents of the device will be deleted.
If you have a copy of the music or songs stored in your iTunes Library, you can use services and apps like AnyTrans on your first connection. Then, the next time, by activating the “Manually manage music and videos” option, you will be able to connect your iPhone to several MacBooks without losing data.
So in a general sentence, we must say that to deal with the problem of deleting iPhone data when connecting to a new MacBook, you can use the feature or option “Manually manage music and videos” in iTunes, and to solve the problem of deleting data on the first connection Use programs like AnyTrans and have a copy of the media files you want.
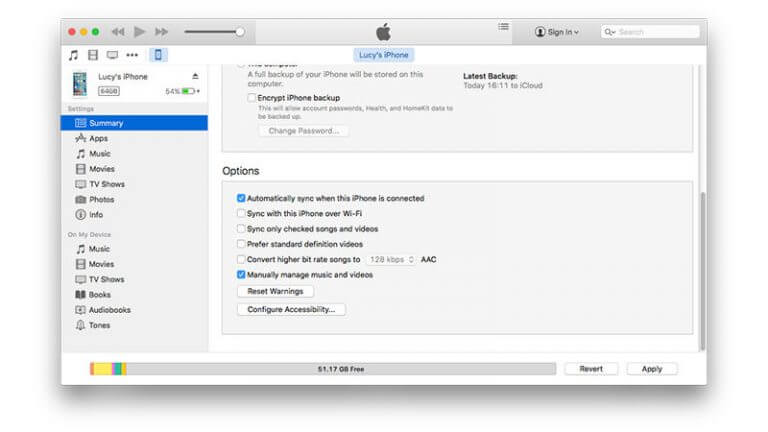
To manually manage music and videos stored on the iPhone, do the following:
- First, connect your iPhone to the new computer using the appropriate cable.
- Launch iTunes or, as most Iranians call it, iTunes.
- Select your iPhone from the Device menu at the top left of the screen.
- From the menu on the left, go to the Summary section and check the Manually Manage Music and Videos option.
- Click on Apply.
You will now be able to manually transfer music and video from MacBook to iPhone and vice versa using the Drag & Drop feature. To copy music or video files from iTunes Library to your iPhone, do the following:

- Connect your iPhone to the computer and run the iTunes application.
- Select the music or media file you want.
- Left-click on the file and hold down the left mouse button to drag it to the left menu of the iTunes application.
- In the Devices section, the name of your iPhone is specified. Drag the file to the top of your iPhone and then left-click.
You will now be able to drag the items you want from the main window to the slide bar and add them to the various iPhones or MacBooks you want from the iTunes section.
Conclusion
As you can see, in this article, we taught you how to connect your iPhone to multiple MacBooks at the same time without losing data. If you need more information about any of the sections and steps described, you can contact the experts of the mobile support unit through the available numbers and ask them for more detailed guidance.