


Step-by-step tutorial for watermarking images in Photoshop (very simple)
In this tutorial, in addition to adding a watermark to a photo, you will learn how to apply the watermark changes to all previous photos.
Watermark, With the help of Linked Smart Object, which is only available in Photoshop CC, you can easily do this.
The second method (basic) – with the help of Linked Smart Object
What is a Linked Smart Object?
Adobe has unveiled a new smart object called Linked Smart Object in Photoshop CC. Before that, by objectifying the images smartly, the changes made were applied only to the same image, but with the help of the Smart Object link, you can apply the created changes even to external files.
Multiple images can be converted to Smart Object Links at the same time so that they can all be changed by making any changes to each one.
You can also use this feature to watermark photos, just save the logo you want in a separate file and then convert all photos to Smart Object Link. In this case, if you change the logo, the logo of all photos will also change. Well, now that you know the basics, let’s start with the tutorial.
1. Create the logo you want
To turn a watermark into a Smart Object link, you must first create a logo in a separate file. In the logo you can put copyright information, year of activity, site address and..
![]()
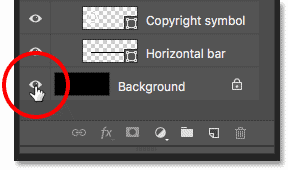
In the picture below, you can see the Layers panel. We chose the background image in black so that you can easily see the text and the shape of the logo.
![]()
2. Turn off the background layer
To convert your logo to a Smart Object link, you need to save it in a separate file, but since we only want the logo text to be saved, you have to turn off the black background layer to make your logo transparent.

This will make the logo a transparent image.
![]()
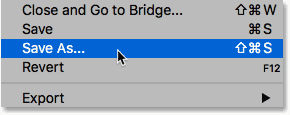
3- After saving the logo, close its file
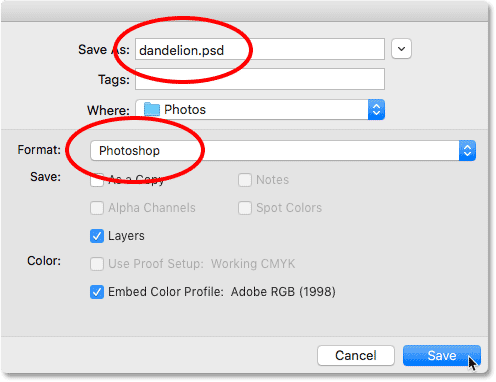
Follow File> Save As to save the logo .

Name your file as a logo or whatever you like, and after selecting the save path, save it in Photoshop.PSD format.
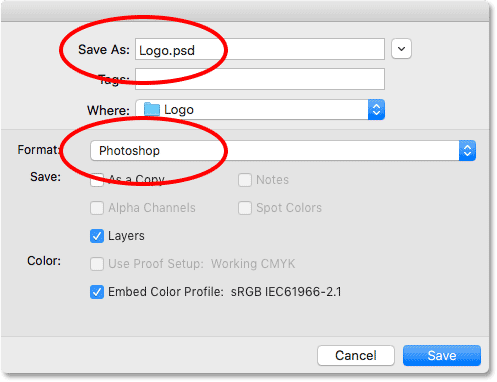
Follow File> Close to close the file.
How to add a logo as a watermark to a photo?
Well, after creating and saving the logo, it is time to add it to the photo. Follow the steps below to watermark the logo:
Add a watermark to the first photo

How to add a watermark as a Smart Object link to a photo?
To do this, go to File> Place linked. Again, this feature is only available in Photoshop CC.

After selecting the logo file, click Place.
![]()
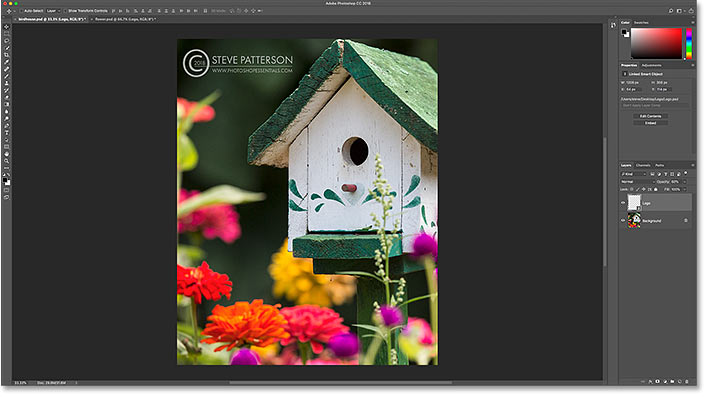
This will make the logo you want appear in the middle of the photo.
![]()
Change the size and position of the logo to your liking
To zoom in and out of the logo, hold down Shift and Alt (on Windows) / Option (on Mac) to resize the logo by clicking on one of the corners.
![]()
By clicking inside the logo box, you can place it anywhere in the photo you like. You must press Enter (on Windows) / Return (on Mac) to save the changes.
![]()
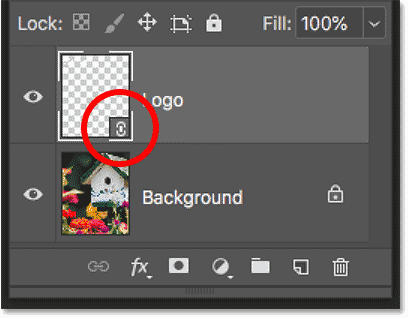
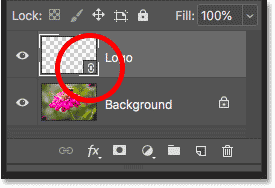
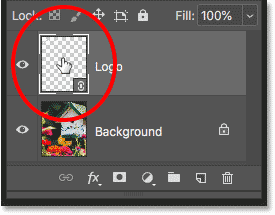
How do we know if the logo has become a Smart Object Link or not?
If you look closely at the Layers panel, you will see that there is a link icon below the logo, which means that the logo you want has become a Smart Object Link.
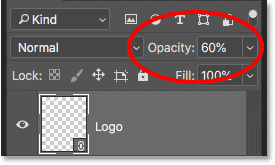
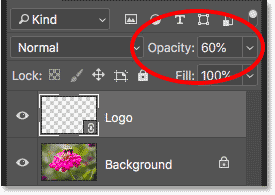
Reduce the logo opacity
To do this, look for the Opacity option in the Layers panel and set it to 60%.
You can easily add a watermark to your first photo.

Add a watermark to the second photo
Well, you have to repeat the above steps again to apply the watermark on your second photo.

Follow File> Place linked.

After selecting the logo file, click Place.
![]()
This will make the logo appear in the middle of the photo.
![]()
To zoom in and out of the logo, hold down Shift and Alt (on Windows) / Option (on Mac) to resize the logo by clicking on one of the corners.
![]()
Below the logo is the link icon, which means that the logo you want has become a Smart Object Link.
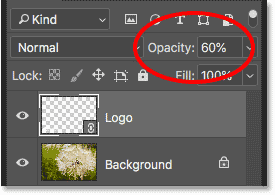
You can reduce the color of the logo by reducing the Opacity.
Now the watermark has been added to your second photo.
![]()
Add a watermark to the third photo
Follow File> Place linked.

After selecting the logo file, click Place.
![]()
This will make the logo appear in the middle of the photo.
![]()
To zoom in and out of the logo, hold down Shift and Alt (on Windows) / Option (on Mac) to resize the logo by clicking on one of the corners.
![]()
Now all three images are together in a smart object link file
Below the logo is the link icon, which means that the logo you want has become a Smart Object Link.
![]()
You can reduce the color of the logo by reducing the Opacity.
Watermark was easily added to your photo.

Save photos and close them
To do this, go to File> Save As.
Note that you must save the photo in Photoshop.PSD format. Finally, click Save.
How to edit the logo file?
Suppose after adding a watermark to all three photos, you need to change the logo and apply changes to all the photos, but how do you do that? You can easily do this with the help of Smart Object Link.
Click on the photo to make it appear on the Photoshop page.
Open the Smart Object link
To do this, just double-click on the Smart Link object icon in the Layers panel.
This will open the file of all three images that you previously converted to the Smart Object link.
![]()
Edit the text of the Smart Object
Now edit your logo. You can turn on the background image to see the logo.
To avoid confusion while working, it is better to form a Layer Group for both logos.
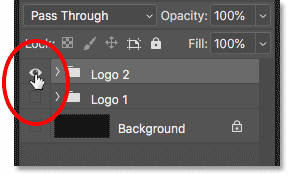
By clicking on the second logo, you can see it on a black background.
![]()
Save changes
Since we only want to save the logo text, we need to turn off the black background layer to make your logo transparent.
Follow File> Save As to save the logo.

Follow File> Close to close the file .

This will replace the previous logo with the new logo. If necessary, you can change the size and position of the logo.
![]()
If you take a look at the photo, you will notice that the new logo automatically replaces the previous one. Changes apply to all files just as easily by changing one file.
![]()
How to change the logo of a closed file?
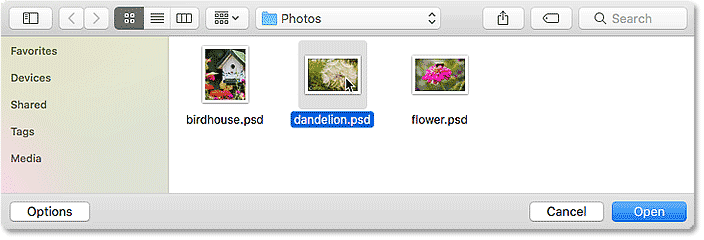
To do this, go to File> open.
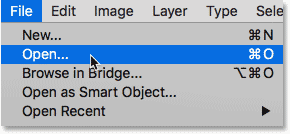
Double-click the file you want to open.
When you open the photo, you will see that the logo of this photo has not changed, because in the previous step, after saving the photo, we closed that file.
![]()
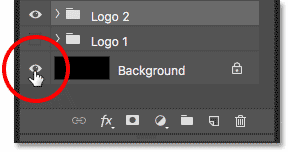
The alert icon in the Layers panel means that by changing the logo of the previous two photos, the logo of the third photo has not changed.
![]()
To change the logo of the third image, follow Layer> Smart Object> Update Modified Content / Update All Modified Content .

This will replace the previous logo with the new logo.
