A Dynamic Host Configuration Protocol (DHCP) server dynamically assigns an IP address and other network configuration parameters to each device on a network. A DHCP reservation is a permanent IP address assignment. A specific IP address in the DHCP range is permanently reserved for a specific DHCP client.
This step-by-step tutorial covers configuring IP reservations in Dynamic Host Configuration Protocol (DHCP). To configure DHCP reservation in Windows Server 2022, you need the MAC address information of the client device.
To create a DHCP server, you need a Windows virtual server that you can buy at the best price from Ded9.com. You can click on the banner below to buy a virtual server.
Server demo environment:
Computer name: server1.test.com
Operating system: Windows Server 2022 Datacenter
IP address: 192.168.3.3
DHCP range: 192.168.3.150 to 192.168.3.200
Prerequisites:
Installing and configuring Dynamic Host Configuration Protocol (DHCP)
Create a DHCP domain
Teaching configuration and IP reservation in DHCP server
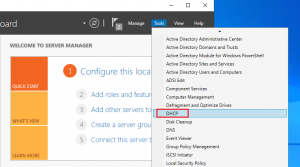
1. Open Server Manager, click Tools and select DHCP.

2. Open Scope, right-click on Reservations and select New Reservation.
3. Enter the reservation name (specify the network name of the device), enter the IP address (specify the IP address from your DHCP domain that you want to assign to the device), and enter the MAC address (MAC address of the client device) and click on Add.
The MAC address of a Windows machine can be found using the ‘Ipconfig /all command.
DHCP reservation is now configured. Restart the client machine for which we created the reservation.
Command line commands for Windows devices:
‘config /release’: Release existing IP address.
‘config /renew’: Renew an IP address.
Demo client environment
Computer name: server2.test.com
Operating system: Windows Server 2022 Datacenter
The IP address is assigned by default by DHCP (Dynamic Host Configuration Protocol). Make sure the client and server are on the same network.
4. Open Server Manager, select Local Server and click Assigned by DHCP.
5. Right-click the Ethernet adapter and click status.
6. Click Details for network connection details.
7. Check the IP address.
This educational article taught us how to assign a reserved IP to the DHCP server in Windows Server 2022. I hope this tutorial will be useful for you.