Do you want to host your site and domain on a Windows virtual server? To do this, you must first prepare a Windows VPS and a domain so that you can proceed with the steps. You can get your virtual server and domain from Ded9.com at the best price.
Teaching how to connect and host a domain to Windows Server
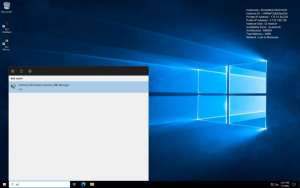
On your Windows Server, open Internet Information Services (IIS) Manager from the Start menu.

2. IIS manager opens a new window. On the right side, Connections, you can see your server name. Click on it. Then click on Sites.
3. Now, from the right side, Actions, click on the Add Website link. A pop-up window will open.
4. Under Site name, enter the domain name of your website.
5. Leave the Application Pool section as it is.
6. Click on the button next to the physical path button and go to the location of the site file. It is generally in the inetpub folder. You can also create a new folder for this site. For example, in this tutorial, we will create a file called index.html in a new directory called arvindnewsite.
7. Then, fill in the Type and IP address fields. Set the port to 80. Using a dedicated IP, you can leave the Hostname field blank. Otherwise, enter www.example.com and replace exampledomain.com with your website’s domain name. Make sure the box next to Start Website Immediately is checked. And then click on the OK button.
You have successfully added your website to IIS. You can see your website in the Sites section of your IIS Manager. Something like this:
Now you are ready to create your website. Make sure to host it in the folder we chose in step 6. We created a new file called index.html for testing. By entering your domain name, you can see this when you access your website.
We hope this tutorial has helped you host a domain in Windows Server 2022. If you need a web hosting service provider, Ded9.com can help you.