

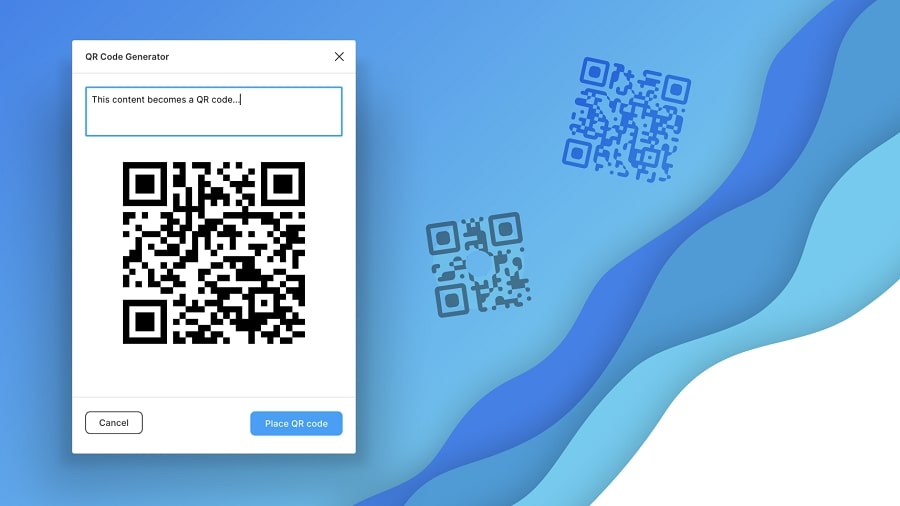
QR Codes Have Been Around For Two Decades, But They Never Became A Mainstream Tool. With The Outbreak Of The Corona Pandemic In 2020, QR Codes Came Into The Spotlight. Brand Owners And Marketers Tend To Use QR Codes As A Contactless Solution.
From adding QR codes to product packaging to replacing physical menus with QR codes, these scan codes are everywhere, especially on websites. What started as a contactless method of providing information has evolved into a direct communication channel with the consumer for most brands.
However, QR codes are often associated with security threats. To help you choose the safest and best QR code generator and add this feature to your website, we will show you how to use a WordPress plugin to work with QR codes and how to create a QR code using Vue.js and Quasar.
Master QR – QR code generator for WordPress
This plugin automatically generates a QR code whenever you publish a custom article/page/post. Users can access the desired website by adding these QR codes to their smartphones and scanning them. Each QR code generated is unique.
Users can disable any post from the QR code settings page. To close one or more positions, pages, or products, you can do so easily from the meta box settings.
Features of the free version
- Add QR code for website post types: post, page, product, custom post
- Beautiful DotScale QR code
- You can easily change the size of the QR code
- You can customize the DotScale range
- Adjust QR alignment
- Meta box support
Premium version features
In the premium version, you get bulk printing and can use a shortcode and built-in widget to create custom links, current page URLs, Wi-Fi access, Google Maps location, phone numbers, and WhatsApp chats. For Elementor users, the Master QR plugin is available in the primary editing panel and offers several options for easy use.


A QR code can be created for the following.
Current page URL: A great QR page to display your powerful site link in different styles using logo, spot color, and image or background color. You will find powerful options for a unique design that makes them stand out.
Custom QR Text, Number, Link: Create beautiful text, phone numbers, and custom links by adding this robust QR code to your website and making them dynamic using built-in features.
Google Location: The QR code is mighty for displaying your site or location. Google provides an excellent combination of longitude, latitude, and image. You can create an i-candy wrap design using the built-in positioning and offset features.
WhatsApp Chat: The WhatsApp Chat QR code is essential for accessing user chats, messages, and other advanced information. It offers extensive customization options to suit your needs.
WIFI Access: Connect to WiFi and share access using the Wi-Fi QR. Separate these codes using internal adjustment and positioning features.
Email Address: Visitors can quickly obtain their email addresses via the email QR code. Communicate with your visitors and customers and share information using the QR email generator.
How to make a QR code with VueJS and the Quasar framework?
Vue.js is one of the most popular front-end JavaScript frameworks today. It was created by Evan You in February 2014 and has grown in popularity. Its latest version is Vue 3.
You can install the Vue CLI with the following commands:
yarn global add @vue/CLI

# OR

npm install -g @vue/cli
What is the Quasar Framework?
Quasar Framework is a Vue.js framework that allows you to develop Vue.js applications with ease and simplicity, including components and other features. It supports SPA (Single Page Application), PWA (Progressive Web App), and SSR (Server-Side Rendering), and provides a BEX (Browser Extension). It makes the hybrid mobile app, multi-platform desktop app, and anything else you want available.
Quasar CLI can be installed with the following commands:
yarn global add @quasar/CLI

#or

npm install -g @quasar/cli
Once the Vue CLI and Quasar CLI are both installed, we proceed to the next step to add the QR code to our website:
Create a new Quasar application
We’ll create a new Quasar application by navigating to our desired location and running it:
Quasar creates QR-generator
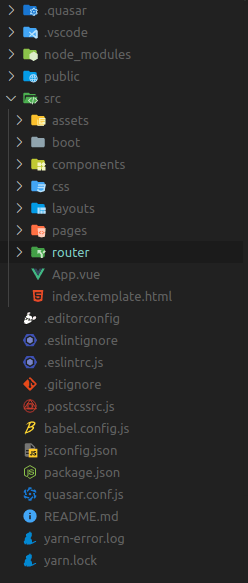
It might take a while, but we’re using Visual Studio Code. Once done, open the newly created QR-generator folder in your favorite IDE.
You should see a file structure like this:

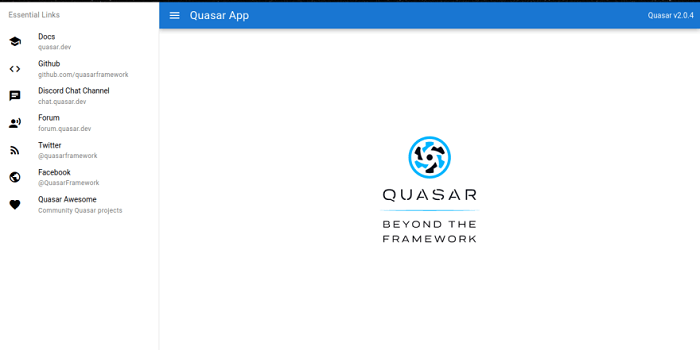
Now, we run the program by opening our terminal at the location of the QR-generator folder and typing:
quasar dev
We should now see a home page like this:

Now that we’ve created a new Quasar application, it’s time to get down to coding.
First, we go to the pages folder and open Index. Tue, we should see the following code:
< template >

< q-page class = "flex flex-center" >

< image

alt= "Quasar logo."

src= "~assets/quasar-logo-vertical.SVG"

style= "width: 200px; height: 200px"

>

< /q-page >

< /template >

< script >

import { defineComponent } from 'vue' ;

export default define component ({

name: 'PageIndex'

})

< / script >
We remove the image and add an input field and a button that connects the V models to create a two-way connection for the input:
< template >

< q-page >

< q-input v-model= "drink" label= "Input value to generate" / >

< br / >

< q-btn color= "primary" label= "Generate QR Code" / >

< canvas id = "QR-code" >

< / canvas >

< /q-page >

< /template >

< script >

import { defineComponent } from 'vue' ;

export default define component ({

name: 'PageIndex,'

data (){

return {

drink: ''

}

} _

methods: {

}

})

< / script >
Now, we’ll create a function in the methods that will allow us to generate the code, but first, we’ll test if it works:
methods: {

generated code: function (){

console. Log ( 'generated code' )

}

}
Then, we connect the function to the button with @click.
< q-btn color= "primary" label= "Generate QR Code"

@click= generate QR codee"

/ >
We should see the generated code message when we click the button and check our console.
Now, we need to create a QR code; for this, we need to install a library called curious:
$ npm install --save curious

# OR:

$ yarn add curiously
Then import it:
Import QRious from “curious” ;
Then, we need to add validation to the input field:
< q-input

v-model = "drink"

label= "Input value to generate"

:rules= "[(Val) => !!Val || 'Link field cannot be empty]."

/ >
Then, in the gene code function, we add validation and a code to generate the QR code itself:
generated code: function () {

if ( this . qrLink != "" && this . qrLink != "\n" ) {

new QRious ({

level: "H,"

padding: 25

size: 300

element: document. getElementById ( "qr-code" ) ,

Value: this. QR link,

} )

}

}
The code should be as follows:
< template >

< q-page >

< q-input

v-model = "drink"

label= "Input value to generate"

:rules= "[(Val) => !!Val || 'Link field cannot be empty]."

/ >

<br /> _

< q-btn color= "primary" label= "Generate QR Code" @clickgenerate QR codeode" / >

< canvas id= "QR-code" >< /canvas >

< /q-page >

< /template >

< script >

import { defineComponent } from "vue" ;

import QRious from "curious" ;

export default define component ({

name: "PageIndex,"

data () {

return {

drink: ", "

} ;

} _

methods: {

generated code: function () {

if ( this . qrLink != "" && this . qrLink != "\n" ) {

new QRious ({

level: "H,"

padding: 25

size: 300

element: document. getElementById ( "qr-code" ) ,

Value: this. QR link,

} )

}

} _

} _

} )

< / script >
We created a QR code generator, and adding this functionality to the website offers many advantages for our business.
FAQ
What is a QR code used for on a website?
A QR code lets users quickly scan with a smartphone to open a web page, download content, or access contact details without typing a URL manually.
How do you generate a QR code for a website?
Use a QR code generator to input the page URL or content, choose style options if available, and then download the generated image for use on your site.
How do you add a QR code to a webpage?
Upload the QR code image to your site and embed it in HTML or your site’s visual editor, placing it where visitors can see and scan it easily.