

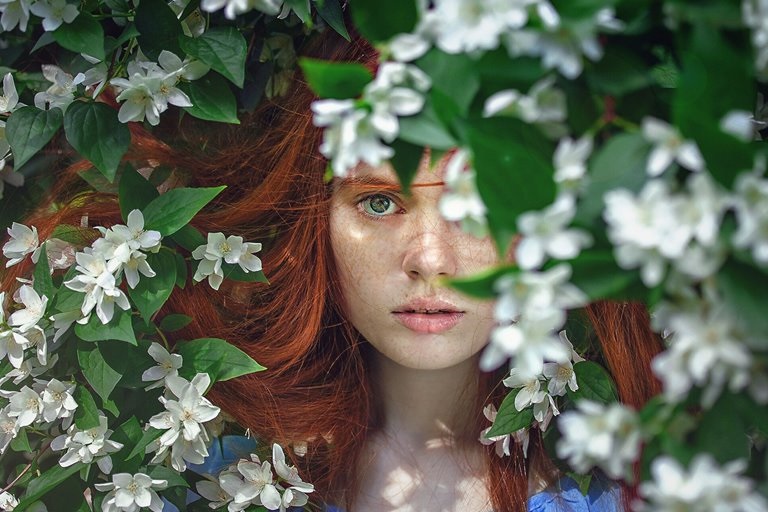
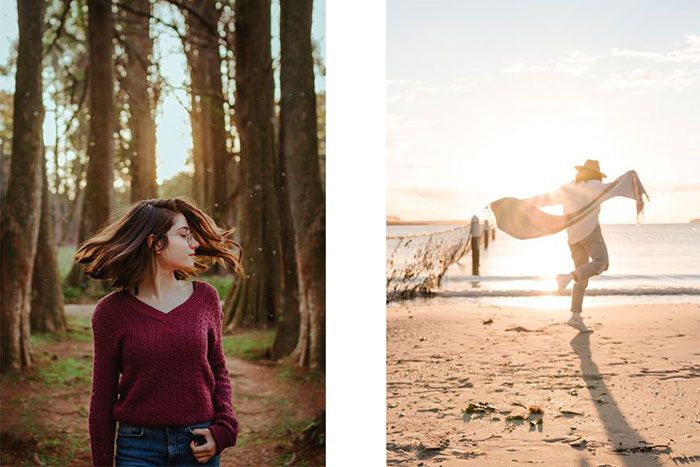
Everyone Has Taken Pictures Of Their Friends And Family At Least Once. Portrait Photography Is One Of The Most Popular Genres Of Photography; But How Can The Quality Of Portrait Images Be Improved?
Ever wondered if you could take better pictures of your friends or family? Do you enjoy seeing portraits of professional photographers? But you cannot achieve the same results?
Are you confused about choosing a variety of photography equipment and need help? If you answered yes to one or all of the above questions, please join us in this article.
The Titles You Will Read In This Article:
- What is portrait photography?
- Portrait photography equipment
- Camera settings for portrait photography
- Portrait photography lighting
- Composition in portrait photography
- Gesture in portrait photography
- Choose clothes and clothing style
- Final editing and selection of images
- Marketing and monetization
What is portrait photography?
Portrait photography means recording people’s nature, personality, identity, and attitude using backgrounds, lighting, and gestures. Although this definition sounds simple, portrait photography can be one of the most challenging types of photography. When a portrait photographer can capture the character of his subject well, the equipment he uses does not matter; However, having the latest equipment is not ineffective.

Portrait photography equipment
In photography, you can use any equipment you have. Whether you use a smartphone, compact camera, mirrorless camera, crop sensor, full frame or old video camera, you can capture beautiful images of your friends and family. As a result, do not let the idealism of your equipment distract you from photography. You can use this guide to improve portrait photography in almost any situation. On the other hand, having enough equipment can make your job easier. In addition to equipment such as the camera body or simple equipment such as a memory card, we need to mention a few examples of essential portrait photography equipment in this guide.
If you use a DSLR camera, you need to keep in mind that different lenses produce completely different results and affect the quality of your images. Most photographers prefer prime lenses for portrait photography; However, zoom lenses also produce various outputs due to the focal length adjustment. Whether you are photographing a wedding or a sports event, sometimes the distance of the subject from the lens has a significant effect on the output of the image. In such cases, using a zoom lens is the best choice for photographing people. Here are some commonly used portrait lenses.
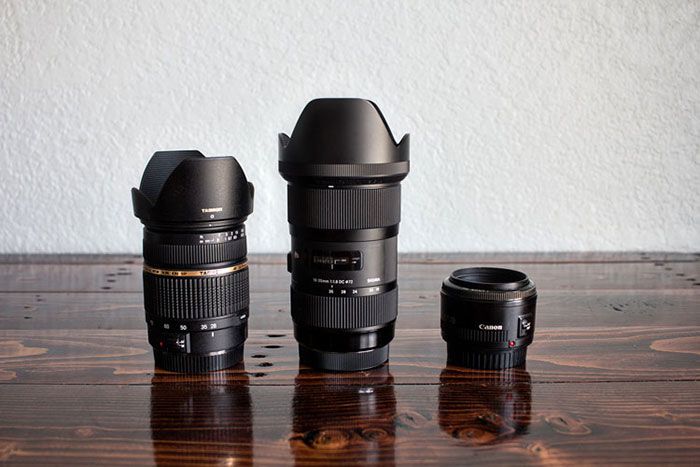
Prime lenses
- 35mm lens: This focal length is not suitable for old portraits in Soroush size; It is also suitable for photographing people with their surroundings. The 35mm lens (on the crop sensor or APS-C) is very similar to the angle of view of the human eye. As a result, it is the best choice for recording events and happenings in the environment. For this reason, this lens is widely used in genres such as street photography.
- 50mm lens: Many photographers buy a 50mm lens in addition to their lens kit. The price and flexibility of a 50 mm lens are not competitive; Because it can photograph with f / 1.8 or f / 1.4 apertures with this lens. If you use a full-frame body, a 50mm lens is useful for family photos; But if you use a sensor crop camera, the focal length of this lens is great for capturing portrait images.
- 85mm lens: Most 85mm lenses are highly flexible and allow you to fill the entire frame with the subject’s face or the whole body in the image without any distortion. In fact, a focal length of 85-105 mm is the ideal distance for capturing portrait images; Because in this distance, the images have less deviation and distortion. In addition, the compression of the 85mm lens makes the background appear closer to the subject, resulting in beautiful, striking portrait images.
Zoom lenses
- Sigma Art Lens 18-18mm f / 1.8: This lens, designed for crop-sensing cameras, has a range of popular focal lengths for photographing people. In addition, the ability to shoot at f / 1.8 makes this lens an ideal choice for shooting people and portrait photography.
- 200-70mm lens: For wedding photography or event photography in general, this lens is an ideal choice for photographers due to its high flexibility in capturing portrait images at different focal lengths. A 70-200 mm focal length range is useful to capture sincere emotions without approaching subjects.
When looking at different portrait photography lenses, remember that you need a lens that captures images at f / 1.2 and f / 2.8 apertures to achieve a fresh and beautiful background in portraits. Lenses with such settings are usually more expensive, But they are worth the cost.
If you are shooting with a zoom sensor camera, you need to multiply the focal length of your lens by the crop factor (a number like 1.5 or 1.6) to get the focal length of the lens for your camera. For example, placing a 35mm lens on a crop sensor camera is like using a 50mm lens.
The 17mm lens in the image above gives the model a strange look
The 70mm lens gives the model a more natural look
Another useful tool
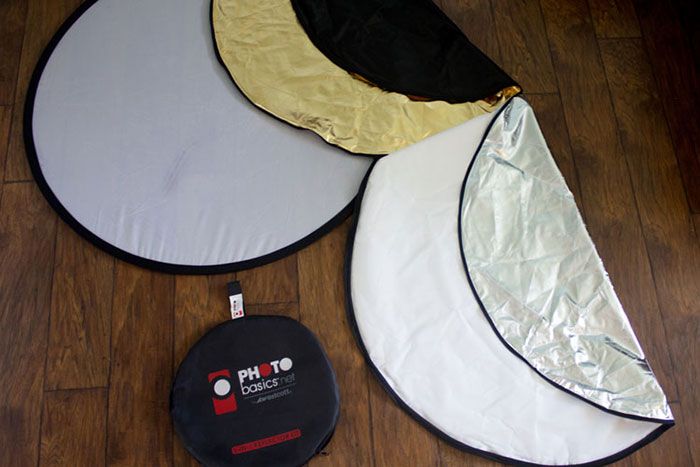
- Reflectors: With a five-in-one reflector kit, you can create a variety of lighting situations. Reflectors are not only suitable for reflecting hot and cold light to the subject; They also have the ability to absorb light and solve light problems when shooting from one to three people.
- Light sources: Even if you are shooting people outdoors in natural light, you can use alternative light sources for lighting. These light sources include side flashes, ring lights, and studio lights. In the lighting section of this article, we will introduce these lights in more detail. In general, the light source can dramatically increase the flexibility of photography.
Camera settings for portrait photography
Two of the most common camera modes for portrait photography are Aperture Priority and Shutter Priority.
Aperture priority
By selecting the aperture priority mode, you have to change the aperture to let the camera do the rest. You can also change the ISO to your liking, But you can leave this option to your camera. By selecting a small aperture (f / 1.8), you focus less on your image. Likewise, much of the image focuses on selecting a larger number for aperture (f / 8). If you want to capture a portrait image with a blurred background, you have to shoot at very wide apertures like f / 1.8.
However, increasing the number of subjects makes it difficult to focus more accurately. As a general rule for shooting a small group of people, the number of apertures should not be less than the number of subjects. For example, if you are shooting two subjects, you can set the aperture to f / 2 or higher. If you are shooting a family of three, you can set the aperture setting to f / 3 or higher; Especially if not all people are on the same level. Aperture priority mode is good for portrait photography or shooting a small group of people whose subjects do not move much.
Shutter priority
Shutter priority mode is preferred for shooting moving subjects. Whether you are shooting a football game, you want to capture a moment, take a family photo or practice street photography. Shutter priority mode is a good way to stop or emphasize movement in people.
Manual mode
In general, you can follow two rules when choosing a portrait mode:
- If your camera is on a tripod, you can also shoot manually
- If you do not have a tripod, select the aperture priority mode.
These two rules are usually 95% effective. Using your tripod will slow you down automatically; As a result, you can change the settings manually freely and voluntarily; Because you have more time to do this. In manual mode, you can easily see the differences in exposure in different settings.
Focus mode
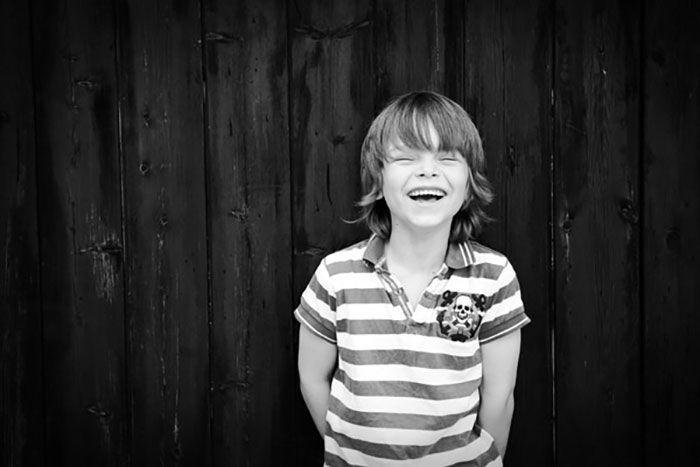
Using single-focus focus, do not allow your camera to focus on other points. This mode is suitable for photographing a subject. To achieve the right focus, try to focus on the subject’s eyes. If one of the eyes is closer to the camera, try to focus on it. Also, select Single Shot (AF-S) when selecting a focus, not the continuous focus; Because you want to autofocus on your subject, and you do not want to track the subject.

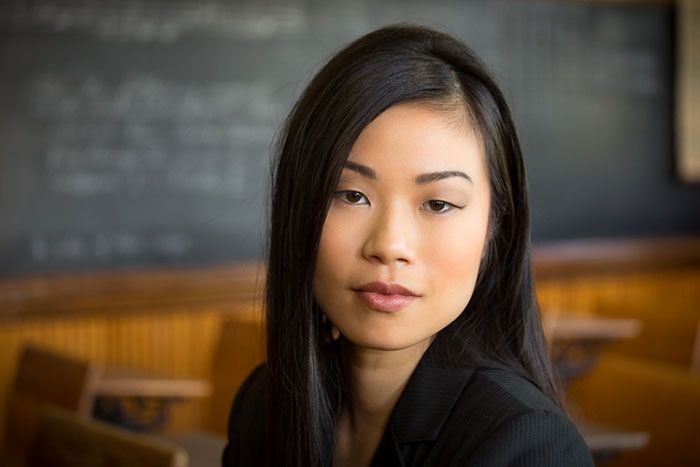
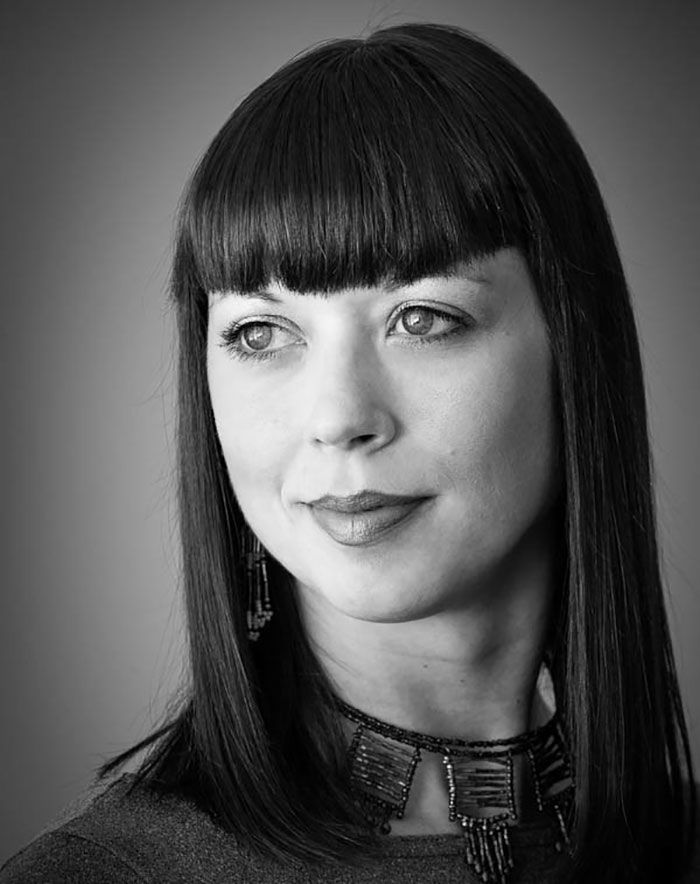
Camera settings: f / 2.8, ISO 200, shutter speed: 1/400. In this image, the focus is on the eye closest to the camera.
Portrait photography lighting
In general, photography means painting with light. According to such a definition, a photographer needs to understand the types of light sources and make the most of them. In-studio lighting, everything is under control, and artificial effects can use to create different effects; But in the open air, you should make the most of them by knowing the types of natural light. Also, outdoor lighting is highly dependent on the speed and timeliness of the photographer.
natural light
One of the most basic types of lighting is natural light. As can be seen from this simple definition, natural light originates from the sun and has no other source. Natural light can use for photography outdoors and indoors and in environments such as windows.
Outdoor portrait photography
The static and controlled nature of the studio provides the ideal position for capturing portrait images. Everything is in place, and all you have to do is change the settings; But outdoors, almost everything changes to light, colours, weather, and more.
Outdoor portrait photography is like having a white native, to which every natural element adds a new colour. Outdoors, not everything is under control; But a skilled photographer can adapt to the conditions by observing the necessary points and achieve good results.
Use a fast lens with an open aperture.
For outdoor portrait photography, you need a fast lens that focuses accurately. Also, the aperture should be wide enough. The faster you shoot and the wider the aperture, the darker the background. This effect is called “bokeh” in photography. Bokeh is one of the most popular elements in current portrait photography, removing background details and making the subject stand out.

Avoid direct sunlight
Amateur luminaires usually think that sunny days mean getting more light and lots of light. However, the opposite is true. The more light you have, the greater the chance of unwanted light hitting the lens and creating extra glare and shadows. On the other hand, cloudy days provide more natural and diffused light, and the photo has a cleaner effect. If you are shooting on a sunny day and have no choice, you can shoot in the shade or use a reflector to eliminate excess light.

Use the golden clock.
You must have heard the term golden watch by now. Simply put, a golden hour is a time when the sun goes down on the horizon. This time occurs just before sunset. As the sun goes down, light is emitted into the Earth’s atmosphere; In such a way that the orange light creates a pleasant colour.

Use of natural reflectors
In outdoor photography, you can use reflectors or natural reflectors around you to enhance the quality of the photo. Some of these reflectors are:
- White trucks
- White walls of the building
- White cars
- White sand
- Signs and whiteboards
- White tables
If not, natural reflector, you can use an artificial reflector to adjust light reflection.

The Sunny Law 16
The Law of the Sun is a classic 16 tips that have survived from the days of film photography. According to this rule, you can adjust the appropriate exposure for sunny days. Of course, all cameras have metering features; But these features are not accurate in some situations. On a sunny day, set the aperture to f / 16. According to this equation, the shutter speed will be the ISO image. For example, if the ISO is set to 100 and the aperture is set to f / 16, the shutter speed should be 1/100, and if the ISO is 200 and the aperture is set to f / 16, the shutter speed should be 1/200. On cloudy days, you can use f / 8.
Photography in RAW format
RAW format is the uncompressed file format that most DSLR cameras have. Even when shooting manually with a DSLR, the camera automatically adjusts some colour contrast and exposure. The camera usually compresses photos to JPG by default; But by setting the camera to RAW mode, you can save all the photo data and change it in the final edit.
Studio lighting
Another lighting option is studio lighting. In-studio lighting, you can use flash, standing light and other artificial light sources as the main light source of photography. One of the main advantages of studio lighting is the easy control of light and the absence of criteria such as weather. Studio lighting can be beneficial for creating high contrast images. Learning studio lighting is different from natural lighting.
In-studio lighting, lighting patterns are used. Lighting patterns are the distribution of light and shadow on the face and the creation of different shapes. There are four common patterns of portrait lighting:
- One-way lighting (split lighting)
- Loop lighting
- Rembrandt lighting
- Butterfly lighting

Split Lighting
In one-way lighting, as the name implies, only one side of the face is lit, and the other side is shaded. This type of lighting is usually used to create dramatic images, such as a portrait of an artist or musician. One-way light is more suitable for men and gives them a more masculine look; However, there are no specific rules for using this type of light.
To achieve this lighting, place the light source at a 90-degree angle to the left or right of the subject and slightly behind him. The placement of light relative to the subject depends on his face. You need to check how the light sits on the face and change its position accordingly.

Loop Lighting
Ring lighting is created by creating small shadows on the subject’s nose and cheeks. To create this type of lighting, the light source should be slightly above eye level and at an angle of 30 to 45 degrees from the camera. In this type of lighting, the shadows of the nose and cheeks should not meet. Try to create a small shadow; But keep in mind that the higher the light source, the stranger the shadows. Ring lighting is the most common method of lighting in the studio.

Rembrandt Lighting
The name of this type of lighting is derived from the famous painter Rembrandt; Because he always used this lighting pattern to draw his subjects. Rembrandt lighting can be identified by the triangle of light on the cheek. Unlike ring lighting, in which the shadow of the nose and the ring do not meet, in this pattern of lighting, the two meet and form a triangle of light in between.
To get the right Rembrandt lighting effect, you need to make sure that the shadow side of the image is light; Otherwise, the eye will become dead and pale. Rembrandt lighting creates a beautiful effect and gives a dark feeling to the image.

Butterfly Lighting
Butterfly lighting is so named because of the shape of the shadow it creates under the nose. This type of light can be created by placing the light source on top of the subject and behind the camera. This type of light is used to create attractive images and create shadows under the cheeks and chin. Butterfly lighting is also suitable for older subjects; Because it emphasizes wrinkles more than one-way lighting.

Composition in portrait photography
In addition to camera and light settings, the composition also plays an important role in the quality of portrait images. When choosing an environment, the first question you should ask yourself is, do you want to convey a story or convey an emotional meaning? Whatever your goal, choosing the right composition and background will help you get the message across.
Use guidelines
Guidelines are fundamental in landscape photography. These lines can also use in portrait photography to create striking photos. These lines help increase the photo’s depth and guide the audience’s eyes towards the subjects and add a three-dimensional feeling to the photo. You can use fences, hedges, paths, trees and sidewalks as guidelines.

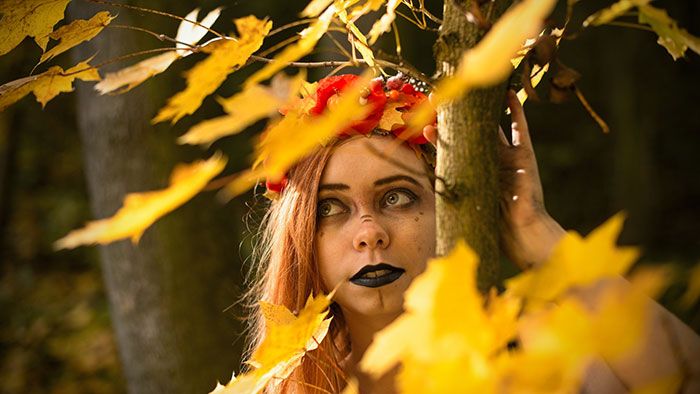
Brilliant leaves
If you place your subjects in front of the illuminated sheets, you will get attractive images. You can also use the tabs as a picture frame. It is best to use spot metering to expose faces and avoid silhouettes in these situations properly. You can also use extra reflectors to deflect extra light.
Attractive textures
A wooden door may not be an attractive background, but its textures can help increase the image’s contrast and make the subject stand out. Also, dilapidated walls or repetitive parallel lines create good backgrounds and compositions.
geometric shapes
The human brain likes to put the pieces of the puzzle together. For this reason, it puts the elements of a picture together like a puzzle. For example, the brain looks for shapes such as triangles, circles, rectangles or squares. Composition using geometric shapes helps to create order and harmony in the image. Geometric shapes can find almost anywhere. Geometric shapes often form the basis of modern art.
Background, middle and background
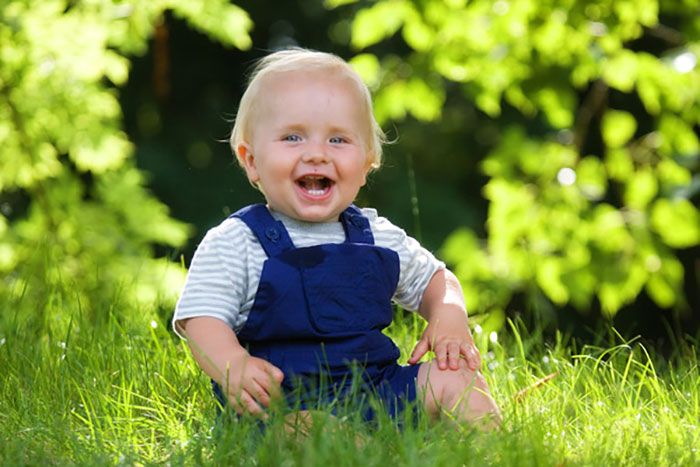
To add 3D depth and feel to photos, you need to direct the viewer’s eye to the foreground, centre, and background. In the image below, scattered sections of grass can act as a background. The child sits in the background in the middle of the sunlight passing through the leaves of the trees.
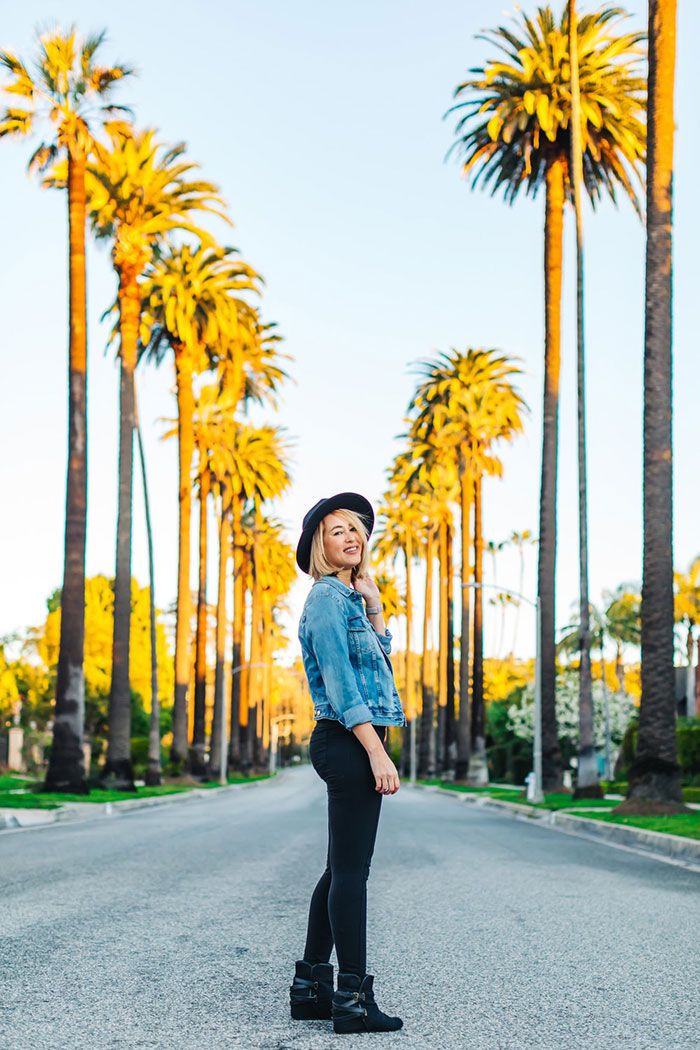
Tree streets
Tree streets can create beautiful effects due to their repetitive and regular effects. They also provide the necessary shade along the way. The path of the trees can help increase the depth of the image. You can use zoom lenses to create tunnel effects in tree streets.

Gesture in portrait photography
There is a big difference between taking a snapshot of people and creating a portrait. Often this difference is due to the relationship between the photographer and the subject. Professional models are usually well acquainted with the principles of posing and standing in front of the camera, But not everyone works with models. The subject of many photographers is ordinary people who have no experience in posing or controlling the face in front of the camera. Here are some tips to improve the subject’s gesture and stand in front of the camera.
Hair conditioning
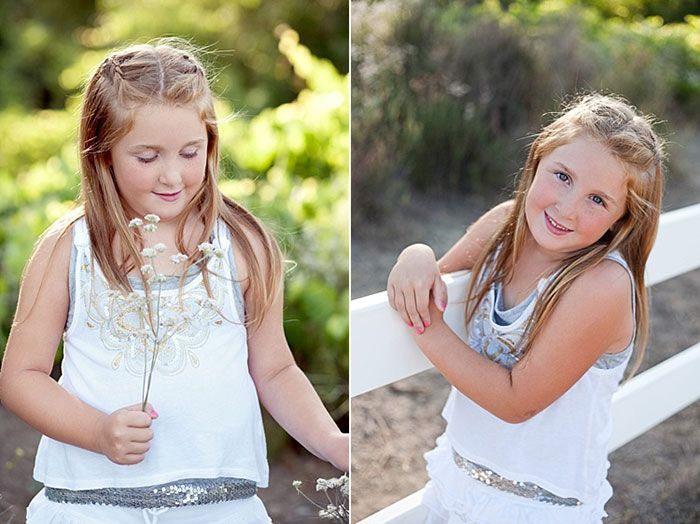
Many people do not consider hair a controllable part of a photo, But hair conditions can easily control. Bad hair is the first thing that catches the audience’s eye in a photo. Now suppose you want to achieve the best portrait photo without a hairdresser or makeup with the least facilities. First of all, try not to put your hair on the shoulder (number 1 in the picture). The following image shows five other hair styling models for portrait photography:
- Put all the hair behind the comb
- Put all the hair in front of the comb
- Part of the hair should be on one side (left or right)
- Hair to be tied
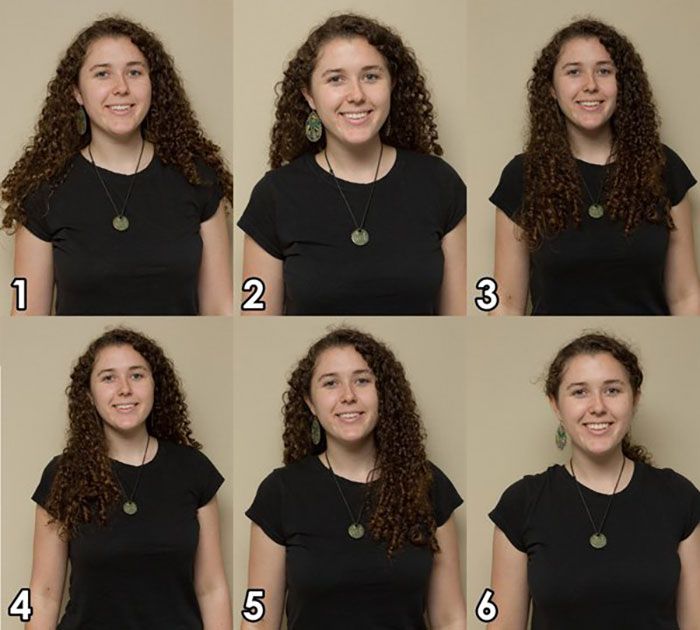

Note that you should avoid image number 1 in any case. The choice of other hairstyles depends on the model and appearance you want. Numbers four and five usually give the hair a more natural look.
Bringing the chin forward
When a person is standing normally, fat usually accumulates under his chin; As a result, the final output is an upward-facing face in which most of the nostrils are visible and does not look attractive. Try to ask the model to bring her head forward. The pictures below show the face and profile before and after adjusting the chin. This technique is sometimes called the turtle gesture technique; Because the head comes out of the shell like a turtle. This gesture may be a little uncomfortable for the subject, But instead, it leads to good results.
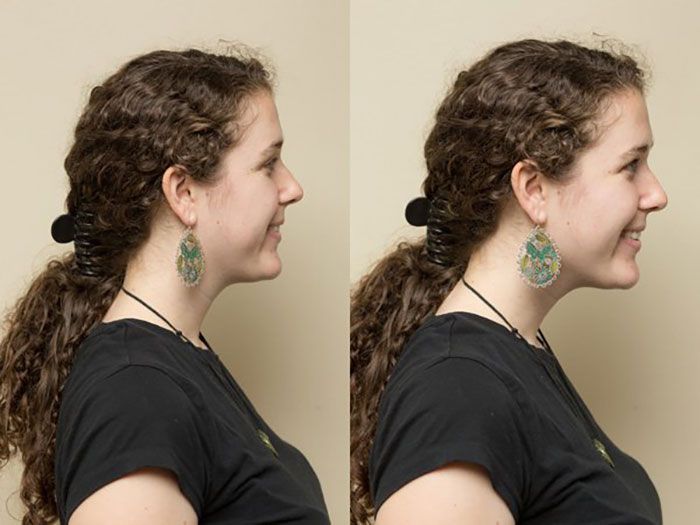
The same technique can be applied to male subjects. Normal head position is not suitable for a photo.

Raising the arm
Normally, the arms stand flat and flat, which can cause problems. First of all, there is a strange and uncomfortable appearance in the photo. Also, this position makes the arms bigger than the real position.
In this case, ask the subject to raise their arm by one or two centimetres; In such a way that it is floating and does not stick to his waist. You can also position the arms so that they are in a different position; So that the hand is on the hip joint.
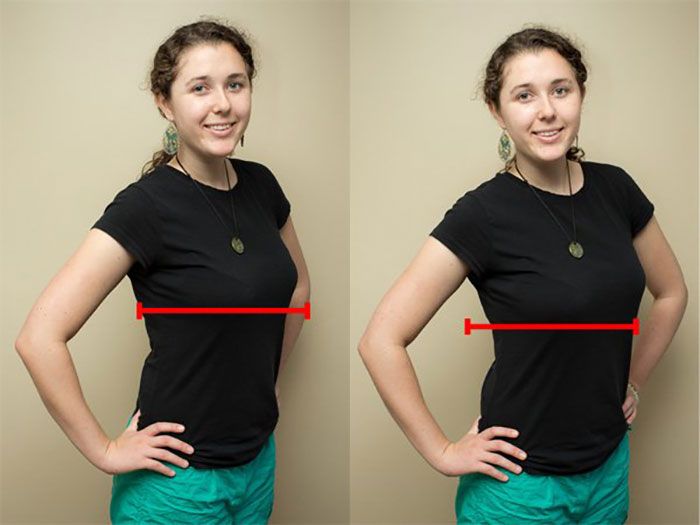
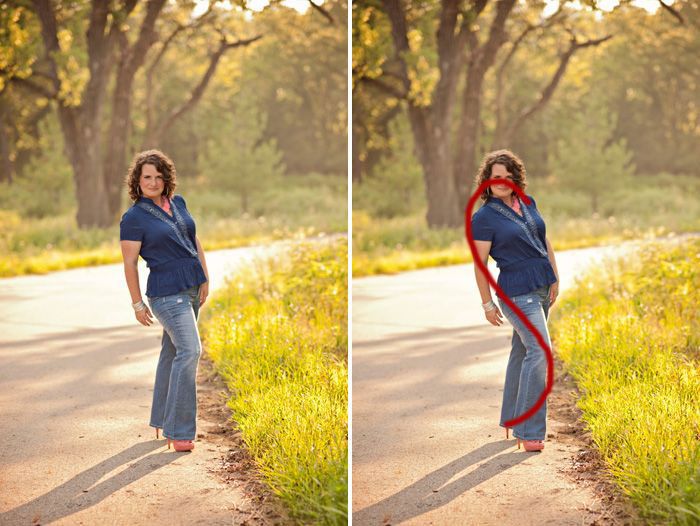
Create visual space with the waist
Everyone likes to look slimmer in pictures. One of the solutions is to shape the waist. In the picture below, the model has her hands on her hip joints. In the image on the left, the arm at the back has no distance from the waist. In this case, ask the model to slightly bending her back arm forward so that you can see the space between the arm and the waist. In this case, the waist does not look fatter than normal. In general, anything that makes the subject appear large in the background is a disturbing element. Other examples are subjects standing in front of tree trunks or light beams.
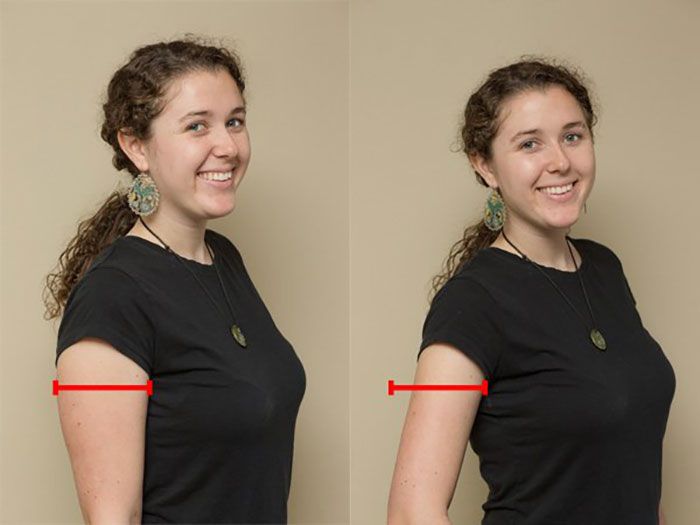
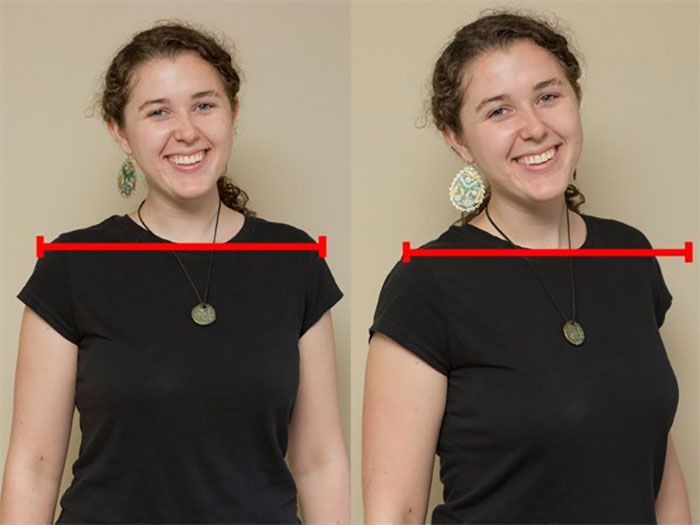
Rotate the shoulders
This is a straightforward but important point. It looks bigger if the subject is directly in front of the camera. This mode can be useful in photographing a football player or the CEO of a large company, But it is not suitable when taking portraits and showing beauty. Ask the subject to turn a little. In this case, the shoulders look thinner and thinner. In the image below, you can compare the length of the subject in normal mode with the gesture mode.
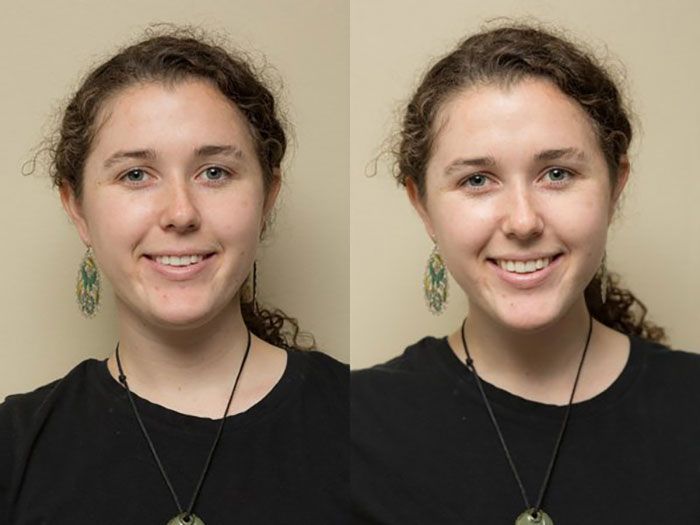
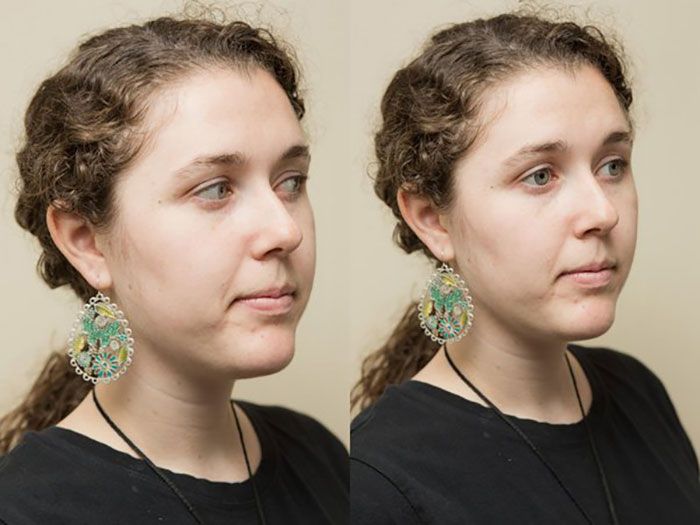
Do not show white eyes.
If you want to give a photo a dreamy look; The subject does not need to be told to “look there” to not look at the camera. Try to use the object behind you to guide the subject. For example, the photographer asks the subject to look at the door next to him in the image on the left. In this case, the whites of the subject’s eyes are facing the camera, which does not look good. In the second photo (right), the photographer asks the subject to look out the window. There is a small change in the direction of the eye, and it gets rid of the white part.
Do not let the nose divide the face into two parts.
This is a little more complicated, But it is essential. Suppose you do not want your image to be completely profiled, and you only want to frame three-quarters of the face. If you draw a hypothetical line to the corner of the face, the line should not cut through the nose; But if it cuts the imaginary line of the nose, the natural curve of the face disappears. In this case, a Pinocchio effect is created, which makes the nose more elongated. You can ask the model to turn slightly towards you to eliminate this situation and create a space between the end of the nose and the corner of the face.


Putting weight on one side of the body
For this gesture, ask the subject to bring one of his legs forward and place his weight on his hind leg. In this way, the subject looks more natural.
Stand cross-legged
Cross standing is common for women. You can cross your legs; Place your weight on your hind leg. The cross-legged gesture places more emphasis on body shape.
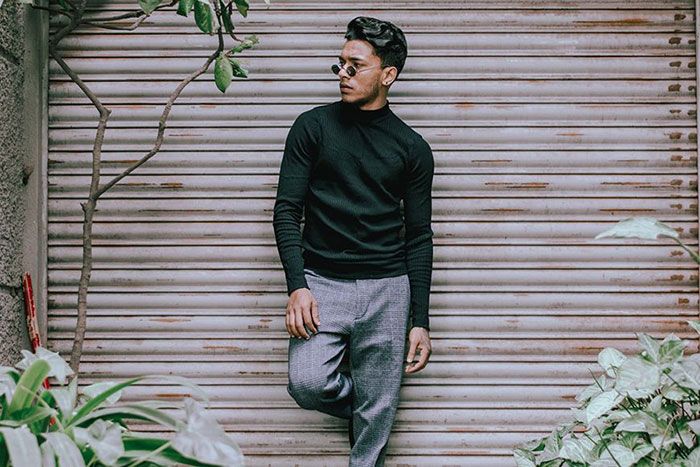
Leaning against the wall
This pose is one of the best portrait photography poses due to its great flexibility. You can use this gesture to photograph men, women, children and even older people and make small changes. Due to the presence of physical support, the body is in a comfortable position.
Lean against the wall with one foot up
If you want to take a full-length photo of a subject, you can use this simple and easy pose. This gesture is more appropriate when wearing a pants model.
Khamshidn Rubhoglu
Leaning towards the camera is a great way to shape the body and turn the face into the photo’s focal point. For this reason, this gesture is used in many portrait gestures. Remember that the closer you get to the camera, the bigger it looks; As a result, with this gesture, the body looks slimmer and slimmer. On the other hand, the face should not be unusual; Therefore, try to place the subject at a reasonable distance from the lens and do not use a wide lens in this case.
S-shaped gesture
This gesture is usually a feminine gesture. Position your model in an S-shape to emphasize body curves and curves. Of course, you should not exaggerate too much in this gesture to make it look strange. This gesture can be created while sitting, standing or lying down.

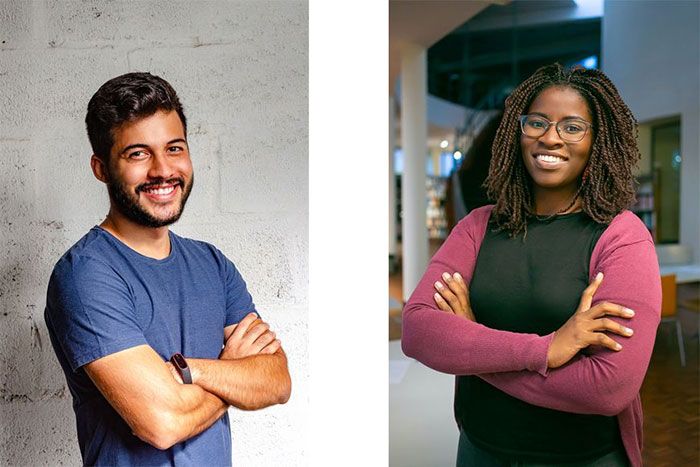
Cross arms
This classic pose is commonly used to photograph corporate profiles or portraits. This gesture usually needs to be photographed carefully; Because if the model looks tough or without a smile, it may look very rough.
Cross with one arm
This gesture is fruitful for both men and women. One of the arms can normally be left on one side (although bend it slightly not to become dead). The other arm is then placed on the elbow of the fallen arm. Based on the coverage and proportions of the model, the location of the arm can determine.
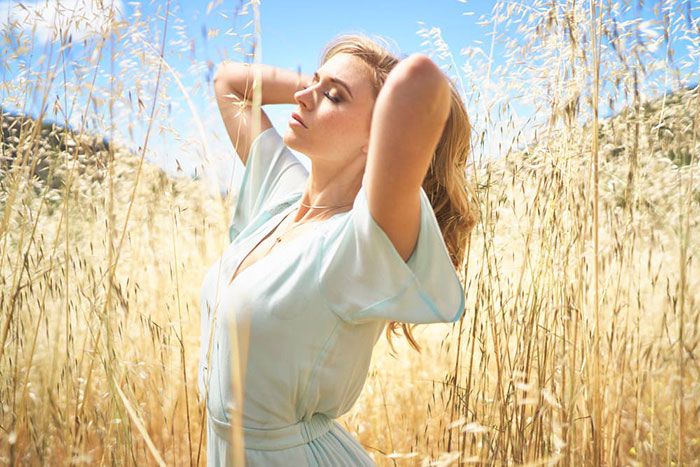
Raising hands
Portrait photographers often use this classic pose; Because it shows the subject narrower. This gesture also helps frame the face and position it as a focal point; Because the arms can act as guidelines and direct the viewer’s eyes towards the face. You can play with your hair or hold a scarf in the air with your arms up.
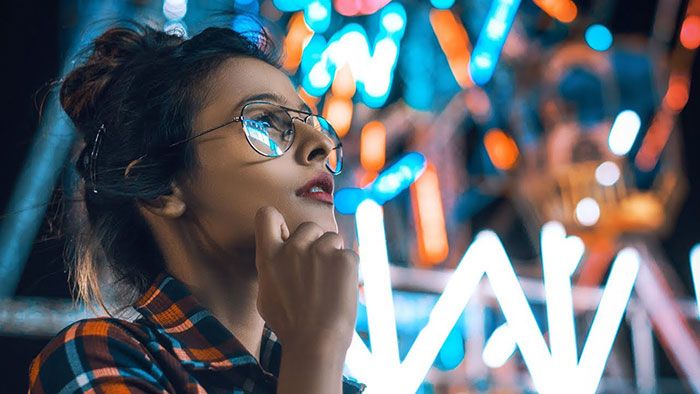
Hand under the chin
Placing the hand under the chin directs the viewer’s eye towards the face, the most important part of portrait photography. This gesture has many uses in head photography; But as you can see in the example below, it can also use to photograph the waist up. In this case, the subject’s fingers should be calm and comfortable to achieve pleasant results.

The hand gesture under the chin has become very popular in recent years due to the symbolic photo of the hand under the chin of Steve Jobs taken by Albert Watson.

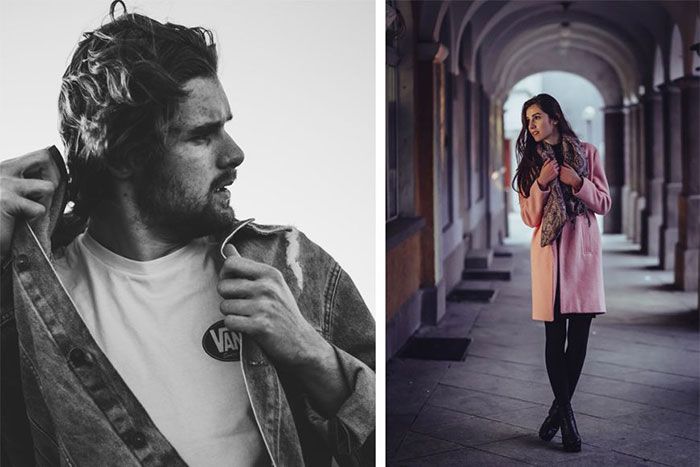
Grab the collar of the coat
Another popular gesture is grabbing a piece of clothing, which in many cases is usually the collar of a coat; But getting a scarf or a hat is also a good idea. Fashion photographers use this gesture to capture images from catalogues or magazines; Because in this way, the viewer’s attention is drawn to the clothes, and the details of the clothes are displayed better. This gesture is comfortable for the model; Because it makes the hands not useless. Also, this gesture has good results for men and women.
Put your hands in your pockets.
This gesture comes in many forms and is usually effective for both men and children, But it is also suitable for women if they have an everyday or casual appearance. You can create various poses by putting your hand in the front pocket, back pocket, pants pocket, jacket pocket, or both. This pose is one of the most popular options for portrait photographers due to its great flexibility.
Looking over the shoulder
This pose is suitable for creating attractive and mysterious effects based on the model’s type of clothes, environment, and face shape. You can ask him to turn his neck and look over his shoulder at the camera with the subject behind you. This gesture is suitable for a variety of subjects. For example, the subject could be a child sitting at a dinner table looking at you from a chair or a man on the sidewalk coming back and looking at the camera. Also, this subject is suitable for taking selfie portraits.

Turn the head
Some portrait gestures are effective on all subjects. Turning the head is one of them. This gesture is suitable for inducing a soft posture and adding movement to the head. Most professional models are familiar with their good angle and pose for the camera accordingly. For non-professional models, you can try both sides of the face and choose the part that looks best.
Add motion
One of the biggest problems with performing a gesture is avoiding looking dry. This happens when the model is anxious; Because he has to pose for a long time. One interesting way to prevent subjects from looking dry is to add movement to the model and capture her image. Creating movement is suitable for capturing family pictures or friendly gatherings, weddings and all kinds of fashion photography.
Sitting gestures
Sitting portrait poses can evoke both everyday and formal poses. Models can sit on the floor or in a chair, with their legs crossed or outstretched, or a combination of both. You can also use sitting gestures in a variety of situations. If you are shooting in the city, ask the model to sit on a ledge or ledge. You can use a tripod or chair and ask the model to lean forward slightly if you are shooting indoors.
to carry over the shoulder
If one subject is stronger than the other; You can try this gesture to push another subject behind you. This pose is suitable for photographing romantic couples, But it can also photograph friends or siblings. The gesture of laughing makes the model laugh, which gives the subject a pleasant and comfortable appearance. This pose is suitable for photographing close friends like the image below.
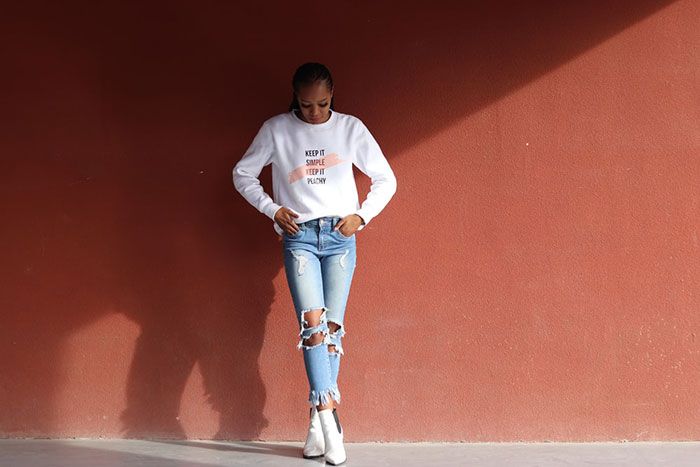
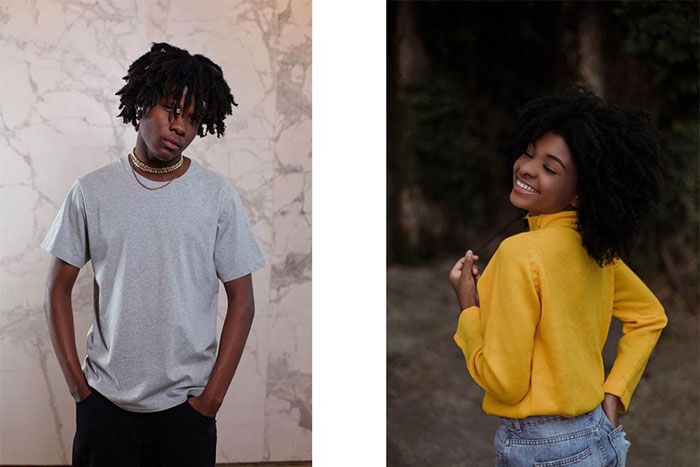
Choose clothes and clothing styles.
Most people wear a variety of clothing for photography. However, depending on the situation, such as the circumstances and the environment, you can help the subjects choose the type of clothing. For example, in street photography or birthday party photography, you can not influence clothing choice, but in ordinary portrait photography, you can give ideas to the model. These ideas can include options such as the colour and texture of the clothes.
The choice of clothing also depends on the personal style of the photographer; But regardless of the photographer’s personal style, there are general rules for choosing clothes in portrait photography:
- Neutral colours such as black, white, grey or garlic brown are always good choices.
- Try to wear clothes that have classic shapes such as circles or squares.
- When photographing families, it is best to wear all the clothes in one colour tone (warm, cool, neutral, etc.)
- Wearing or taking off a coat is a good way to increase your flexibility in photography.
- If you are photographing more than one person, make sure that the colours of the clothes are not the same.
Stimulating subjects
When photographing a subject with a gesture, the next step is to evoke the subject’s feelings by asking questions or talking to him. For example, when photographing children, you can do funny things to make the child laugh. If you are photographing a high school student or older, you can ask about their plans for graduation and get them excited. If you photograph a newlywed couple, you can ask them about a dating story or marriage proposal. When photographing a wedding, you can ask couples to practice dancing in front of you.
Final editing and selection of images
After capturing the images, you need to select the best images and perform the final editing process. If you shoot in RAW mode, you need Lightroom or Adobe Bridge to detect RAW files.
Select images
In the image selection process, first, remove all images that you think are not worth editing. Then, select all the images that you are interested in editing. Image selection depends on your preference, and there is no better way; But when choosing images, keep in mind that you do not need to select ten images with the same face mode, focal length, or camera angle. However, be careful of differences in the shape of the faces and details so as not to delete the photo error.
Portrait image editing
Whether or not to edit images in digital photography has always been a hot topic. There are many editing options, but the most common is the Adobe Creative Cloud suite for photography. This suite includes software such as Lightroom, Photoshop and a full suite of mobile applications.
Many photographers edit their images in batches using Lightroom defaults or Photoshop actions. If you are new to editing images, there is a complete set of templates and actions; But keep in mind that most actions and pranks are not technically designed and require changes to achieve results. In general, to get the best results, you should have a basic understanding of Photoshop or Lightroom software. When editing portrait images, try to stay true to the originality of the image as much as possible. Portrait photos can enhance with small changes in colour, light, and detail retouching.
Marketing and monetization
Suppose that after photographing family and friends, some people suggest that you start your own photography business. If you want to become a full-time or part-time portrait photographer, pay attention to the following points.
Business rules
The rules for small businesses vary from region to region and country to country. You must be licensed for a photography job; Sometimes, you even need to register your business name. Elsewhere, you will need to declare your income to pay taxes. It is best to check the rules of your place of residence. Even if you are not ready to start and register a business, it is best to do basic research.
- Building a portfolio: First, you need to create a portfolio of your work to show your career prospects to the client. Often, photographers make their portfolio free by offering photos of friends or family to improve their resumes. Another option for building a portfolio is participating in photography workshops that allow you to use images during an event.
- Brand building: After building a portfolio, you need a brand to enter the market. This step is usually accompanied by a brand, logo, watermark, profile picture, and often a colour theme that you can use online and in print.
- Online presence: One of the most important steps in developing a commercial photography level is online presence and communication. An online presence can include building a website, a photography blog, a Facebook business page or an Instagram account.
- Audience Development: Many photographers start their careers by photographing family and friends and gradually expand their audience. If you encourage friends or family to tag your photo pages on social media, you can expand your audience well.
Concluding remarks
In this article, we have tried to provide comprehensive information about portrait photography. However, the extension and generalization of some topics such as lighting and image editing are very detailed and require separate articles. If you are not worried about the volume of data above, you can learn all of them gradually with experience. Try to put your knowledge into practice. Only people who go out and experience it succeed.