


What Is Landscape Photography; Everything We Need To Know To Get Started
Landscape Photography Is One Of The Attractive Types Of Photography That, In Addition To Technique, Needs To Convey Emotion And Expression.
Landscape Photography, we discuss the technical and non-technical aspects of this photography genre.
Being in nature and recording moments is something that many people do today. The most important thing in photography is to enjoy the moments; Especially landscape photography, which provides an opportunity to experience fresh air and a calm atmosphere. In this article, we will introduce the necessary tips and tools for landscape photography.
The titles you will read in this article:
- What is Landscape Photography?
- Start landscape photography
- Landscape photography equipment
- Camera settings for landscape photography
- Search for a photographic perspective
- The perfect time for landscape photography
- Weather information and forecast
- Composition in landscape photography
- Transmit emotion in landscape photography
- Edit landscape images
- Share landscape photos
- Making Money From Landscape Photography
What is Landscape Photography?
Landscape photography is the art of capturing natural and outdoor landscapes. The best images show the photographer’s connection to nature and his understanding of the world around him from wide to small details. Landscape photography is the best way to get away from the hustle and bustle of everyday life and enjoy the natural spaces. Landscape photography for some people means hours and days of traveling and searching for beauty. Some people dream of becoming full-time professional photographers and do not look at landscape photography as a hobby.
Start landscape photography
This guide is useful for you, whether you are shooting with a smartphone or a professional camera. Inspiration is significant in landscape photography. Where is your source of inspiration? You can also find this resource in your daily life: movies, collections, art, new events, and a summary of everything around you. If you have ideas, write them down. The source of inspiration for landscape photography can be a specific situation or place. You can take a close-up view of your home or move to another country. Exploring is an important part of landscape photography. First of all, we need to get acquainted with the technical aspects, including equipment. In the next section, we will discuss the aesthetic points and share and find the subject.
Landscape photography equipment
In general, equipment is not the most important factor in landscape photography. As mentioned in the previous section, landscape photography can also do with a smartphone. The choice of the equipment largely depends on the type of application and the professional level of your work. In any case, it is not without merit to get a basic understanding of the important equipment of landscape photography.
Camera
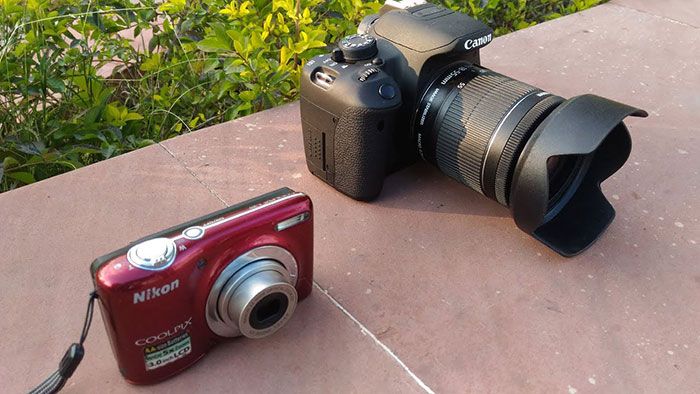
Digital cameras fall into three categories: point and shoot or compact cameras, DSLR cameras, and mirrorless cameras. Point and shoot cameras are small digital cameras that most novices use. The lenses of these cameras are not interchangeable and have small sensors that limit the image quality. Point-and-shoot cameras are commonly used to capture snapshots. If you are serious about photography, you need a camera with a larger sensor, manual settings, and the ability to change lenses.
DSLR cameras are the most popular type of camera for landscape photography for several reasons. With these cameras, you can shoot in RAW format and capture maximum image detail. These cameras have different shooting modes, including manual mode. DSLRs also have large sensors on which you can mount a variety of lenses.
Mirrorless cameras are a relatively new technology. The specifications of these cameras are the same as DSLRs, but they do not have a built-in mirror-like mechanism. That’s why mirrorless cameras are usually lighter and smaller but not cheaper. However, if weight and size are important criteria for you, you can use mirrorless cameras.
Sensor size
In terms of image quality, sensor size is the most important factor, and contrary to popular belief, megapixels are not as important as sensor size. The largest sensors are known as full frames; Because they are the same size as a 35mm film negative. Whether buying a mirrorless camera or DSLR, you will have to pay more for a full-frame sensor.
Sensors smaller than full-frame are known as crop sensors. There are many types of cameras with these types of sensors that are also more cost-effective. The third sensor with a smaller size is the four-thirds sensor. In fact, there are different sizes between the three sensors, but these are the three most common types. Smaller sensors than these three can find in compact cameras and mobile phone cameras.
In general, it is recommended to choose affordable options that both feel good in your hands and have a menu system. These days, many mirrorless DSLR cameras are available that offer almost all the same features, so do not waste your time on different brands.
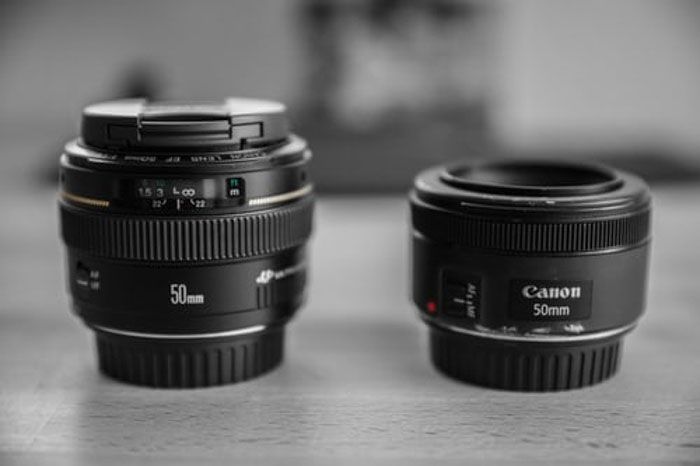
Lenses
After selecting the camera, you should choose lenses that offer various focal lengths from wide-angle to telephoto. The wide-angle lens puts everything in your field of view, while the telephoto lens allows you to zoom in on distant subjects.
The choice of lens is significant; Because the lens affects the output of the image more than the camera. Sharpness, contrast, focus, sharpness, and detail are all almost determined by the lens. The lens shapes the image while the camera only captures it. Many photographers prefer low-cost cameras with high-quality lenses. Because lenses do not wear out over time, it is worth investing in them.
Prime lens compared to the zoom lens.
Le.nses are divided into two forms: prime and zoom. The prime lens has a fixed focal length of about 35 mm. The zoom lens has a variable focal length, such as 18 to 55 mm. Prime lenses are usually sharper than zoom lenses. But zoom lenses are more flexible, and with these lenses, you will not need multiple lenses. It is recommended to use zoom lenses for landscape photography that cover a focal range of 10 to 200 mm:
- 10-18 mm wide zoom lens
- The normal zoom lens 18-55 mm
- Telephoto lens 55-210 mm
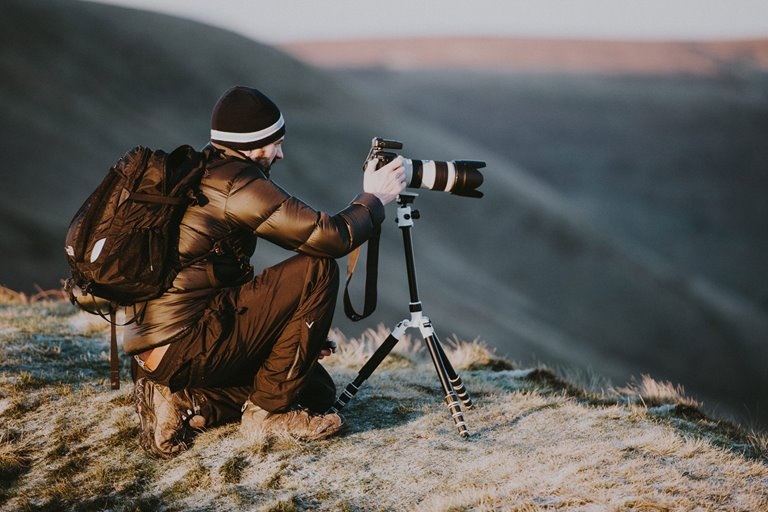
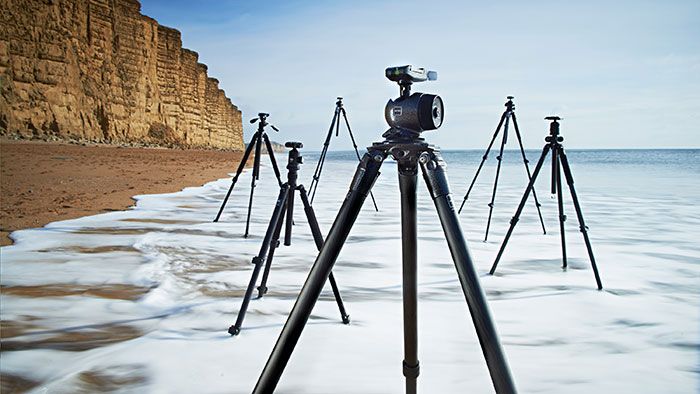
Tripod
The tripod is one of the essential pieces of equipment for landscape photography. You can shoot by hand when there is much light in the scene, but you need a tripod to use slower shutter speeds in low-light situations such as sunrise or sunset.
Most landscape photography techniques require the use of slow shutter speeds. The choice of tripod type is important here. For example, a cheap tripod is not strong enough to hold the camera and lens steady or against all kinds of winds. Buying this type of tripod is a waste of money. On the other hand, if you spend money to buy a suitable and strong tripod from a reputable brand, you can use it for a long time. Also, make sure your tripod can withstand the load to make sure it can hold your camera for a long time.
Filters
Many landscape photographers use filters. You can use the filter to enhance your images. Two common filters for landscape photography are the polarizing filter and the neutral density filter, or ND. ND saturation filters can also be useful, but they are difficult to use when there is no clear horizon line.
Polarized circular filter: This filter is useful for photographing water and removing reflections and glare from its surface and allows the registration of rocks below the water surface. It also helps to improve the color of the blue sky or remove reflections from windows and other bright surfaces in urban areas.
Left image: without a polarizing filter, right image: with a polarizing filter
Neutral Density Filter (ND): If you want to shoot in the middle of the day with lots of light, you can install this filter in front of your lens. This filter prevents excess light from hitting the sensor and allows a slower shutter speed to be used. These types of filters have different intensities and can be used for different levels of light absorption. Note that the size of the filter fits your lens.
Other equipment
You can also carry the following equipment in your camera bag, depending on your needs and location.
- Remote control: You can use the remote control for long exposure without touching the camera. Using the remote control is also useful for exposures longer than 30 seconds.
- Rocket blower: You can use an air blower to remove dust from the sensor quickly. You can also remove water from the surface of lenses and filters.
- Rain for the camera: Always look for a plastic or quality raincoats. In landscape photography, you never know what happens and how the weather changes.
- Lens Cleaner: Use quality cloths to clean your lenses and filters.
- Power Bank: Having a power bank is always necessary to charge a phone or even a camera. Some cameras today are charged with a power bank.
- Flashlight: The flashlight is especially needed for moving in fog or absolute darkness.
- UAVs: UAVs can provide wider angles for capturing landscape images. UAVs have become very popular in landscape photography these days. These tools are small and portable. Of course, having a drone is not necessary, and you can use it as you wish.
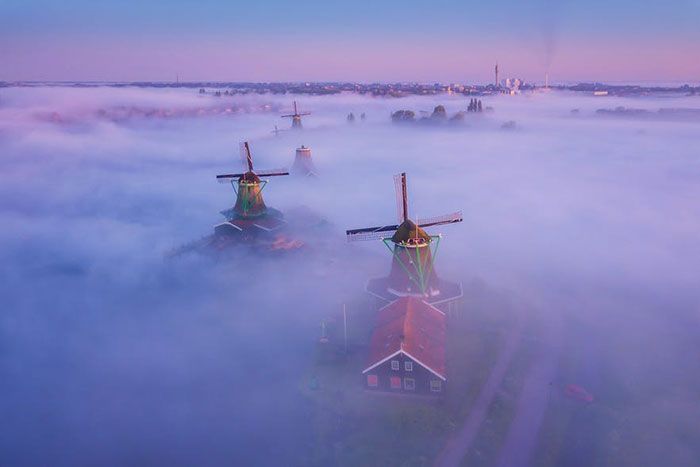
Beautiful image of a drone in the Netherlands
Camera settings for landscape photography
Camera settings vary based on landscape type, time of day, and weather, but the initial settings generally can be broken down.
Diaphragm opening
Aperture is one of the most important landscapes photography settings, depending on the depth of field and the sharpness of the image. In landscape photography, we usually want a large part of the image to be in focus. For this reason, apertures close to f / 11 are commonly used to achieve the high-focus vision. In general, for standard landscape photography (such as shooting a typical daytime landscape), an aperture between f / 7.1 and f / 13 is appropriate. In this range, the whole image is in focus and has enough sharpness.
Shutter speed
The shutter speed in landscape photography depends entirely on the situation. Shutter speed does not matter much when there is not much movement in the scene. In general, aperture and proper shutter speed contribute to proper exposure. Adjusting the shutter speed depends entirely on the amount of light and time of day.
If you are shooting at high-speed subjects such as birds, the ideal shuttle speed could be 1 / 1000th of an ounce, capturing all motion perfectly. You can use high or low shutter speed to capture a waterfall. High shutter speeds are hidden when you want to capture water droplets with great detail and texture. By slowing down the shutter speed to 1.50 seconds or even a second, the appearance of the waterfall changes completely and becomes silky.
ISO
For landscape photography, it is better to use the lowest ISO of your camera, which is often 100 ISO, and on some cameras, it is 64 or 200 ISO. At low ISO, you will have the most dynamic range and the least amount of noise; But when shooting at night, you can use higher ISOs such as 1600 or 3200.
RAW shooting
Most people are accustomed to shooting in JPG output format, which is the default setting for most cameras. JPG is a compressed format which means that some of the data recorded by the camera are ignored to achieve a smaller file. On the other hand, the RAW format is completely uncompressed and does not delete any information from the image.
The result of RAW shooting is a large file that you can open via Adobe Camera RAW, Lightroom, Photoshop, and other image editing software. It is better to shoot in landscape photography to change the light settings and details later. You can try the camera’s RAW + JPEG combination mode if you always shoot in JPG mode. This way, you will have both output formats.
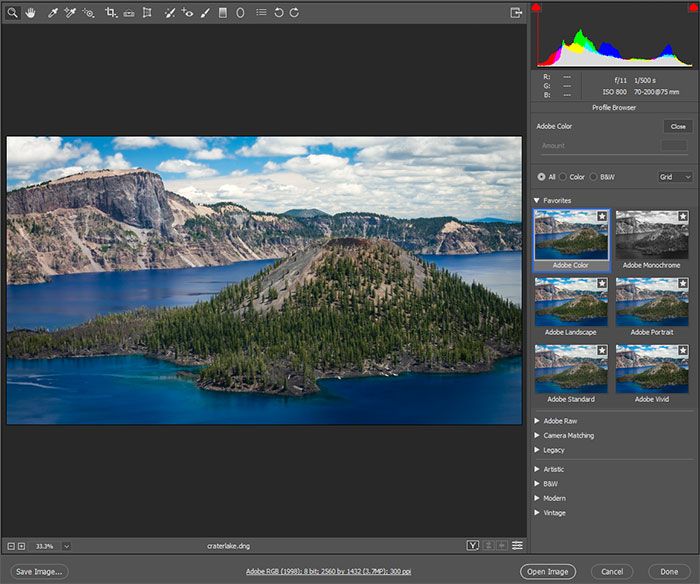
View of Adobe Camera Raw software used to adjust the brightness and color of Raw images.
Landscape photography mode
Professional cameras have different settings called shooting modes, classified as follows: auto mode, aperture priority mode, shutter priority mode, program mode, and program mode. Manual mode. Aperture priority mode is recommended for landscape photography. This mode is indicated on cameras by the abbreviation A or Av.
Using the aperture priority mode is that the aperture can control the image’s depth of field. Depth of field refers to the part of the image that is completely in focus. In landscape images, too, everything usually has to be in focus so that you can use the f / 11 or f / 18 setting in aperture priority mode; But sometimes you want only one subject to be clear and a large part of the image to be out of focus, in which case you can use f / 4 or f / 5.6 aperture. Using the aperture priority mode allows you to select based on the artistic landscape, and the camera selects the shutter speed accordingly.
An example of a low depth of field is obtained by opening the aperture at values such as f / 4
High depth of field: Almost everything is in focus
Metering mode
Matrix metering is the most common mode of metering in landscape photography because, in this mode, the camera reads light information from all parts of the frame. Matrix metering is the best way to capture shadows and lights. However, the camera’s light meter may be deactivated if there are too many dark shadows or too many bright lights in the image. In this case, you can switch to point metering mode. In this case, the camera performs its readings based on a point in the frame.
Spot photometry
Focus mode
Professional cameras usually have four focus modes: single-shot autofocus, automatic autofocus, continuous autofocus, and fully manual focus. The best option for landscape photography is the single-shot focus, as it adjusts the camera’s focus only once by half-pressing the shutter button. Other focus modes are useful when you have a moving subject, and you want to lock the focus on it.
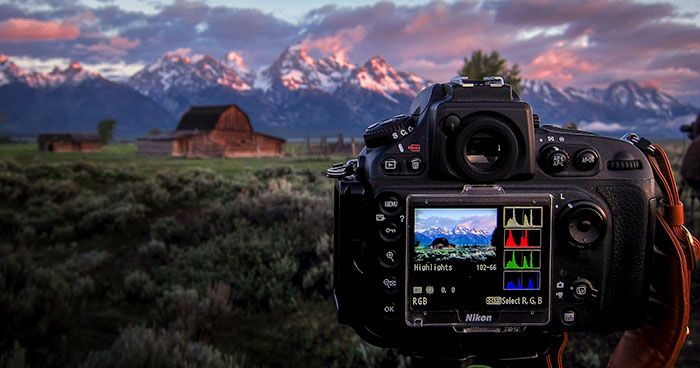
Histogram
When shooting, try to look at the camera histogram. Make sure the top of the histogram is not tilted to the left or right. With the histogram, you can see the distribution of shadows and highlights of the image. If one side of the histogram is raised and the chart is not in the middle, the details are missing in parts of the image. This feature is significant in the final editing of images.
Other popular techniques
Bracketing: You can use the bracketing technique if you can not adjust a landscape due to strong contrasts within the histogram (for example, strong contrast at sunrise or sunset). In this method, the camera captures several dark and light images to cover the entire dynamic range of the scene. Most cameras have bracketing settings. Usually, three to five photos are taken with one or two degrees of light difference. The best results depend on the camera.
An example of bracketing for separate front and sky lighting
Panorama: If you do not have a wide-angle lens, you can shoot in panorama mode. Do not use the camera’s auto panorama modes. Instead, you can take pictures separately. The best way to do this is to capture images in portrait mode (portrait) with approximately 50% overlap. You can then put the images together in Lightroom software.
Panoramic photography is made by stacking overlapping images.
Fo.cus Accumulation: Sometimes, we want to get too close to the background. You can’t keep everything in focus at close range, even with an aperture of f / 14. In this case, a technique called focus accumulation can be used. Focusing means capturing multiple images at different focal lengths and then combining them through simple image editing so that everything is finally in focus.
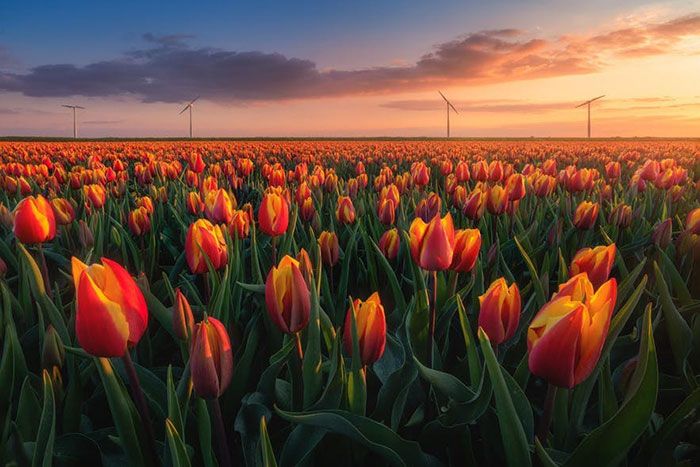
An example of focus stacking designed to place tulips and background view in focus
Search for a photographic perspective
What sights are appealing to you? In landscape photography, it is necessary to scrutinize your surroundings. Even the normal route to the workplace can provide you with interesting subjects. You often lose great subjects because you ignore your surroundings. Always try to take a fresh look at your surroundings, and when you find an interesting subject, simply record it with your smartphone.
Google Images
Google is a potent tool. You can find the images and situations you want through the Google Images section. Even if the image does not have a specific name or address, you can use Google’s reverse image search feature to find data related to similar images.
If you plan to visit a new location, simply type the location’s name in Google Images and add the phrase photo spots. This way, you will find the most popular images of the desired landscape.
Instagram is one of the best sources of inspiration for landscape search, But you should know how to make the most of Instagram. For example, you can easily search for different locations. Even the most remote places on earth have pictures. These images may not be high quality, but they can give you photography ideas.
Another option is to search for images using hashtags. Through places, you can find the most popular images and situations and then see the hashtags used. You can find more pictures through these hashtags. Hashtags are a great way to position yourself on Instagram.
Google Earth Pro
Google Earth is one of the leading sources of mineral resources. With this tool, you can even see your house in 3D. Google Earth is very detailed these days. You can see mountain landscapes in great detail and explore an entire area in three dimensions. Google Earth is also a great tool for finding new photography opportunities in lesser-known countries, as it allows you to see places that have never been photographed before.
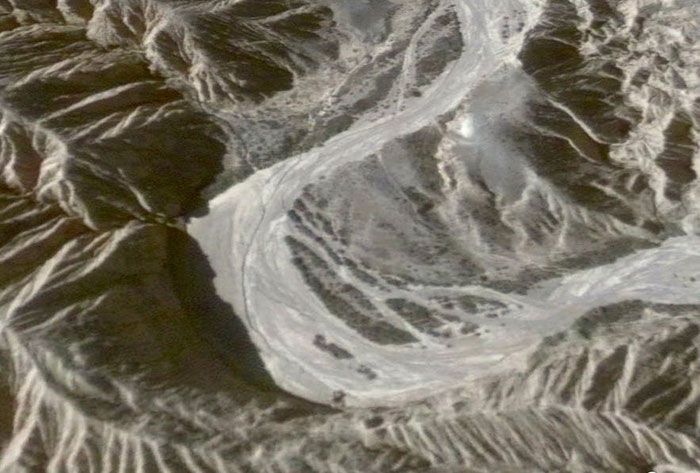
Screenshots of dry rivers in Kyrgyzstan on Google Earth Pro
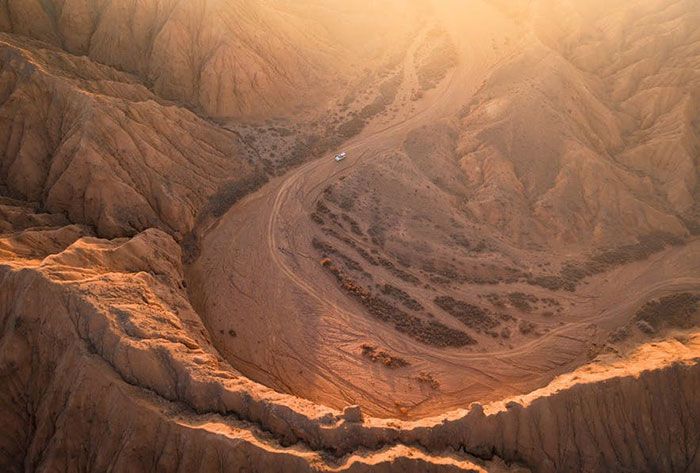
A real view of a dry river in Kyrgyzstan
Lighting in landscape photography
Understanding natural light is an essential aspect of landscape photography. Even when everything is in place, poor lighting can prevent images from being at their best. In landscape photography, you have to experience all kinds of lighting situations. You can easily change the direction of the light by moving towards the subject or shooting subjects that are in the shadows.
Sidelight
Lateral light hits the subject from the side and casts a shadow on the other side. This type of light is the most desirable light for landscape photography because the contrast between light and brightness creates texture and shape. If you have a round object with a sidelight, a shadow will appear on the other side, and the grading of the light will emphasize its round shape. Similarly, textured subjects have shadows that emphasize texture. Without shadow, the texture shows its hardness.
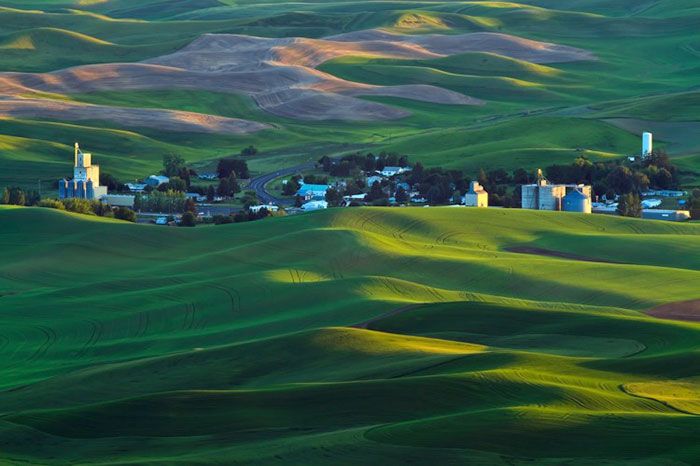
This photo was taken from the Palos Washington area, showing the sidelight of the hill curves in the best possible way.
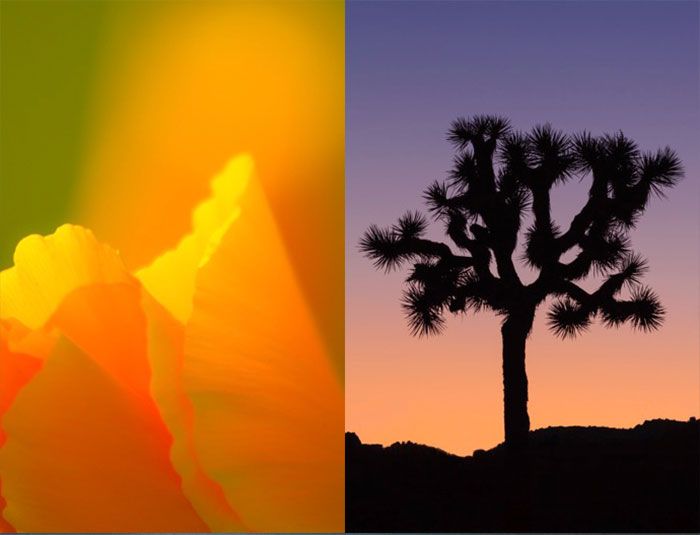
Backlight
Backlighting occurs when the light source is directly in front of you and hits the subject’s back. It is difficult to achieve proper exposure in such conditions. Back exposure is useful when the subject is slightly transparent (for example, the petals of a flower), in which case an internal glow is produced in the subject. This type of lighting is also useful when you have a dark background. In this situation, you can measure the subject so that the rest of the image is in the shadows.
Backlight is also useful when the subject has an interesting shape and can be photographed silhouette. For this purpose, a suitable exposure should adjust for the sky section. When you have a backlight and want to measure a certain part of the frame, you can use point metering instead of matrix metering. It is difficult to work with this metering mode, but instead, it produces more beautiful effects.
Opposite lighting
Opposite light occurs when the sun hits a subject in front of you from behind. This type of light is usually intense and does not create much texture or depth. However, if you use it at the right time, such as sunset or sunrise, it can have good results and give the subjects a golden glow.
Broadcast light
Diffuse light usually appears on cloudy days or when the subject is in the shade. In this type of light, the subject has pastel colors and transmits a soft, shadowless texture. You will not achieve this effect in other lighting conditions. In diffused light, the landscape has little contrast.
This type of lighting is suitable for creating relaxing and soft images. For example, landscapes with colorful flowers produce good results in diffused lighting but remember that it is better to get closer to the subject on clear cloudy days.
Achieve proper exposure
Achieving the right exposure means balancing exposure, such as aperture, shutter speed, and ISO, so that no image frame area is too bright. If the image becomes too bright, you will not be able to make any changes during the final editing step, and you will always have white spots. As we said before, you can use the camera histogram to check the dark and light points of the image.
But how is it possible to achieve exposure balance? In landscape photography, it is the aperture that affects the depth of field of the image. The smaller the F-stop, the greater the aperture and the more light that hits the camera sensor. This process is a bit confusing; Because F-Stop is actually a ratio. We will not go into too much detail about the math here. Just remember that 1/2 is greater than 1/8; As a result, f / 2 is greater than f / 8.
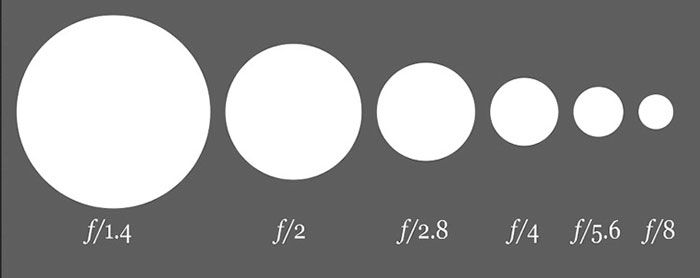
The more the valve is opened, the shallower the depth of field. In other words, the amount of clear vision will be less than the subject. Below are three images that show the effect of aperture on depth of field. After the aperture, it is time to adjust the ISO. As we said in the previous section, to achieve the proper exposure in landscape photography, it is necessary to set the ISO to its lowest value, which is 100 on most cameras. Of course, in some dim conditions, such as aurora photography, you may need higher ISOs. The third side of the exposure triangle is the shutter speed. If the shutter speed is less than 1/100 of a second, you may need to use a tripod.

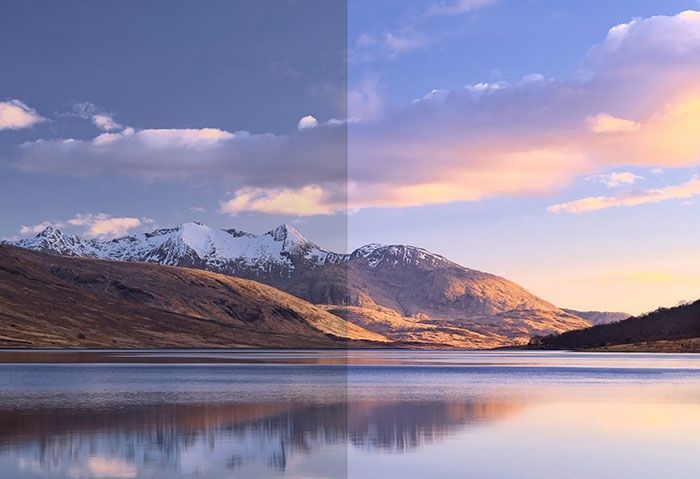
The perfect time for landscape photography
We need proper lighting for landscape photography, but exactly when should we shoot during the day to get the most out of light?
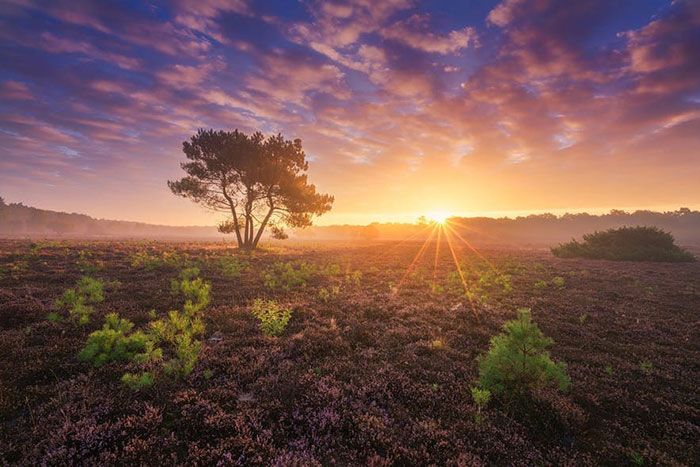
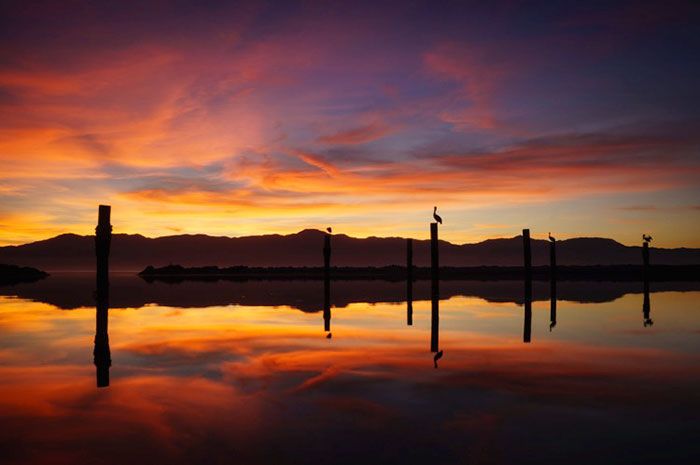
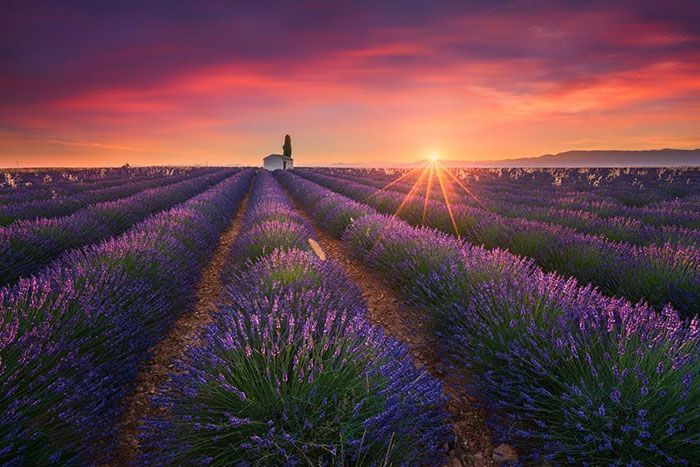
Sunrise and sunset
Sunrise and sunset are some of the most popular times for landscape photography that depicts dramatic effects. These two times of day are a priority for many landscape photographers. Just remember to be on stage 45 minutes before sunrise and sometime after sunset. This way, you will get the best lighting. Especially during sunrise, light is distributed just before the sun rises from the horizon, and the most beautiful colors appear in the sky.
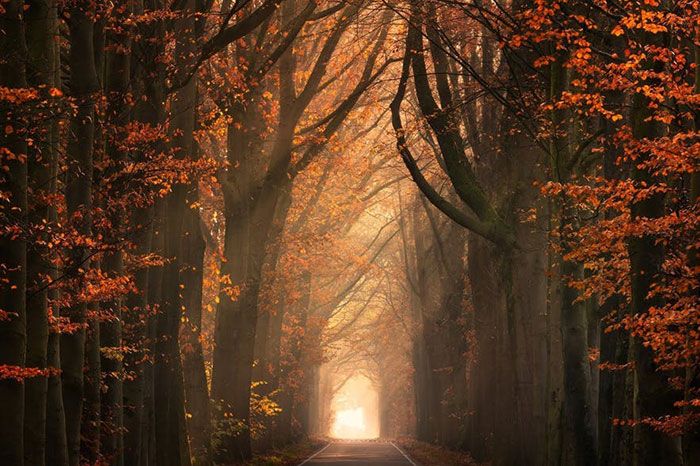
A spectacular view of the sunset during the transition from autumn to winter
Blue clock
The blue clock is the time between sunset (before sunrise) and complete darkness in landscape photography. The term blue clock is not entirely correct because the light of a blue clock lasts only a short time, about ten minutes. The blue clock is a popular clock for photography because it distributes very soft light. At this time, you can reach very soft color tones in nature, and beautiful glow in the mountains, or an interesting contrast between the street lights and the night sky.
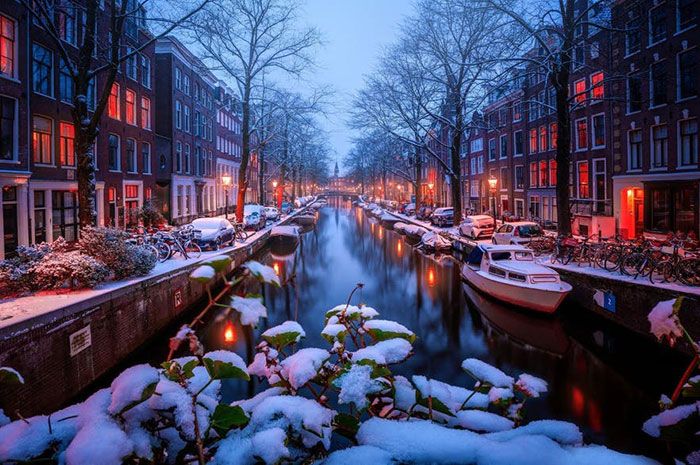
A winter photo of a blue clock takes in Amsterdam. The combination of the blue clock with the lights gave the photo a magical appearance
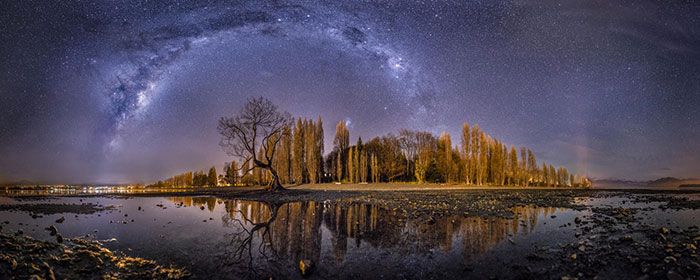
the night
Landscape photography during the night is magical. There are many options for night photography. For example, you can photograph the glow of the sky using the Long Exposure method. Night landscape photography is a popular choice for astronomical photographers. At this time, you can do creative work with light and flashlight.
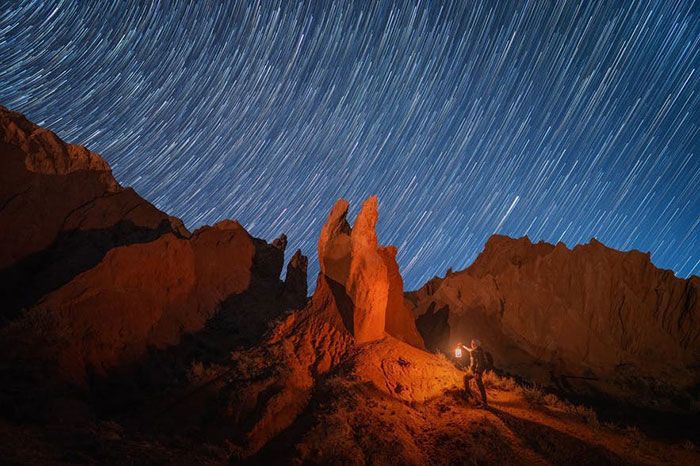
Night photography in Kyrgyzstan
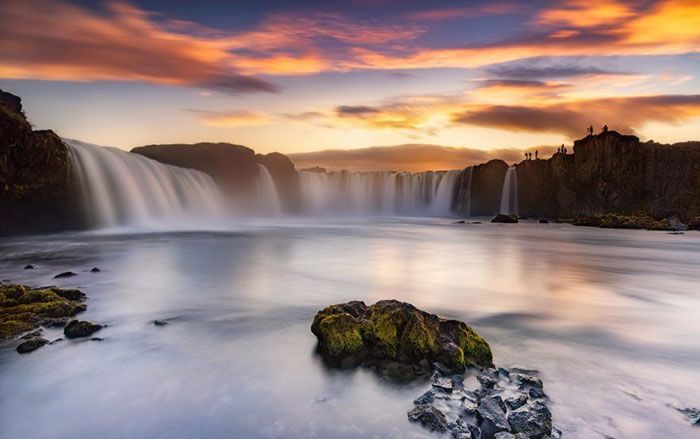
Midday photography
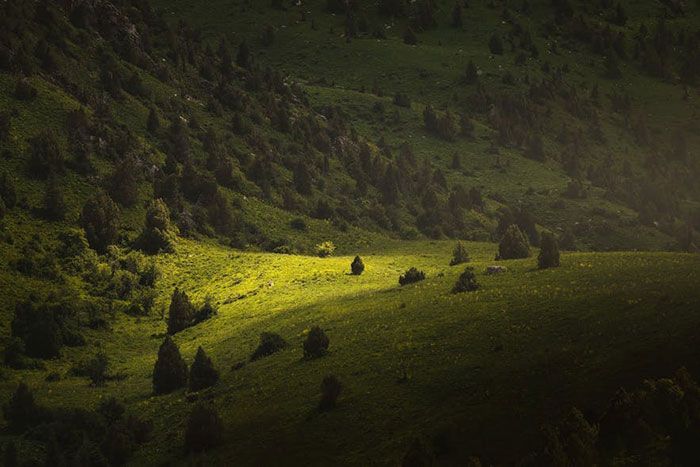
It is suitable for landscape photography any time of the day. Remember not to limit yourself to a specific time of day. During the day, you sometimes experience bad weather; But there is no such thing as bad weather in landscape photography; Because any kind of weather can create beautiful effects in the sky. Think cloudy or foggy conditions, for example. Fog can create magical effects.
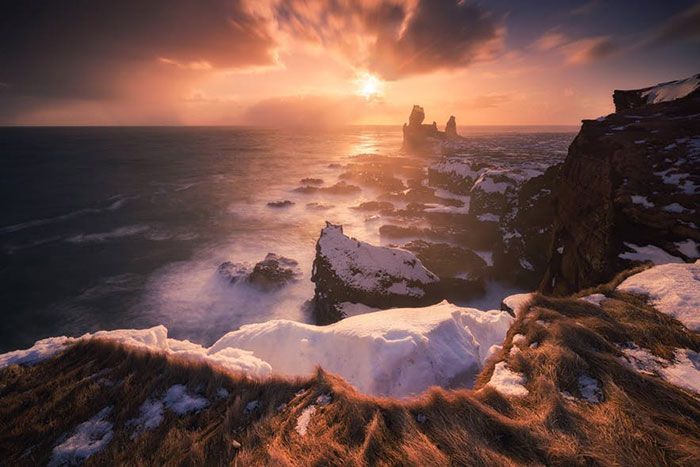
An evening photo in Iceland
Weather information and forecast
How do you predict a great sunset or a foggy day? Much of this depends on experience. Experienced landscape photographers use a combination of weather forecasting and intuition to understand and predict the weather. There are many methods for forecasting the weather, some of which are listed below:
Local weather forecast
Local weather forecasts can provide a good view of the weather. These forecasts usually refer to the possibility of the foggy or cloudy morning and evening clouds.
Weather Pro app
This app gives you almost everything you need to know about the weather and provides features such as hourly and location-based weather forecasts. The Weather Pro app is surprisingly accurate and allows you to predict good sunsets or sunrises.
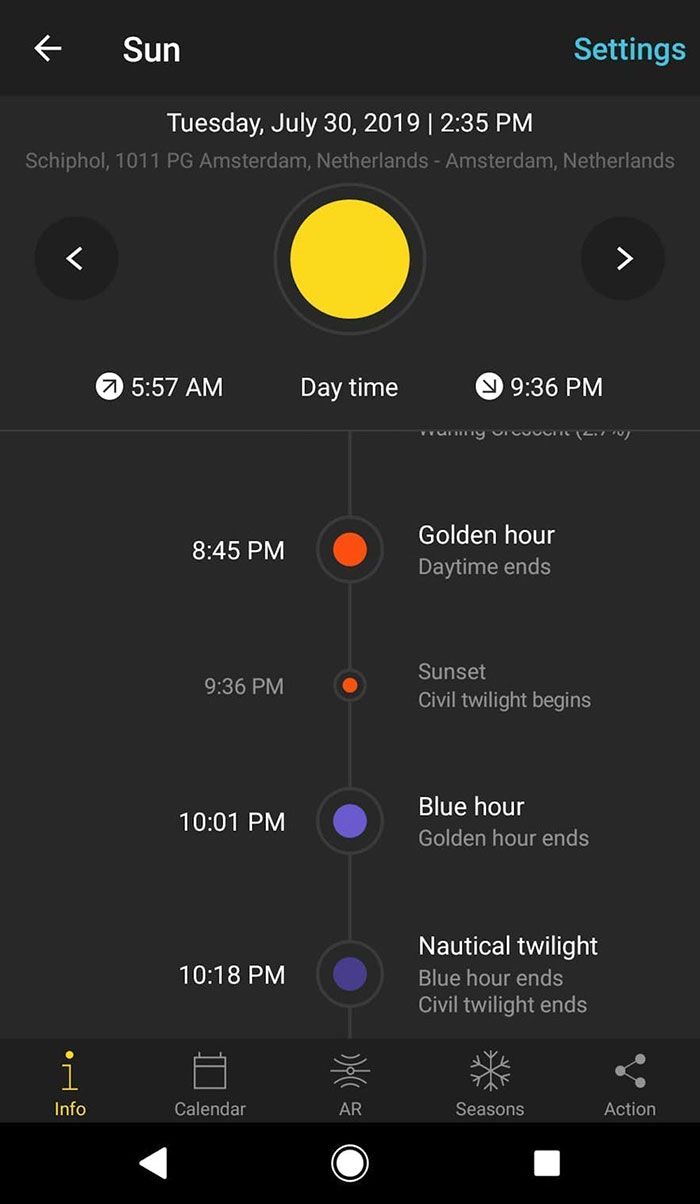
PhotoPhill
The PhotoPhill app shows the state of sunrise or sunset anywhere in the world, as well as the exact movement of the sun and moon. With this application, you can find out the exact time of sunrise and the moon and its location. The app also has lunar calendars, instant displays of the Milky Way in the sky, and options for moving stars.
Seasons
After forecasting the weather, it is time for the seasons. We know that nature does not always look the same—everything changes in each season. The forest is cold and dead in winter, which provides a good opportunity to create images similar to the movie Lord of the Rings. In summer everything is dreamy and lively and in autumn golden nature is seen. Each season has its charms, so do not visit a situation once. Always think about what a landscape will look like during different seasons and times of the day. Of course, you should always prepare yourself for unexpected situations.
Photographing a landscape in two different seasons creates different effects.
Composition in landscape photography
When shooting a scene, it is necessary to guide the viewer’s eyes in the image and convey the photo’s message. Proper composition is one of the essential parts of achieving the ideal image. The composition can create in a small part of a large landscape or landscape. This section will define several compositional tips that will help you achieve an aesthetic and attractive image.
The law of one-third
The law of one-third is the most well-known law of composition in photography. This rule is more important because of the guidelines. As you progress in photography, you may break many rules and come up with your own unique ways of composing images; But before breaking the rules, you must understand them.
According to the law, one-third of the image frame is divided into three vertical and horizontal sections. The main subject should be on one vertical or horizontal line to achieve an attractive and dynamic composition. Placing the subject at the intersection of two vertical and horizontal lines will give you the ideal result.
The central horizon gives equal importance to the sky and the earth, and the audience has no direction to look. For example, placing the horizon line on the bottom third line will gain more visual weight, and the viewer’s eye will direct towards the sky. The higher the horizon line, the more the viewer’s eye is directed to the bottom of the image. The placement of the horizon line depends on which part you want to emphasize more.
Symmetry
Symmetry is exactly the opposite of the law of one-third. The symmetrical composition has a central subject located exactly in the middle of the frame, and the same weight is around it. The two sides of the image are often mirrors of each other. This rule is especially effective for subjects such as plants or architecture that are inherently symmetrical. Another way is to use short line symmetry in the center of the frame, especially when using reflection to balance the image.
Guidelines
You can use the guidelines to guide the viewer’s eye to the main subject. Lines can be structures like roads, fences, bridges, or natural elements like rivers or rocky paths. The guidelines usually start at the bottom of the frame and move up and into the image to guide the viewer’s eye along with the image and connect the foreground to the background and the main subject.
A simple combination of a farm in France with all the lines pointing to the house
Here the water lines act as guides
Combination with a wide lens
When shooting with a wide-angle lens, try to make the most of the foreground. Do not always place your camera on a tripod to find a combination with a wide-angle lens. Lay the camera on the floor and see what happens. Go around very slowly and examine the different elements of the background. Stones, small flowers, contrast all create a better view in wide mode.
Combining with a 12mm wide-angle lens, the foreground is also covered in this photo.
Combination with the zoom lens
Finding composition with a zoom lens is a little different. When you use a zoom lens, you subconsciously look for compositions remotely. Try to find small details. Zoom lenses are great for creating minimalist artistic images.
A simple exercise to find a composition with zoom lenses is to stand in front of a wide field of view, look at the telephoto lens, and then slowly move the lens from left to right and up and down. This way, you will have to look in a smaller frame and find attractive combinations. Tree paths, water texture details, and rocks can be interesting abstract subjects for landscape photography.
Do not place objects on the border of the frame when combining. Always place space between objects and image borders. You can also crop the photo a bit, but if the composition is too closed, the sharpness of the image may decrease.
Combination with 400mm telephoto lens. In this photo, a single tree in the light has become the main subject.
With telephoto lenses, you can capture details and create abstract views.
Note: The above tips are just a guide to improve your work. Once you have mastered composition, you can be creative and break many rules.
Transmit emotion in landscape photography
You can shoot at sunrise or sunset or night by milk; But keep in mind that landscape photography does not only mean proper planning and technical skills. Emotion transfer is also an important part of photography that allows people to convey their feelings and experience towards photography.
An image can be dramatic, funny, strong, or scary. Try to think of the feeling you want to convey. In some images, a story can even be created and narrated. Try to arouse the audience’s emotions. If the audience is emotionally attracted to the photo, you will have a successful photo. You can also change the feel of the image during the final image editing process.
Edit landscape images
Image editing is an important part of digital photography. During the film era, lab technicians edited and printed the negatives and made many decisions about the effect of color and contrast on the final output of the image. These days, this can do more easily in image editing software. If you think your images are dull or gray, it may be because you have not edited them yet.
When shooting in RAW format, a large amount of detail is captured with the image, which can use later in the editing process. View raw images with Adobe Camera Raw, available as standalone software or in Lightroom or Photoshop software. You can also use other software compatible with RAW format.
But Lightroom software has the Adobe Camera Raw plugin for image editing and provides a great way to organize and access images. You can do the whole initial editing process in Lightroom and Photoshop. Using the sliders in Adobe Camera Raw, you can make fine adjustments that greatly affect the final output. Common settings include the following:
- White Balance: White balance
- Contrast: Adjust contrast and contrast
- Vibrance and Saturation: Adjust color saturation
- Sharpening: Adjust sharpness
- Noise Reduction: Noise reduction
- Cropping: Photo cropping
A bit of editing combined with good composition and the right use of light output makes for a great start.
Other tips to improve the photo
If you want to raise your landscape photos a little higher than the postcard images, try to apply the following points to your photo.
Adding a background element: One of the biggest drawbacks of photography is that the 3D perspective becomes a 2D image, and the physical depth of real life is lost. You can use a strong element in the foreground to induce a sense of depth.
Using shadows to add depth to images: In music, the space between the notes is as important as the notes themselves. Similarly, in photography, spaces that are not exposed to light can help increase the depth of the image. Shadows help to tell a story and improve the sense and visual power of the photo. You can create beautiful combinations with high contrast and minimalist simplicity by directing the audience to the shadows. An object and its shadow can reinforce each other. Sometimes you can remove the whole object and play only with its beautiful shadows.
Share landscape photos
These days, social media has provided a great opportunity to share landscape photos. Social media can be a great way to share photos with the world and get feedback. The best image sharing platforms are:
- Instagram: The most popular social network is Instagram photo sharing. Instagram is a vast platform where thousands of new photos are uploaded daily. Although becoming famous on Instagram is not an easy task, it still provides an attractive opportunity to share photos with friends.
- Facebook: Facebook is still a good platform to show photos and get feedback. There are many groups on Facebook that are still active. You can get good feedback by sharing pictures in these groups.
- 500x: Although this website is not as popular as in previous years, it is still a good platform for searching for quality content and displaying works.
- Flickr: Flickr is a good community for sharing works. Shared photos on this social network are of high quality. This is a popular media website for photographers.
- Personal Website: Creating a personal website is very important to show the works to others because you can design the website based on your preferences. Your website is yours, and you can share information about yourself and your work.
View from Flickr, a professional network of professional photographers
Making Money From Landscape Photography
People who pursue landscape photography as a profession use many methods to earn money. On the other hand, you may want to make a small income to cover the cost of purchasing equipment and the cost of your travels. There are several ways to monetize photography, and here are a few examples.
Sell artwork
The most obvious way to make money is to sell works. Photo sales can be in print or digitally. When selling your work in print, keep in mind that printing is a completely different dimension of photography. Converting an image that looks good on a screen to a print image is fraught with challenges. Digital selling works is another way to make money. Magazines or companies are potential buyers of photos.
Teaching
Photography is prevalent these days, and many people are interested in learning photography. If you feel you have reached a high level of skill, you can hold photography workshops. Try to come up with a unique way of teaching. Many photographers hold photography workshops these days, and if you want to have an outstanding performance, you have to follow a different and special method.
Writing
Websites and magazines around the world are always looking for content. Refer to these websites if you can produce unique articles and content.
Employment jobs
When you have your own style, companies may be interested in working with you. Once you are known in your city, you can work with urban organizations.
Brand building
Once you start making money through photography, building a brand seems essential. Your brand reflects your style. As a result, seek to develop a brand by building a good website and, most importantly, a portfolio from the beginning. Achieving a decent income through landscape photography is not easy, but it is quite possible.
Concluding remarks
Landscape photography can be a lot of fun and engaging. Using the above tips, you can start your journey and explore the world around you. Remember, photography is like a journey, so keep learning and growing as a photographer. Take a look at the past to see how far you have come. Then think about the next skills you need to learn and plan for them.
In the end, landscape photography depends on interest. The interest in capturing natural beauty is one of the characteristics of all landscape photographers. All human beings have a common interest in exploring the planet Earth and visiting beautiful places. You can record these beauties attractively and uniquely.