


Training Hard Partitioning In Windows 11
Hard Partitioning In Windows 11 Is A Simple Task, And By Doing A Few Steps, You Can Allocate Multiple Drives To The System Storage Memory.
All storage memory is presented in the form of a drive. You only have access to one partition when you buy a new computer or get new storage. For various reasons, having multiple sections on your System is better—the higher the system memory capacity, the better to increase the number of cells.
We recommend that you do not put any other file in the C drive of the System except Windows files and installed applications. Because if a problem occurs with the drive related to the operating System, other files stored inside that drive may also face problems.
You can create a separate partition to store personal files. Some people prefer to have another section for games and a compartment for storing movies.
It is better not to rely solely on the system drive and make backup copies of critical files in cloud servers so that if the problem of not recognizing the hard drive occurs in Windows, it will not be impossible for you to access the files.
In the Windows operating system, storage memory partitions are called drives. Each drive has a particular letter (drive C, drive D, etc.).
You can create drives, increase or decrease their capacity, and do other things on them.
In general, you can perform the arduous partitioning process in Windows 11 in two ways, and these two methods are similar to how to create a drive and partition in Windows 10.
The first method is done in the Windows installation process (Clean Install method), and the second is based on the Disk Management tool. Of course, before dealing with the partitioning method, it is necessary to provide explanations about the partition reserved by the System.

What is the System Reserved partition?
After installing Microsoft Windows on the storage memory, you will notice that these operating systems have a particular partition called System Reserved. Windows usually do not choose the letter it assigns to regular drives for System Reserved partitions, so they cannot be viewed inside This PC and are only visible in the Disk Management menu or similar tools.
The System Reserved partition was first introduced in Windows 7, so you won’t find such a partition in older versions like Windows XP. This partition is also created in the second version of Windows Server 2008 and newer versions of Windows Server.
System Reserved partitions contain Boot Manager and Boot Configuration data. When your computer starts up, the Windows Boot Manager tool reads the boot data from independent storage of boot configuration information. The computer runs the bootloader tool through the System Reserved partition, and in response to the Windows event, it is started through the system drive.
System Reserved partitions also contain boot files for the BitLocker tool (for encrypting storage drives).
When you encrypt one of the system storage drives, the System Reserved partition stores the files necessary to start the computer. In this case, the computer executes the unencrypted System Reserved partition and then decrypts the main encrypted drive, and then Windows comes up.
The System Reserved partition is usually created during the Windows installation process. Using the BitLocker encryption system without having the System Reserved section is impossible. This partition also stores important boot files by default, although you can also store these files in the primary Windows partition if you prefer.
What is the difference between GPT and MBR partitions?
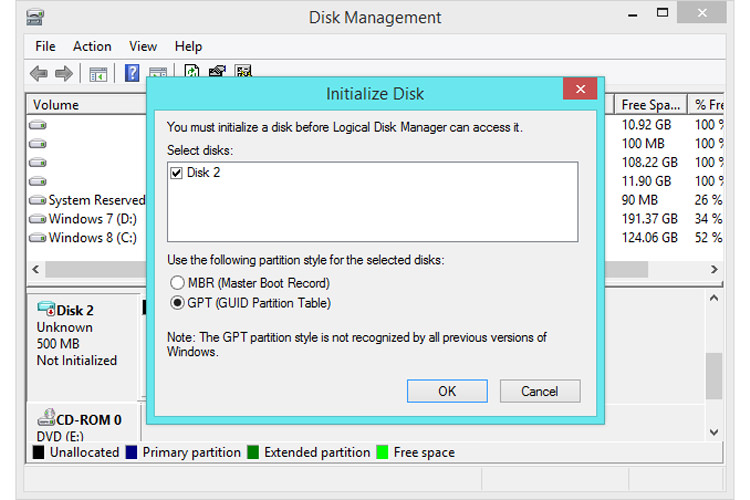
When creating a partition, you will be prompted to choose between MBR or GPT. GPT has many advantages, But it is still not as compatible with systems as MBR, and in some cases, it is necessary to use MBR. MBR and GPT are not Windows-only standards, and Mac OS, Linux, and other operating systems can also use GPT.
The partition structure If you’ve ever partitioned and formatted a storage drive or tried to install Windows on a Mac, you’ve probably come across MBR and GPT. GPT is a newer standard and is gradually being replaced by MBR. In addition to specifying how the information on that partition is structured, the partition structure determines the code that will be used during boot (if the cell is bootable).
Before you can use the storage memory, you need to partition it. GPT and MBR are two different ways to store partitioning information on storage memory. This information includes the start and end of the partition on the physical disk so that the operating system knows which partition each section is related to and which partition is bootable.
MBR has some notable limitations. For example, this standard supports up to two terabytes of storage memory and four primary partitions.
GPT is a more modern and better standard and is related to UEFI. GPT does not face the limitations of MBR. GPT-based drives can be much more extensive. This standard also allows access to an infinite number of partitions, the only restriction being the Operating System itself (Windows is limited to 128 cells in GPT storage).
GPT can recover data in case of corruption. On MBR disks, partitioning and boot data are stored in the same place, so you’re in trouble if the data is overwritten or corrupted. On the other hand, GPT stores multiple copies of this data across the disk and is, therefore, more secure.
How to convert GPT partition to MBR and vice versa
Converting the GPT partition to MBR and MBR to the GPT partition is accessible. We recommend you make a backup copy of all the content in the storage before converting it. Also, close all applications that have access to the storage memory.
You can convert the storage memory from GPT to MBR if it is empty and you have not defined a drive.
Convert via the command line
1. Back up all data in the storage memory or transfer it to another location.
2. Right-click on Command Prompt and select Run as Administrator.
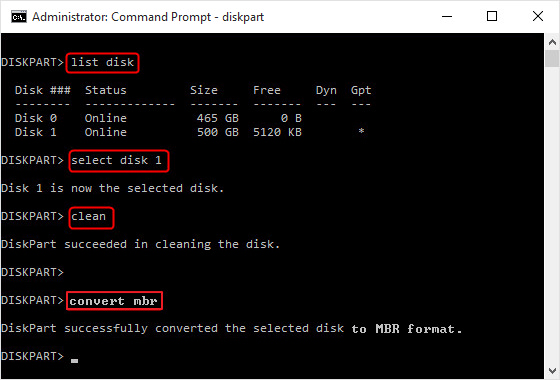
3. Type diskpart and press enter. If the storage memory contains no partitions, skip directly to step 6.
4. Type list disk and press enter. Pay attention to the number of the disk you want to delete.
5. Type the statement <select disk <disknumber) and enter (enter the disk number instead of the disk number).
6. Type clean and press enter.
7. If you want to convert GPT to MBR, type convert MBR, and if you want to convert MBR to GPT, type converts up and hit enter.
How to partition the hard drive before installing Windows 11
How many partitions you should create on your hard drive depends on the internal capacity of the hard drive. It is better to make only two divisions if you have a low-capacity hard drive with 128 or 256 GB of memory. It is generally recommended to have at least three sections on the System: one purpose for the Operating System, one movement for software and games, and one for documents, pictures, and personal files.
It is recommended to always install your operating System on a drive with a capacity of 120 to 150 GB. The new hard drive does not have a partition by default, so it is necessary to know how to partition before installing Windows 11.
To partition the hard drive, before installing Windows 11, you must install the operating system using the Clean Install method. In the Clean Install method, all information, including software, is deleted from the computer’s memory.
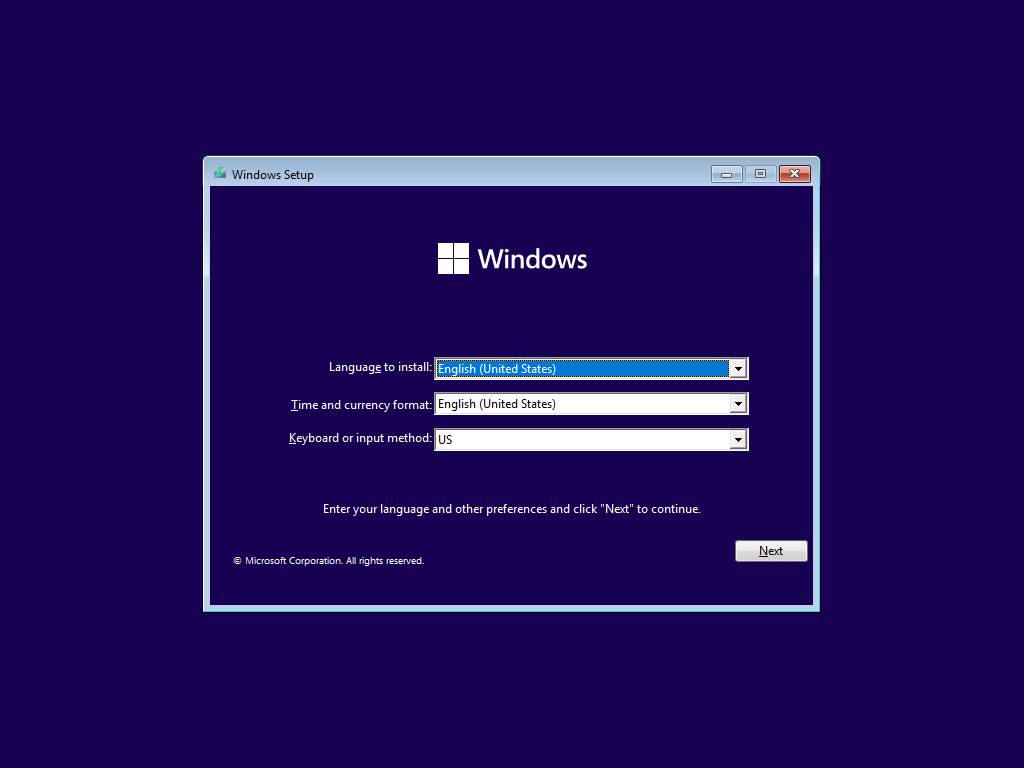
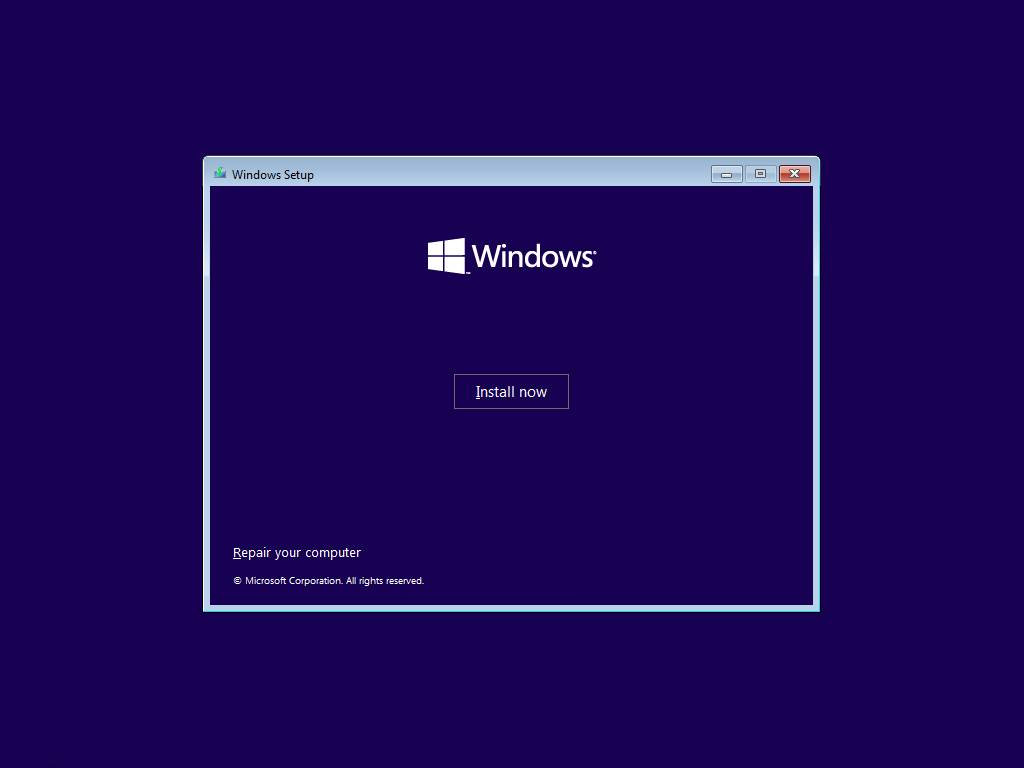
After starting the Windows installation process, you will see the initial window that can be seen below this text. Leave this window unchanged and click Next.
At this point, click on Install Now.
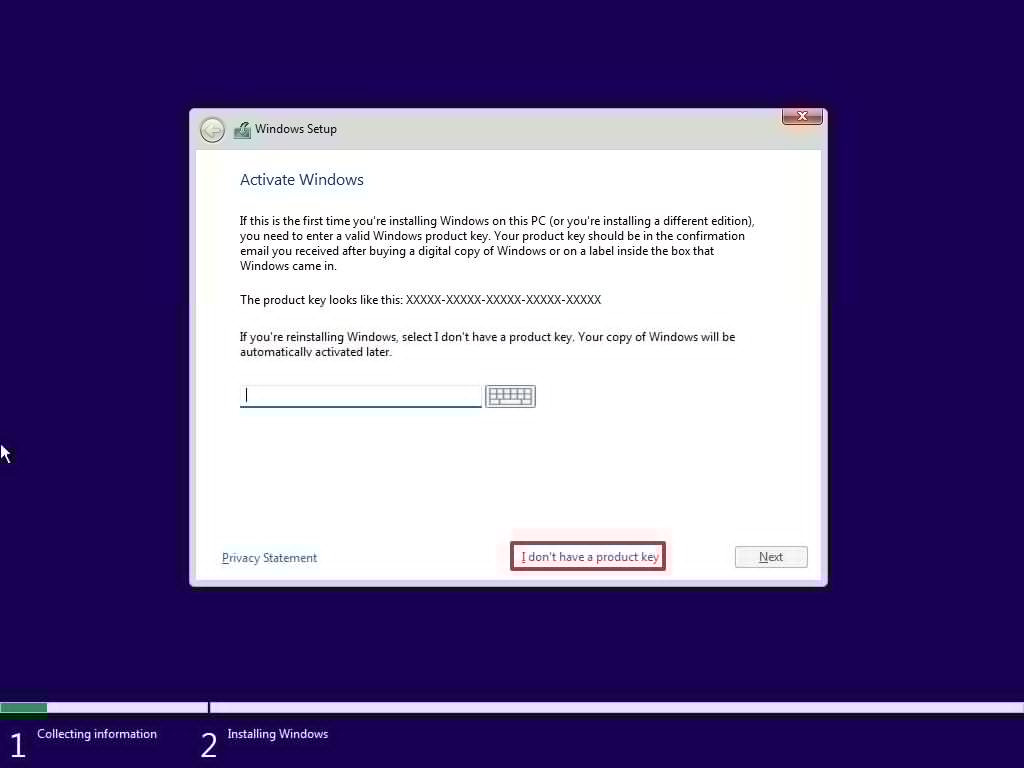
Click ” I don’t have a product key ” and click ” Next ” on the next page.
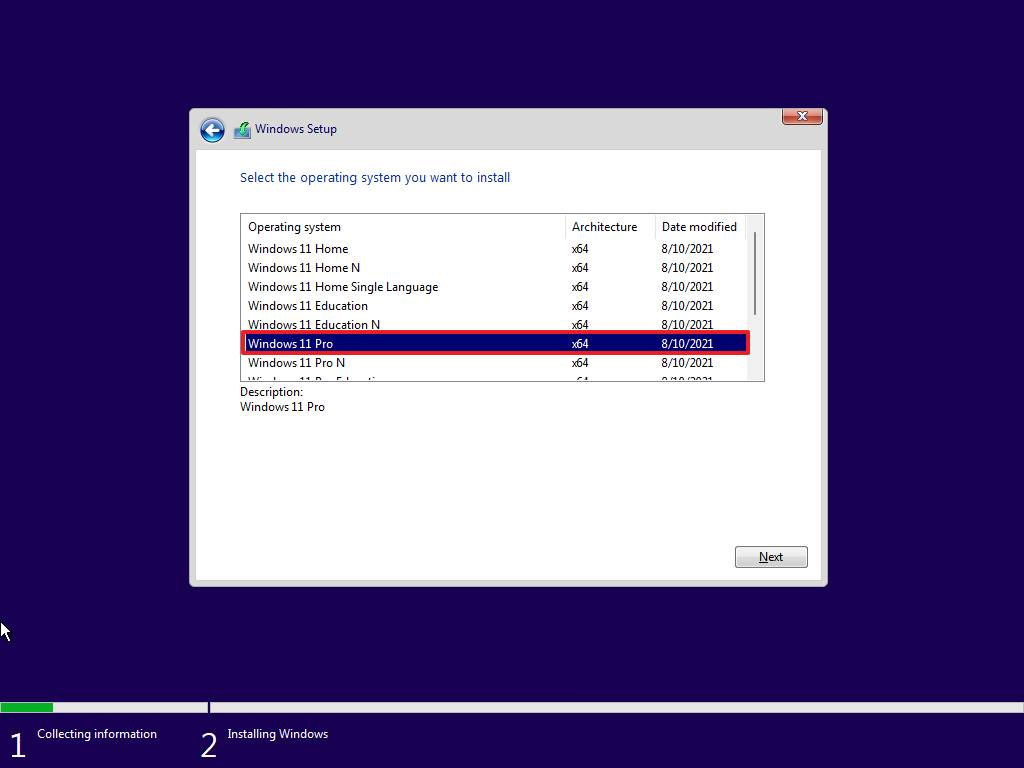
In this step, select the version of Windows you want to install and click Next. In the next step, agree to Microsoft’s rules and regulations (I accept the license terms) and click Next again.
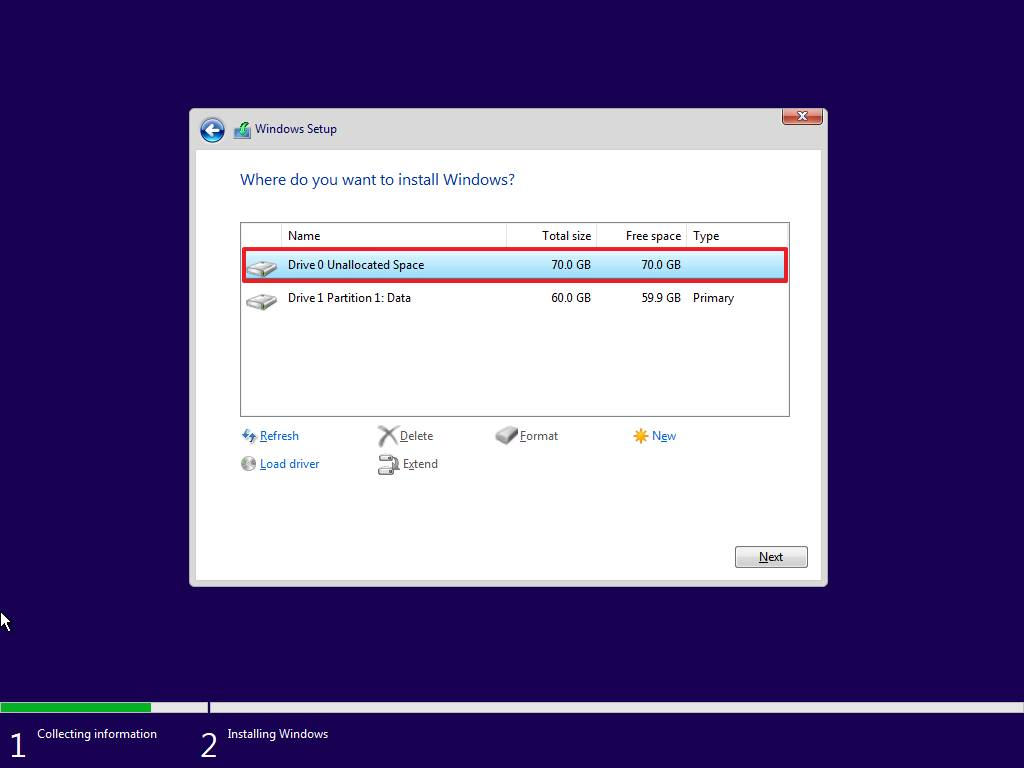
Click on Custom: Install Windows only (Advanced).
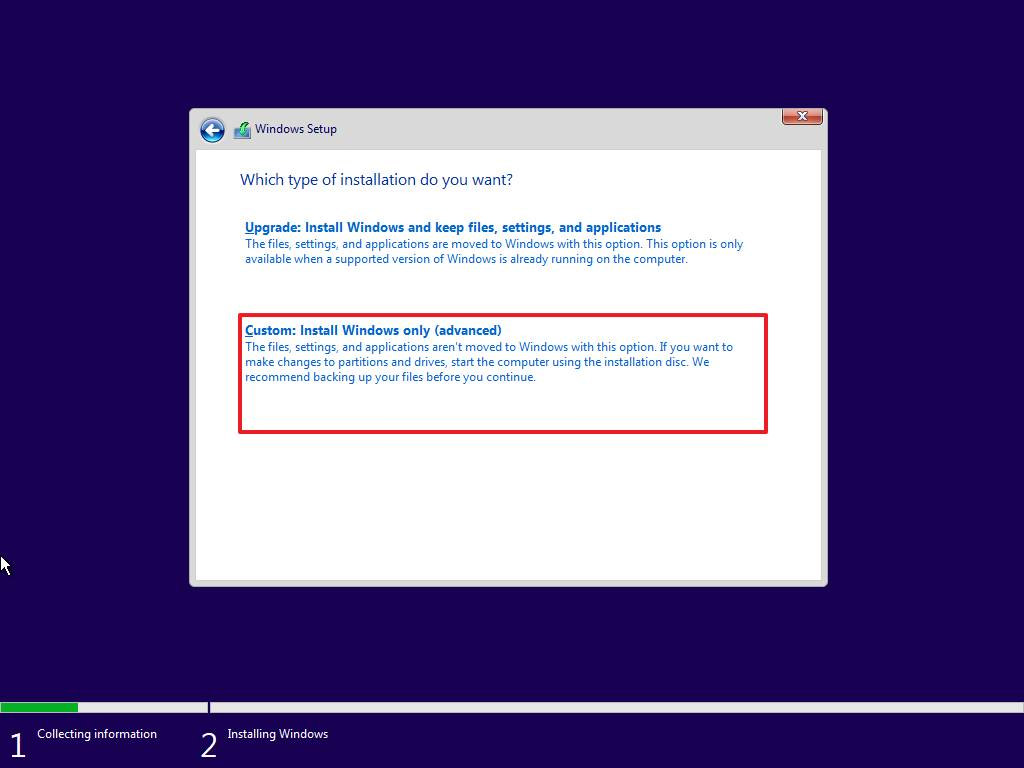
At this stage, you will see different options on the screen. If you want to format the industry, the Format option is available, and If you want to create a new drive, it will be possible to create a new one after clicking on Unallocated Space. If you want to delete the industry, after clicking on it, select the Delete option.
If you want to increase the drive’s capacity, click on the Extend option (we will explore these options in more detail later). After doing the desired tasks, click Next to enter the Windows installation process.
Training on partitioning after installing Windows 11 with Disk Management
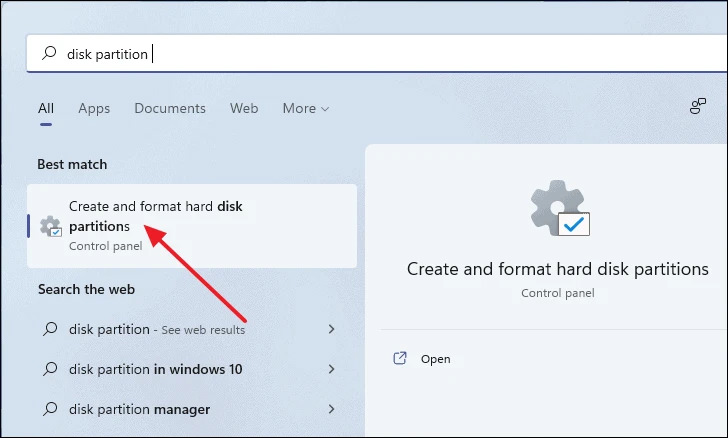
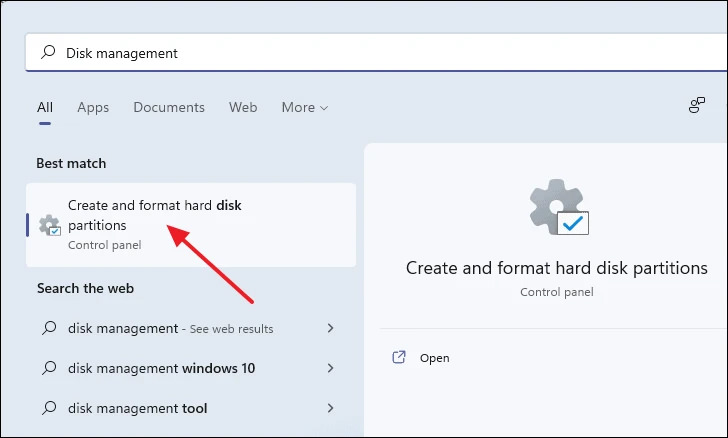
Partitioning after installing Windows 11 can be done through various tools, But we recommend using the primary Windows tool, Disk Management, because it makes it possible to do this easily. For this purpose, in the search section of Windows, type Disk Management and click on the first option on the results page, i.e., Create and format hard disk partitions.
Build unallocated space by reducing drive capacity
To create a new partition, you must first reduce the power of one of the current System drives to create “Unallocated Space.” To create a section, you need to convert the unallocated space into a separate drive and assign a letter in the English alphabet.
The Disk Management utility page contains information about the current system partitions. The Disk 0 and Disk 1 sections at the bottom of the window show how many storage devices you have on your Systems, such as HDD or SSD.
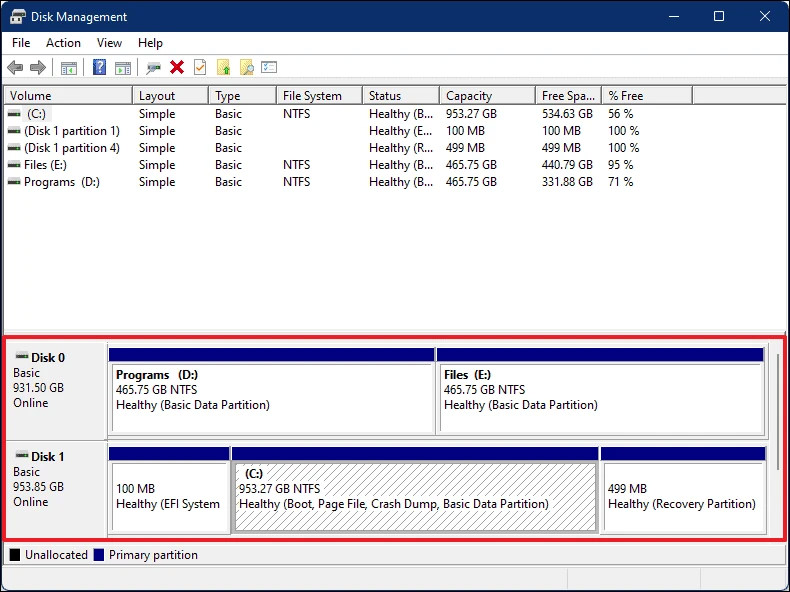
Click on the box corresponding to the desired purpose to reduce the drive’s capacity. After clicking on the box, diagonal patterns will be seen inside it, showing that you have selected the expected package.
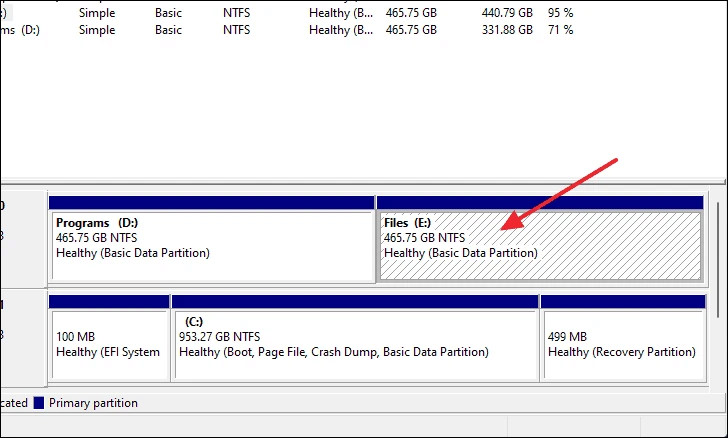
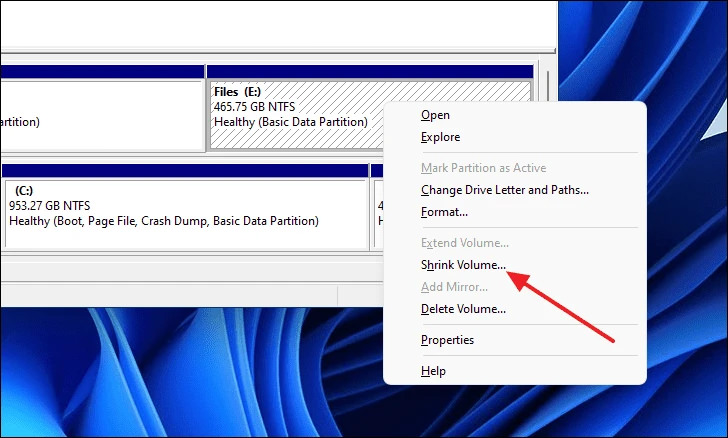
In the next step, right-click on the selection box and select Shrink Volume.
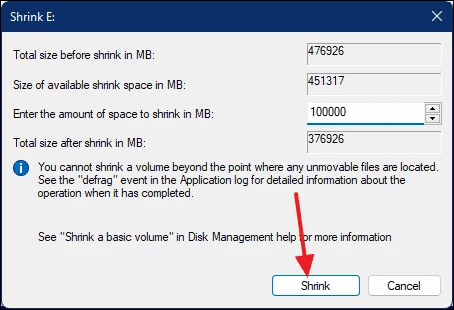
A smaller window will open, and through it, you can determine how much the capacity of the drive in question will be reduced. To simplify the tutorial, we set the capacity reduction amount to 100,000, equivalent to about 97.5 GB. After selecting the number, click on the Shrink option.
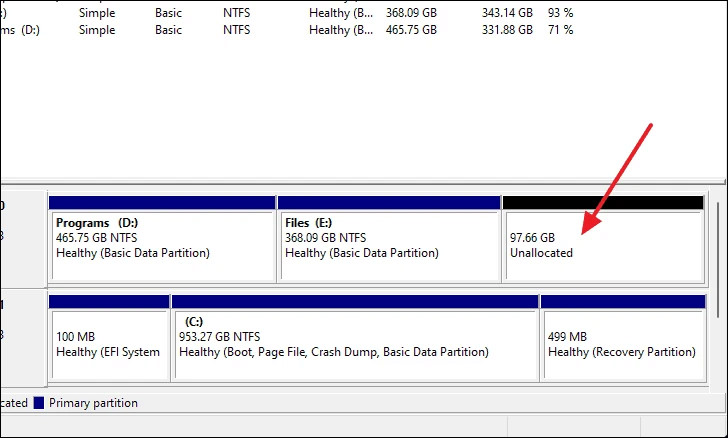
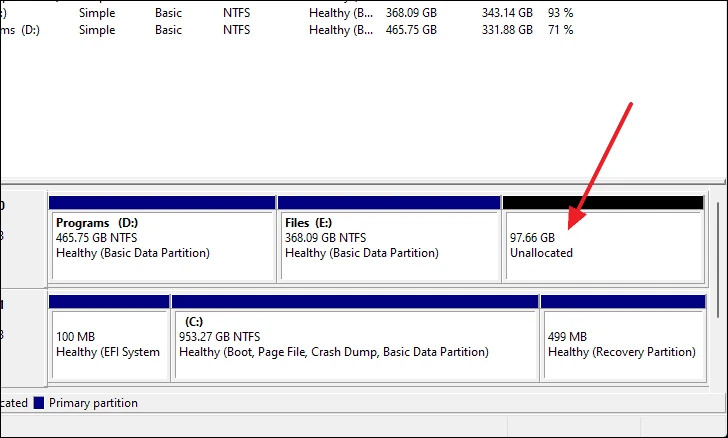
If you follow the above steps carefully, you will see that 97.5GB of unallocated space has been created. You can use this new memory to create a drive.
Creating a new drive from unallocated space
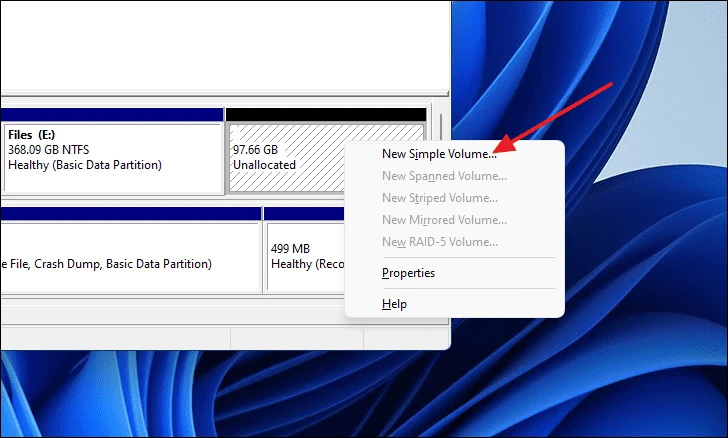
To convert unallocated space to a drive, right-click on the Unallocated box in the Disk Management tool and select New Simple Volume.
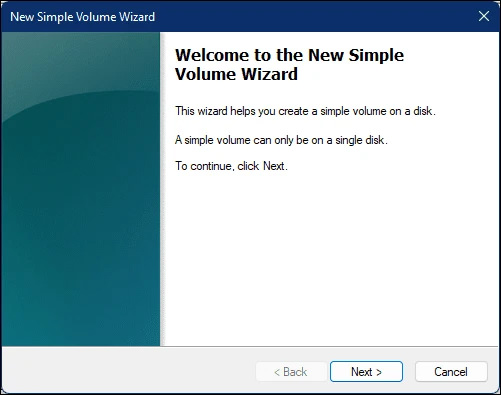
A new window named New Simple Volume Wizard will open. In this window, click Next to enter the next step.
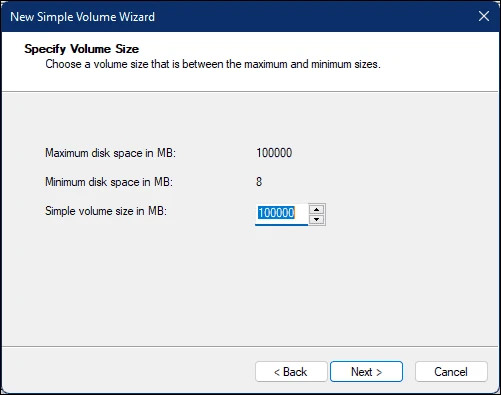
In the Specify Volume Size step, leave the settings unchanged if you intend to convert all unallocated space to a new drive. You can change the capacity if you want to save some areas for another purpose. Finally, click Next.
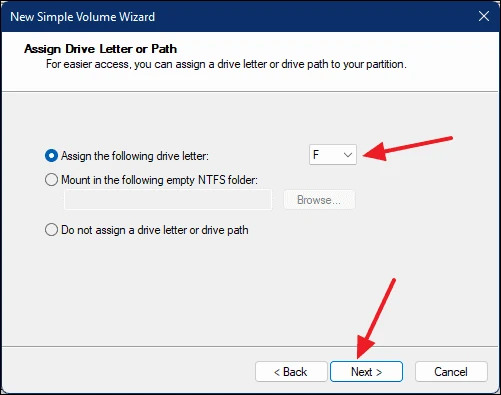
Next, click Next again. You can change the letter assigned to the drive by clicking on the drop-down menu.
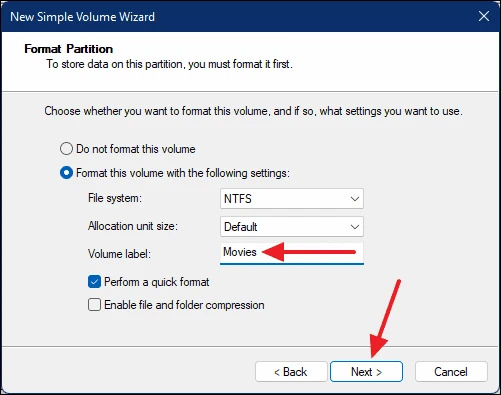
Next, by typing in the Volume label section, you can choose any name you want for the drive. After selecting the word, click Next.
Finally, click Finish to create the drive.
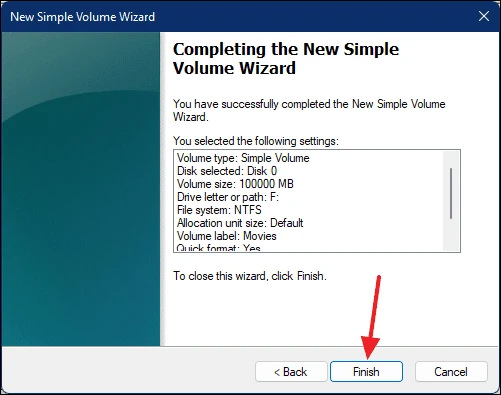
You can now see the new partition in the Disk Management screen.
Increase drive capacity through the Disk Management tool
If you want to increase the power of your drives in the System, you can remove another drive you are not using and use the new unallocated space to increase the capacity for another purpose. Before removing any purpose, transfer its data to another drive or make a backup copy of the data.
First, you need to run the Disk Management tool. For this purpose, type Disk Management in the Windows search field and click on Create and format hard disk partitions.
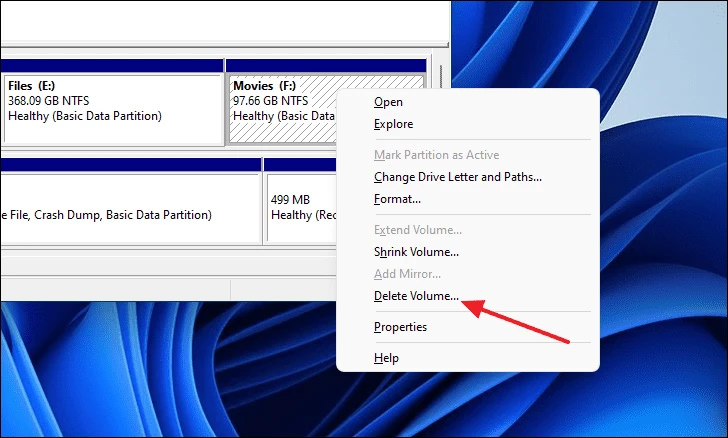
In the Disk Management window, you must delete one of the drives if you have no unallocated space. For this purpose, after transferring the drive information to another location, right-click on the drive and select the Delete Volume option.
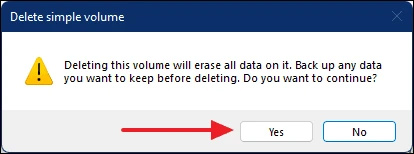
Next, a small window will pop up asking to confirm the removal of the drive. Click on the Yes option.
After removing the drive, you will see that an Unallocated space is created.
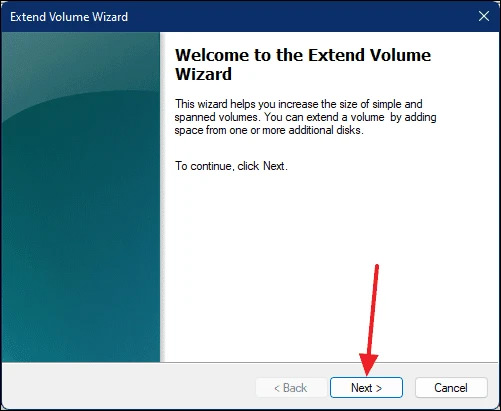
To increase the drive’s capacity, right-click on it and click on the Extend Volume option.

Click Next in the Extend Volume Wizard window.
Unallocated space is automatically selected. Click the Next option to enter the next step.

Finally, click on the Finish option to finish increasing the drive capacity.

System storage memory partitioning allows you to manage memory in a better way. After partitioning, you can move different data to different drives regularly so that they can be accessed quickly. Hard disk partitioning also allows the installation of multiple operating systems. For example, if you want to install Windows 11 and Windows 10 at the same time, you must partition.
Common Questions
What is the easiest way to partition Windows 11?
Windows 11 partitioning can be done in different ways, But the easiest way is to use the Device Management tool.
Is it possible to partition Windows 11 before installation?
If you install Windows using the Clean Install method, it is possible to partition Windows 11 before installation.
How to increase drive capacity in Windows 11?
The Windows 11 Device Management tool allows you to increase and decrease the capacity and remove storage drives.
What is the difference between GPT and MBR partition?
GPT and MBR are two different ways to store partitioning information on storage memory. GPT is a more modern and better standard and does not face the limitations of MBR. MBR has some special rules.