


Is Your Windows 10 Slow After an Update?13 Tips to solve this problem
No one can deny the value of Windows updates, but sometimes the System slows down after installing updates, which can have various reasons. Suppose you are also facing the problem of Windows 10 slowing down after the update. In that case, there is no reason to worry because we will examine all the practical solutions to solve such problems in this tutorial.
The problem of Windows 10 slowing down after the update has various reasons that Microsoft may solve over time, but you have to solve some of them yourself, and the following methods will help you.
So let’s get to know the reasons for Windows 10 slowing down after the update as soon as possible, as well as how to solve them:
Reasons for slowing down Windows 10 after the update
Windows 10 updates are the defense line of the System against malware and harmful viruses. The changes in the appearance of these updates may not be noticeable, but the importance of these updates is very high in terms of security.
Some users notice that their Windows 10 system slows down after the update, but when all these updates are done to improve the performance of the systems, why should this happen?
Everything that happens has a reason! Of course, this slowdown of Windows 10 has its logic, which we will mention below:
- Bugs in updates
- Damage to Windows file systems
- Insufficient hardware resources
- Impaired allocation of resources to background programs
- Unimportant files and caches
Although virtual servers have advanced features and settings to optimize performance, and anyone can use caching tools and increase access speed after purchasing a Windows virtual server and setting up their website, these files in Windows ten can also cause a drop in rate, which has its solution.
Now that we know the main reasons for slowing down Windows 10, it’s time to get to the bottom of the matter and check out the beautiful methods that can solve this problem in 3 whistles.
How to fix the problem of Windows 10 crashing after updating
It doesn’t matter what the reason is for Windows to slow down; if you try the methods we’ll discuss in this section, at least one of them will indeed work to speed up your System after the update:
1. Roll back Windows 10 updates.
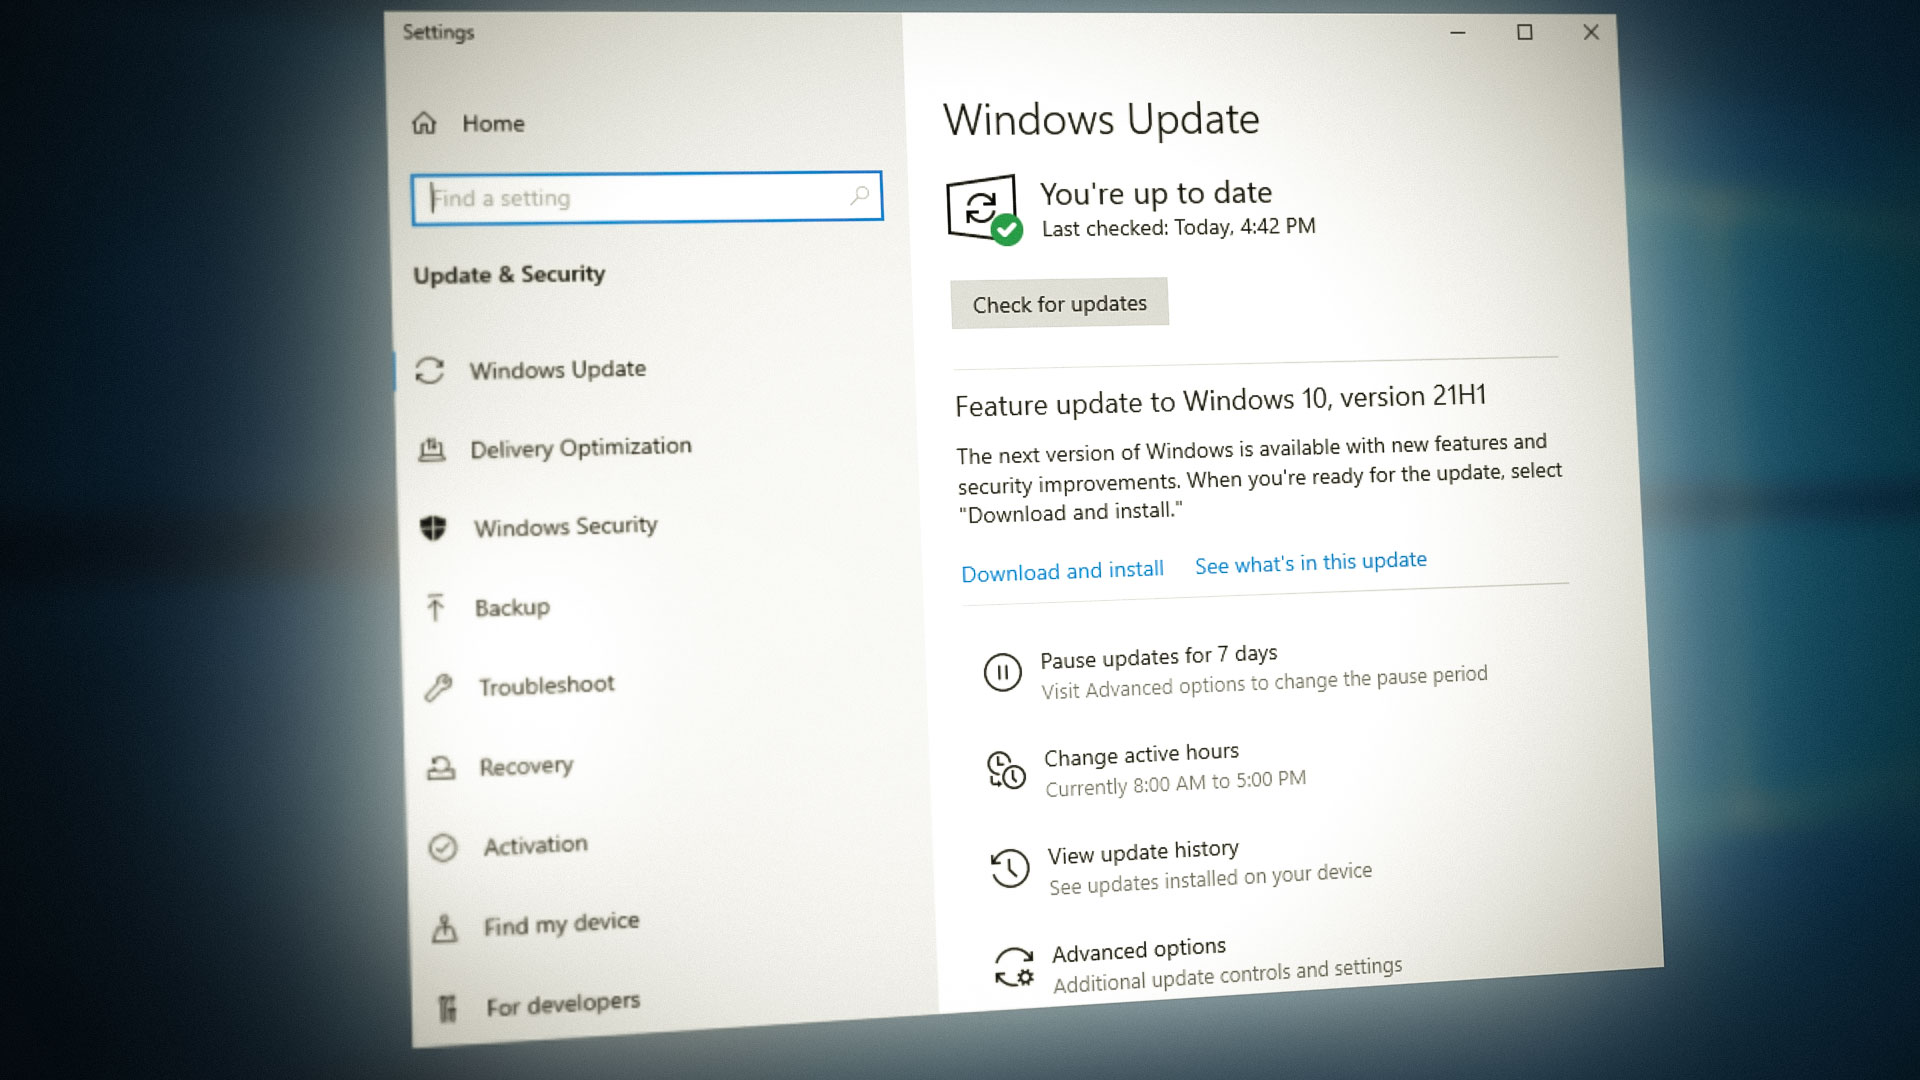
If new updates have slowed down Windows 10, rolling back to the previous update can solve the problem. Fortunately, Microsoft has included an internal tool to restore Windows 10 to its original state, which you can use to remove the desired update.
Just follow the steps below:
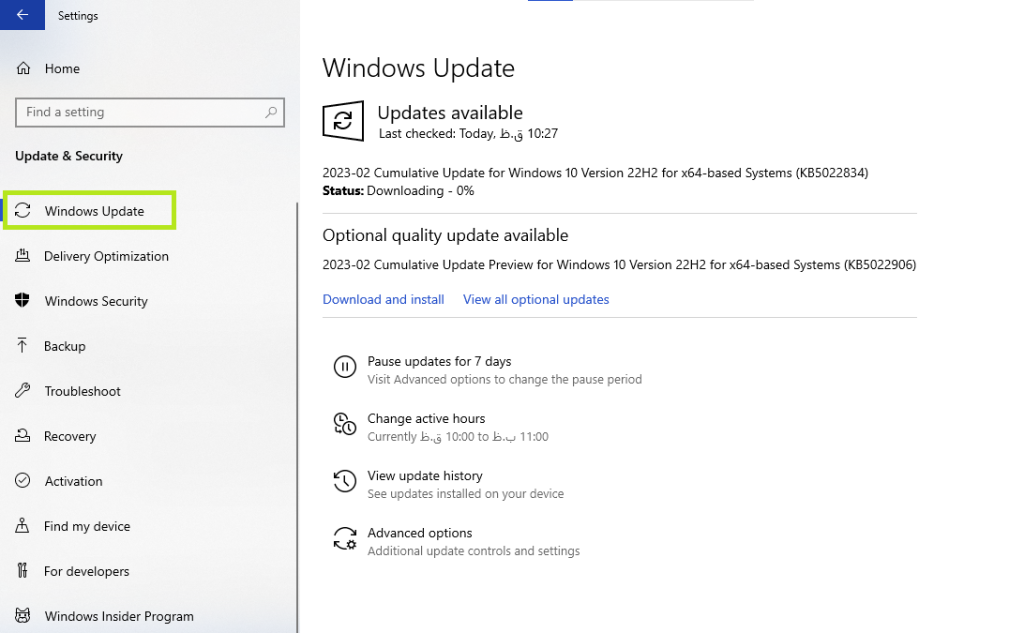
Open Settings and click on Windows Update from the Update & Security section.
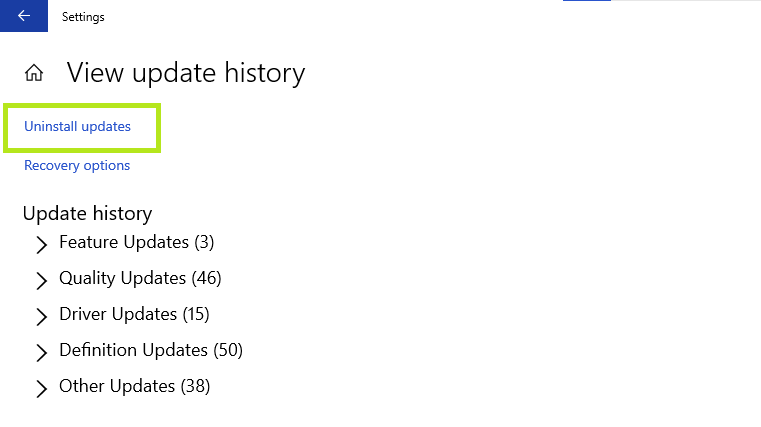
Then click on View update history and select Uninstall updates.
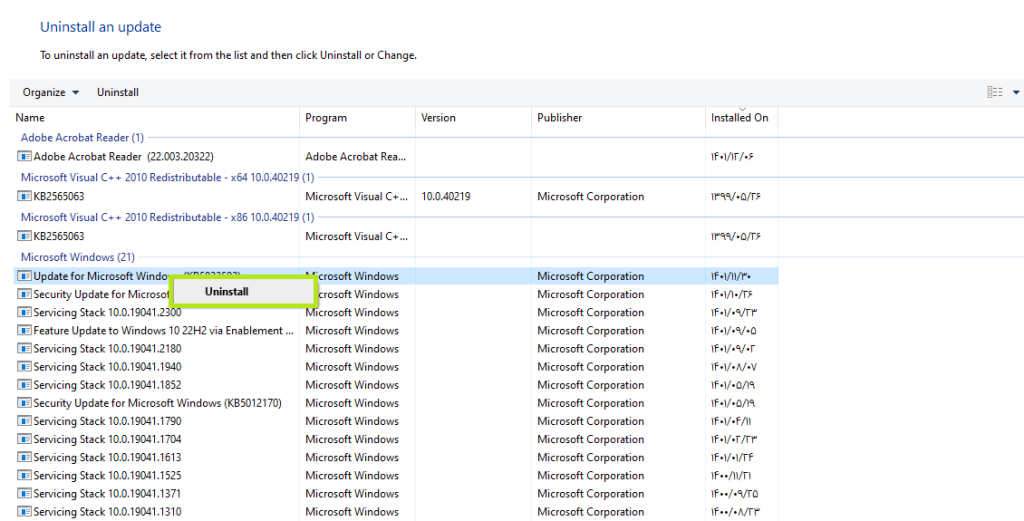
Select the update from the list of recent updates that you think is causing your system to slow down. Then right-click on it and select uninstall.
2. Disable startup programs.
These programs start working when the system boots and their large and heavy volume not only causes a drop in system performance but also increases the boot time.
To disable unnecessary startup programs, follow the steps below:
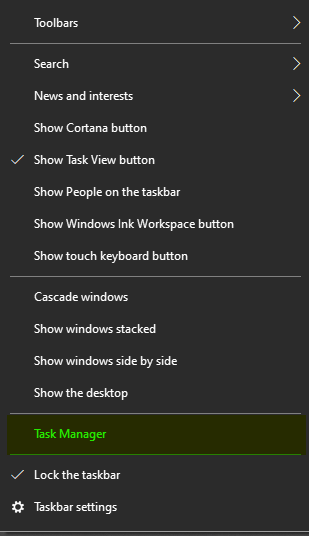
Right-click on the taskbar and select Task Manager.
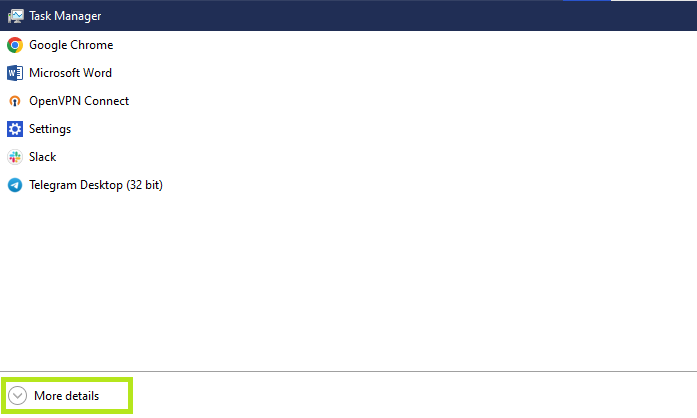
Click More Details to display more details about running programs.
Select the startup tab and disable the programs that are unimportant to you.

3. Repair damaged files.
Sometimes important Windows files get corrupted or damaged for various reasons, which can cause Windows 10 to slow down. Fortunately, Microsoft has come to your aid again with an extension of the System File Checker tool. This tool is used to repair crashes and damages related to files.
To run this tool, follow the steps below:
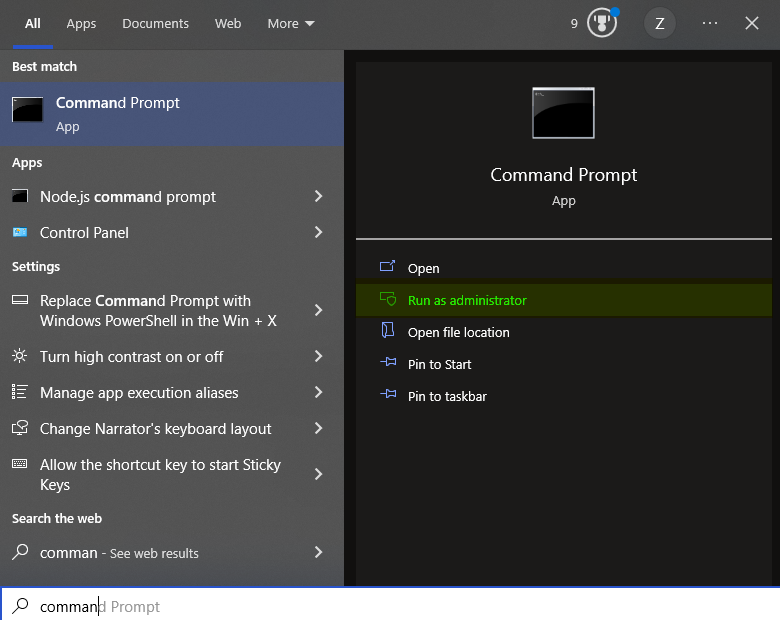
Go to the start section, type Command Prompt, and open it as Run as administrator.
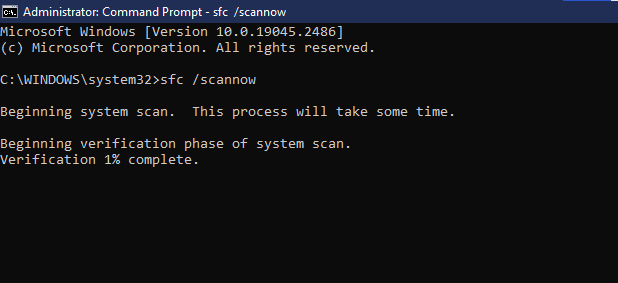
Enter the following command and press Enter.
sfc /scannow
After the system scan is finished, restart your System so that if your Windows 10 is slow due to corrupted and damaged files, this problem will be resolved entirely.
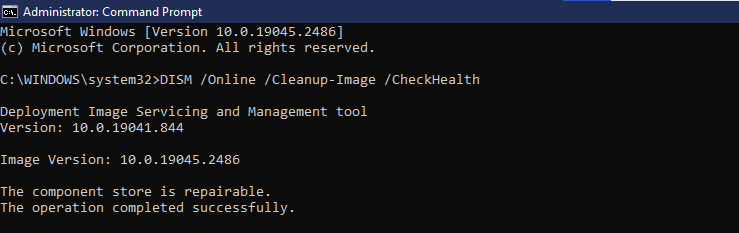
If this command doesn’t fix your files problem, use the DISM command instead. This command is also used to detect errors related to the file system and is far more potent than SFC.
To run this tool, follow the steps below:
Go to the start section, type Command Prompt, and open it as Run as administrator.

Enter the following command and press Enter.
Dism /Online /Cleanup-Image /CheckHealth
For a more advanced scan of your System, you can also use the following command:
Dism /Online /Cleanup-Image /ScanHealth

If you find a crash after this command, you can use the control below to download and replace the damaged files with healthy files:
Dism /Online /Cleanup-Image /RestoreHealth
After executing these commands, restart your System. Then rerun the SCF command to remove the errors related to the file system completely.
4. Delete temporary files and cache.
In general, some many temporary files and folders are created by the operating system and programs, and by consuming disk space, they cause a decrease in the speed and performance of the System. After installing the updates, many unwanted files are added to your System, and finding and deleting these files, which are collateral for the updates, is a bit complicated.
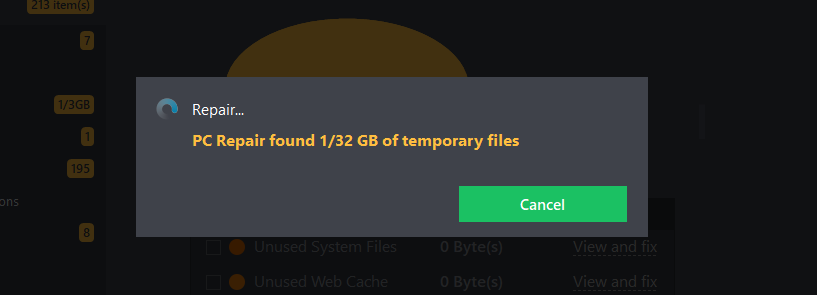
To remove such files, you can use disk cleaning and management tools, Outbyte PC Repair is one of the best.
Just visit the Outbyte PC Repair download page and run it after the download and installation process.
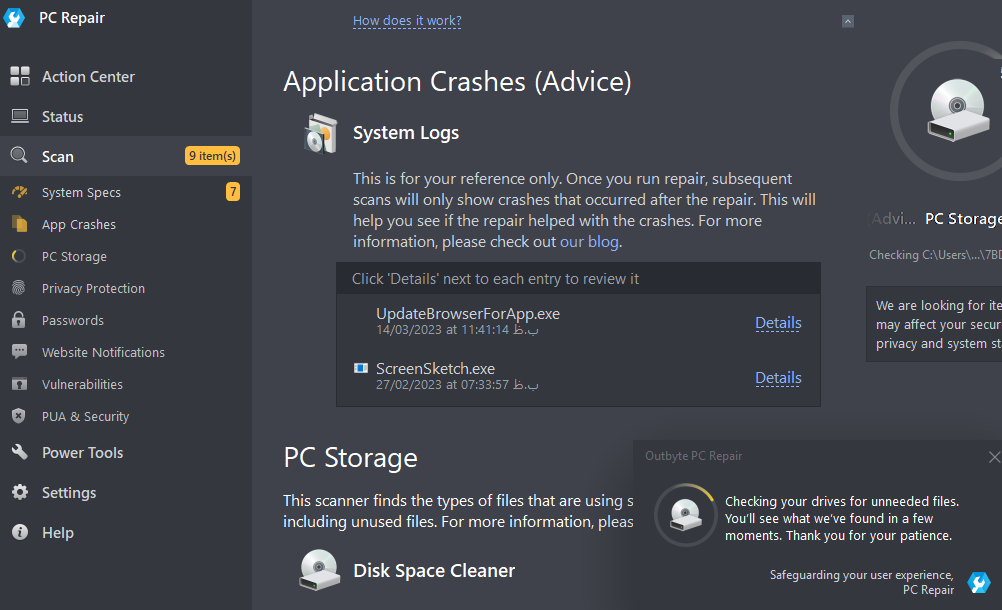
After scanning, all unnecessary and temporary files will be identified for you to delete or repair.
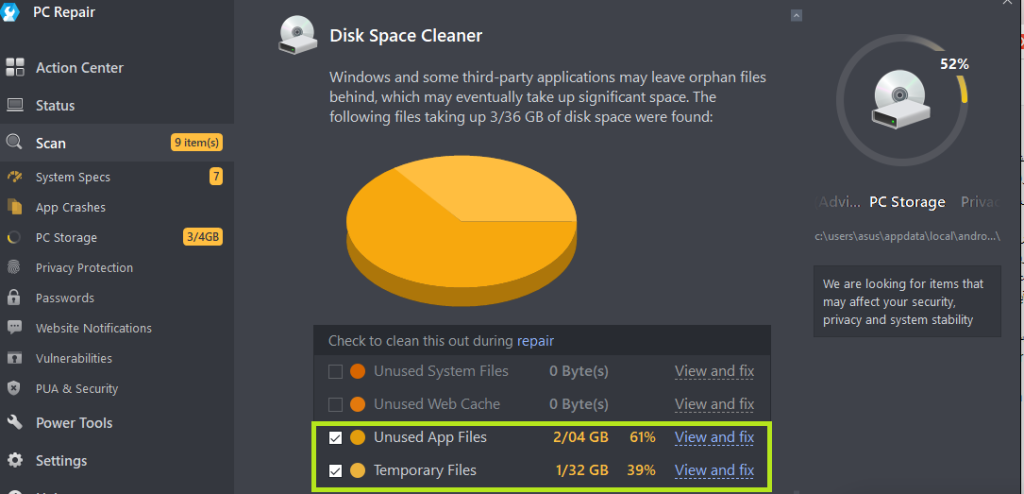
If you click View and fix, it will ask you to enter your license key to activate this software. However, this key is necessary to delete all detected files, and Unused apps and Temporary files can be deleted without activation.
Just click on View and fix and select Resolve.
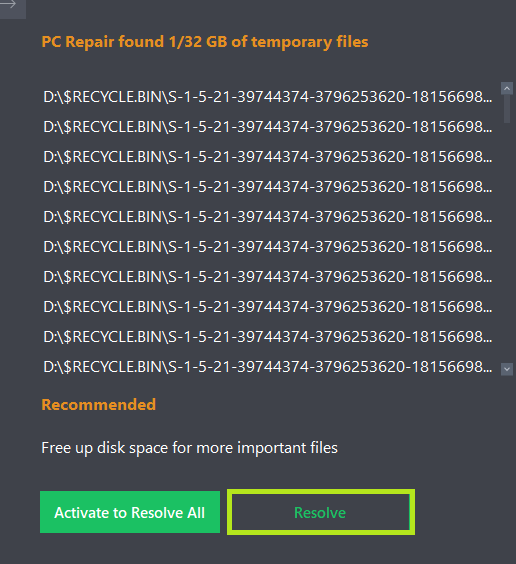
All unused or temporary files will be deleted if you click Resolve again.

5. Disable background apps.
Sometimes the background programs that are not needed cause Windows 10 to slow down because these programs are run with the installation of Windows 10 and may occupy a large percentage of system resources with each update, and that’s it. It slows down Windows 10.
So, to disable unnecessary background programs, follow the steps below:
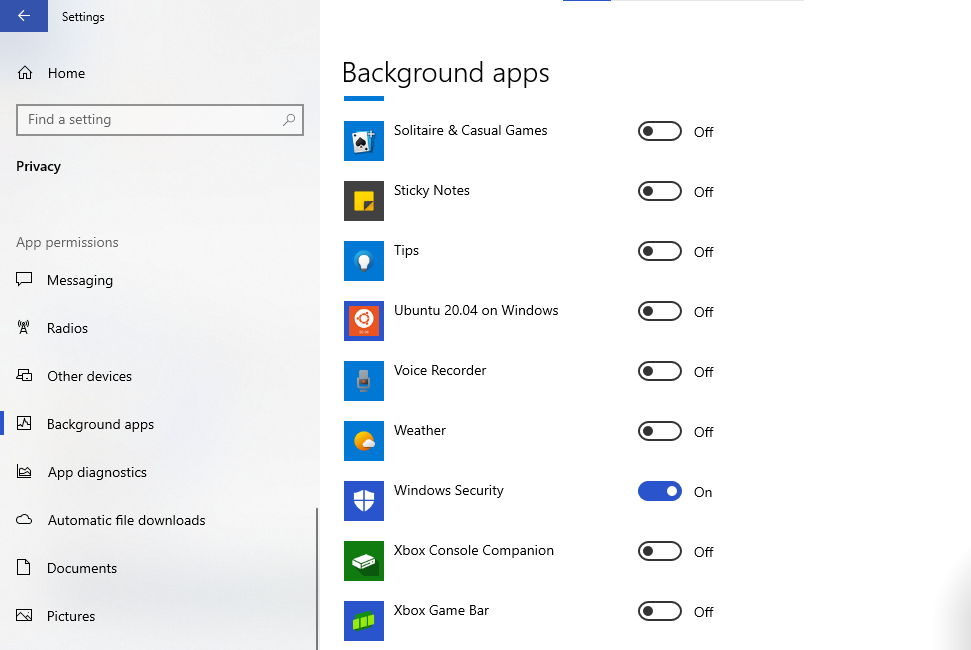
Open Settings and click on Background Apps from the Privacy section.
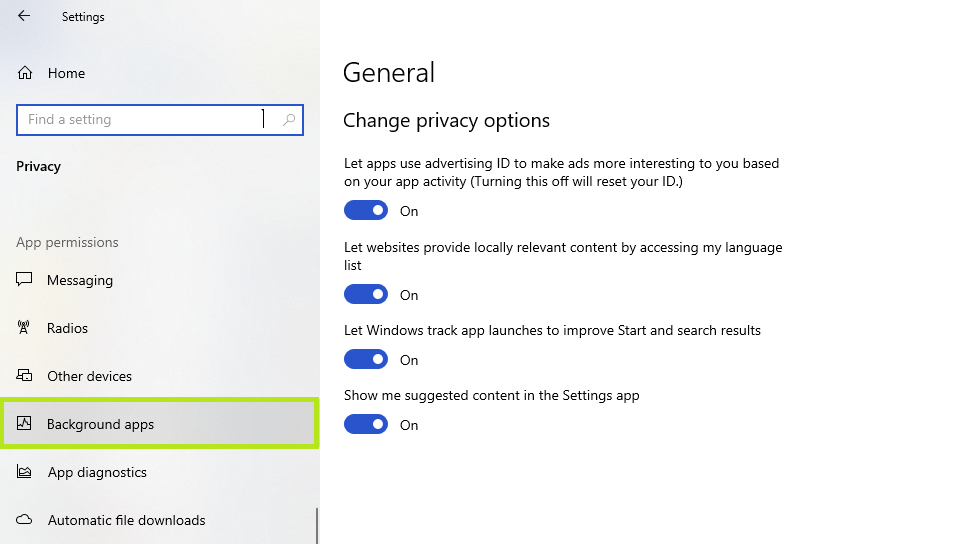
Find the programs you don’t need and turn them OFF.
Next, restart your System to see if the necessary space for the faster components of Windows 10 programs has been opened or not.
6. Do a clean boot.
If you clean boot your System, it will run with minimal drivers and programs. By doing this, you can determine whether your System is slowed down by another program.
So for Clean boot, do the following steps:
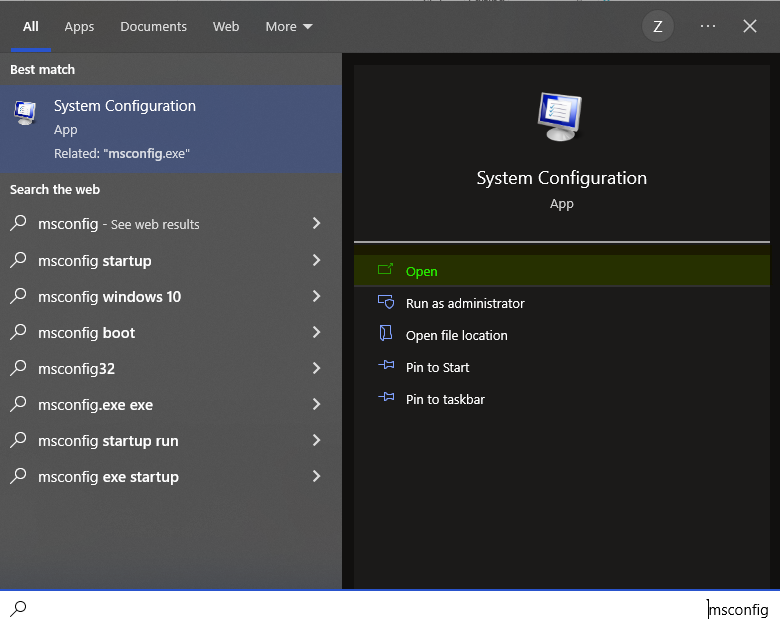
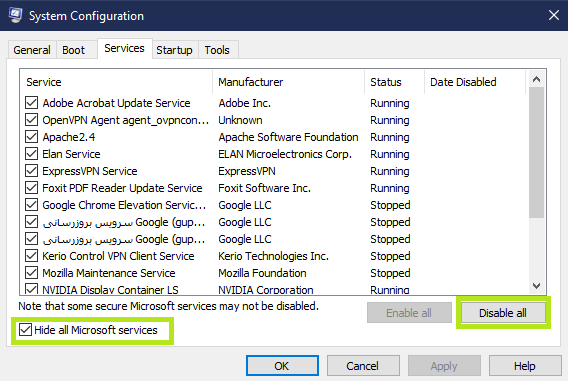
Go to the Start section, and after typing MSConfig, open the System Configuration App.
Next, select Hide all Microsoft Services in the Services tab and click Disable All.
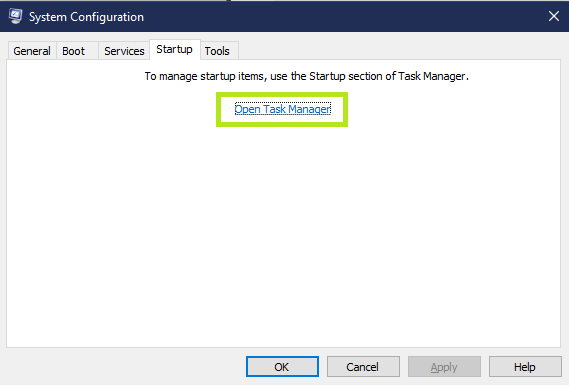
If you haven’t implemented method two so far, you can run startup programs using the Startup tab of this program.
Go to the Startup tab and click Open Task Manager.
Next, select the programs you don’t like to run automatically when you turn on the System and disable them.
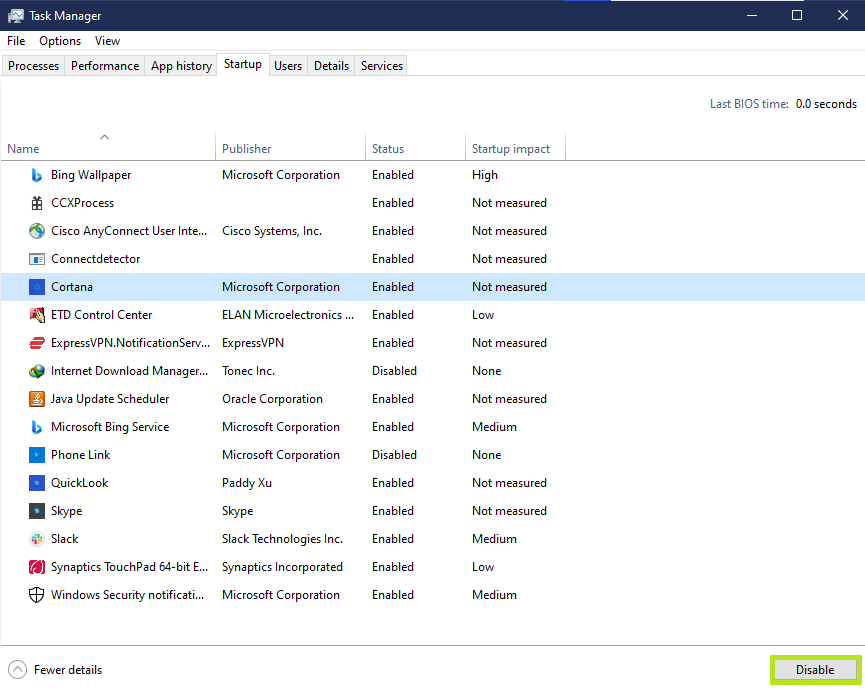
Then close the Task Manager tool and the System Configuration program by clicking Ok.
Now that you have disabled all unnecessary programs, if you restart your System, you are doing a clean boot of your System. If you notice that the speed of your Windows 10 system has increased after restarting, you can be sure that one of the programs you disabled was the culprit of your System’s slowness.
If you want to identify this program, it is better to activate them individually and see if your System slows down again until you finally find the malicious program.
7. Windows Update Troubleshoot your System.
Sometimes, the Windows update itself is accompanied by errors, like the KB4551762 update of Windows 10, which caused the usage of the processor and hard Drive to reach 100% and the speed of Windows 10 systems to drop significantly.
Although the Microsoft team immediately resolves such errors, if your Windows Update system is not working correctly, the update problems will not be determined until you start working.
To troubleshoot the Windows Update system, do the following steps:
Open Settings and click on Troubleshoot, then Additional troubleshooters from the Update & Security section.
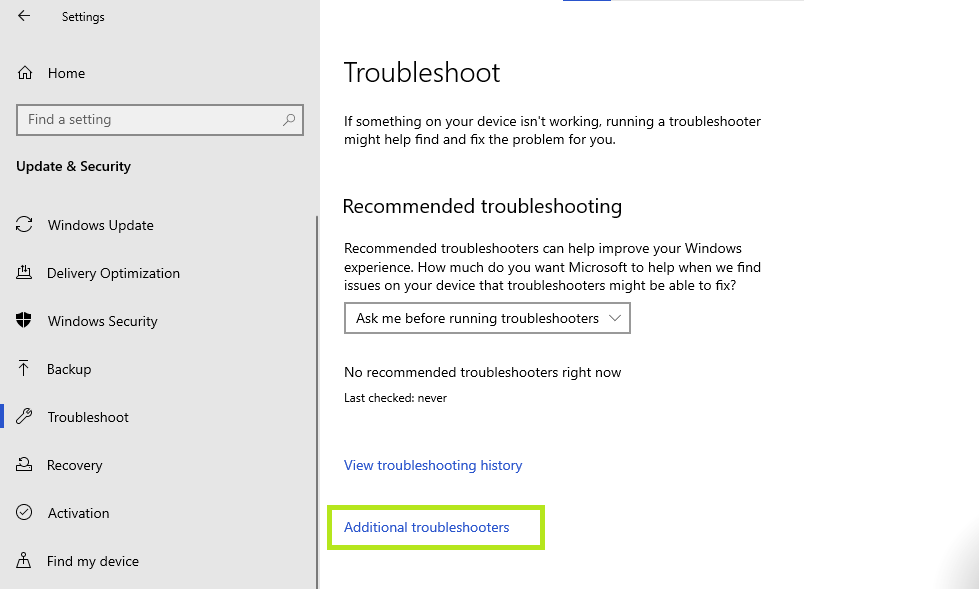
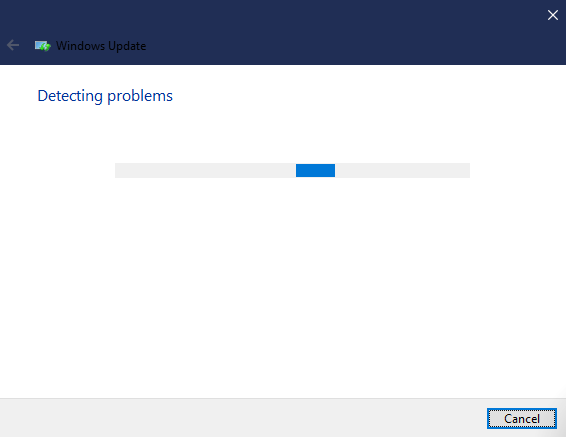
Click on Windows Update and run the troubleshooter with Run the Troubleshoot.

Allow this process to complete and Run the Troubleshoot to identify and fix the issues.
8. Run the System Restore program.
System Restore is a free tool that restores your Windows system to the same versionthat is . By running this tool, you can return to the settings and status before the recent update.
To get started, follow these steps:
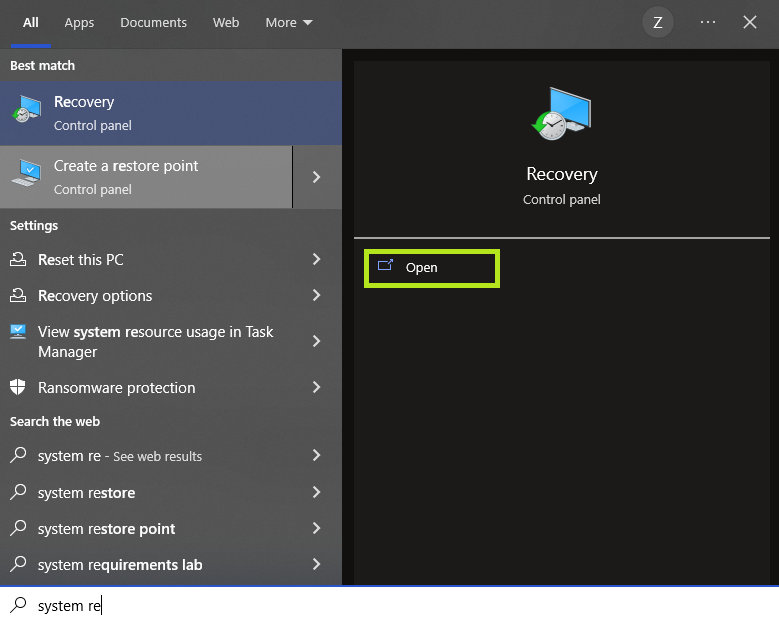
Go to the Start section, and click Create a restore point after typing System restore.
On the System Protection tab, click the System Restore button.
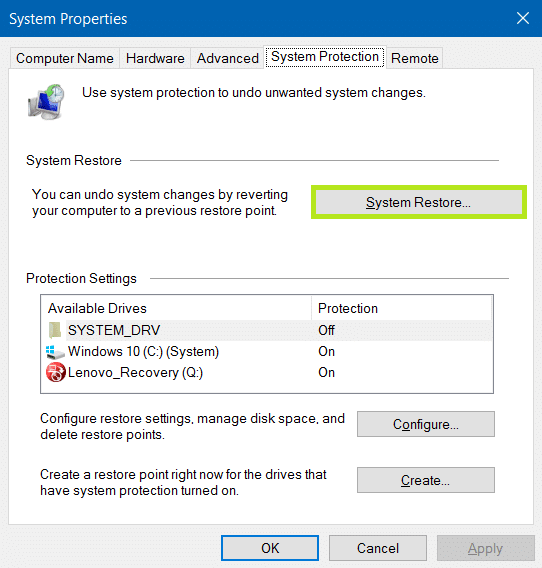
* If this button is disabled, you cannot restore your System because you have not defined a restore point before. Restore points are created from the Create section at the bottom of the System Protection tab.
Click Next, select a restore point, and click Scan for programs to confirm the programs to be removed.
Click Next and finally Finish to start Recovery.
After completing this process, your System will return to the state of the restored point you specified.
9. Factory reset your Windows 10.
Another solution that you can use to solve the problem of Windows 10 slowing down is to use the Windows Factory Reset tool. With this tool, you will have a fresh start because your System will be restored to its original state.
To factory reset Windows 10, follow the steps below:
- Open Settings and select Recovery from the Update & Security section.
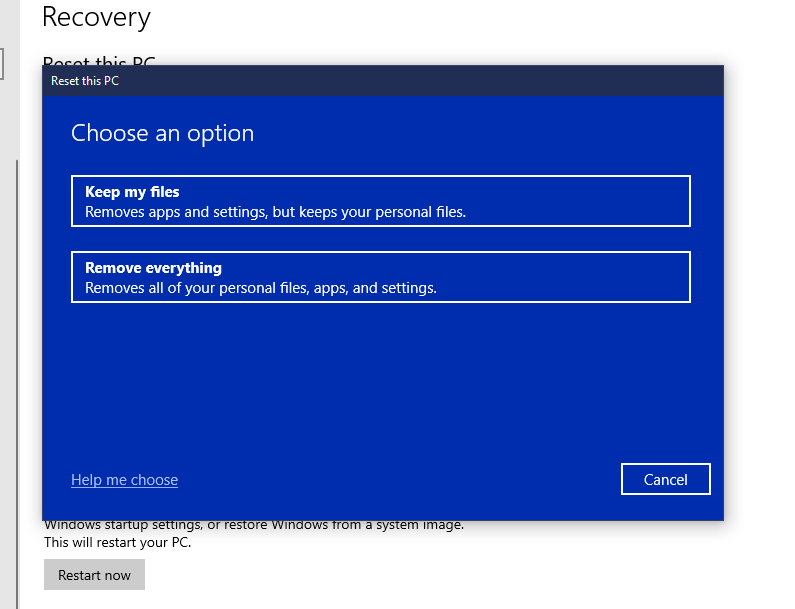
- Click the Get Started button to Reset this PC.
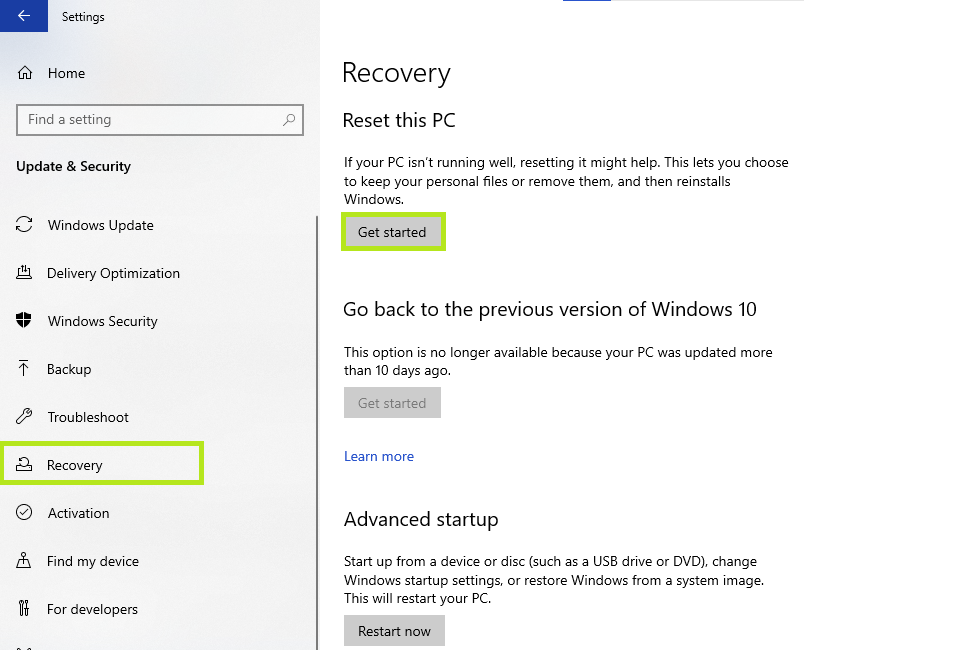
If you want to keep your files, you will most likely select Keep my files. Otherwise, select Remove Everything to start the factory reset process.
After completing the factory reset, your System will restart again, and if you follow the instructions and make the settings, you will get a short version of Windows.
Of course, apart from these methods, several other methods can eliminate the slowness of the Windows 10 system:
Disabling the automatic update of Windows 10 can reduce unwanted changes in your System.
Delete apps you don’t use.
Store large files and data in a cloud space such as One Drive.
Upgrade your system resources so that your CPU, RAM, and disk memory have the ability and speed to handle processes and applications.
In general, the problem of Windows 10 slowing down has many reasons, each of which can be solved with a series of specific solutions. If you don’t know why your System slows down after the update, it is better to perform the above methods in order before finally solving the problem.
Conclusion
Although Windows 10 updates are done with positive goals, especially the updates that are to increase the security of the System, sometimes these updates cause Windows 10 to slow down. If you also face this problem, be sure the above methods can quickly solve this problem.
Thank you for staying with us until the end of the article. We hope that reading this article was helpful for you. If you have any questions, or requests and need guidance, you can contact us by registering your opinion so we can answer you as soon as possible.