How to Partition a Hard Drive on Windows 11?
How to Partition a Hard Drive on Windows 11?
When you get a new computer or laptop, its internal storage may be SSD or HDD. Most hard drives have one partition. But when you want to organize your files in different categories, you may need to partition the hard disk and have multiple purposes. Windows 11 also has a default hard disk management option where you can create, delete, shrink, or enlarge partitions and change their size. To partition the hard disk in Windows 11, you must open the computer management section. Let’s see together how to do this.
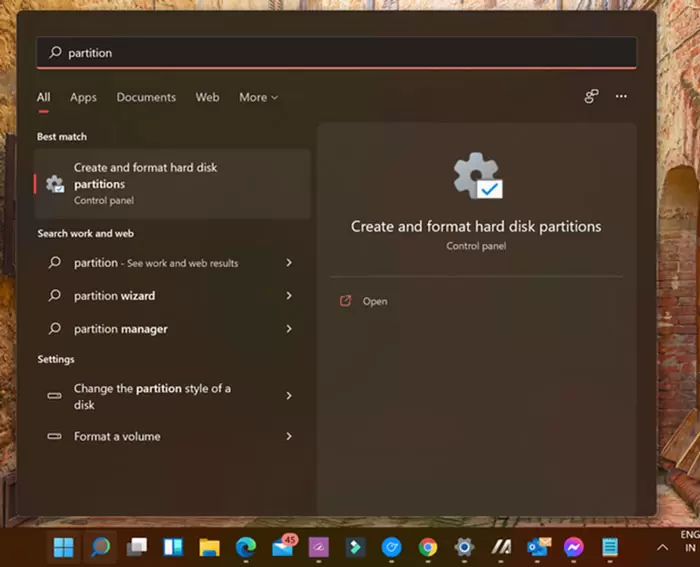
To partition the hard disk in Windows 11, open the start menu and type partition. The first option in the list will probably be to Create and format hard disk partitions. Select this option to open the Disk Management tool in Windows 11.
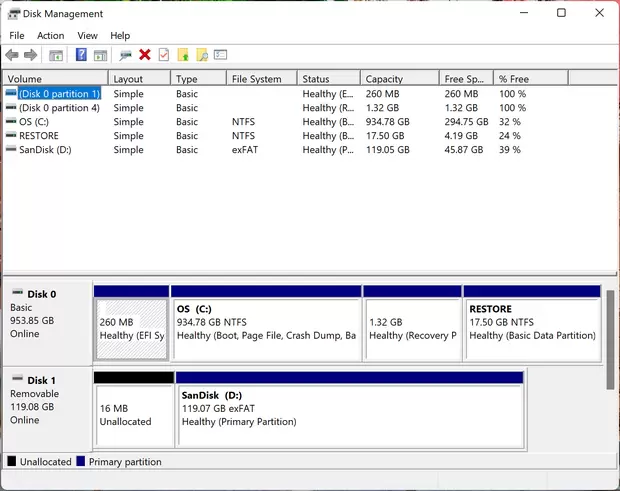
Disk Management tool can create, delete and shrink partitions in Windows 11.
Creating a new partition is as follows:
Step 1: You can create a new partition by using unallocated space or by shrinking the existing Volume. To create a new book from free space, right-click on a space in Disk Management, click on New Simple Volume, and create it based on your disk size.
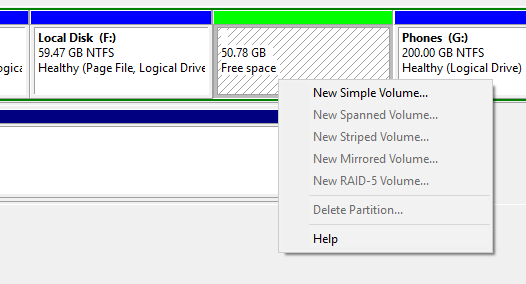
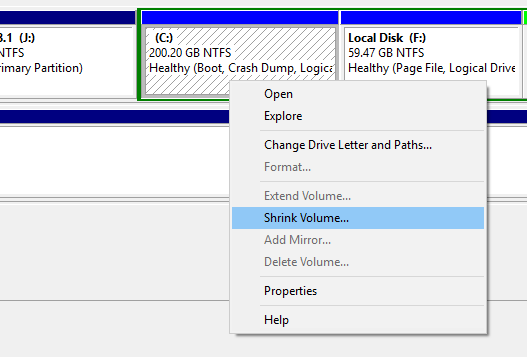
Step 2: If you bought a new laptop, you might not have free space, so to create free space, right-click on the partition you want to remove storage space from and select Shrink Volume.
Step 3: Select the space you want to open from this drive and click OK. Here you will see the partition size, Volume a,nd size after shrinking. If you shrink the primary partition of your operating system, make sure that you leave enough space for the drive to install programs and updates.
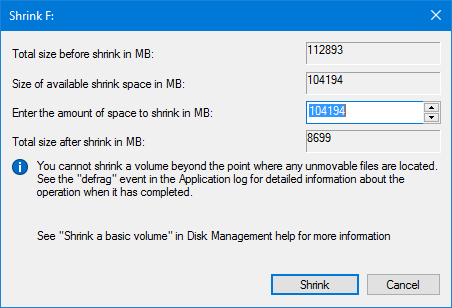
Shrink space
Step 4: After doing this, you will see the free space on your disk, and you can create a partition with the size you want with the help of the previous step.
Increasing space or Volume:
If you find that the existing drive is running out of space, you can increase the distance. But this option is only available if you have free space. But remember that you can only increase the Volume if there is always unallocated space. For example, in the image below, you can add drive F using the free space, but you cannot extend drive G because the free space is next to F.

In the add drive guide, you can select the space you want to add and then complete the process.
The built-in partition manager in Windows 11 only allows these features, and if you’re looking for advanced features, you may need to download and install free third-party tools such as Partition Manager. So, the procedure is partitioning the hard disk using the default tools in Windows 11.
Use of the software
Fortunately, AOMEI Partition Assistant Professional disk partitioning software allows partition expansion regardless of whether there is unallocated space next to the partitions you want to expand. In addition, you can even extend the section without unallocated space on the hard disk. In the following, we teach two ways to expand the partition with the help of Partition Assistant.
Method 1: Extending the partition when the unallocated space is not next to it.
Before doing this:
- You can merge one or more parts of unallocated space into one partition.
- The “System Reserved” partition cannot be combined.
- If there are running programs in the partition you want to operate on, AOMEI Partition Assistant will suggest that you either close them or do it in PreOS mode. (explained below)
- If there is no unallocated space on the disk, please go to method 2.
PreOS mode:
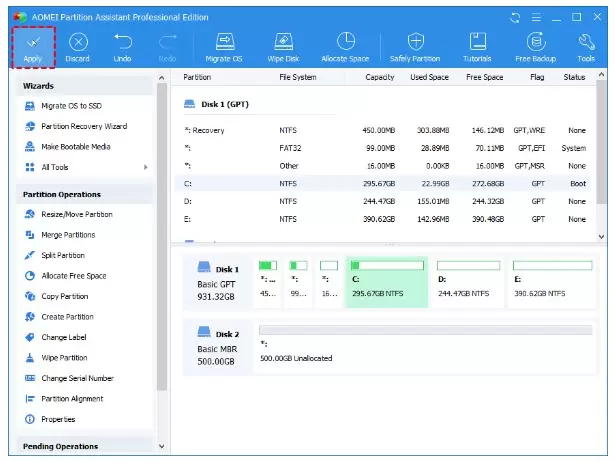
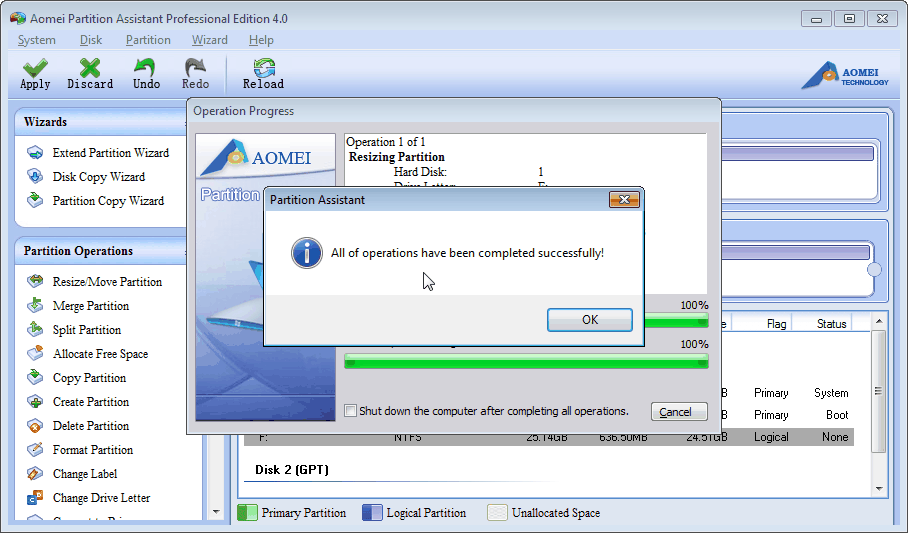
When you click the “Apply” button to perform the Partition Assistant operation, this operation ends under Windows mode. Like the picture below:
However, it is not possible to perform some operations under Windows mode, such as “Shrink system partition” or “Clone System Partition” or some running programs (including page file) that are performed on the partition you want to resize. The target partition cannot be locked. So the operation ends in boot mode (PreOS Partition Assistant mode).
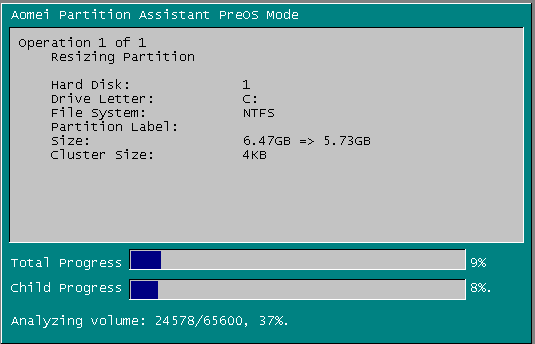
Sometimes when you encounter error code 36, 12, and 1004, you need to operate in PreOS mode.
Manual mode to activate Assistant Partition Start PreOS:
For the process to run in boot mode, you must hold down the shift button while clicking Apply in the toolbar and then do it in PreOS mode.
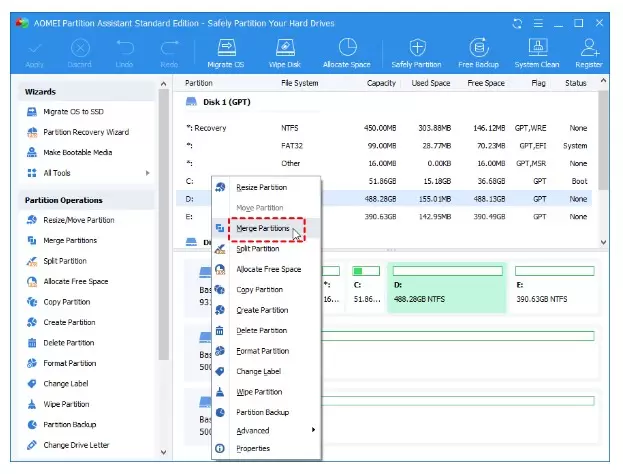
Step 1. Install and launch AOMEI Partition Assistant Professional. Right-click on the partition you want to extend (eg, Drive D) and select Merge Partition.
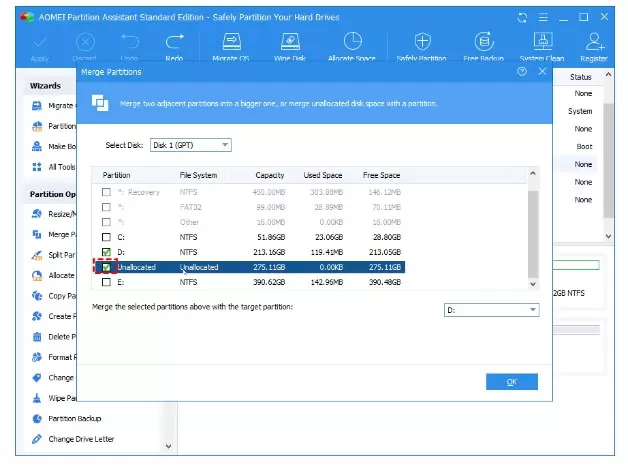
Step 2. Tick the unallocated option and then click ok.
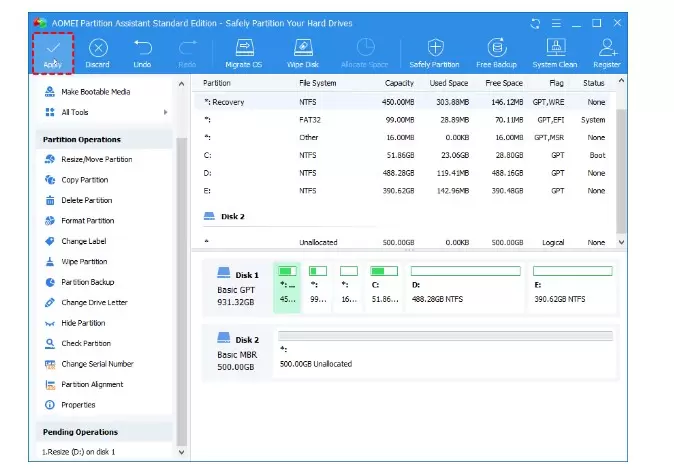
Step 3. Now you can see the preview of unallocated space added to Drive C. Click the Apply button in the upper left corner to save the changes.
Method 2: Extend the partition when there is no unallocated space.
Before doing this:
- If there are four primary partitions on an MBR disk and you want to partition one of them, automatically, the partition that is partitioned into a logical partition (each partition created by Extended is named LOGICAL). Becomes.
- If a disk has four primary partitions, this program will not allow you to partition the system partition or the boot partition unless you can convert one of the other partitions from the primary section to a logical partition. Then the program will allow you to Partition gives the system partition. The generated partition is automatically set as a logical partition.
Step 1. Open the software, right-click on a partition with enough space (here is partition D), and then select Free Space Allocate.

Step 2. Enter the free space you want to add to another partition (here, C drive), then click OK.
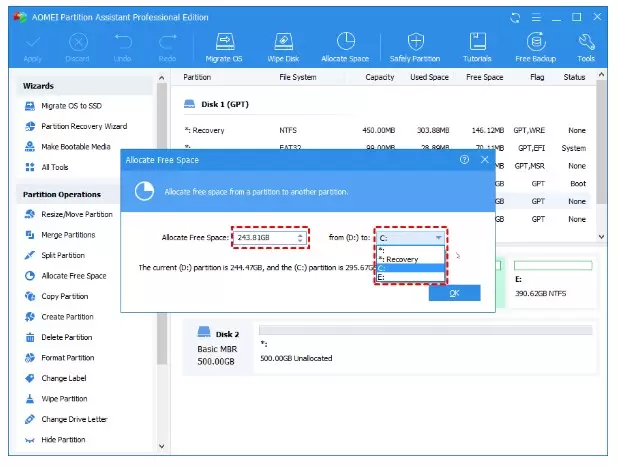
Step 3. Now you can preview the free space allocated from the D partition to the C drive. Click Apply to save the changes. Now you can extend the C partition.