


High CPU consumption Can Completely Affect Windows’ performance. This Tutorial suggests various Solutions, Each Of Which Can Help Solve The Problem Of High CPU consumption in Windows 11 and Windows 10.
One significant problem for users of Windows 11 and Windows 10 is high CPU usage, which can directly affect the user experience.
Program execution, switching between them, and the performance of simple tasks will be much slower, and the operating System may even crash completely.
If the processor is used 100%, working with Windows 11 or 10 will be almost impossible, and you may need to restart the device.
This article will identify the causes of high CPU usage in Windows 11 and Windows 10 and offer various solutions.
What causes high CPU usage in Windows 11 and Windows 10?
Each computer system can process a specific volume of tasks depending on its hardware. On the other hand, Windows allows the user to run multiple programs simultaneously. Each program consumes some processing power, so CPU usage increases as the number of running programs increases.
Here are some common reasons for high CPU usage in Windows 11 and Windows 10:
- Running multiple programs: As mentioned, the more programs running, the higher CPU consumption. This will increase the tasks assigned to the processor and may cause the System to “hang.”
- Backgrounds: If you minimize running applications instead of closing them, CPU usage will likely increase over time as more programs are launched, and you will experience High CPU Usage.
- Malware: As the name implies, malware generally causes a malfunction in the host system and, when running in the background, takes up most of the System’s processing power. It can increase CPU consumption and thus slow down the device.
- Windows Services: Sometimes, Windows itself may take 100% of the CPU for a short period by running various services on your System to complete a specific issue. Therefore, you will experience high CPU usage.
- Antivirus Problems: Some antivirus programs run continuous background scans at regular intervals to detect potential threats. It can help increase CPU consumption.
How can you discover high CPU consumption in Windows 11 and Windows 10?
If you experience unusual slowness while using Windows 11 or 10, the first step is finding the cause. To do this, follow these steps:
- Launch the Task Manager (Task Manager is performed in different ways: pressing Ctrl + Shift + Esc, pressing Ctrl + Alt + Delete, then selecting Task Manager, and finally right-clicking the Start button and selecting Task Manager)
- If a simple version of Task Manager is displayed, click the More Details button at the bottom left or press the Alt + D key combination (keyboard language must be English)
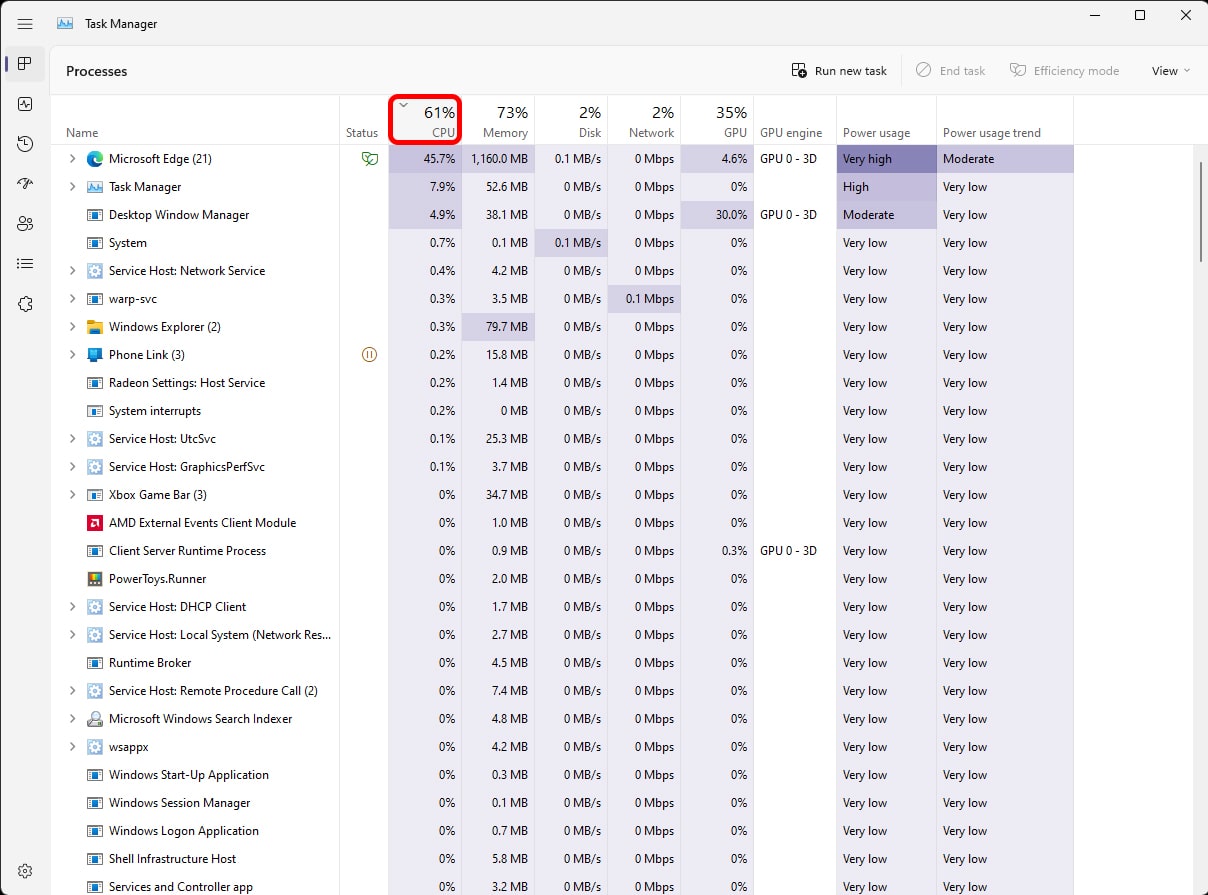
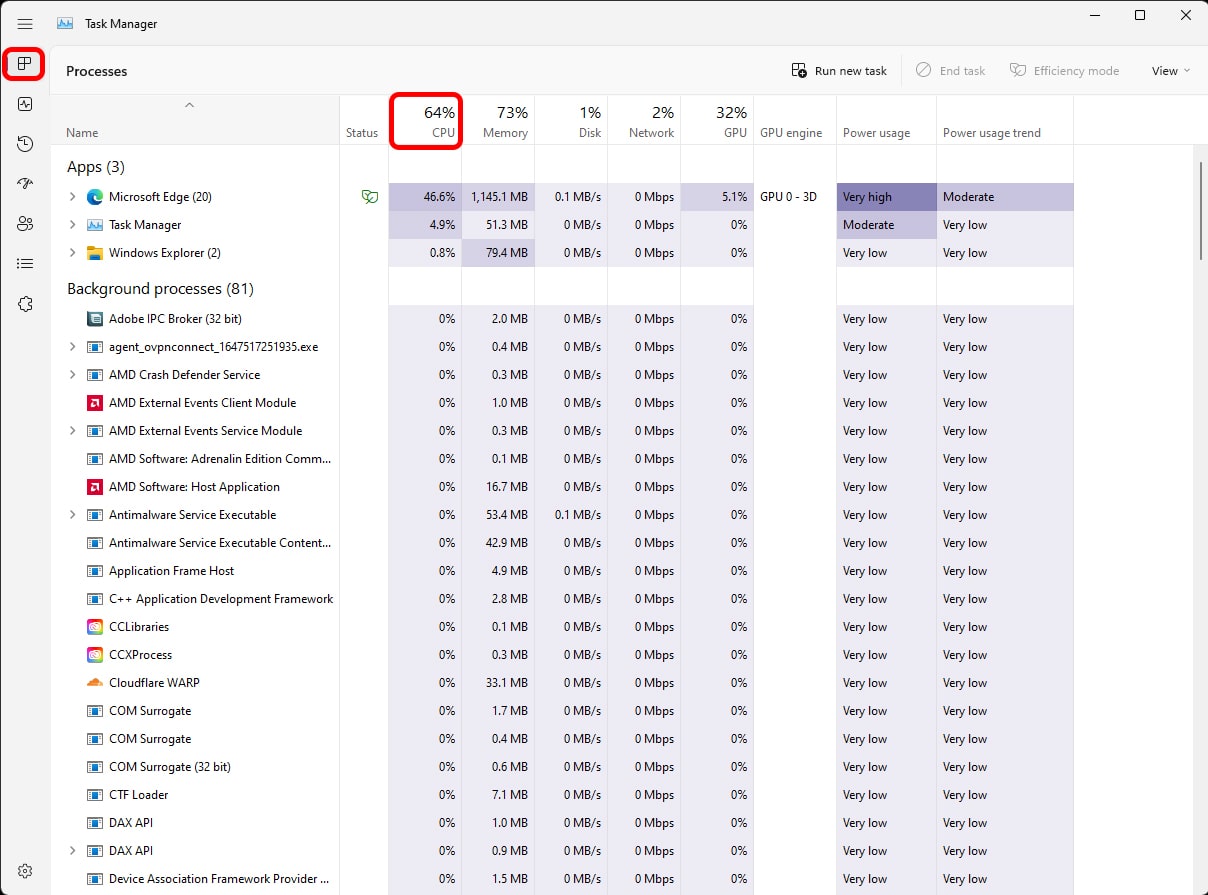
- From the Processes tab, check the percentage written in the CPU column. You can also see CPU usage from the Performance tab.

Solve the problem of high CPU consumption in Windows 11 and Windows 10
If you are experiencing high CPU usage in Windows 11 or Windows 10, the good news is that there is a solution. But the bad news is that it is not a one-size-fits-all solution; depending on your situation, each of the following solutions may be the key to solving your problem.
Find a program that consumes a lot of CPU power.
You can easily find the program with the most processing power through the Task Manager. Once the program is found, you can quickly free up the processing power by closing it so your System can breathe easily. To do this, follow these steps:
- Launch the Task Manager. (Different ways to open Task Manager are listed above.)
- Click on the CPU column from the Processes tab to sort the column contents in descending order.
- Check how much CPU the first program has.
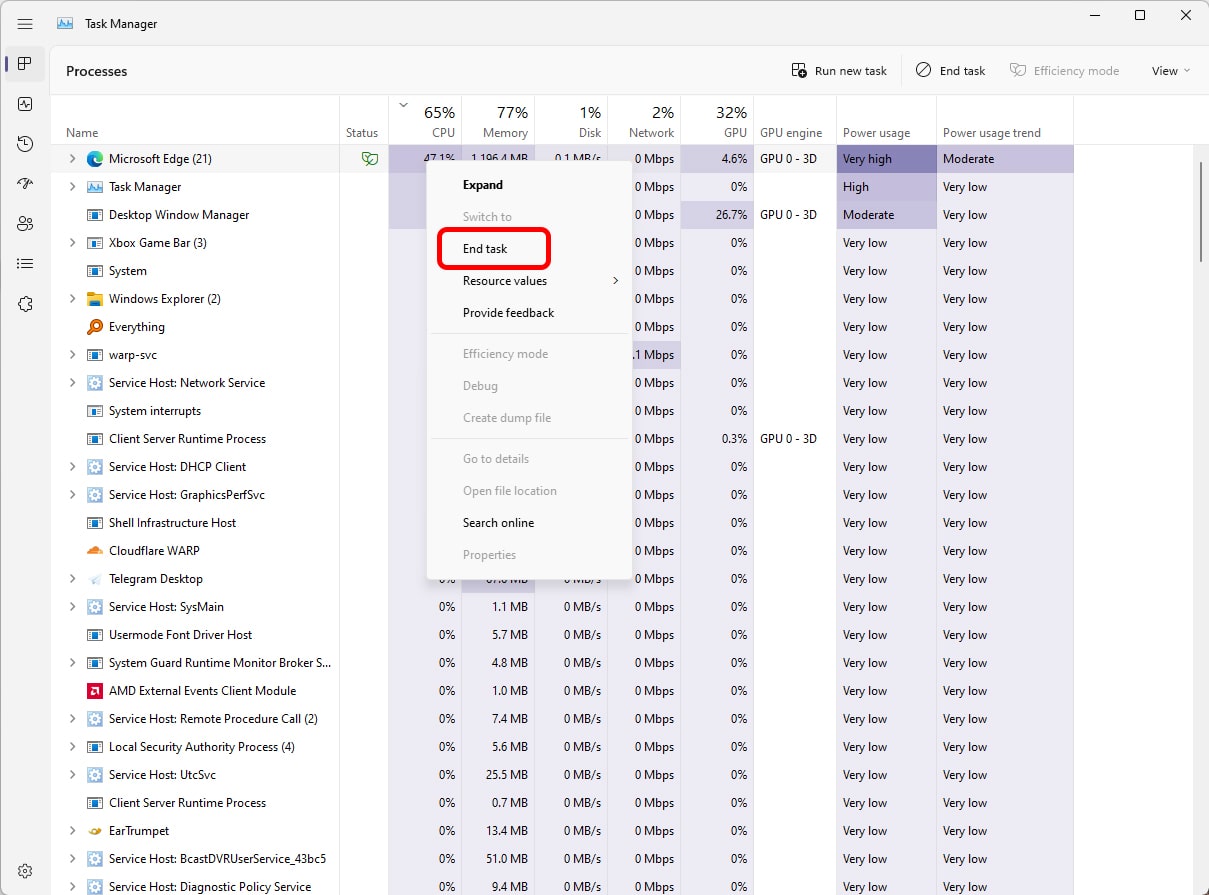
- If the program is consuming a lot of resources, you can stop it by selecting it and then hitting the End Task option.

Remember that apps like Google Chrome require a lot of processing power when streaming video or playing music while playing multiple tabs. In addition, the presencpluginsrious plugins can increase CPU consumption.
Restrict background applications
One reason for high CPU consumption can be running multiple programs simultaneously in the background. Sometimes, as we said above, you do not minimize these programs. In fact, these programs run because they have a license to run in the background and take up some of the chip’s processing power. Follow the steps below to get permission to run applications in the environment.
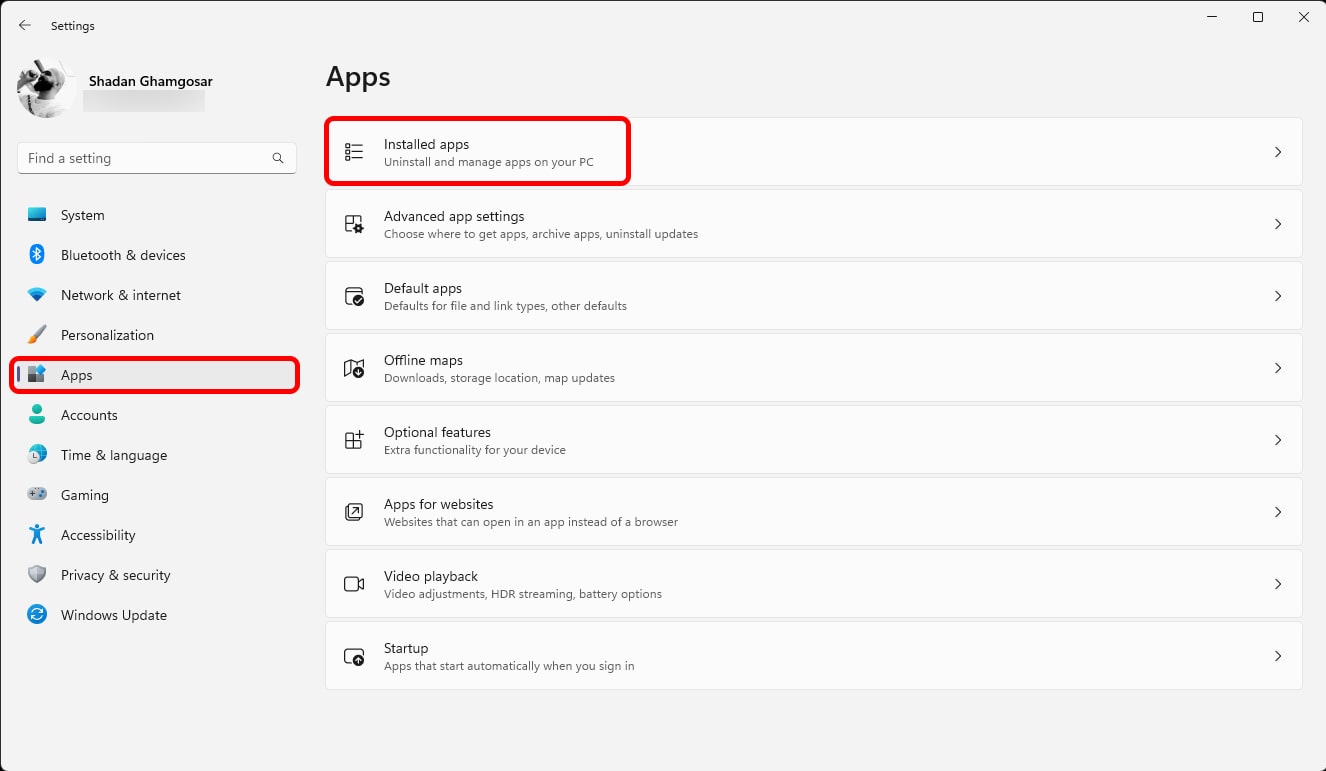
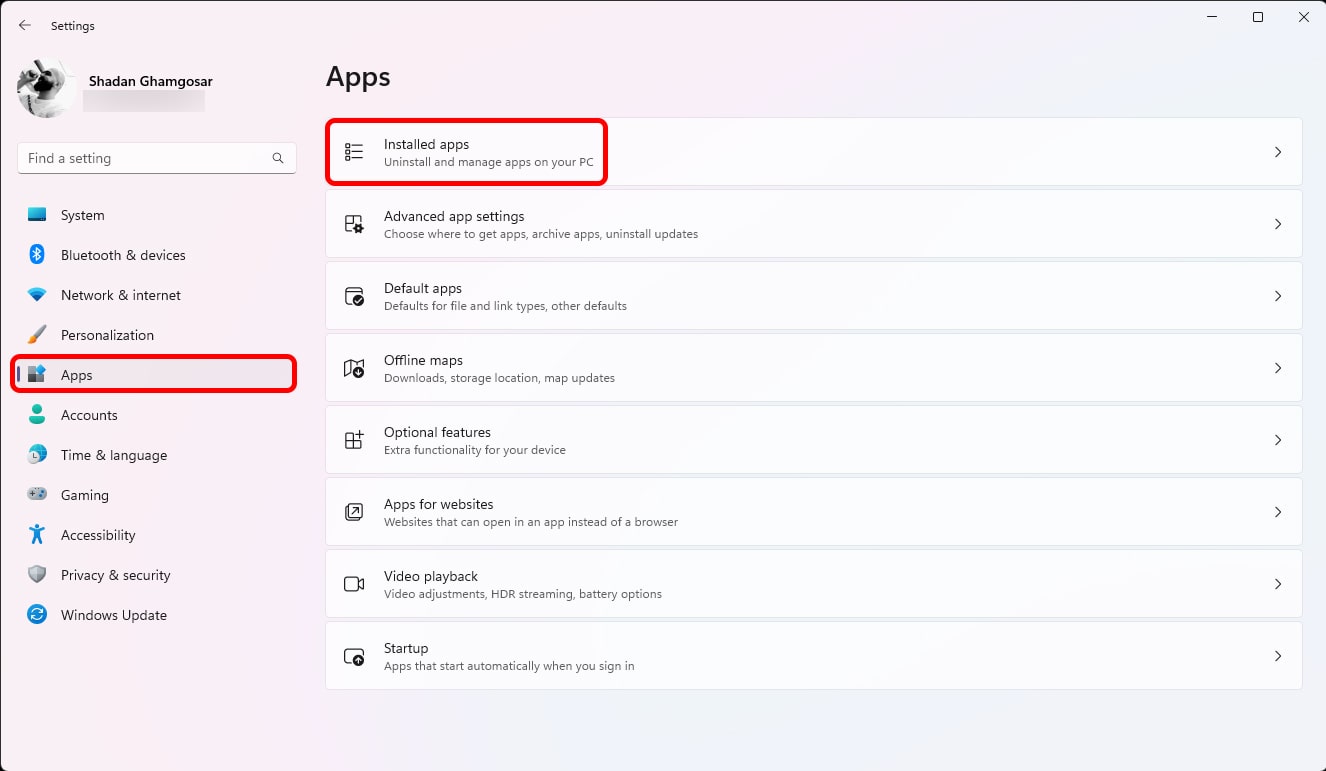
- Enter Settings (press Ctrl + I, right-click on Start and select Settings, or open Start and click on the gear icon) and click Installed Apps from the Apps section.

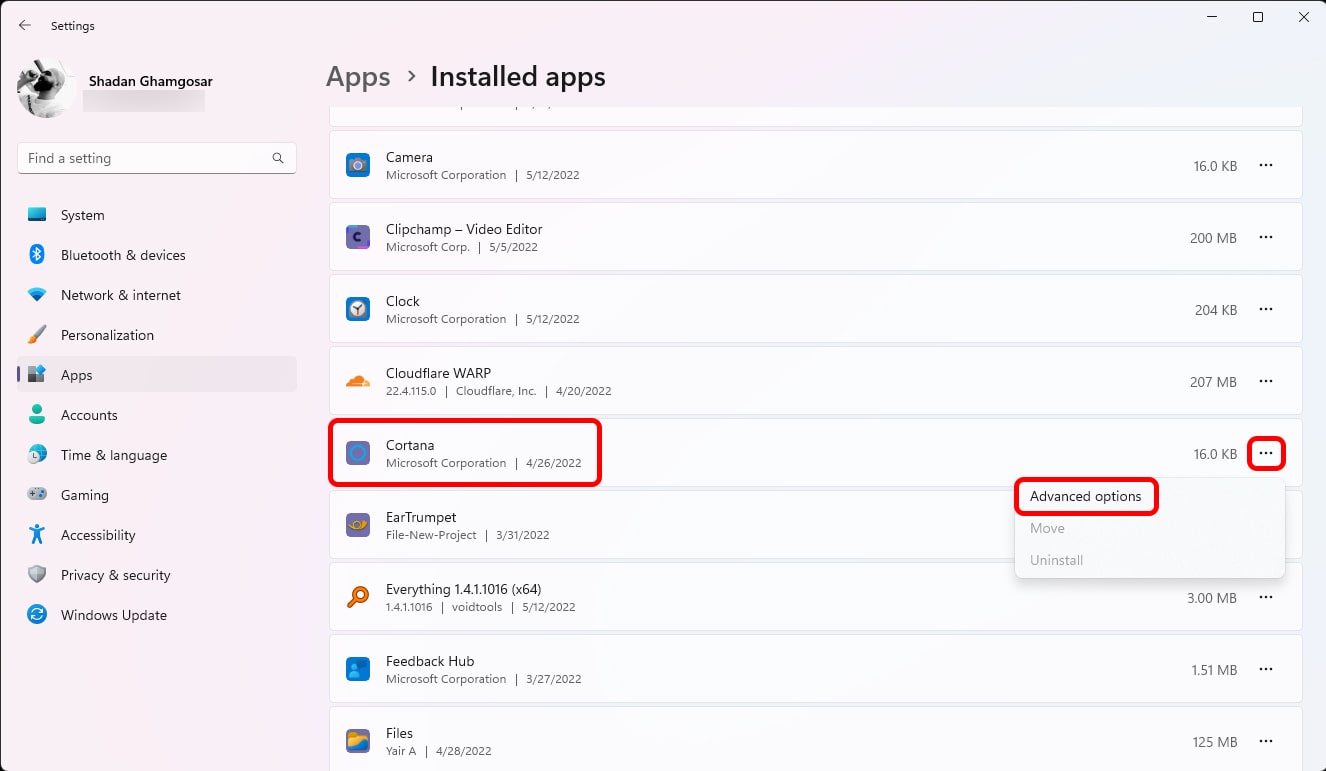
- Find the program you want, then click the three-dot icon next. Then tap Advanced Options.
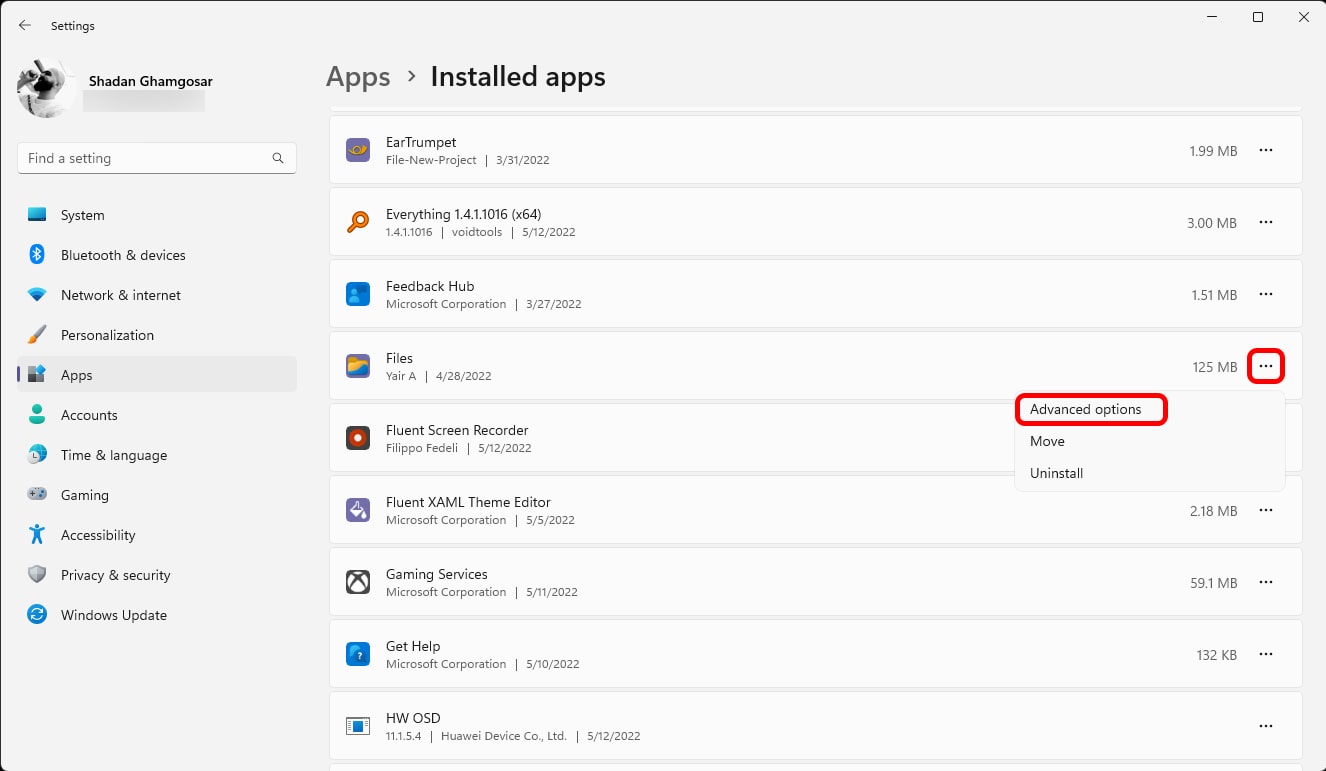
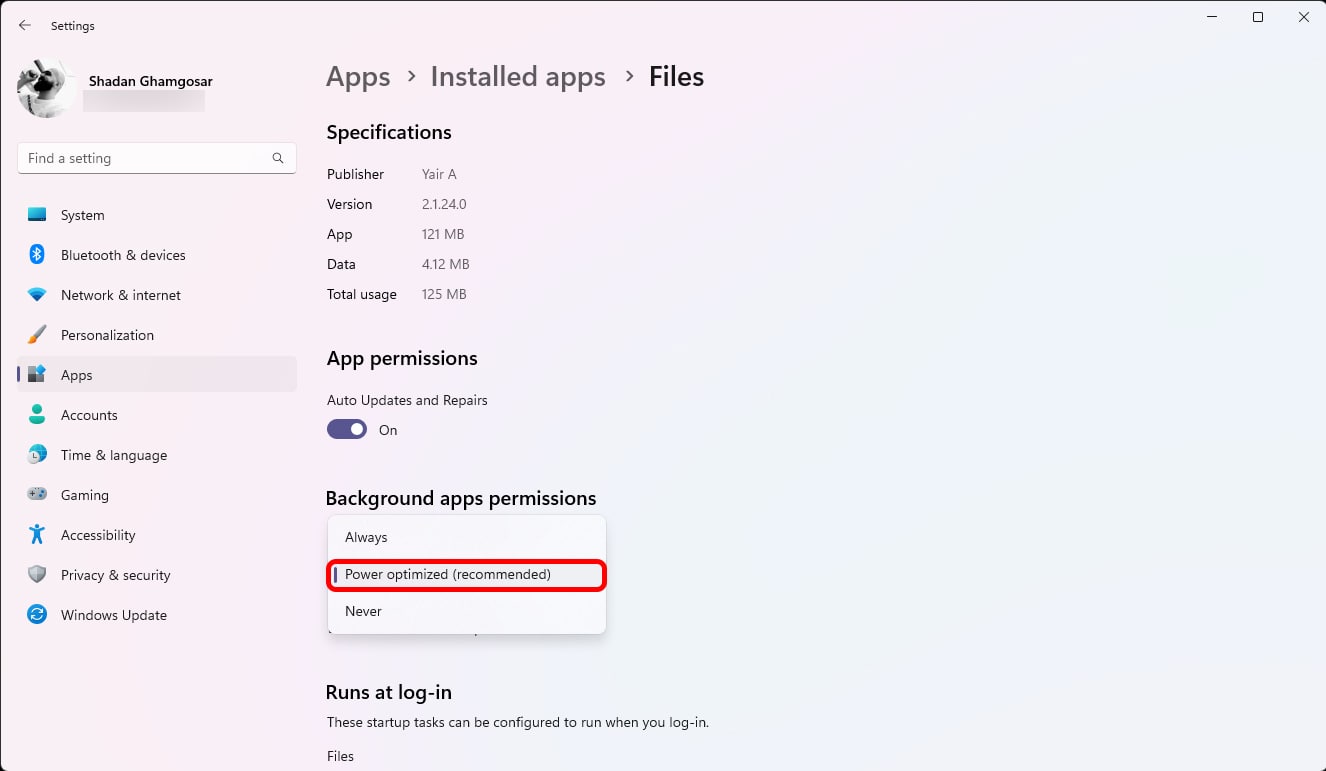
- Under the Background app permissions section, change the Always option to Never.
Repeating this process for all the programs you want will stop the license from running in the background. Keep in mind that in Windows 11, there is no way to disable the background activity of all programs, so you have to repeat the above process for each one separately.
If there is no Background App Permissions section in Windows settings, follow these steps. Note that these steps require sufficient knowledge of registry editing, and any mistaken changes may cause severe problems for the operating System. So follow the steps below with full awareness.
- Right-click on Start and select Run.
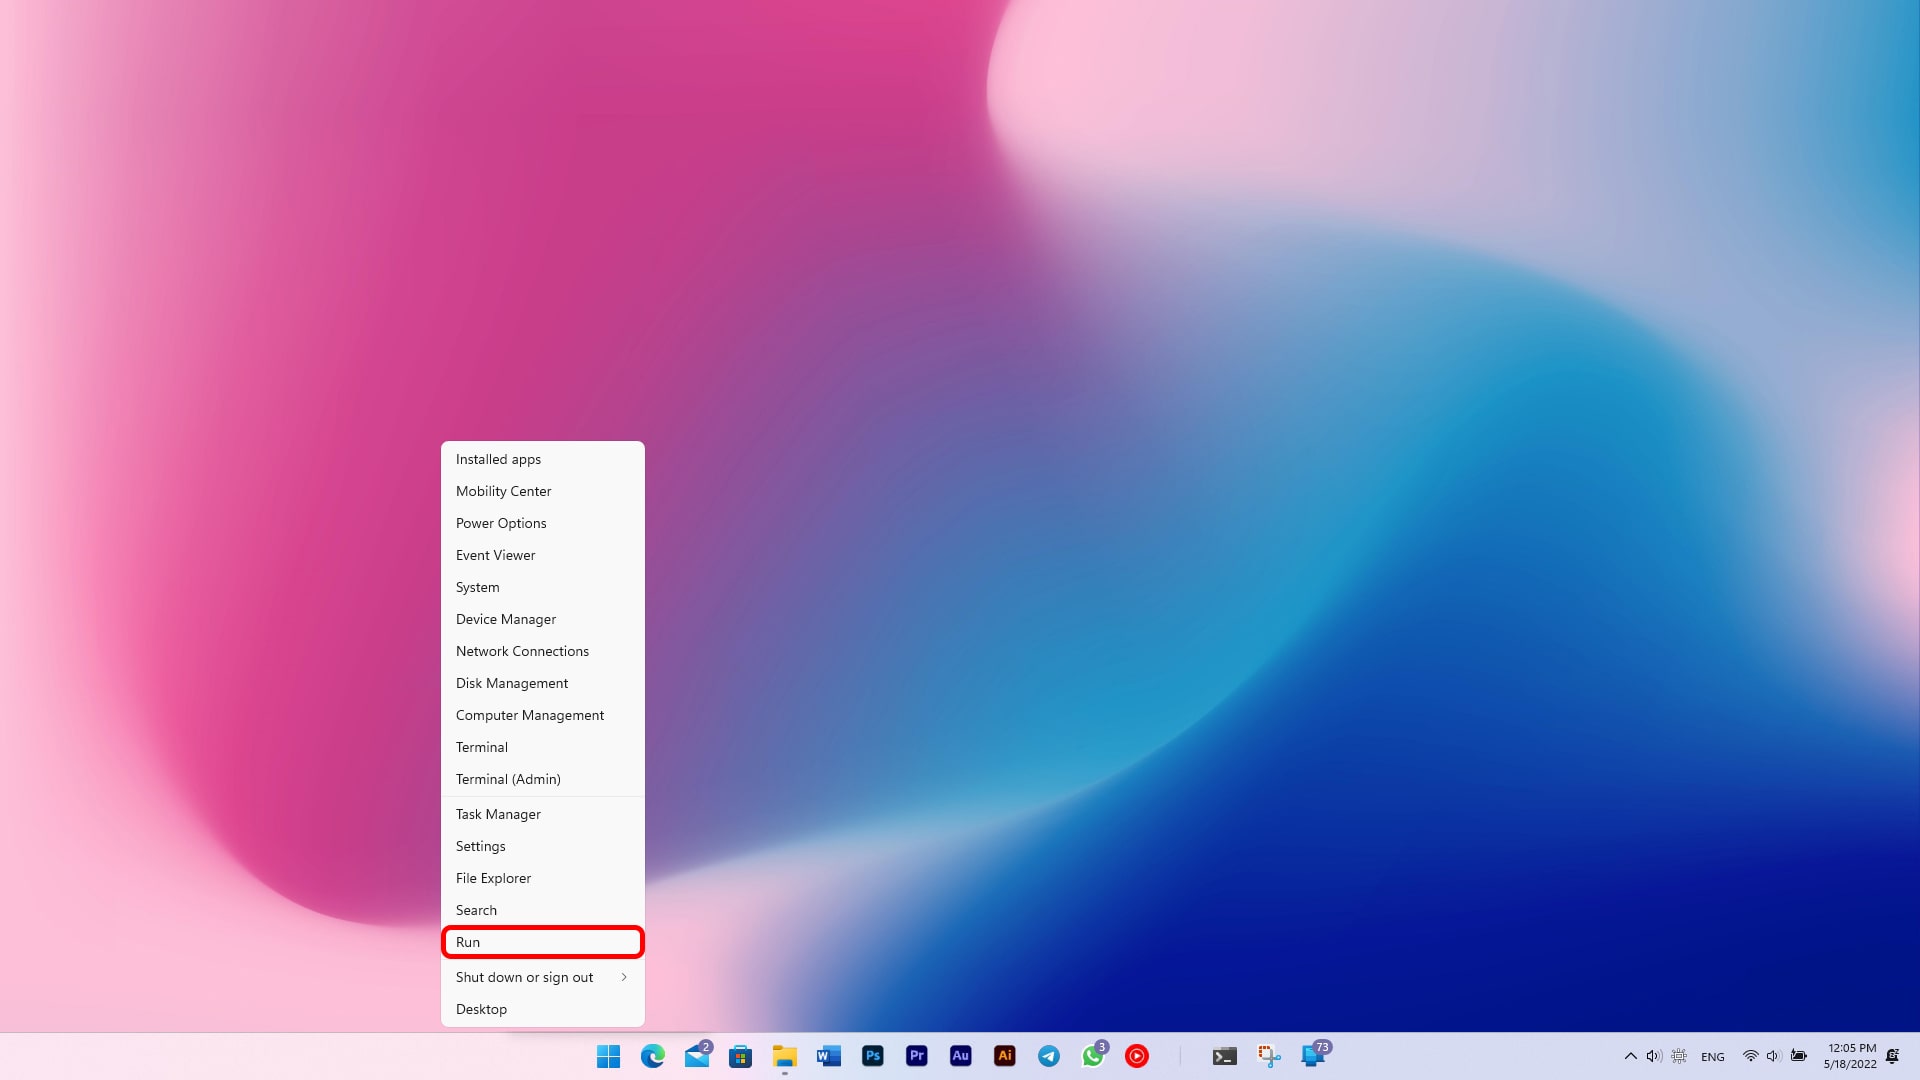

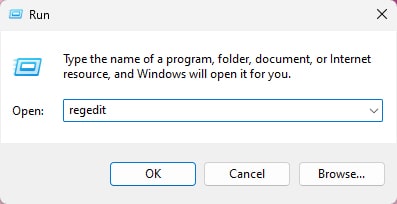
- In Run, type Regedit, then click OK.

- Follow the path below:
HKEY_CURRENT_USER \ Software \ Microsoft \ Windows \ CurrentVersion \ BackgroundAccessApplications
- On the right side of the page, find the GlobalUserDisabled field, and after double-clicking on it, change the entered value to 0.
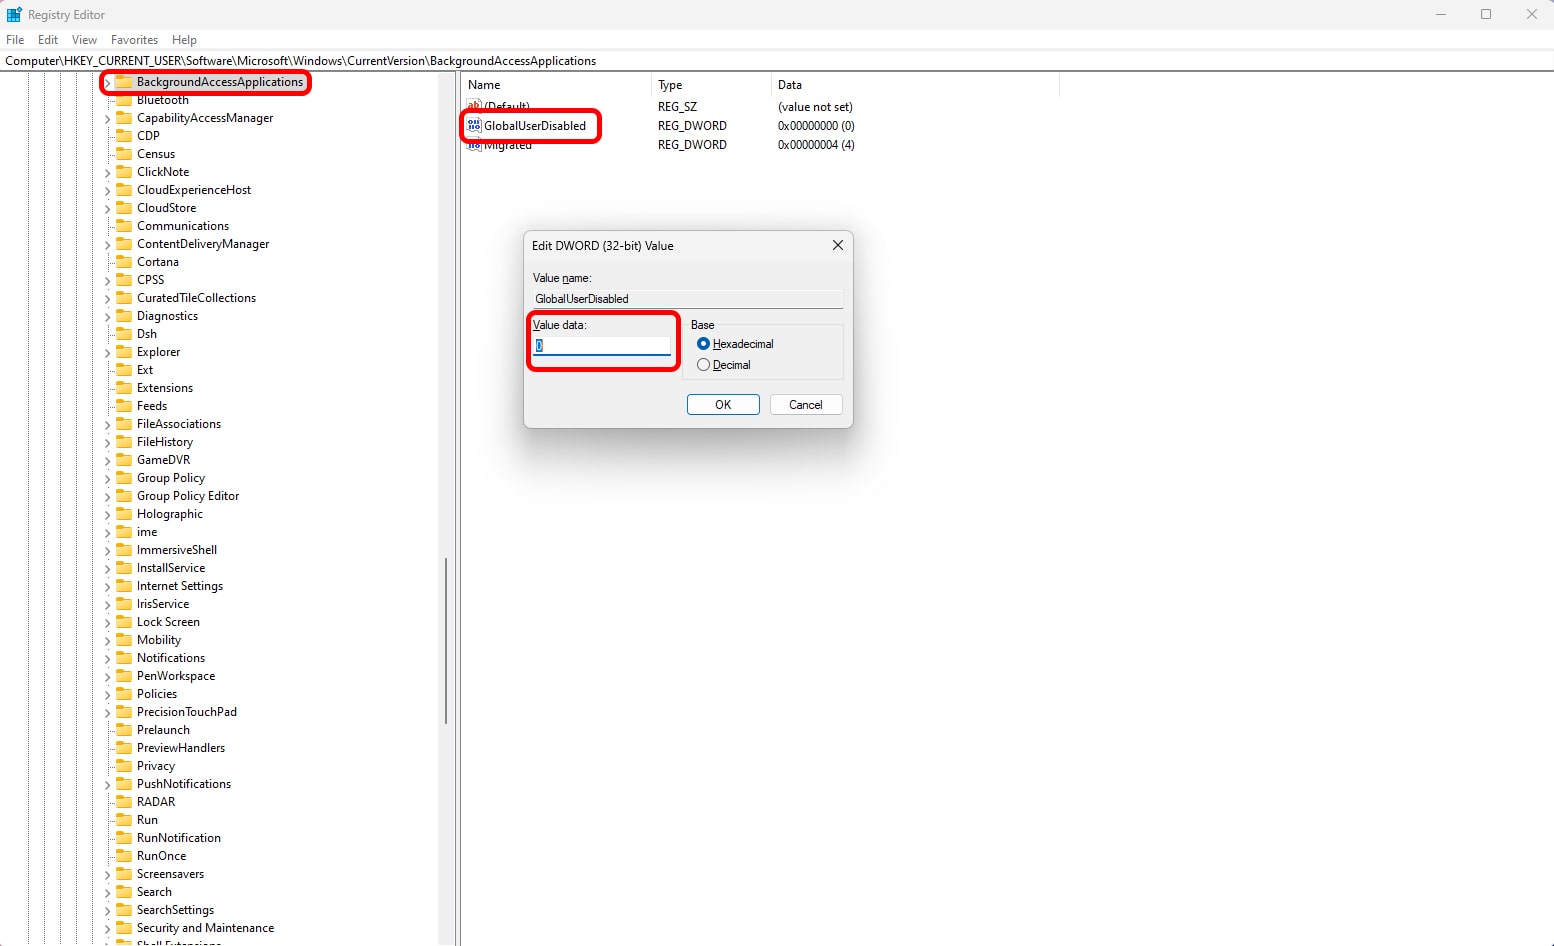

- If no such option is available, right-click the blank field and create a DWORD (32-bit) value file named GlobalUserDisabled.


- Set the value inside to 0.
- Then follow the path below:
HKEY_CURRENT_USER \ Software \ Microsoft \ Windows \ CurrentVersion \ Search
- On the right side of the page, find the BackgroundAppGlobalToggle field; after double-clicking on it, change the entered value to 0.
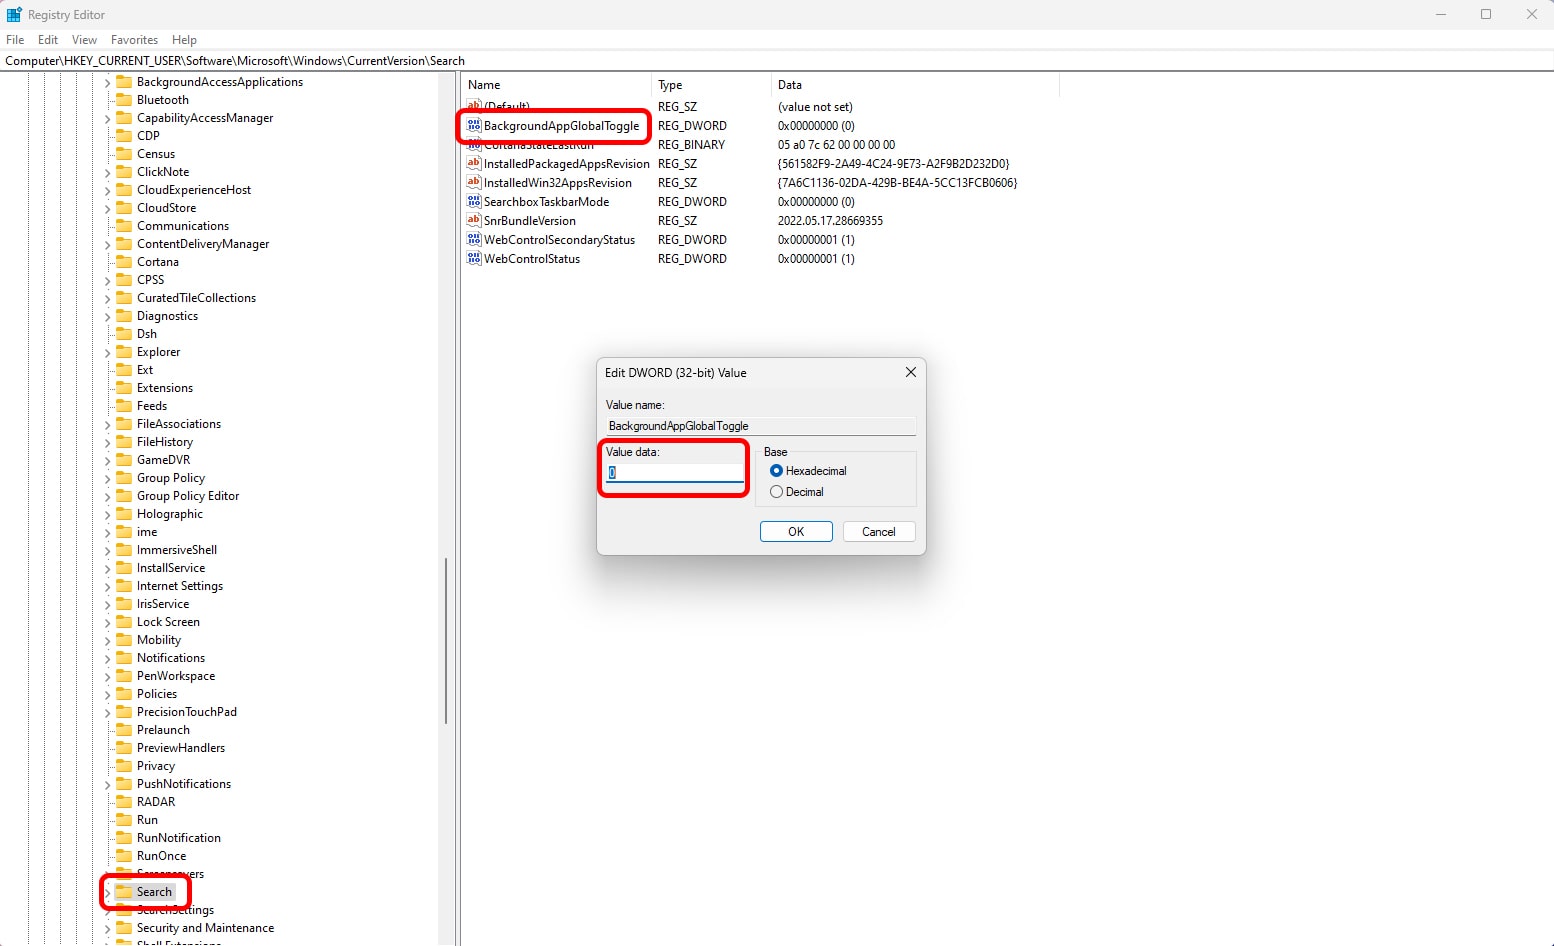
- If there is no such option, right-click on the blank as above and create a DWORD (32-bit) value file named BackgroundAppGlobalToggle.

- Set the value inside to 0.
In the application information section, Background Apps Permissions should be created.
Restore POWER PLAN settings to their original state.
Windows 11, like previous versions, allows users to select the device’s power settings from three modes: highest performance (Performance), best battery life (Battery Life), or a balance between the two (Balance). However, you can also make more advanced settings for each profile. Incorrect settings may cause problems. Problems such as high CPU consumption. Here is how to restore Power Options settings to the previous state:
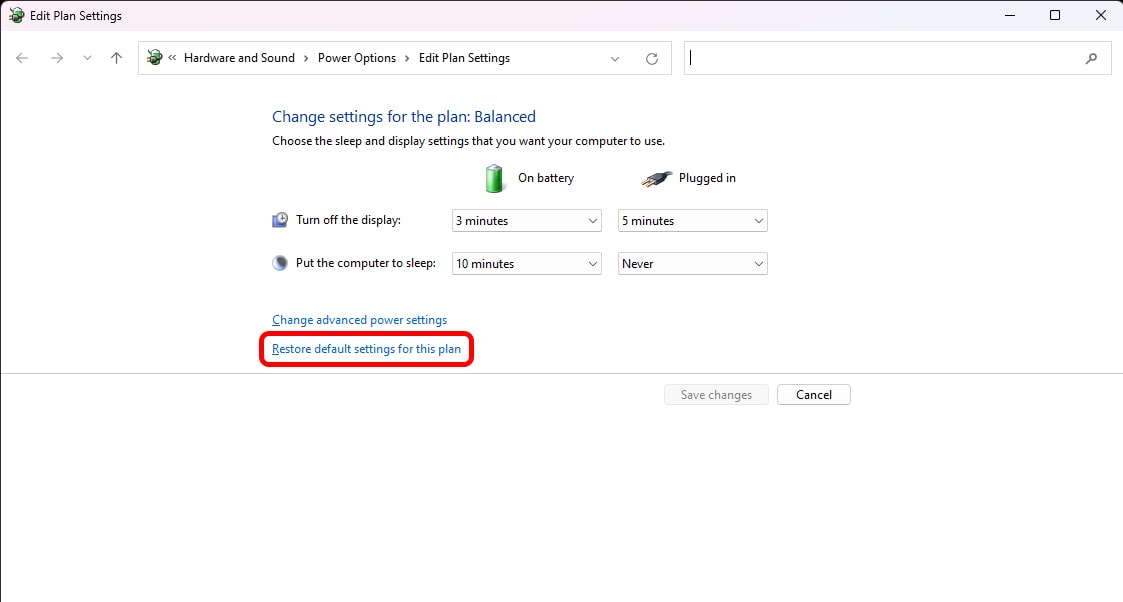
- Open Start and search for the phrase edSearcher plan. (You can open the search window directly by pressing the Win + S key combination or clicking the magnifying glass icon on the taskbar.) Then select the Edit power plan option from the displayed results.

- Click Restore default settings for this plan in the window and click Yes.

Then restart your Windows once and monitor CPU and program performance from Task Manager. If the problem persists, try the next solution.
Turn off the super fetch service.
With Windows 10, Microsoft unveiled a new feature called Superfetch that allowed the operating System to estimate the likelihood of a program running before it was opened and load the required content into memory, so the software would run much faster. Still, depending on the number of software installed, Superfetch can strain the CPU and increase its usage. To solve the problem, you can turn off this feature, which is done below:
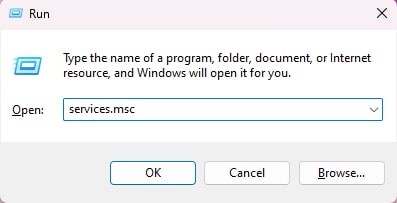
- Run. (Using the Win + R key combination, right-click on Start and select Run or search for the phrase Run at Startup or the Windows Search section.) Then, type services.MSc in the box and click OK. (You can also access this section from the Services tab in Task Manager by selecting the Open Services option.)

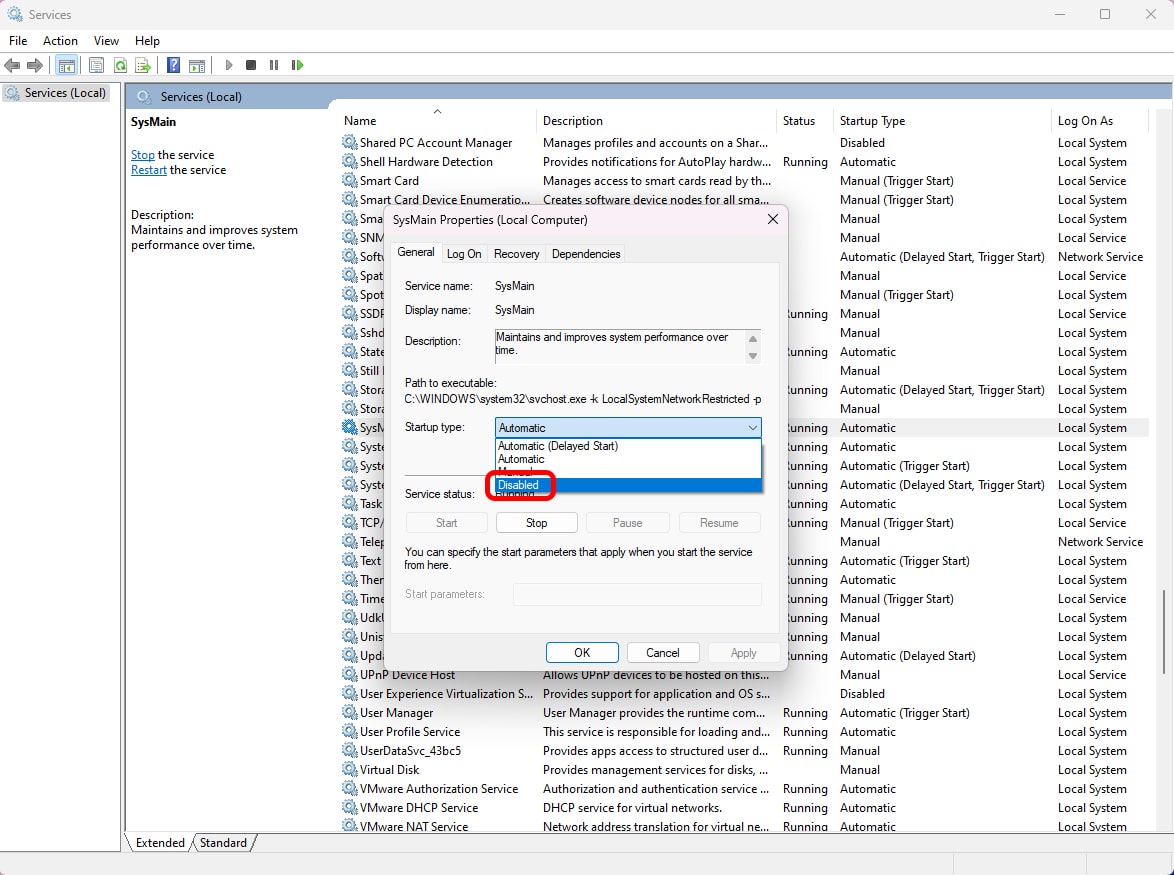
- Find the SysMain service and double-click on it to enter the Properties section.
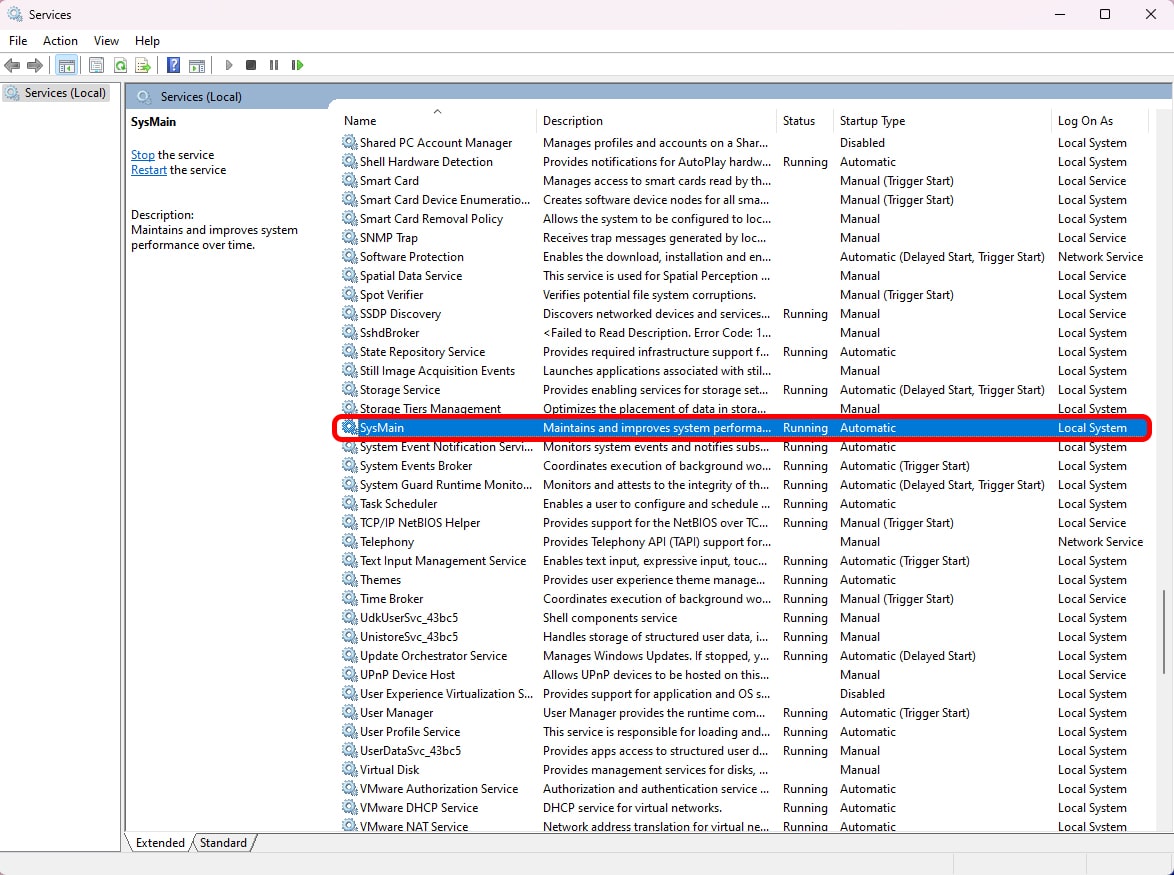

- In the Startup type section, change the Automatic option to Disabled. Then click Apply, then OK to apply the changes.
Then restart your Windows so that this time Windows runs without this feature. Monitor CPU usage in Task Manager and try the following option if the problem persists.
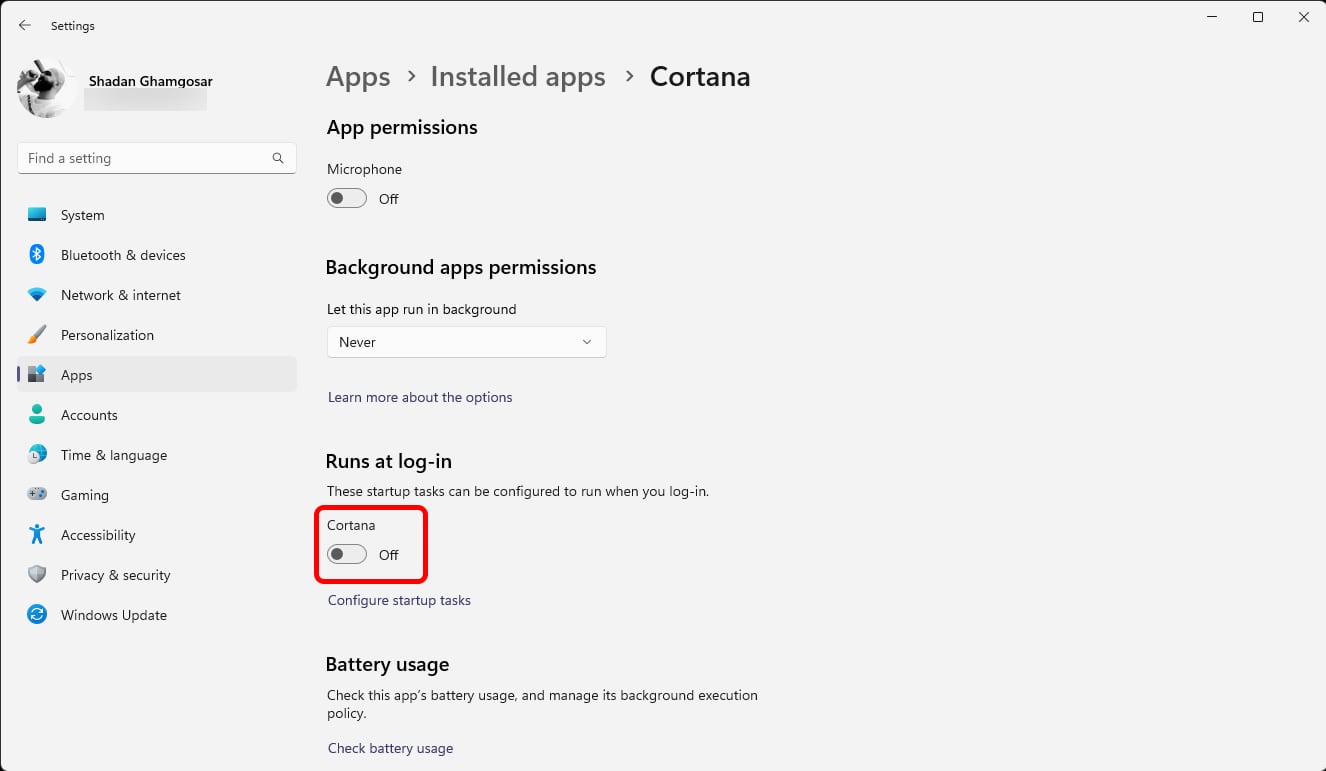
Disable Cortana
Unlike Windows 10, Microsoft’s Voice Assistant does not have the same status in Windows 11. The Redmondians have removed many of its valuable features altogether, and there is currently only a basic version that is not very practical. Interestingly, Cortana can still be one of the reasons for the high CPU consumption. So it is better to disable it through the following steps:
- Enter Windows Settings and select Installed Apps from the Apps section.
- Find Cortana among the displayed programs and click Advanced options after clicking the dot icon.
- Finally, shutting down Cortana in the Runs at log-in section prevents it from running at log-in.
Wait for Windows Updates to complete
Windows receives updates weekly, monthly, and sometimes daily, and installing them can be a CPU-intensive task. If your System is experiencing high CPU usage, it is best to check the status of system updates. To do this, follow these steps:
- Enter Windows Settings. (Different ways to enter this section are listed above)
- Check the installation status of updates in the Windows Updates section.
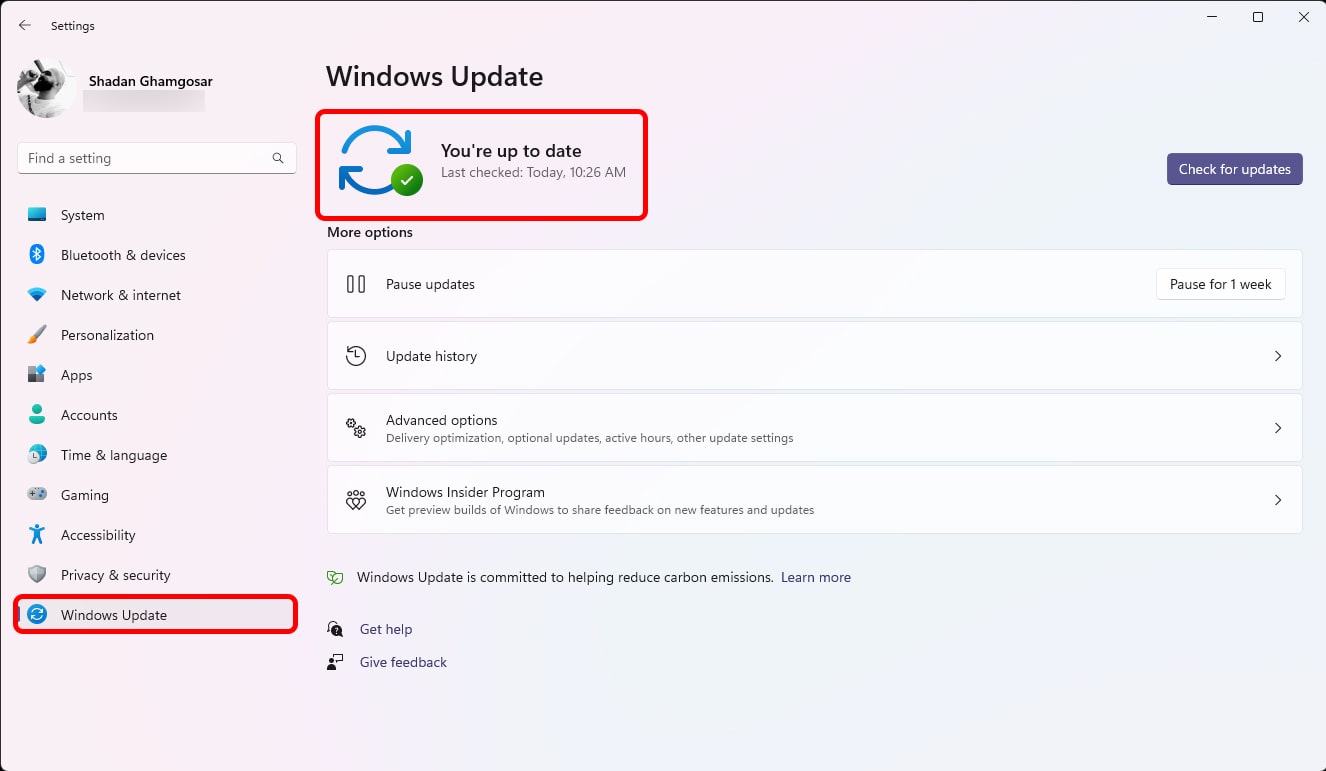
If you see an option being downloaded in this section, it’s best to wait until the installation is complete. If CPU usage remains above 10% after installation, we suggest you try the options below.
Check the power supply of your device.
Reduced Power and heavy processing can be used to increase CPU usage. When the energy required for CPU activity is not provided, this component is subject to reduced Power and, as a result, operates with Poweress Power. Therefore, we recommend that you ensure your device’s power supply is working correctly and check the condition of the connected cables.
Search for malicious programs and turn off third-party antivirus software
Malware can also be a reason for increased CPU usage. Therefore, using Windows Security to scan the System thoroughly is essential. To do this, run Windows Security, go to the Virus & Threat Protection section, click Scan Options, select Full Scan, and click Scan Now.
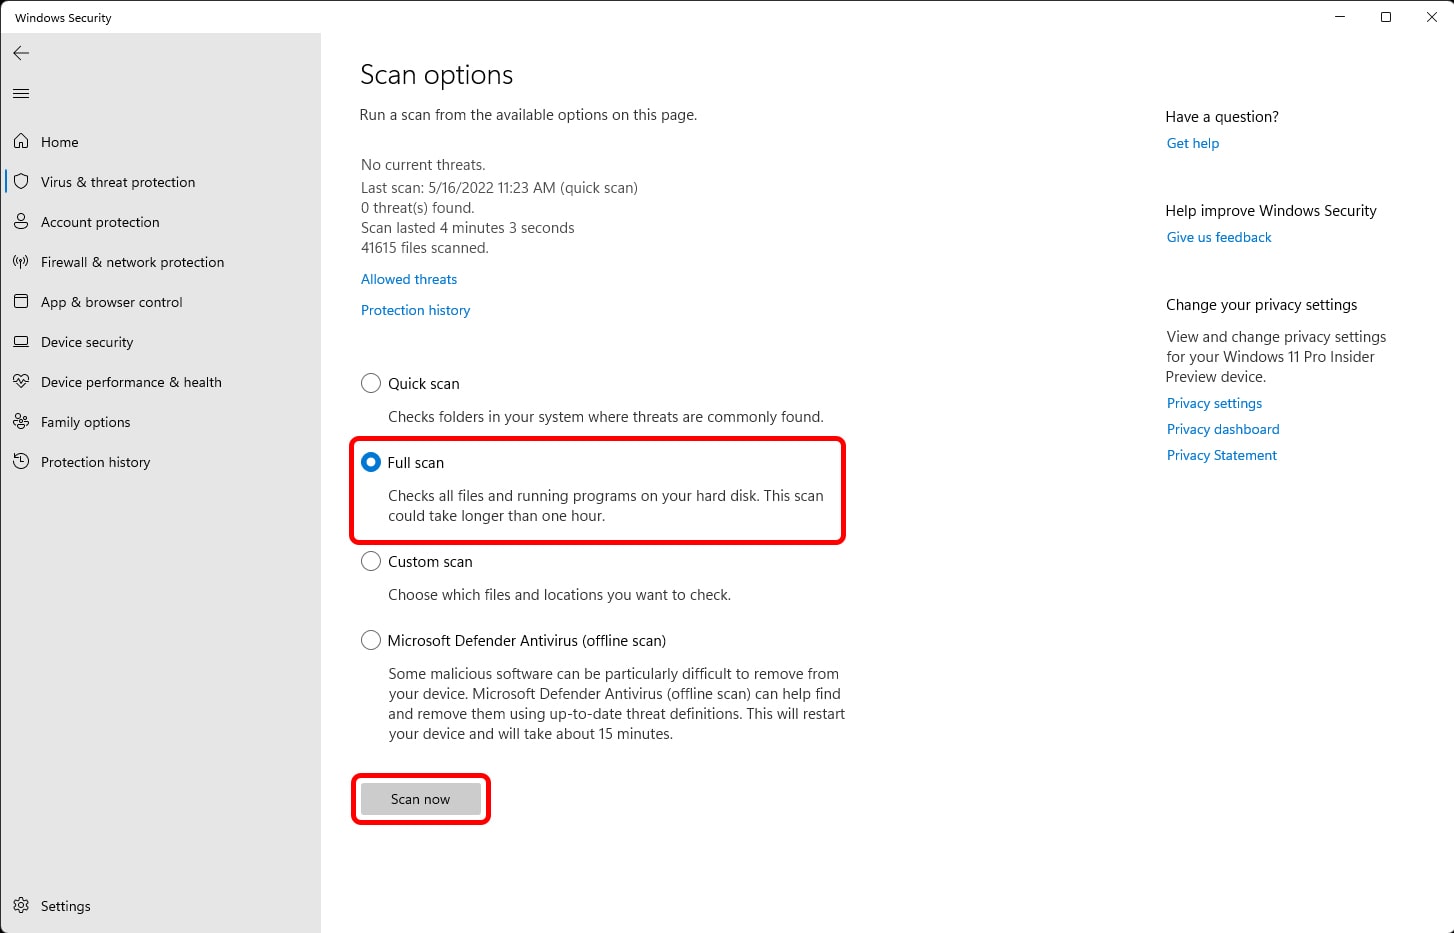

Turning off third-party antivirus software is another option. By constantly scanning and monitoring various files on your computer, some antivirus programs can impose an additional burden on the CPU, leading to higher CPU usage. To resolve high CPU usage in Windows 11 and Windows 10, disable your antivirus and check CPU performance.
Exit the Windows Insider program.
If you’ve logged in to Windows Insider with your Microsoft account and are experiencing high CPU usage, we suggest you quit. Because joining Windows Insider will install the beta and Dev versions of Windows 11 or Windows 10, Versions that are lower than the stable general version of Windows. So, high CPU usage can be a known (or even unknown) bug in the latest Windows Insider build.
We suggest that you exit the Windows Insider program using the following steps:
- Enter Windows Settings and select Windows Insider Program from the Windows Update section.
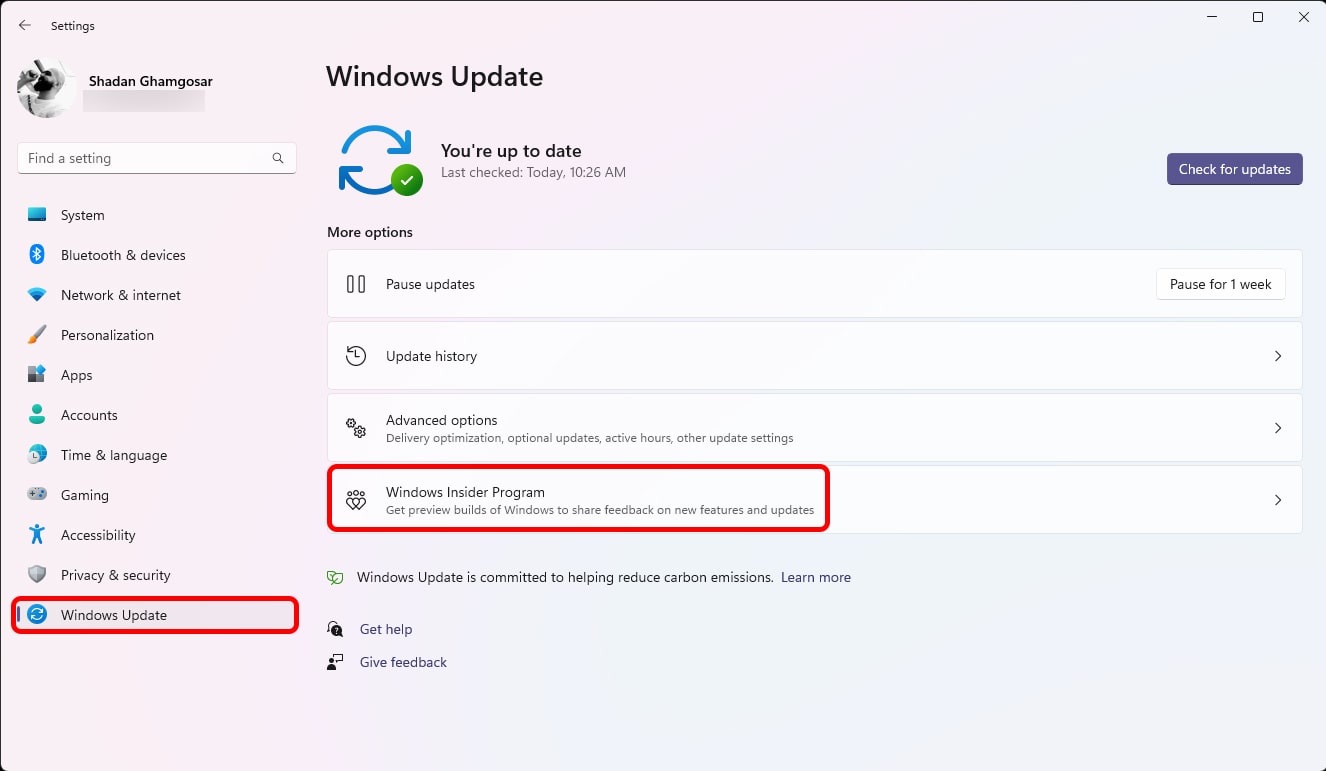
- In the Stop getting Preview builds section, enable the Unenroll this device option when the next version of Windows is released.
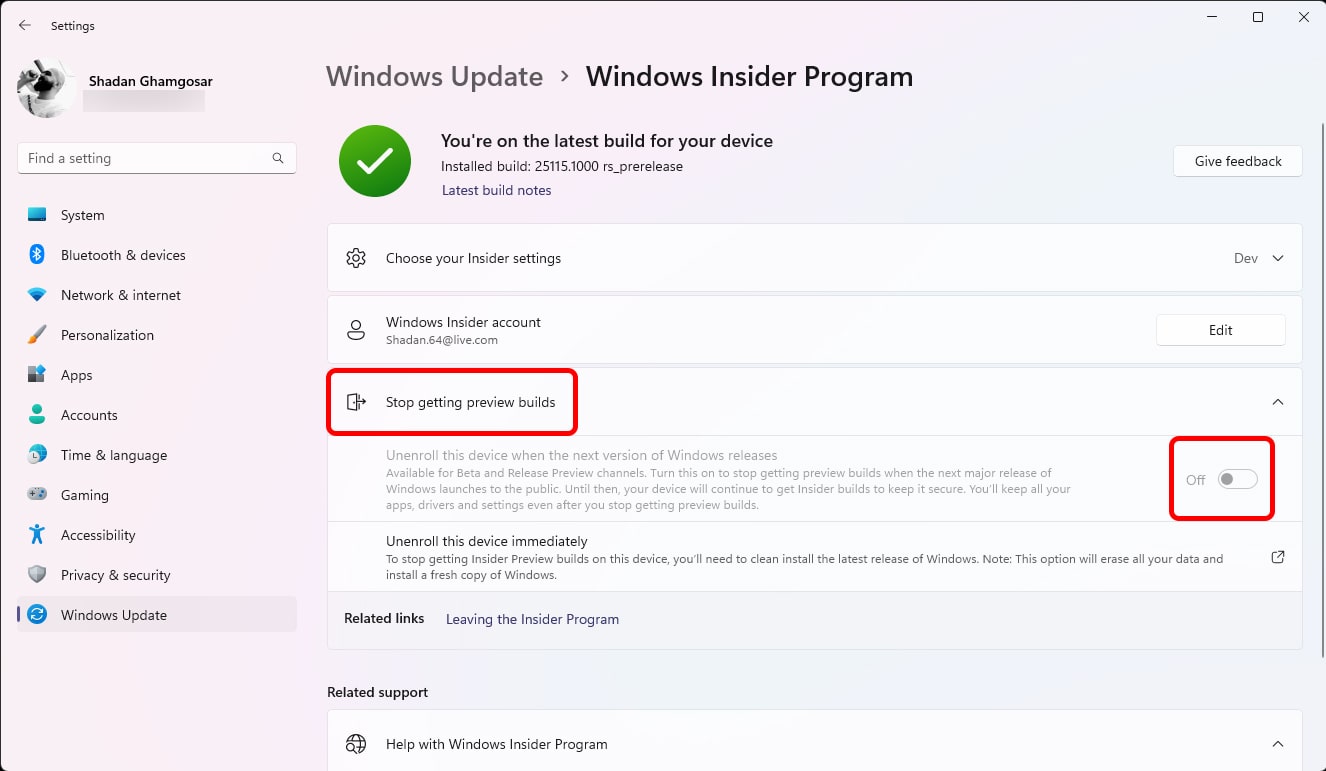
- Restart your Windows to apply the settings.
Note: By following the steps above, the unstable version you have installed will not be updated to the stable version; only future versions will be released to you. Therefore, we recommend that you download and install the latest, stable version of Windows 11 or Windows 10 if you still experience high CPU usage. After installing Windows, it is clear that all information and programs on the Windows drive will be deleted.
Use System Restore
The high CPU consumption in your System may be due to changes in the settings or the installation of incompatible programs. In these cases, you can use System Restore. This tool allows you to restore your Windows to its latest registered steady state. Before doing anything, you should remember that using System Restore will delete all the information and programs installed since then.
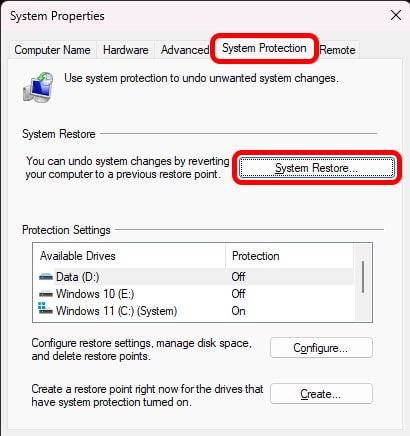
- Open Windows Search with the key combination Win + S, then search for “Create a restore point.” Run the first option with the same name as the search term.

- From the System Protection tab, click the System Restore button.

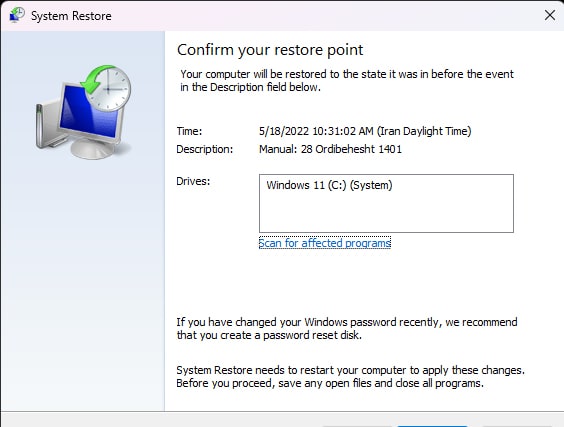
- Select the last restore point (preferably Select Recommended restore) and click Next.
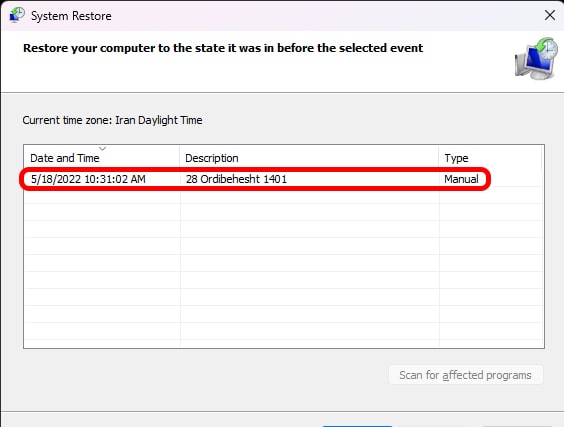

- Follow the steps individually to restore the operating System to its previous state.
Update your Windows to the latest version.
Operating systems are always released with unknown bugs and issues. Problems may be revealed sometime after the public release, and the only way to fix them is to install a new update published by the manufacturer. Windows is no exception, and Microsoft always releases minor updates, commonly known as patches, after discovering new bugs. Follow these steps to check the status of recent updates:
- Open Windows Settings. Then click Check for Updates in the Windows Update section and wait for the new updates to complete.
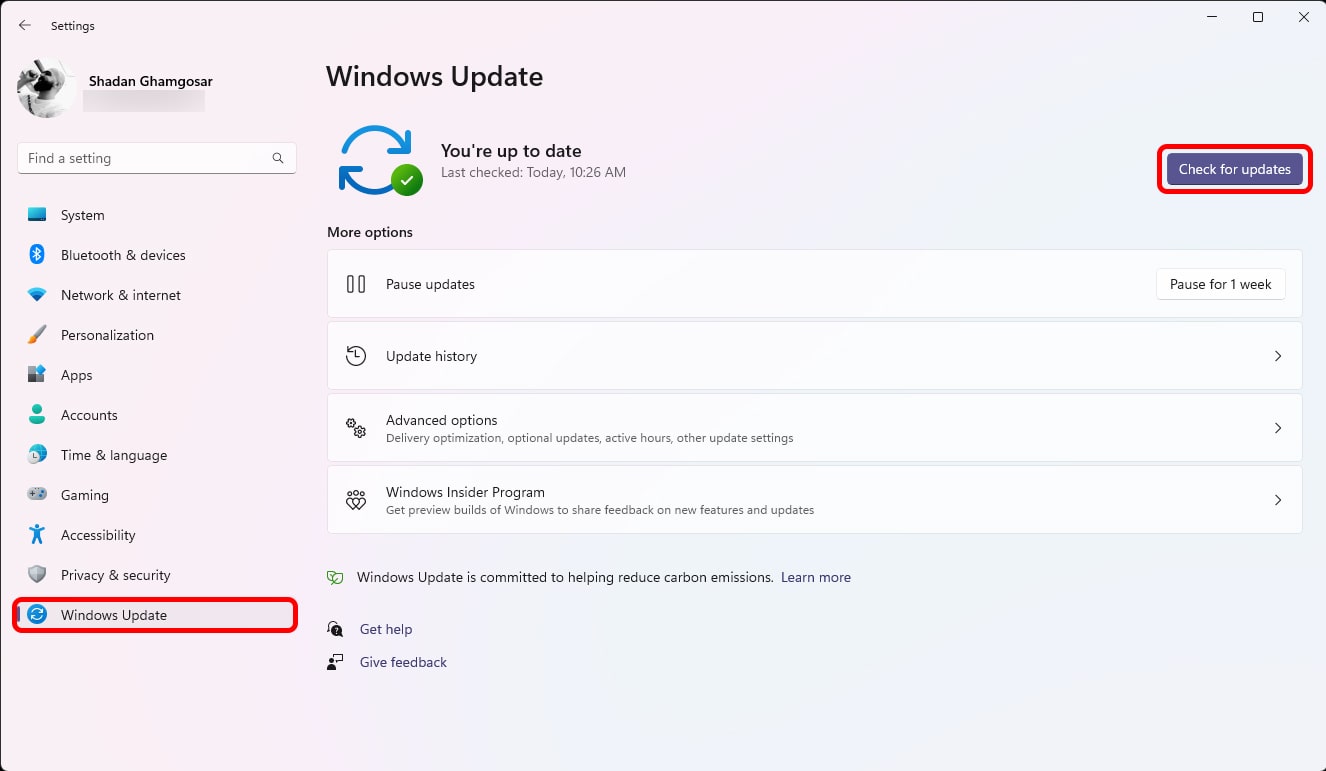
If a new update is released, install it and restart Windows. The problem is likely to be resolved, but there are still options to try if this option does not resolve your issue.
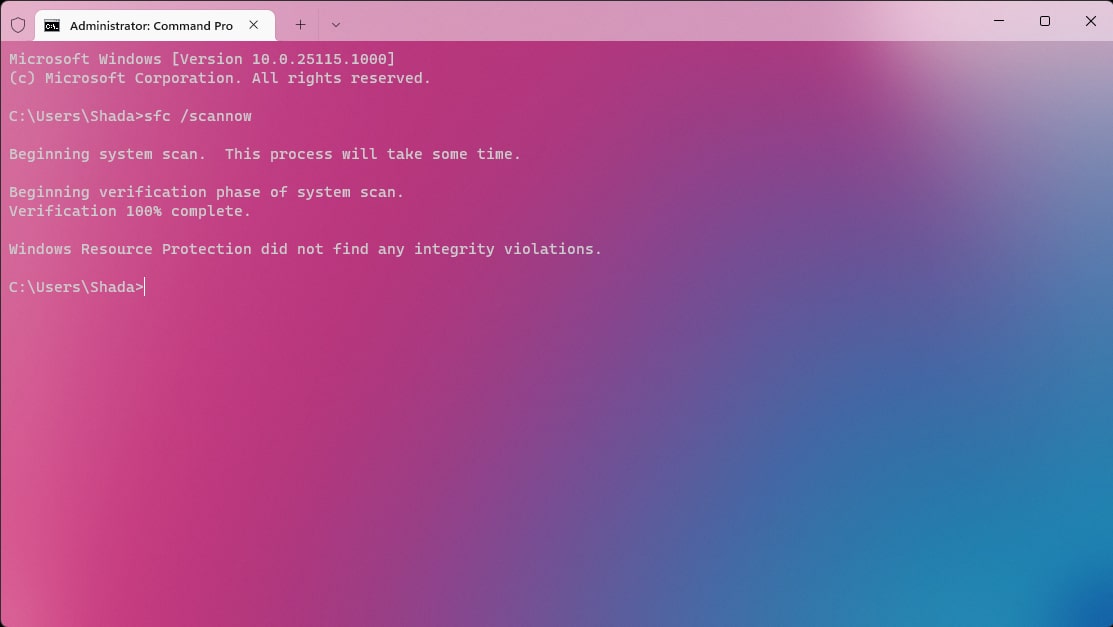
Use Windows System File Checker or SFC
Windows System File Checker (SFC) is a tool for Windows 11 and 10 that helps ensure the integrity of Windows system files. This tool examines files with Administrator access and repairs any corrupt files. To use SFC, follow these steps:
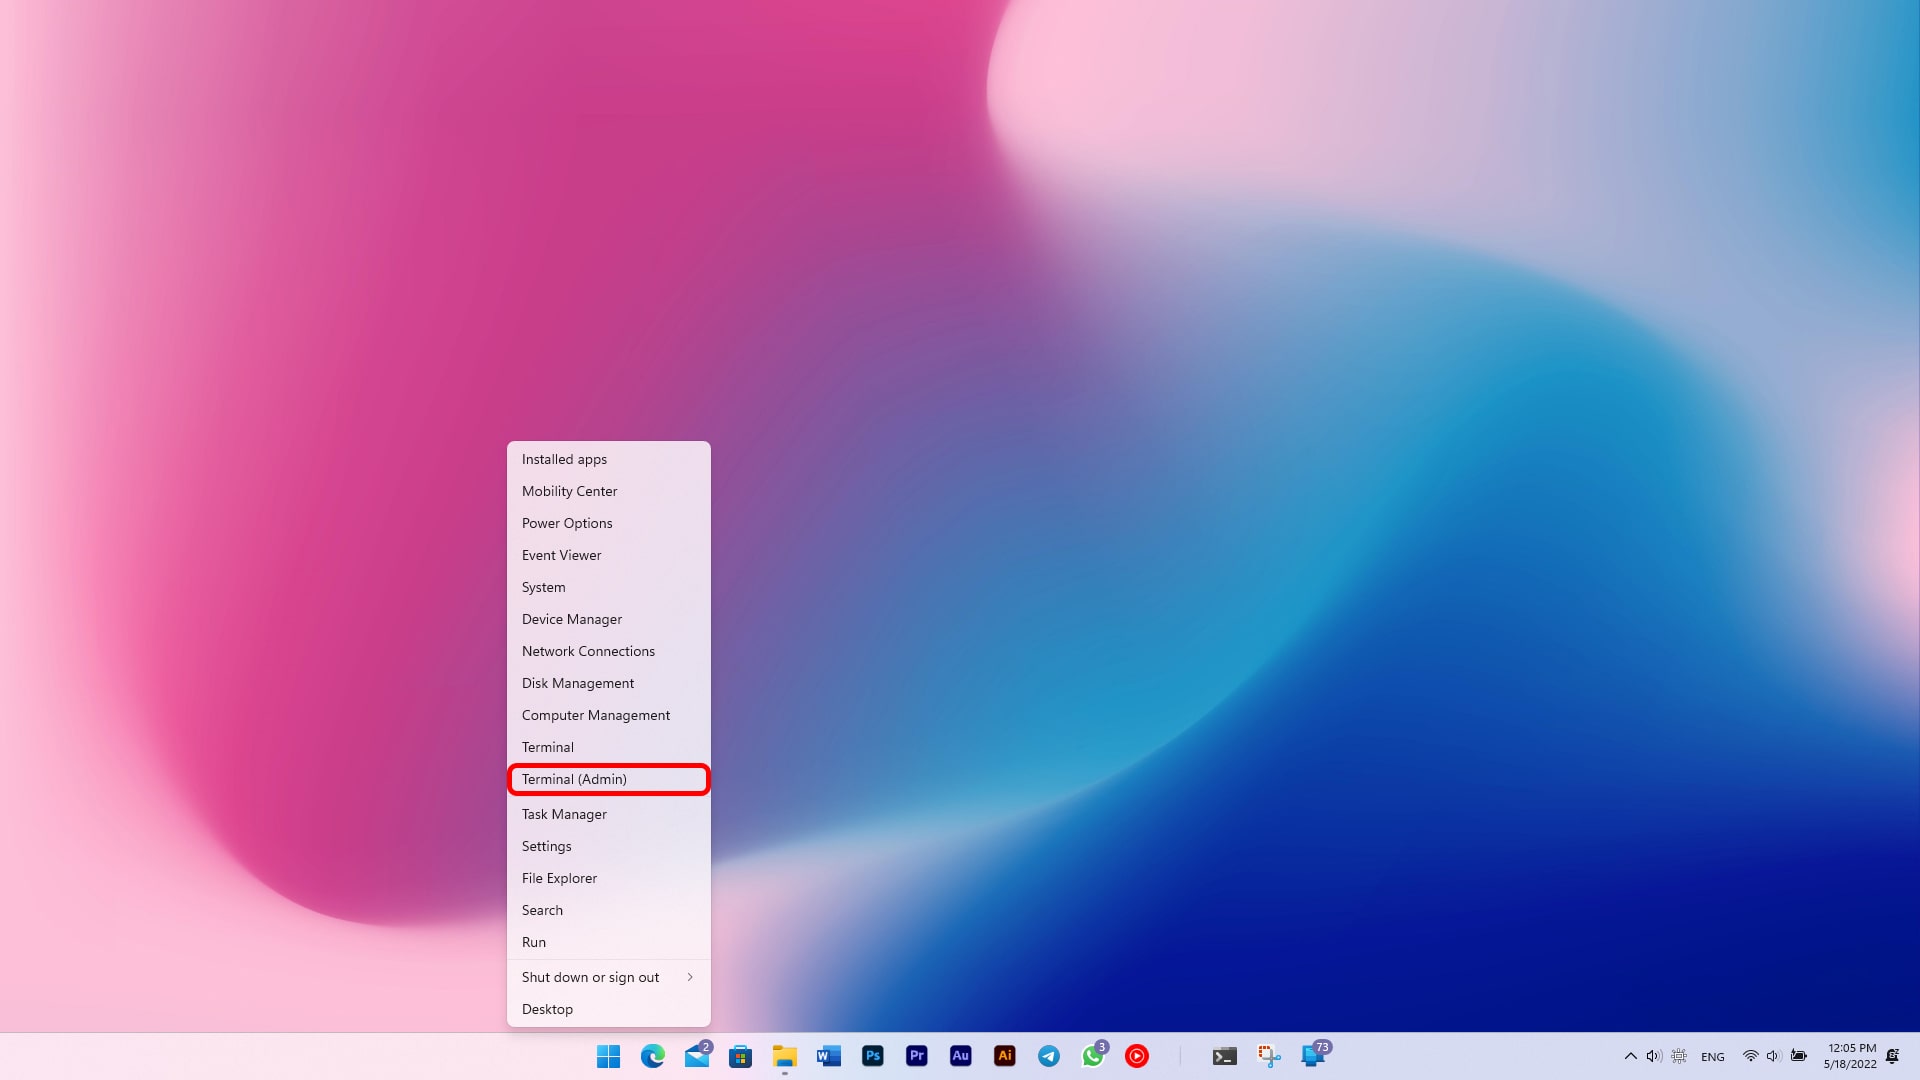
- Right-click the Start button and click Windows Terminal (Admin). (You can also open the menu by pressing Win + X)

- A window will be displayed to confirm the use of the Administrator (Administrator) access (Windows UAC feature). Click Yes.
- After opening the Windows Terminal, enter SFC /scannow and press Enter.


- The file review process will then begin. This process may take a long time. Therefore, it is better not to use your computer until the end of the review process. Finally, a message like the one below will be displayed if the file is corrupted and repaired.
After performing the above steps, restart your Windows and, as in the previous steps, run the Windows Task Manager to check the CPU usage.
Disable Widgets in Windows 11
The widget panel is one of the new sections in Windows 11, featuring various widgets and daily news. Generally, many users do not use this section, but it still has a lot of resources. In addition, devices can be used to increase CPU usage. For this reason, you can check the effect devices have on CPU usage by turning them off. Follow the steps below to do this:
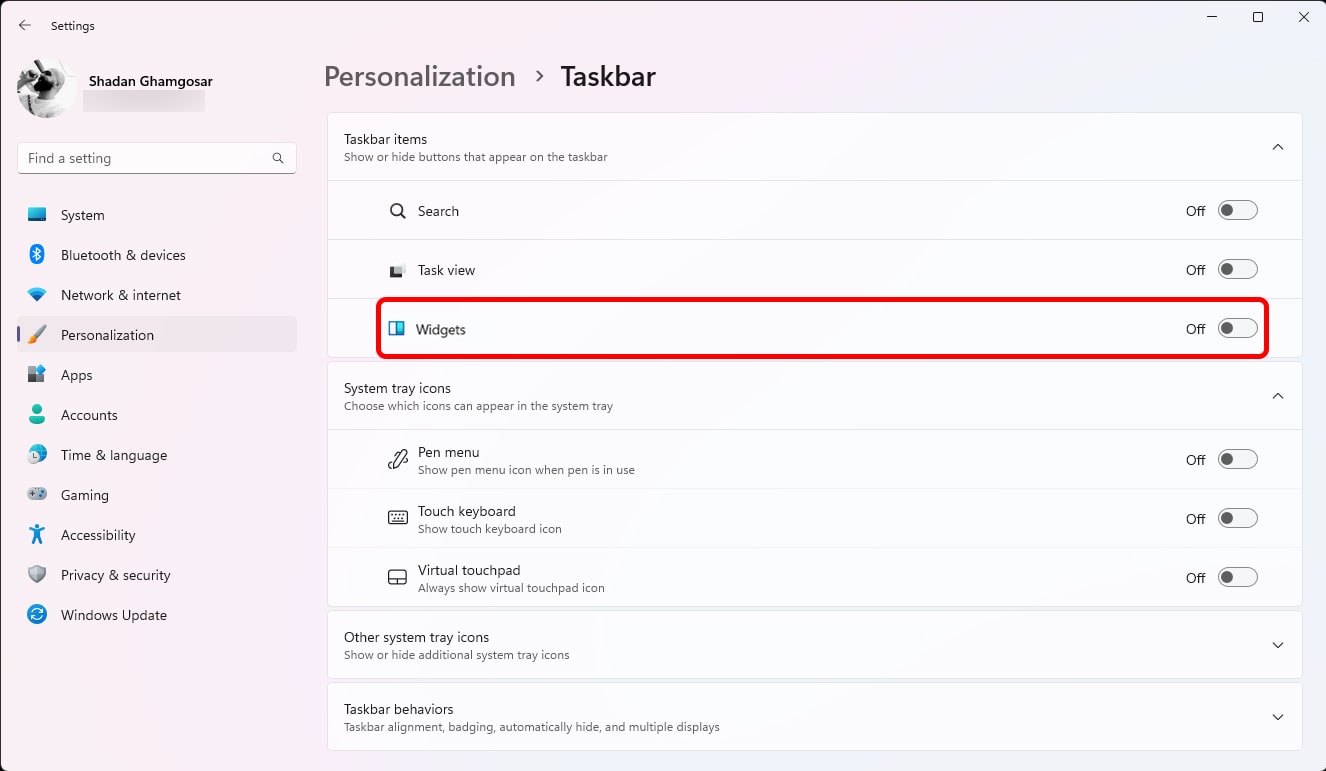
- Enter the Windows settings section. Then select the Taskbar option from the Personalization section. (You can also right-click on the taskbar and select Taskbar Settings)
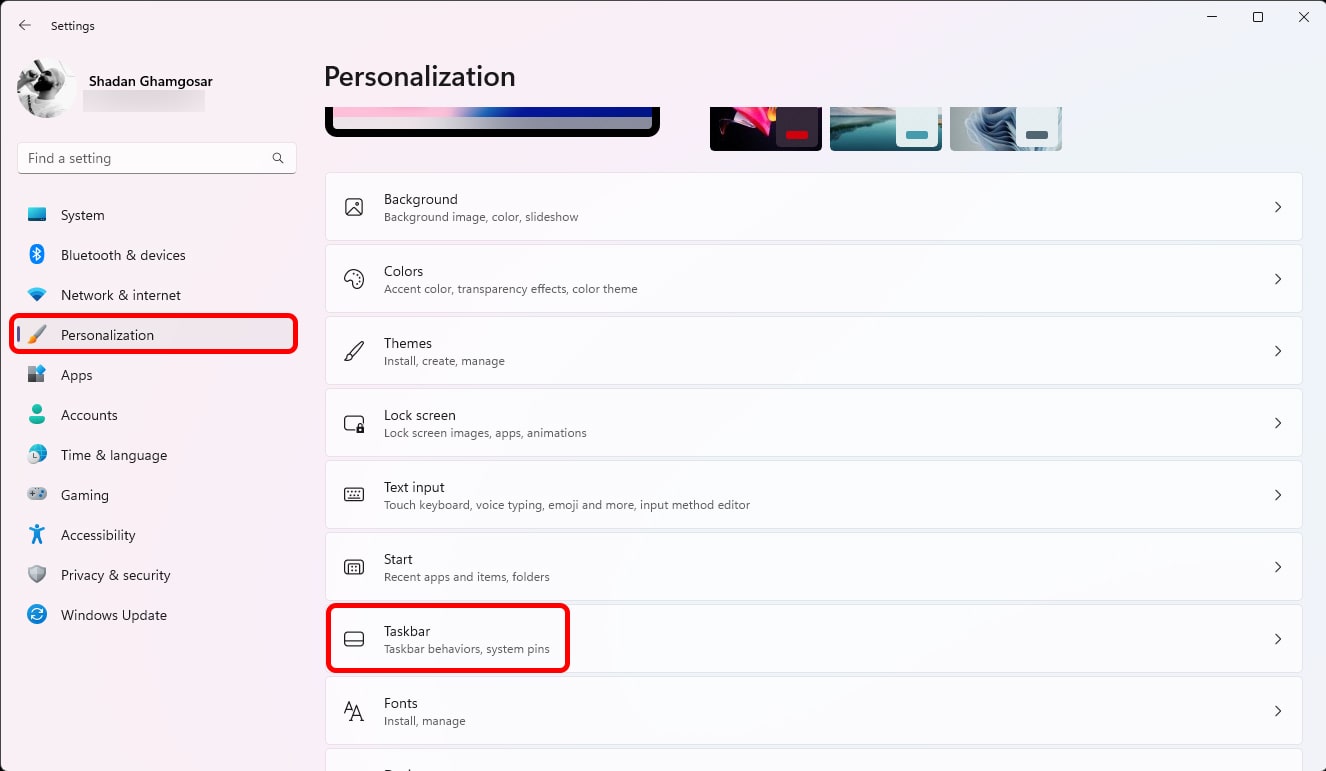
- Turn off the Widgets option.
Disabling widgets will not stop them from running; Windows will intelligently abandon their use. So don’t be surprised if you still see Widgets running in the Task Manager after disabling Widgets and restarting Windows.
Disable automatic execution of programs when Windows starts up
As mentioned at the beginning of this article, background programs can be one of the main reasons for high CPU usage in Windows 11 and Windows 10. Several programs run with your permission. Once your System is turned on, it takes up a lot of resources.
Follow these steps to prevent these programs from running automatically:
- Run the Windows Task Manager, then, on the Startup tab, click the Status bar to see which programs run when Windows starts.
- Prevent programs that do not need to run automatically by selecting and clicking the Disable button.
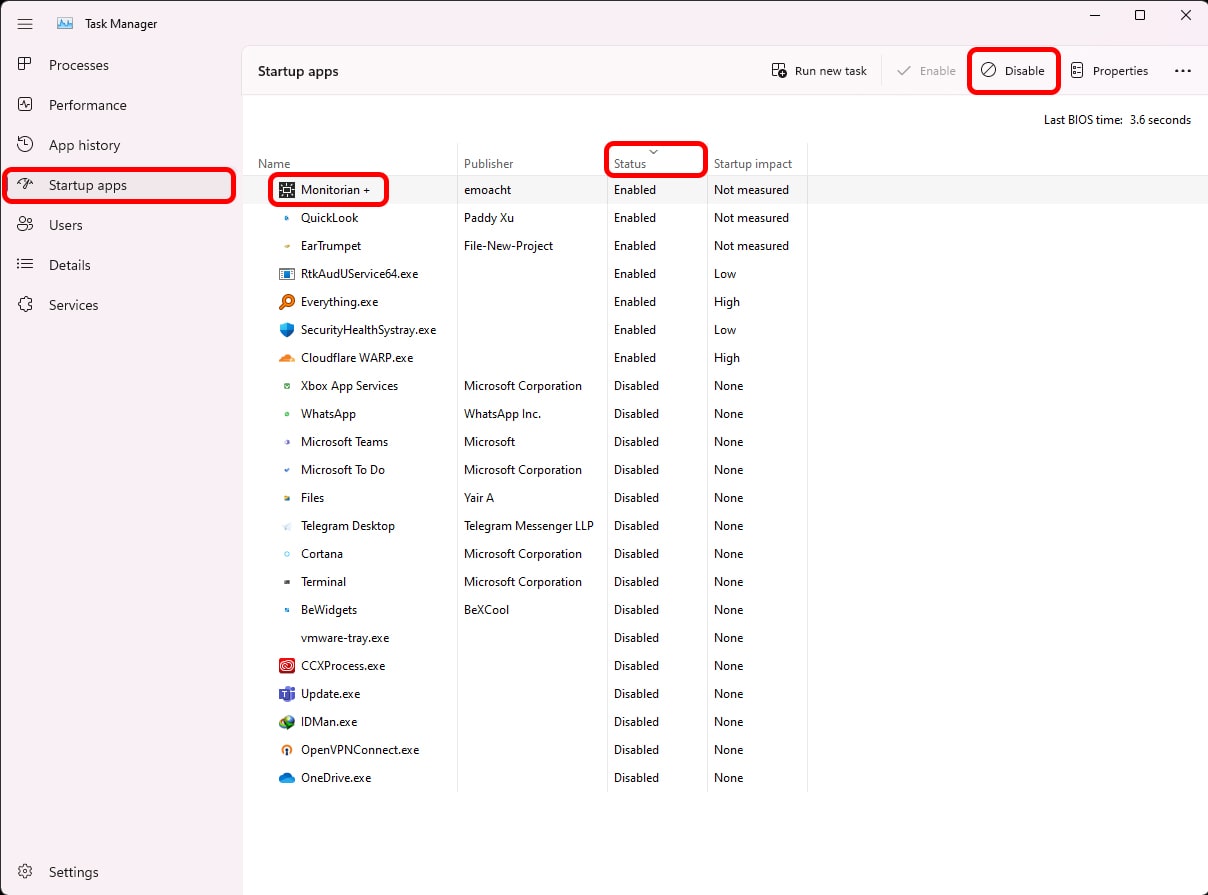
Keep in mind that disabling programs from running automatically does not stop them from running; to do so, you must restart Windows.
Check the Windows Power Options settings.
We reviewed the power options in the initial restore options and now want to suggest changes to reduce CPU consumption.
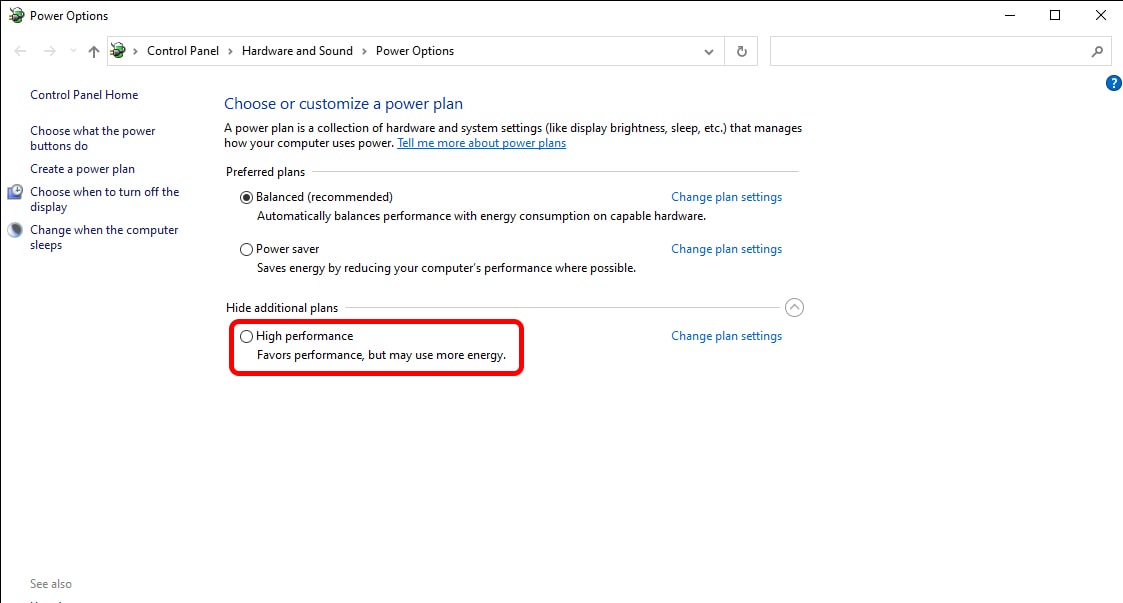
If you are currently using Balanced Mode, follow these steps:
- In the search box (Win,+ S), enter the phrase, choose a power plan, and select the first option of the same name.
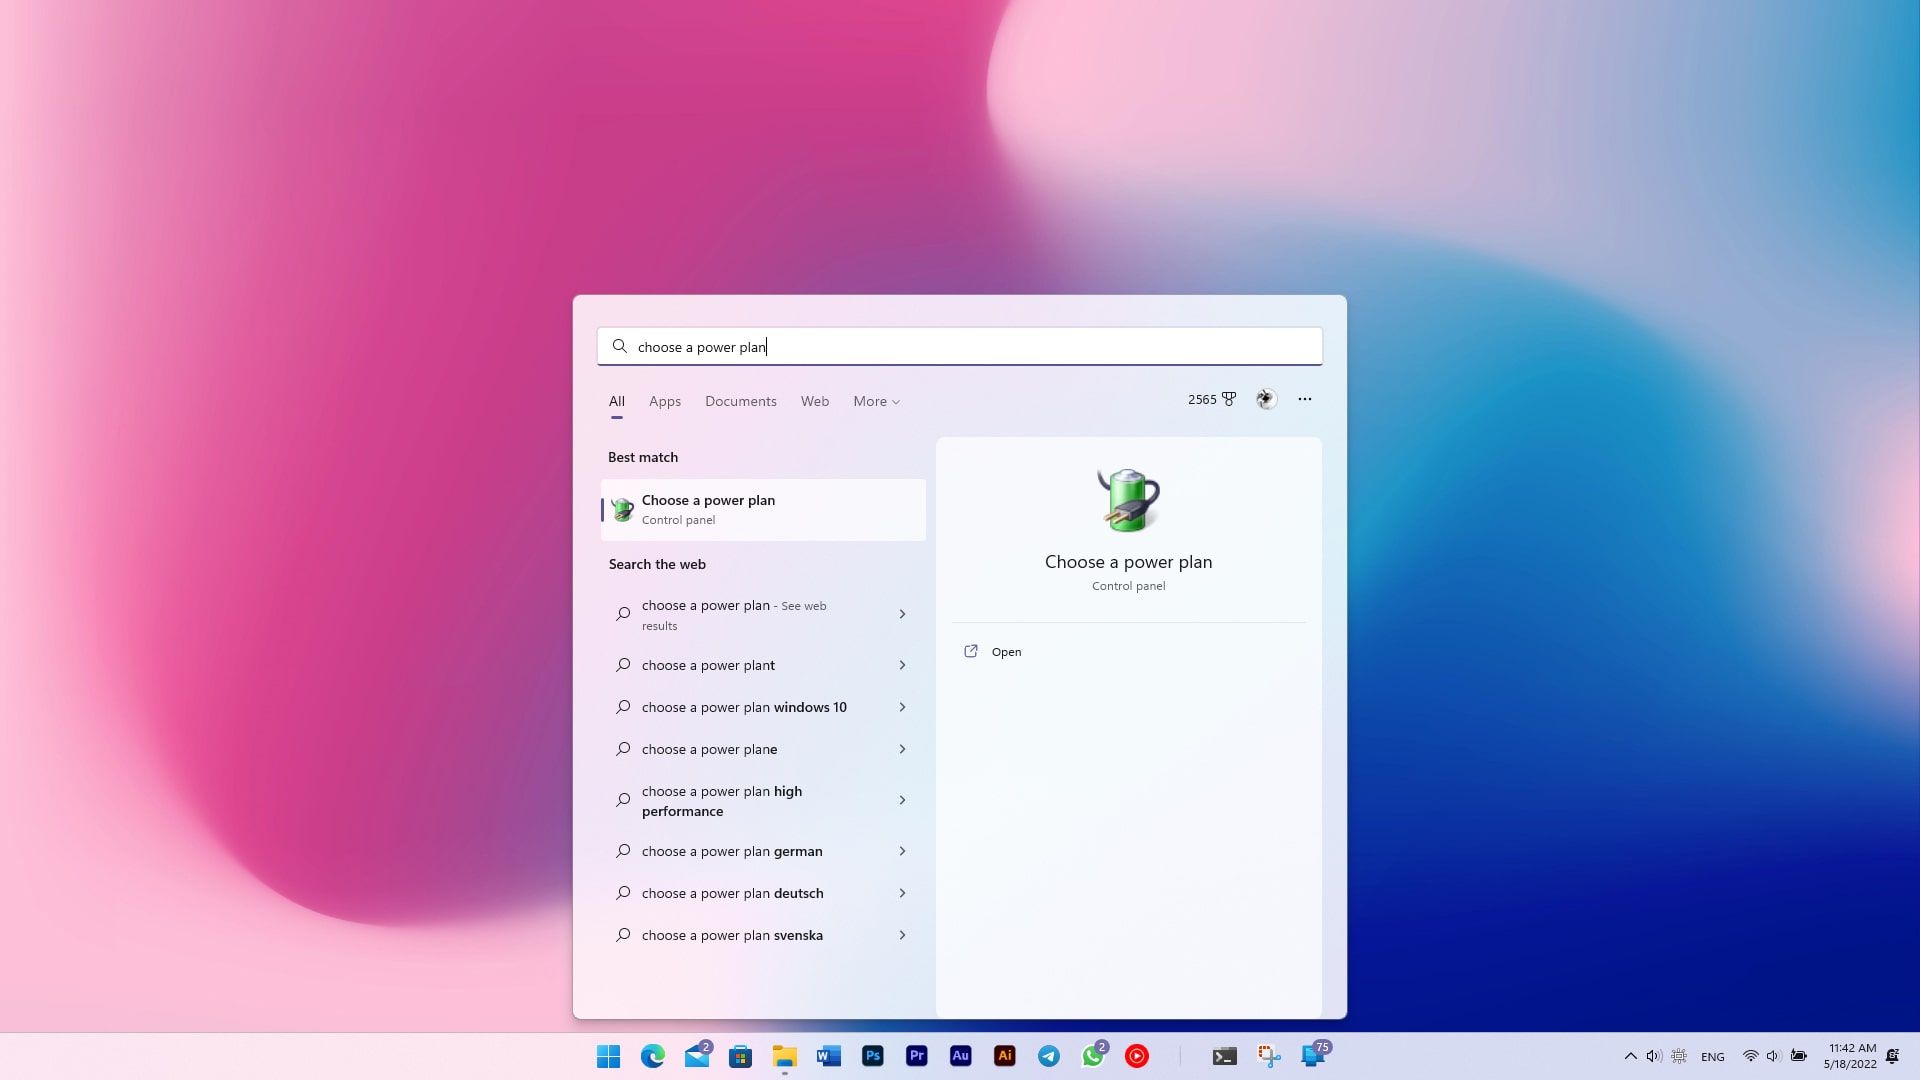
- In the window that opens, select the High-Performance option. (If only Balanced and Power Saver options were available, click Show additional plans to display other options.)

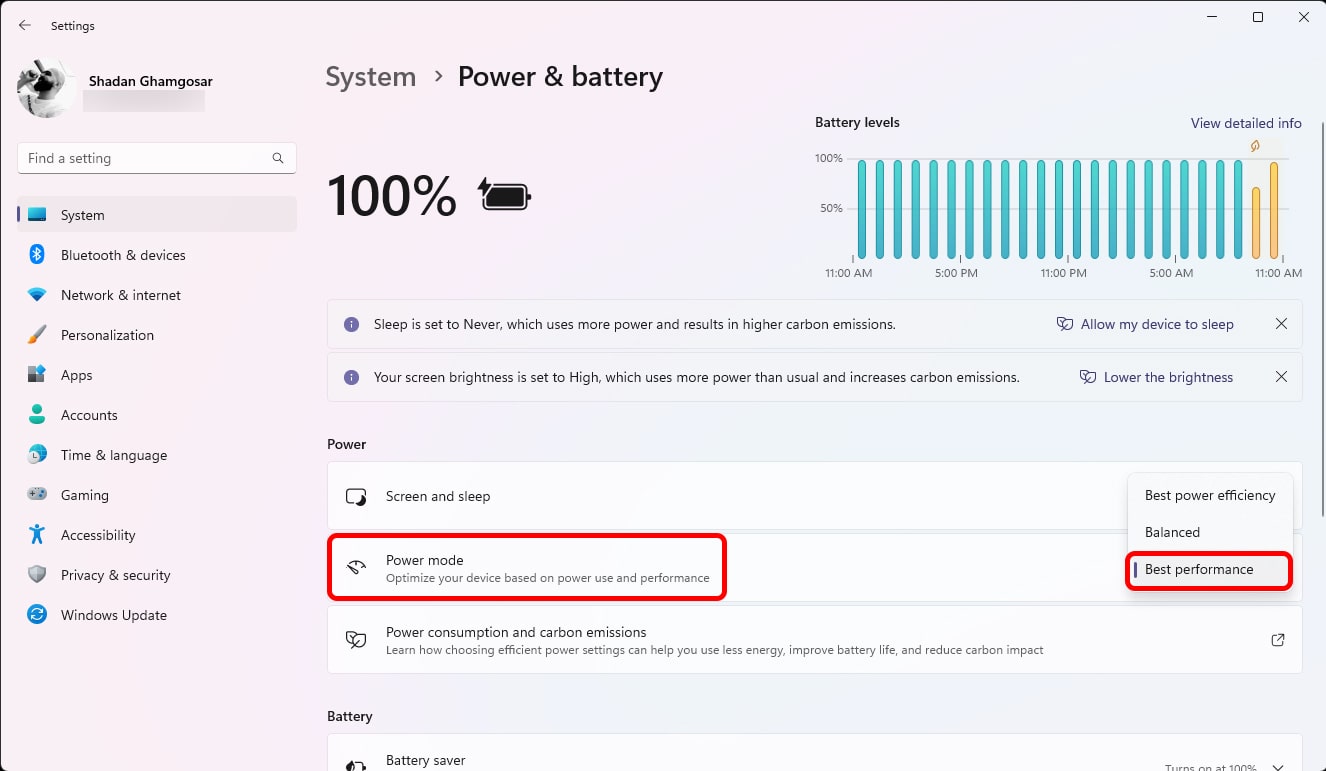
In recent Windows updates, this section may only include the Balanced option for some assertions. Follow the steps below to set Power options in this mode:
- Open Windows Settings and select Power & battery from the System section.
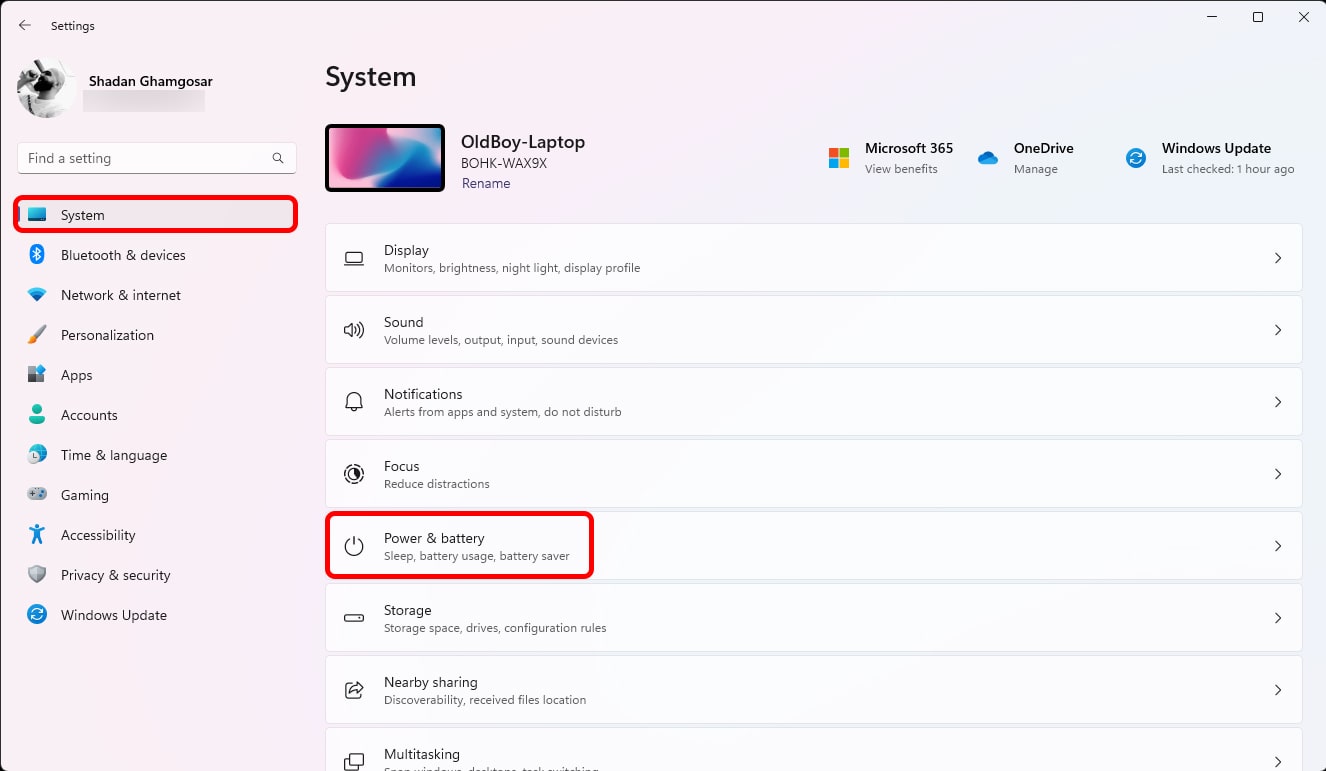
- Then select the Best Performance option from the Power mode section.
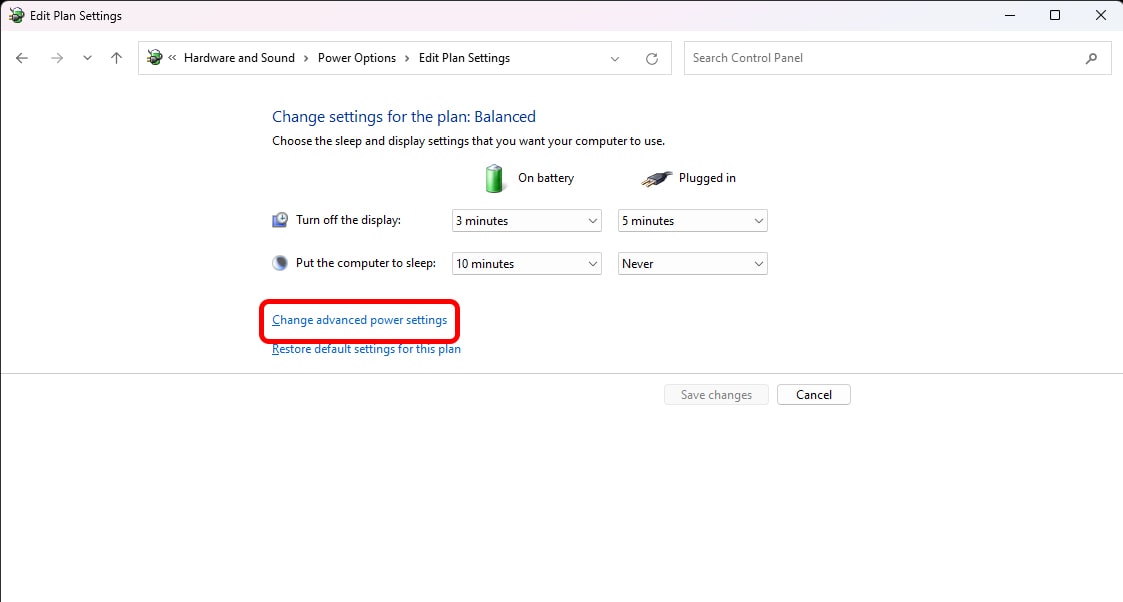
If you are currently using High-Performance mode, follow these steps:
- Click Change plan settings next to the High-Performance option.
- Select the Change advanced power settings option.
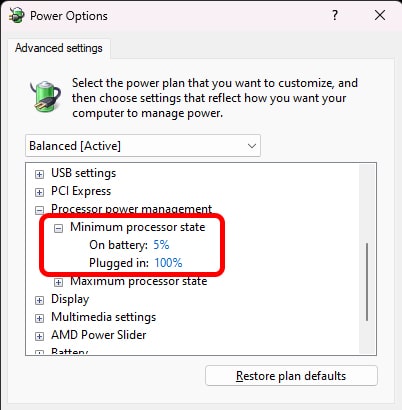
- In the opened window, find the processor power management option. In the minimum processor state section, select the battery values at 5% and the voltage at 100%.

- Then, in the Maximum processor state section, set the OnPluginy and Plug-in values to 100% and click OK. (Note that you can also set the same settings for the Balanced profile)
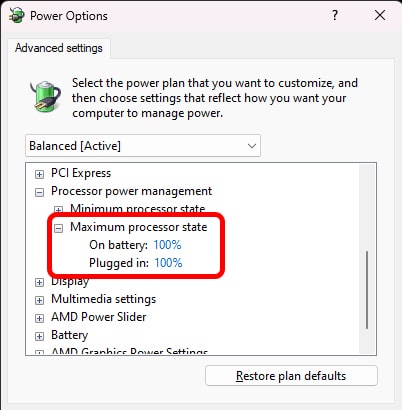
After performing the above steps, restart your System and check the processor’s status.
Update Windows drivers
With the release of Windows 11, many drivers have encountered problems due to changes in the operating system’s underlying layers that are not working correctly. Therefore, it is better to check the drivers’ status and update the required hardware. To do this, follow these steps:
- Right-click the Start button (Win + X) and select Device Manager.

- In the open window, right-click the option with the yellow warning icon, then click Update Driver.
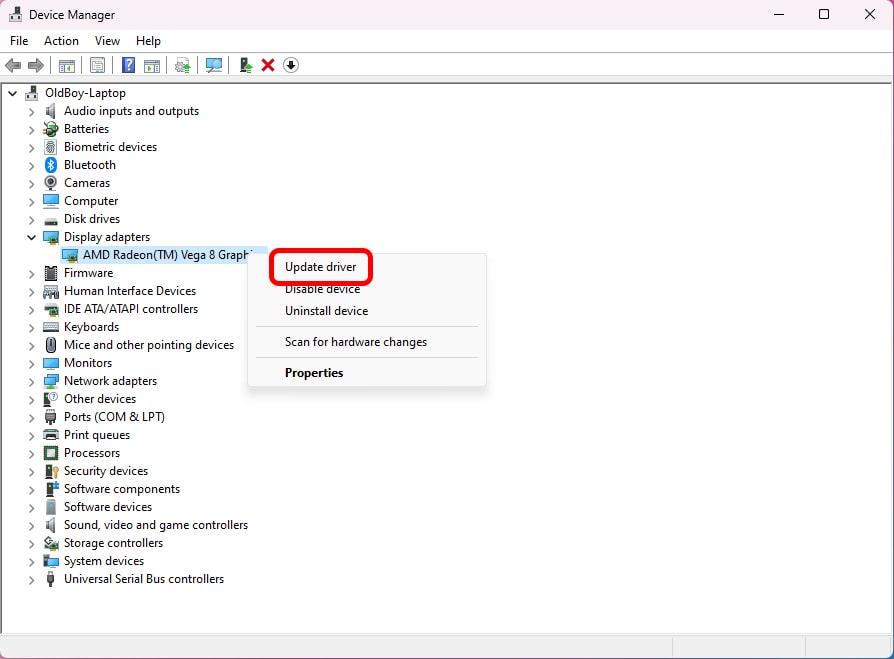

- Select Search automatically for searchers and wait for the update process to finish.


Suppose the above method did not work for you, the new driver for the installation process is missing, or a newer version is unavailable. In that case, you can go to the hardware manufacturer’s site by entering the hardware model to get the latest update.
Additionally, you can use software such as Driverpack Solution (online version). It offers a beta version to the user, which can cause more significant problems. Of course, it is recommended that you check the driver’s stability before installing the recommended drivers.
Disable non-Microsoft services
By installing different software, different services are created to obtain permission from the operating System to operate the software. These services may lead to the useless use of the CPU and other computer hardware resources. You can proceed through the System Configuration section to prevent Cunnington from using these services.
Remember that disabling services alone can cause the operating System to malfunction. Therefore, the consequences of following the steps below will be up to you. The full description of the steps is as follows:
- Right-click on the Windows button and select Run (you can also use the Win + R key combination)
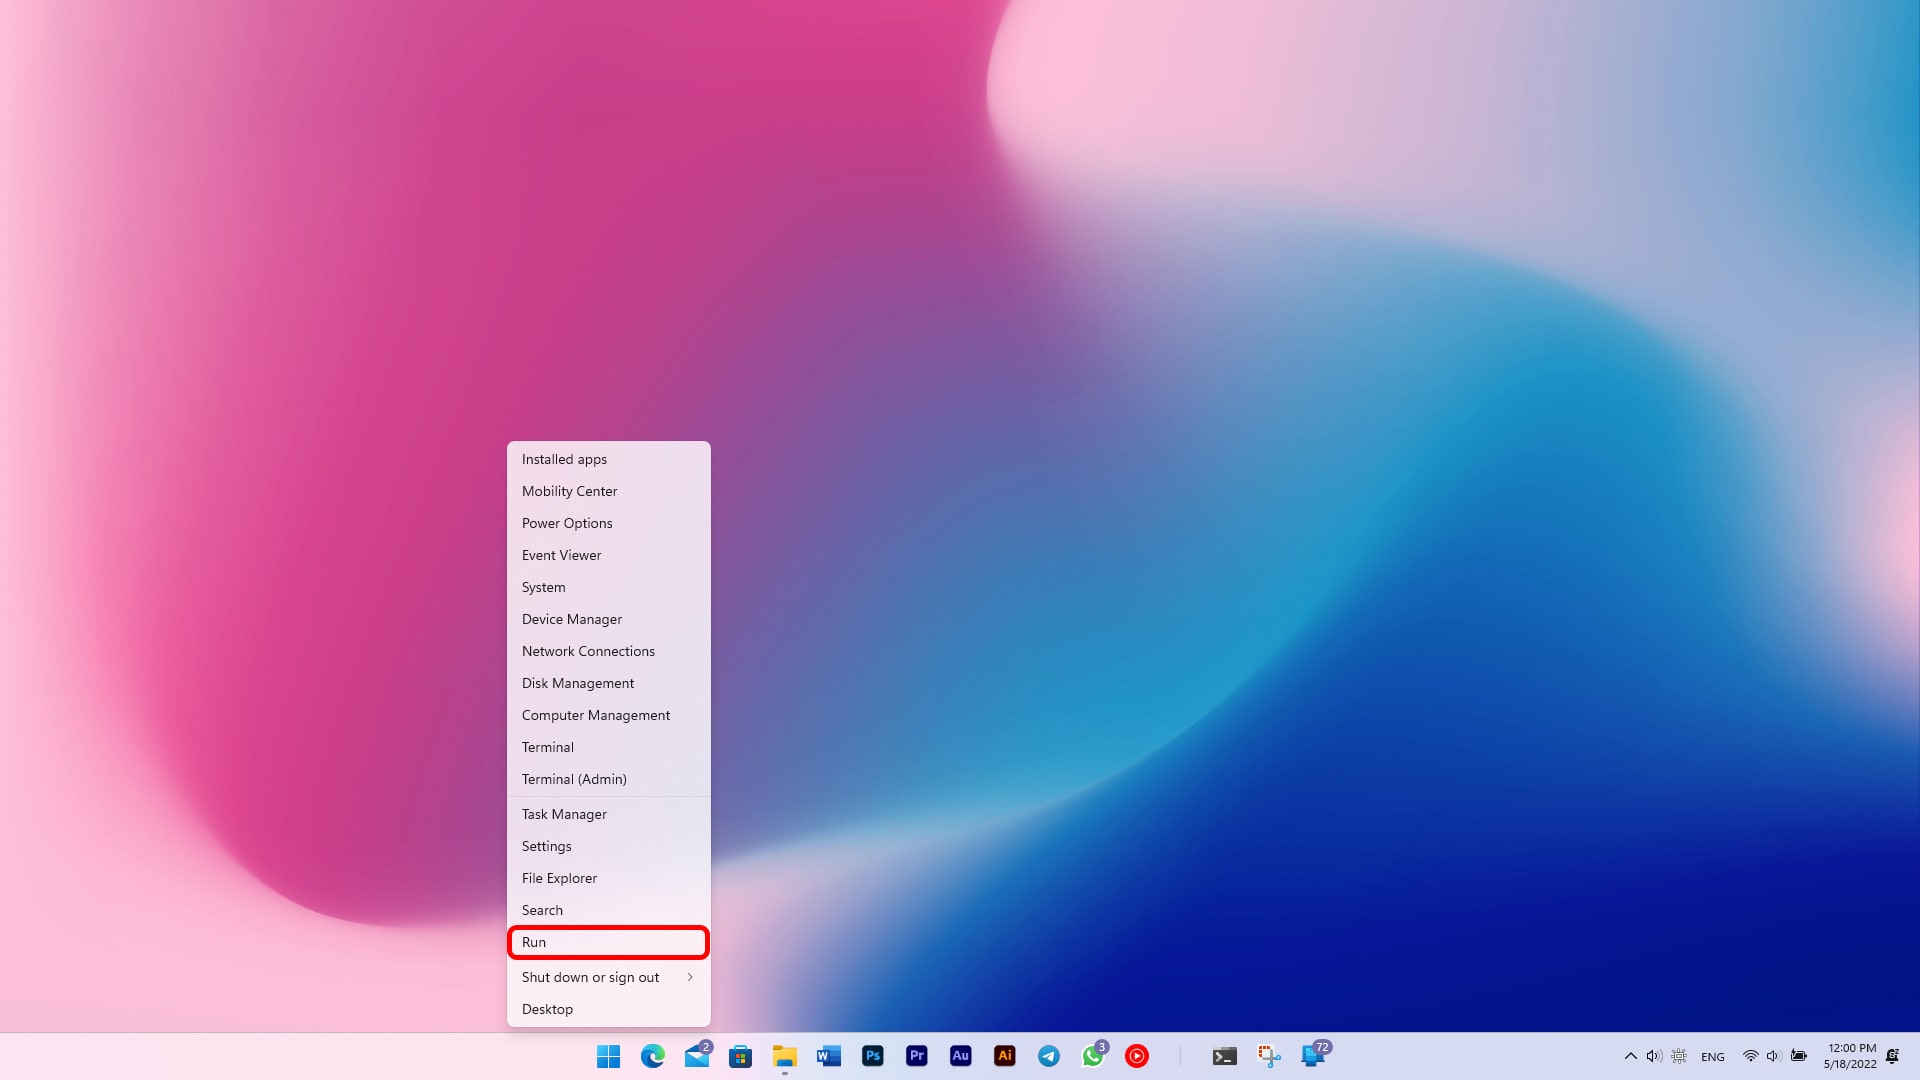
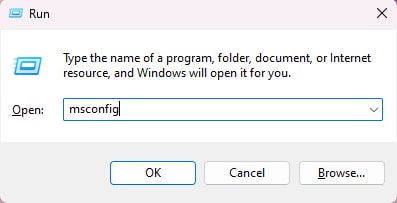
- In the window that opens, enter enMSConfig, then click OK.
- On the Services tab, check Hide all Microsoft services. After selecting this option, only non-Microsoft services will display.
- Check all the options and click the Disable all button.
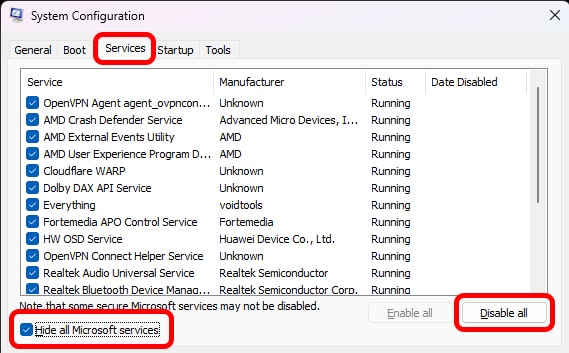

- Restart Windows.
Check the processor’s status through the Task Manager. If the problem is resolved, enable the disabled services one by one and restart Windows to identify the problematic service.
Disable Microsoft services. Me. At this stage, disabling several problematic Microsoft services has led to 100% CPU usage issues. Like the previous solution, turning off these services can cause instability in the operating System. Therefore, the consequences of making changes will be the user’s responsibility.
In general, 3 Windows services can cause problems and high CPU consumption:
- SysMain: Used to load applications in RAM. (Full description is in the Superfetch section)
- Windows Search: Provides a list of files in storage for better search results.
- Windows Update: Checks for new updates on Microsoft servers.
We recommend stopping the mail services individually and checking their CPU usage. If, after stopping all three, Windows is faster and better than before, you can set all their quality settings to Disabled (See the Tutorial below). Here’s how to stop these services:
- Open the Windows search box (Win + S) and enter “Services.”

- Find SysMain, Windows Search, and Windows Update from the ears.
- After right-clicking on each, select the Stop option.
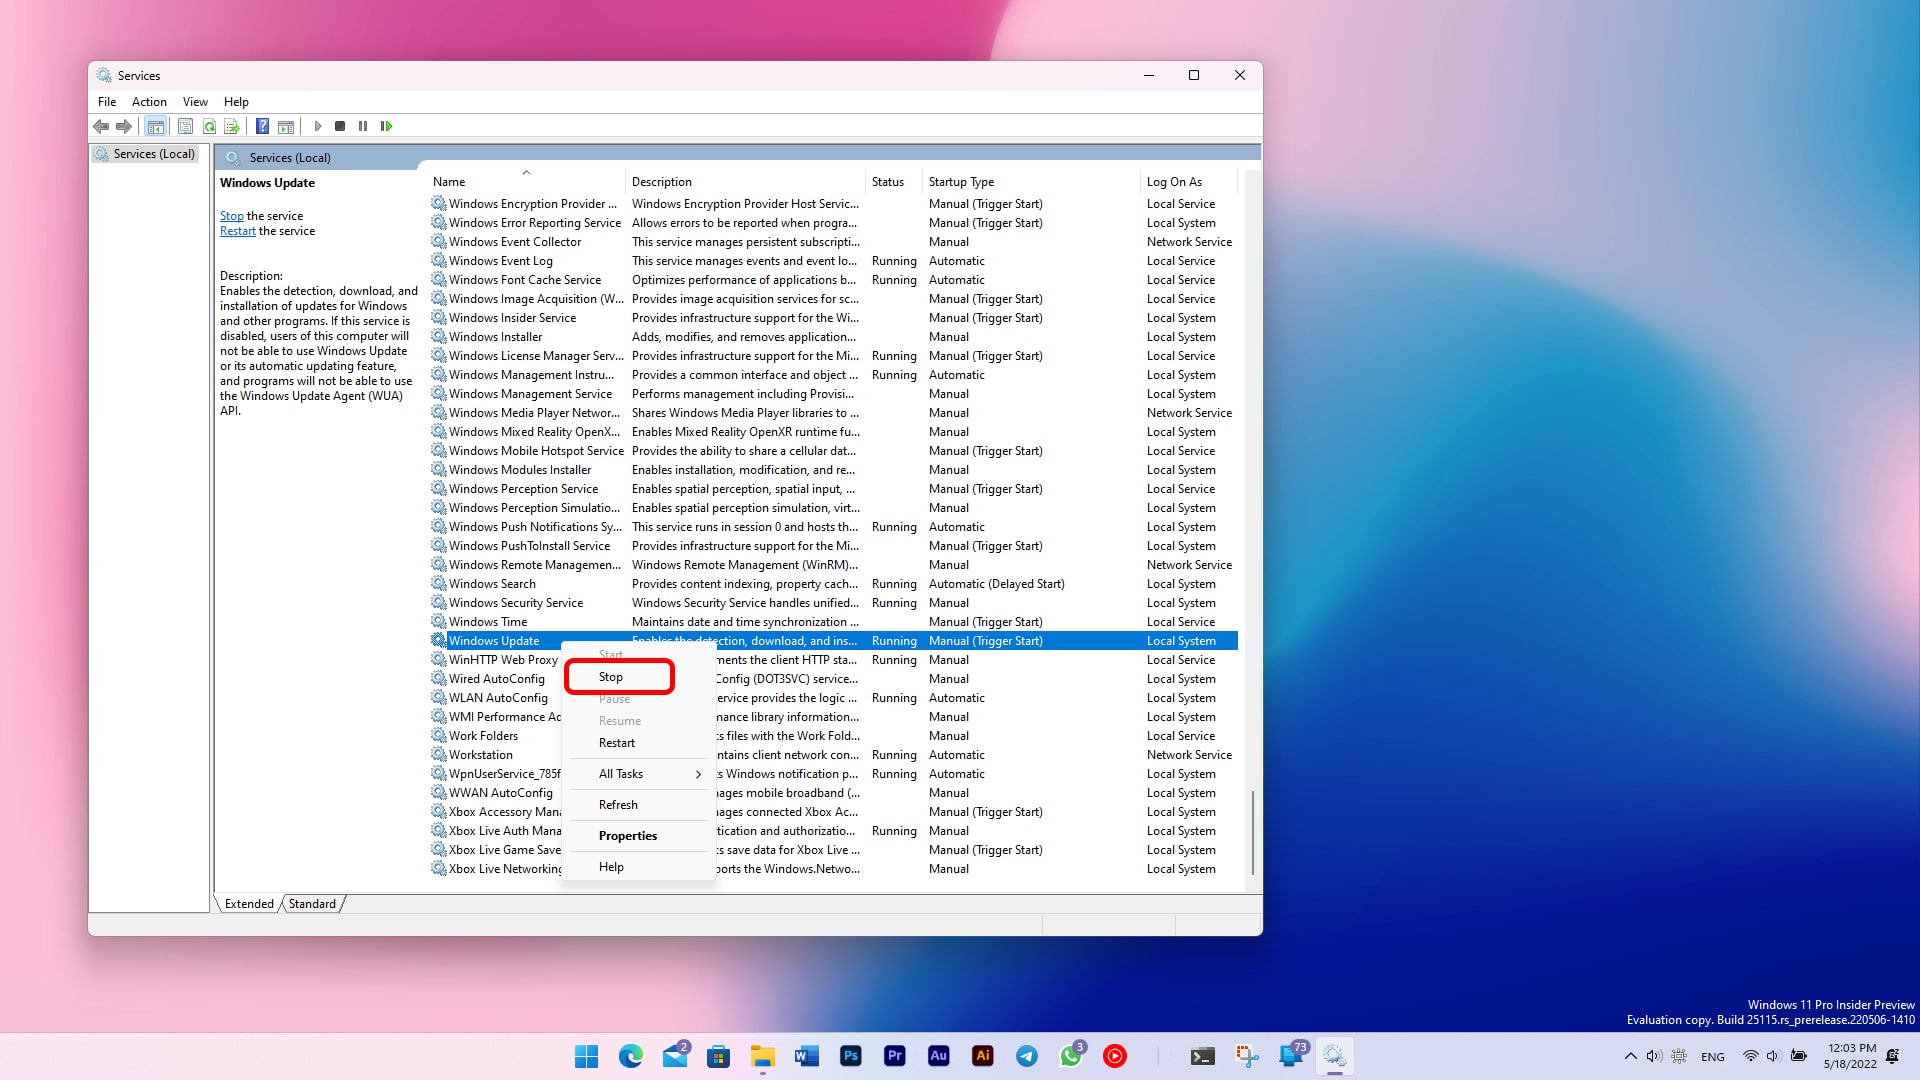
- Check CPU status.
Note that if the changes are successful, do not leave the situation as it is, because after restarting Windows, all services will run again. Follow these steps to turn it off completely:
- Double-click the SysMain, Windows Search, and Windows Update services to open their Properties windows.

- In the Startup type section, select the Disabled option, click Apply first, and then, if you need to reactivate, select the Automatic option.
Update Windows Policy
Windows also automatically updates its operating policies when it installs new updates. However, since this process is incomplete, it may still cause inconsistencies and thus increase CPU consumption. Here are the steps to do this manually:
- First, right-click the Start button and select Windows Terminal (Admin).
- A Windows UAC message may be displayed here. Click Yes.
- After opening the Windows terminal, enter GPU update and press Enter.
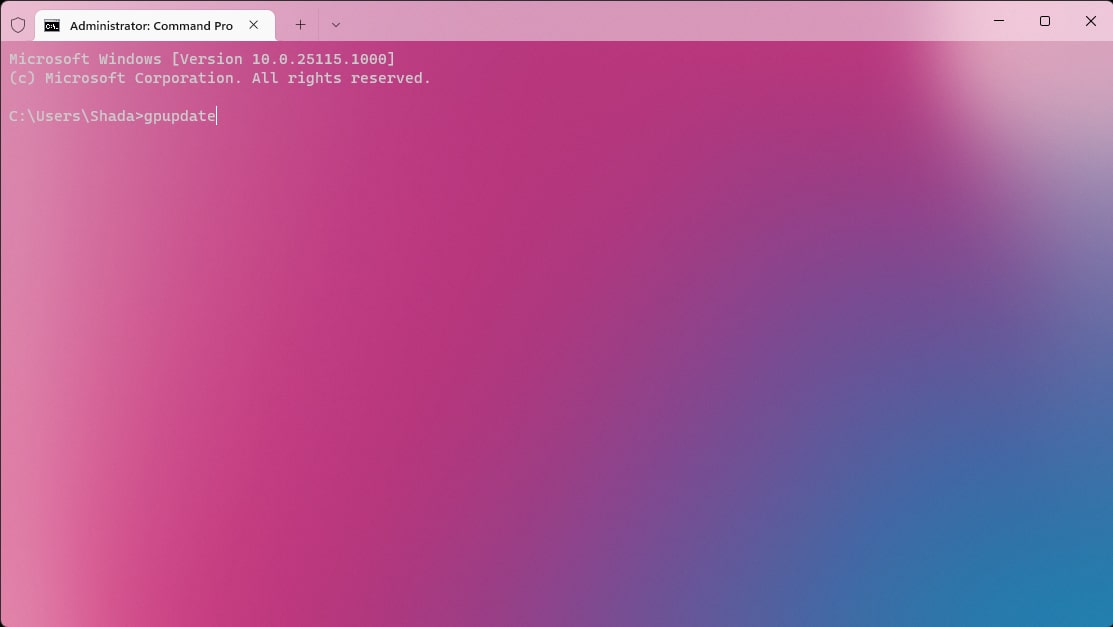
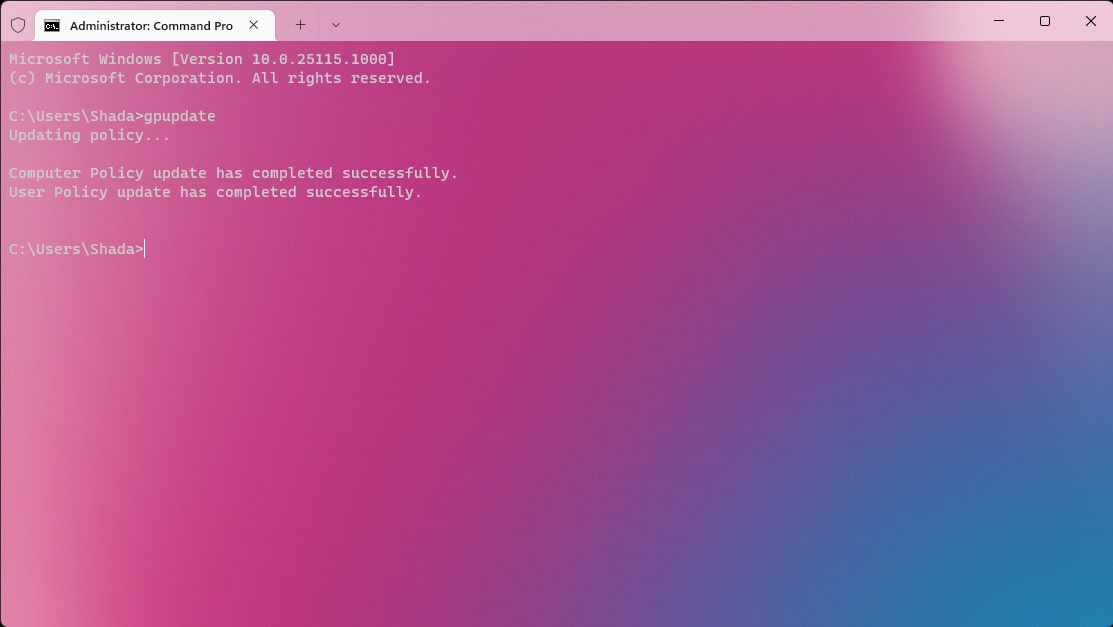
- Wait for the update steps to complete. The following message is displayed when finished.
Windows 11 or Windows 10 drive repair
The passage of time and the constant bad sectors. Fortunately, Microsoft has provided tools to address these issues with Windows, which you can see below:
- Right-click the Start button (Win + X) and select Windows Terminal (Admin).

- Click Yes if you see a Windows UAC message.
- Type chkdsk c: / f in the Windows terminal and press Enter.
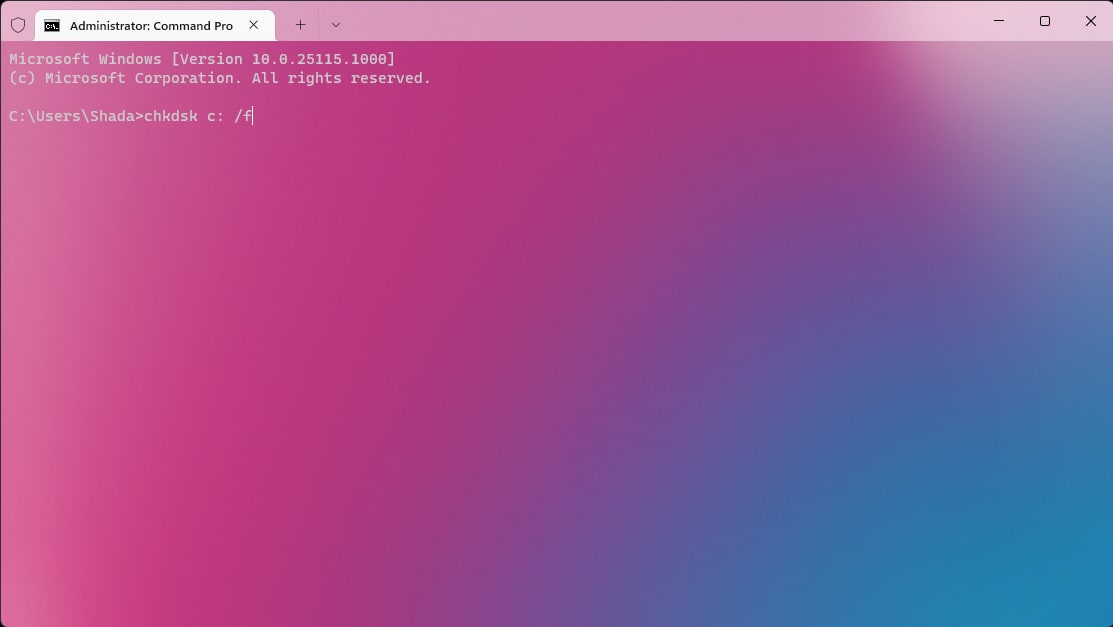
- The following message will be displayed. Enter the letter Y and press Enter.
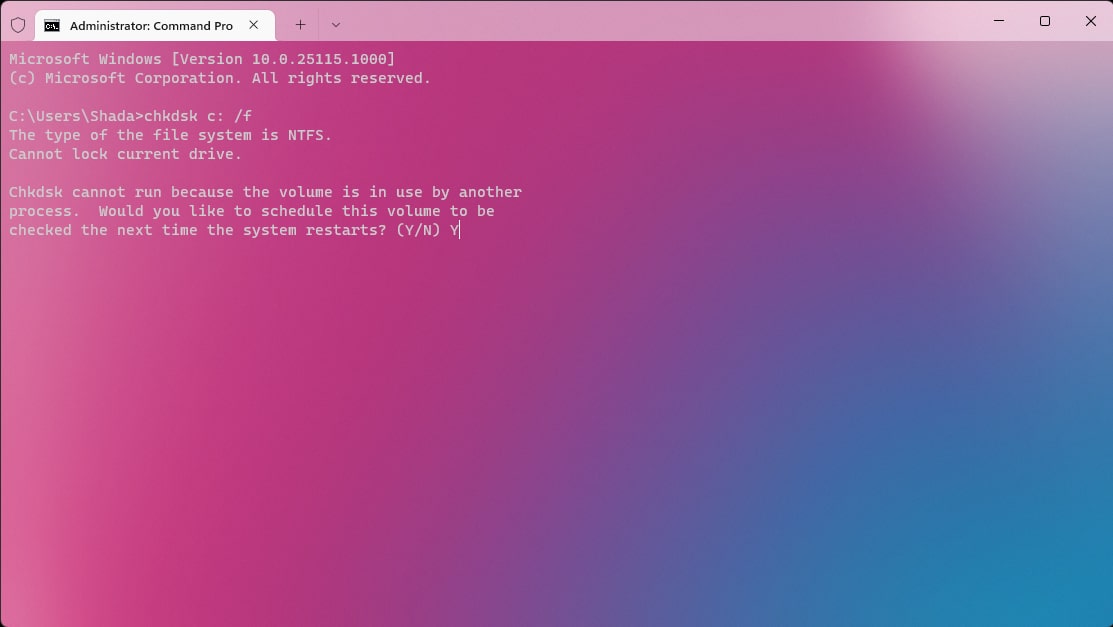
- A message operation will be displayed on the next reboot.
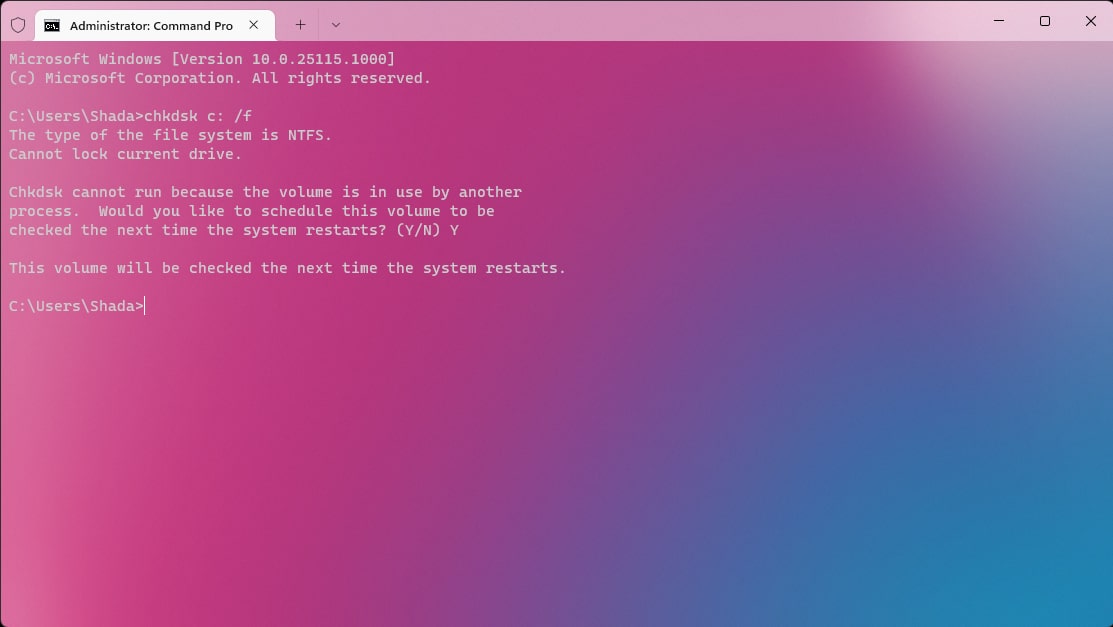
- Close the terminal and restart Windows. (Open Start, click on the Power icon, and then click Restart)
After performing the above steps, your System will restart. Still, after displaying the motherboard logo, it will enter the section of checking and fixing the damaged sectors of the Windows driver (usually drive C). This step can take hours, depending on the instructor’s size. Note that at this stage, you should not turn off the computer or unplug it. This “may” cause serious storage memory problems.
Cleaning the internal components of the computer
Over time, as dust accumulates in the computer system, the cooling process becomes more complex; as the processor temperature rises, it may experience severe performance issues.
Processors automatically reduce their performance when the temperature can be controlled. Therefore, during heavy processing, due to decreased performance, you will experience high CPU consumption! It is due to dust on the CPU cooler.
Therefore, we suggest you open your computer case and clean its internal components. You can do this using a soft toothbrush or a powerful blower (a hairdryer is not a good idea!).
Some components, such as a fan or heatsink, can also be dipped in alcohol to thoroughly clean them and reconnect them to the motherboard, as they are scorched.
Cleaning parts is not just for computers; it can also be used on laptops. You can use a powerful blower to clean the computer’s internal components without opening it.
Concluding remarks
If none of the above steps work for you, we recommend reinstalling Windows. Of course, if the installed program is essential to you, we recommend you consult a Windows technician and discuss the matter with him.
FAQ
What causes high CPU usage in Windows?
Background processes, outdated drivers, or software bugs can overload the CPU and slow your computer.
How can I diagnose which process uses too much CPU?
Use Task Manager to check CPU usage per process and identify heavy tasks or applications.
What steps help reduce high CPU usage?
Update drivers, close unnecessary programs, check for malware, and optimize Windows or settings depending on the source.