


Import information in C-Panel host database through phpmyadmin tool
Imagine that you are the administrator of a website. You launched your site with a content management system like Joomla or WordPress that works through a database or the same database. Now you decide to move your site from local to host or Transfer from the current host to another host, the first step is first to transfer your website files to the new host, and the second step is to get a .sql output from your current host database to do this in the previous tutorial videos. We have taught you, and the next step is to import the output .sql file of your previous database host into the new host through the PHPMyAdmin tool. This tutorial has decided to teach you how to import the compressed database file to the new host.
How to import MySQL information into PHPMyAdmin
Imagine that you are the manager of a large site, and to make sure that you do not lose information and data on your site, you always back up your host database and output a .sql file from your web host every day. , Now your site suddenly has a problem. With this tutorial, you can enter the management of your website database and delete all the currently damaged tables, then the database backup file or the same .sql output from the database when your site has a problem. If you have not backed up its database, import it into your PHPMyAdmin web host to return your website to its original state, so stay tuned for the rest of this practical tutorial.
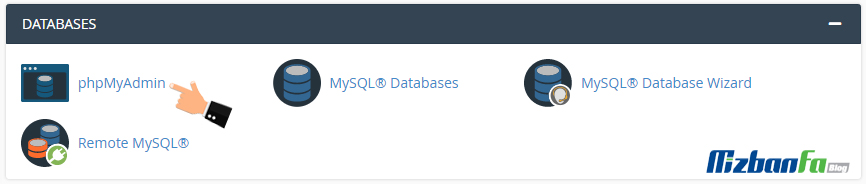
First, we enter the C-panel host of our website by learning how to enter C-Panel, then we click on the PHPMyAdmin icon from the databases section.
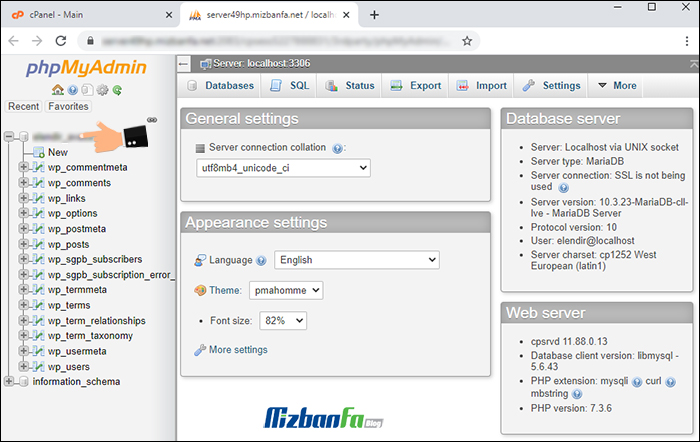
To be directed to the database management section, loading this page may take a while. From the database server section on the right side of this page, we first look at our MySQL version, here in the Server version section of our server version 5.6 34. At the end of the tutorial, we will describe the database version. Now we click on the name of the database we want from the left because the name of the database we want is mizbanf2_wordpress. How to click on our database tables Load up.
These are our information bank tables, but if you want to import the .sql output file into a new host or database, there is certainly notable information inside. Before we continue, we will open our site in the browser. Let’s look at the beginning of the steps, then type mizbanfa.net and press Enter. As you can see, it is a simple WordPress site, and now we have returned to PHPMyAdmin. Here are two ways:
- We can delete the previous database. Please create a new database and import the information into it. To do this, learn how to build a database in C Panel using the MySQL Databases tool and create a new database.
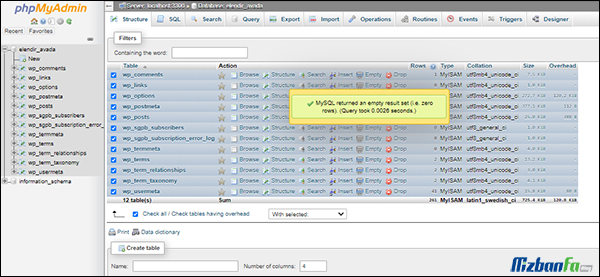
- The second solution is to delete all the database tables because we have another output file from the same database and we want to import it, so here we check the check all option from below to select all the tables, and now from this option, Select drop because we want to delete all tables. Then we import the previous database here.
Before continuing this work, remember that you must have a backup file or a .sql output from this database. After doing this, all the information inside this database will be deleted, and you will see a message-deleting the database information. And does that mean that you are sure of doing this and deleting all the database tables? And we click on the yes button from here. As you can see, all the information and tables in this database have been removed from our host, and there is nothing left here. We will enter the mizbanfa.net website again in the browser, and as you can see, the whole site We are gone, and we are faced with the message of restarting WordPress.
Let’s go back to PHPMyAdmin because now we want to restore the database .sql file, which is supposed to be the output or backup of our database information, into this database, so while we are inside the database, click on the import button from above. To enter this page.
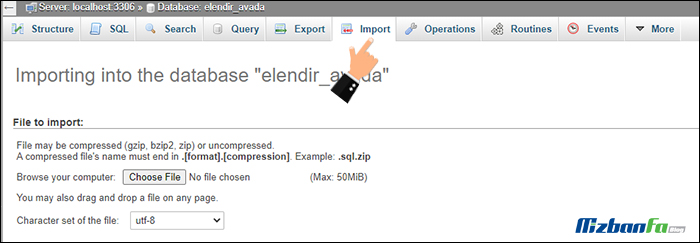
And here, from the File to Import section, select the choose file option, and now select the output version of our database, which is also in .sql format, from within our computer. And we have nothing to do with the other values, and we click on the go button below to start importing the database.
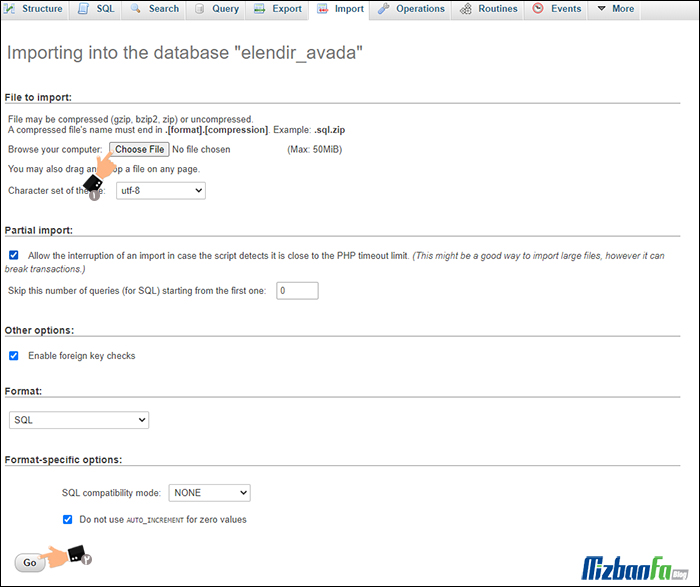
This step may take some time, so we wait 5 seconds. It is very important to see the green message Import has been successfully finished because just seeing this message means that all database tables are imported without any problems.
![]()
And as you can see, when we click on the name of our database from the left, it is typical that all the WordPress database tables are in it again. We go back to the site to see the result again, so we type mizbanfa.net and enter yes. And As you can see, our WordPress site is back to its original state and active without any problems.
Problem importing database on C-panel host
Sometimes after loading the database file and pressing the go button, you may not see that green message, and it shows you a series of unspecified errors. There are several reasons, including:
- The output format of your database file may not be compatible with the data input format.
- Your database output file may be incomplete.
- It is so common that the MySQL version from which you got the database output file may not be the same as the MySQL version you are importing the output file into, and this can often be a hassle you should in these cases. Notify the server administrator or hosting company of upgrading your MySQL hosting version so that you can import the output files of the database into your new hosting database.
In the next tutorial video, how to build a site with the site publisher tool in C-Panel. You can then create a simple and elegant site with the C-Panel website setup tool, which has recently been added to this popular control panel. Create for yourself without the need for coding. So join us to see more tutorials about the C Panel, which is one of the most popular control panels of host management, please refer to the classified tutorials and use all our tutorials for free.