


How to take a screenshot in Windows 11
How to take a screenshot in Windows 11
There are many reasons to take a screenshot in Windows 11. For example, you might need to take a picture of how an app or webpage works to show someone what the user interface looks like. You may also need to take a screenshot of an excerpt from an article and share it on social media with specific sections highlighted to make a point. Or there may be an image online or in one of your apps that you could not save.
It does not matter why you want to take a picture. There are several ways to take a screenshot in Windows 11. The method you use should be based on what you want to photograph, as some methods give you a full-screen screen and some only a part of the screen. Some of these methods give you options to save directly to your hard drive, while others give you a few seconds delay before saving the image.
Here are six ways to take a screenshot in Windows 11, mostly done using the operating system’s built-in capabilities. With the help of PicPick NGWIN, our latest method is a freemium program that includes an internal image editor and can scroll down the screen to get all the details in the photo. This is the only thing the operating system alone can not do.
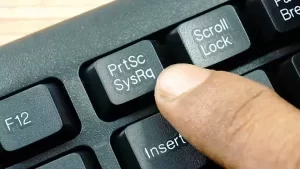
1. The PrtSc key sends screenshots to your clipboard
The easiest way to take a screenshot in Windows 11 or 10 is to press the PrtSc key to copy your entire desktop to the clipboard. The PrtSc method, while easy, is a bit tricky. If you have multiple monitors, you can get a large image from all desktops, and if you want to save your image as a file, you still need to place it in an image editor like Microsoft Paint, Gimp, or Photoshop.
On the other hand, if you want to email the image, embed it in a document, or share it on Twitter or Facebook, you can click the CTRL key, provided you want to show your entire screen. + V + Paste it in the appropriate editor.
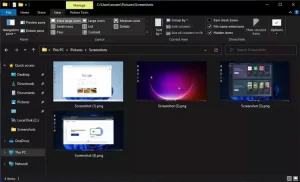
2. Windows Key + PrtScr saves a file
The windows key is the keyboard key with a Windows symbol on it. If you want to take a screenshot of the entire screen and save it as a file, the easiest way is to press the Windows key + PrtScr. Your entire desktop darkens for a second to show that a screenshot has been taken, and a new PNG file is saved in the Pictures or Screenshots folder. Each file is named Screenshot (#) .png, where # is replaced by # 1, 2, 3, etc.
3- Alt + PrtScr takes a screen from the active window
Most of the time, you do not want to take screenshots of your entire desktop and only want to take screenshots of the specific application you are using. If you press Alt + PrtScr, Windows 11 takes the active window and copies it to your clipboard.
Note that this action only takes a screenshot of the active window, and if the program is more than one window, the Screenshot is not taken from the whole. For example, if your app has a pop-up menu that appears in a small window, only the small window will take the screen, not the large window behind it.
4- Snip & Sketch tool takes screenshots from different areas
You may want to take a screenshot of a small desktop part. This small part can be part of a web page in your browser or a series of windows. However, if you press the S + shift + windows keys, the Windows Snip & Sketch tool will launch, and a rectangular box will immediately appear in which you can drag anything you want from Windows 11.
If you do not want to take a picture of the rectangle of the desktop, you can draw a shape in any form and take a picture from the active window or full screen. Your photo will be saved to the clipboard, but you will also receive a notification from Windows indicating what you have taken. Clicking on it opens the Sketch section of the Snip & Sketch tool, where you can draw, crop, or highlight sections with a yellow highlighter at the top of your Screenshot.
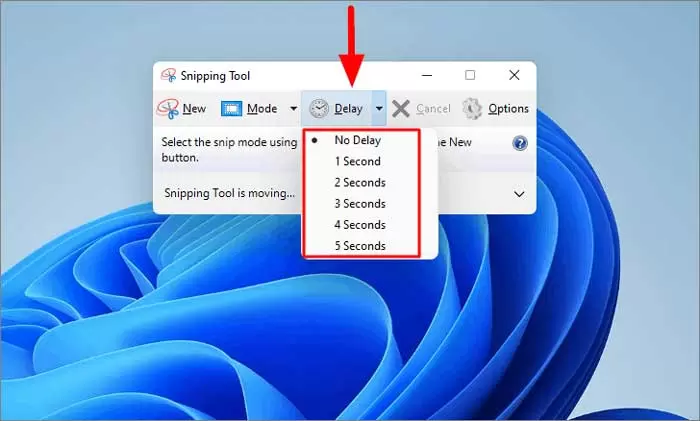
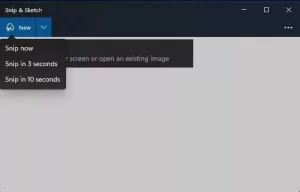
5. Take a screenshot with a delay
Sometimes it is necessary to take a screenshot a few seconds after something, not right now! But what is this delay for? For example, if you need to take a screenshot while activating a drop-down menu or something like that, pressing the PrtScr key or other key combinations can make your menu disappear before taking a picture of the operating system if you can enable a screenshot that will be activated later and allow you to display that menu on the screen as well.
To take a screenshot with a delay in Windows 11, run Snip & Sketch not through the keyboard shortcut but by searching for it or from the Start menu. Then select “Snip in 3 seconds” or “Snip in 10 seconds” from the New menu. Please do what you want to do during that period; the Snip & Sketch tools will appear, allowing you to draw a frame around it.
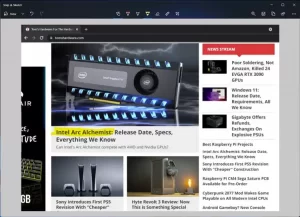
6- Take a screenshot of a full web page or mouse pointer
There are a few things that you can not capture with the built-in screenshot capabilities of Windows 11. For example, you can not use Snip & Sketch to take a screenshot of a web page or other scrolling document (such as a PDF) while scrolling or you can not show the mouse pointer in your photos.
But if you have PicPick installed, you can do both. To capture the entire contents of a web page, click the PicPick tray icon and select and scroll Screen Capture, or press CTRL + ALT + PrtScr together (you can also assign a custom key for this). Then select the web browser you want to take a picture of, and take a screenshot of it while scrolling across the entire page.
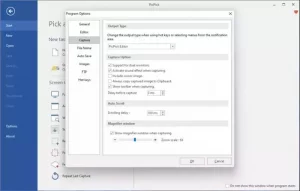
If you want to include the mouse cursor in any of your photos, open the Program Options menu, go to the Capture tab, and select “include cursor image.”
Another advantage of PicPick is that it allows you to create your custom keys for any video capture. It also has an editor that is much more powerful than Snip & Sketch, so you can drag colorful frames or circles around the parts of the image you want to highlight.