


How To Share Files On A Network Between Mac And Windows
Have You Ever Had Both A Windows PC And A Mac On A Network? You May Be Telecommuting At Home Due To Coronary Conditions And Need To Easily Transfer Files Between Your Mac At Work And Your Windows PC At Home.
It does not matter what files you want to move, documents, photos, movies, or music. There are several different ways to share files between a Mac and a Windows computer on a network. This article will introduce you to three quick and easy ways to transfer files between macOS and a Windows PC.
How to move files between Mac and PC in a network
Use Apple Windows File Sharing
If you are a macOS user, your computer already has a file-sharing system built into it. With a bit of tweaking, you can provide file sharing on a Mac between a Mac and a Windows PC.
1. In the Mac toolbar, select the Apple logo.
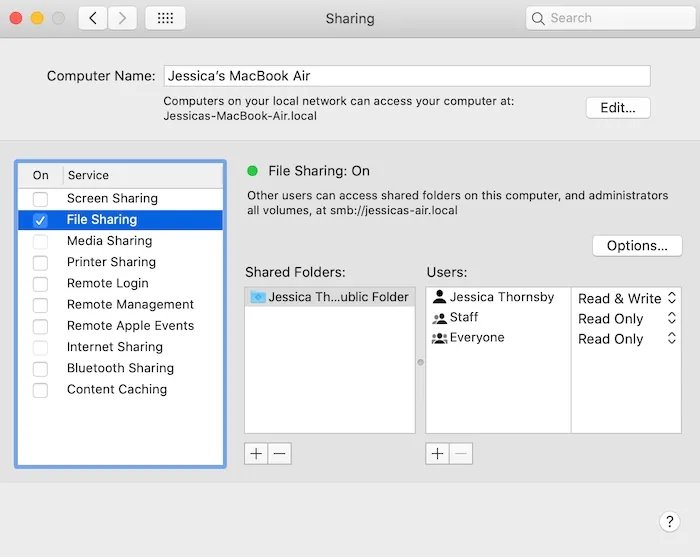
2. Go to “System Preferences… -> Sharing”.
3. From the menu on the left, select “File Sharing.”
Use Apple Windows File Sharing
4. Select “Options…”.
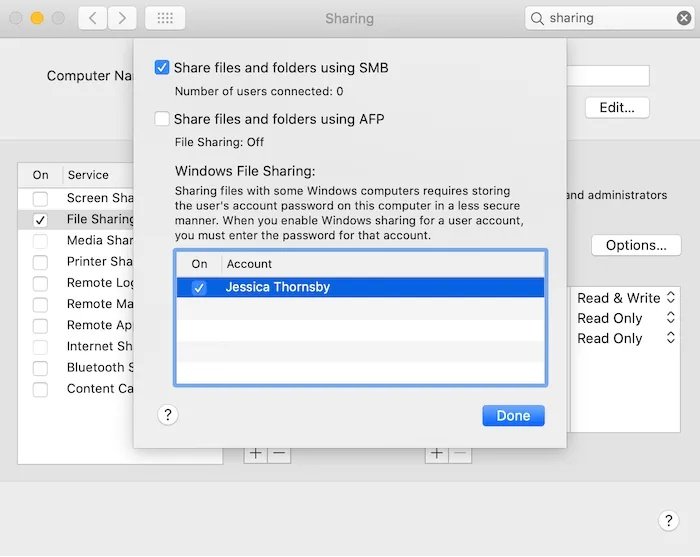
5. “Windows File Sharing” lists all the user accounts registered in this Mac. Select the account you want to share with Windows.
Use Apple Windows File Sharing
6- You are asked to enter the password of this account.
7. Select “Done.”
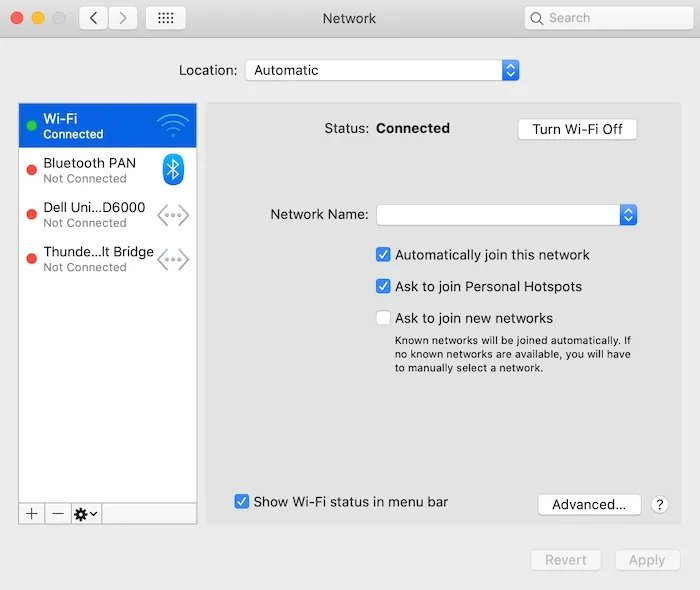
8. After that, go back to the “System preferences ” page and select “Network.”
9- In the menu on the left, select your active connection.
Use Apple Windows File Sharing
10. Select the “Advanced ….” option.
11- Select the “WINS” tab.
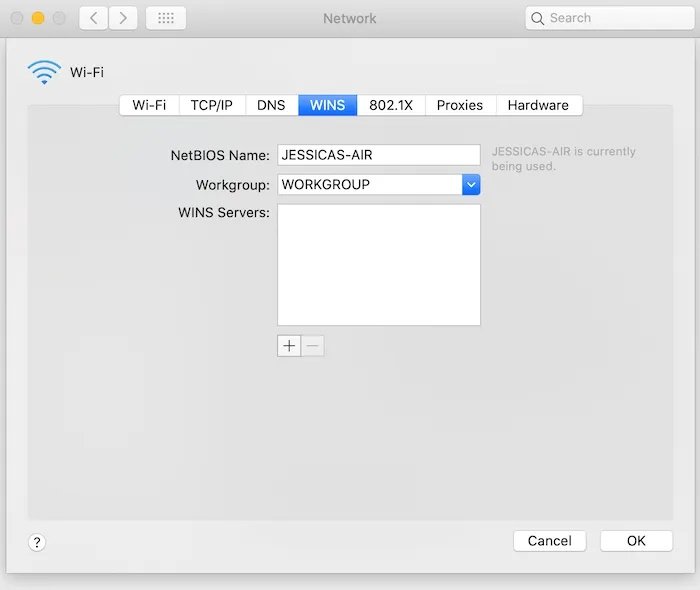
Use Apple Windows File Sharing
12- In this field, enter the workgroup’s name used by the Windows computer on the network. Windows usually use “WORKGROUP” or “MSHOME” to do this. But if you do not know the name of the workgroup, on a Windows computer, go to “Control Panel -> System and Security -> System.” go. Now you should see the name of the workshop.
13. On the Mac, select “OK.”
14. You are now ready to share files between your Mac and Windows computers on the network.
15. To move files, open the “Finder” window in macOS and select “Network.” In this section, you should see a list of all known devices on the network.
Move files using Snapdrop.
If you want to move a file, you can use Snapdrop. If you’ve worked with Apple AirDrop before, this tool will seem strangely familiar to you.
Move files using Snapdrop
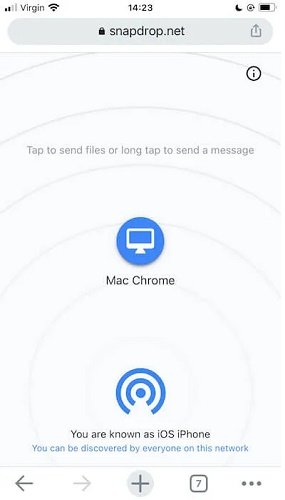
.Snapdrop is an online, multi-platform tool that lets you move files between multiple operating systems, including macOS and Windows. Just open Windows and Mac Snapdrop on your computer. Both devices must be detected automatically.
You can then drag and drop files into this window, much like AirDrop.
Use the cloud
If you constantly share files with another device within a network, setting up shared cloud storage is a good idea.
Cloud-based online tools are ubiquitous these days. If you only want to share static files, Dropbox is always a popular option. Google Drive, meanwhile, is great for working together on documents.