


How to Setup the VPN Connection on Windows 10 by Mikrotik
How to Setup the VPN Connection on Windows 10 by Mikrotik
Windows 10 makes it very easy to set up and use a VPN on your computer. Below you will find the steps to set up a VPN in Windows 10. A VPN service lets you protect your privacy from anonymous browsers in a remote location through your privacy. To use a VPN on a computer, you must first look for a good VPN service provider and sign up for its services.
After logging in with a good VPN service provider, you should gather the following information.
- Web address or IP address of VPN server
- Your VPN username and password
- Other special requirements (if any)
The web address (www.myvpn.com) or IP address (192,000,981) of the VPN server is required to connect to the VPN service from your computer.
You will need a VPN username and password to verify your connection to the VPN service.
Steps to set up a VPN in Windows 10
Once you have the information needed to set up a VPN, you can follow the steps below to set up a VPN in Windows 10.
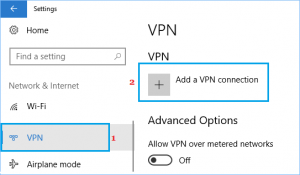
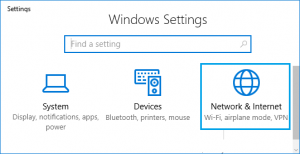
1. Open the settings on your computer and click on the Network & Internet tab.
Set up and use a VPN in Windows 10

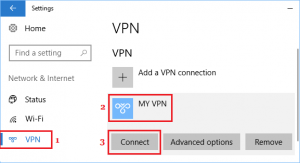
2. On the next screen, click on VPN on the left screen. On the right side, click on the Add A VPN Connection option in the “VPN” section.
Set up and use a VPN in Windows 10
3. On the next page, you will be asked to provide details about your VPN connection. For simplicity, we have broken the page into two parts.
In the first part, you will be asked to provide information about your VPN provider, VPN Connection name, VPN Server address, and your VPN connection type.
Set up and use a VPN in Windows 10
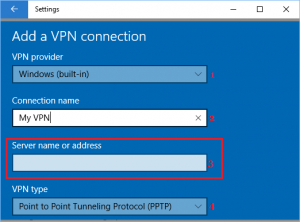
VPN Provider: Select the Windows (built-in) option
Connection Name: Type any name that comes to mind.
Server Address: Here, you need to provide the web address to your VPN server (www.yourVPN.com).
VPN Type: Select the Point to Point Tunneling Protocol or any other option recommended by your VPN provider.
After providing the above details, go down and provide more details about your VPN connection.
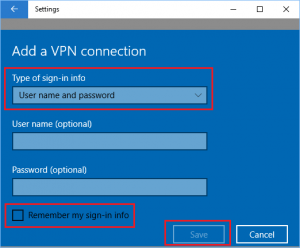
Type of Sign-in-info: Select the username and password as the method you use to log in to your VPN. You can choose other options if recommended by your VPN service provider.
- User Name: This is optional
- password: Optional
You can select the Remember my Sign-in info option if you provide a username and password.
This allows Windows 10 to remember your username and password, allowing you to log in to the VPN without entering your username and password.
5. After providing all the details, click the Save button to save these settings.
How to connect to a VPN in Windows 10
Once the VPN network is set up on the computer, you can connect to the VPN network using the settings or directly from the Taskbar.
1. Click the Network icon in the right corner of the Taskbar, and then click your VPN network name in the menu (see image below).
Set up and use a VPN in Windows 10
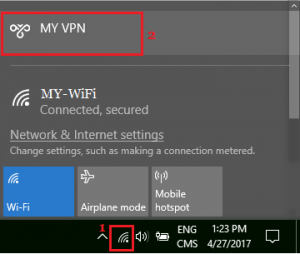
2. On the next page, you will be asked to enter your username and password to log in to your secure VPN system.
Another way to connect to a VPN is to access the settings menu in Windows 10.
1. Open the settings on your computer and click on the Network & Internet tab.
2. On the next screen, click on VPN on the left. Click on your VPN name in the right pane and then click Connect.
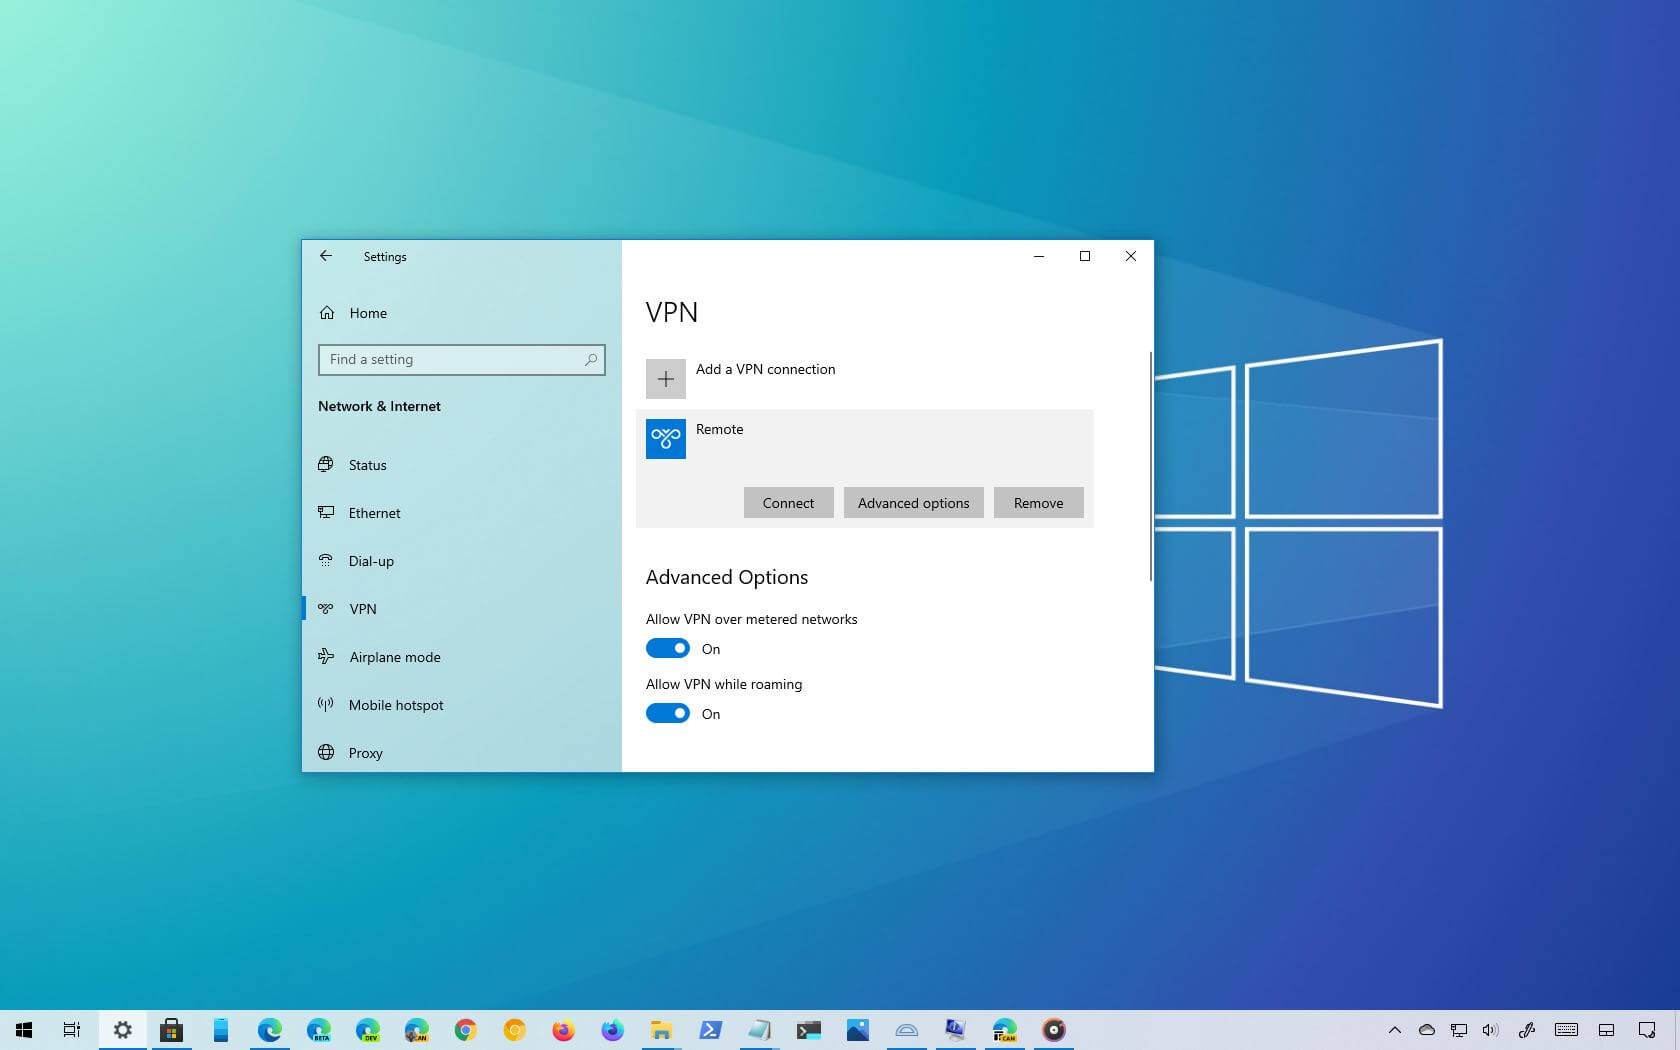
As you can see from the image above, connecting to a VPN from the settings menu also gives you access to advanced options.