


How To Restore Your Computer Back To An Earlier Time?
If your Windows don’t boot, restoring the System to a date or a few hours earlier can be an ideal solution, provided you have a backup version of the System. How to restore the computer to a previous date in Windows 7, 8, and 10 using a restore point? This post will guide you entirely and answer your questions.
Restoring your computer to an earlier date is critical
Windows 10 has been upgraded in some features compared to previous versions. Despite this, sometimes system failure occurs, such as Windows reset problems, black or blue screen, upgrade errors, etc.
The factors that lead to system failure are different, such as virus attacks or ransomware like WannaCry, hard disk failure, faulty operation, program installation, etc.
So, how can we deal with system failure? Letting your computer work as usual is not far from imagination, Provided that there is a backup copy of the System or you have already created a restore point.
In this case, you can restore the computer to an earlier date.
How to restore the computer in Windows 7, 8, and 10 to the previous date?
Usually, you can use a system image or restore point to return the computer to an earlier time.
To answer the question of how to restore the computer to a previous date, stay with us by continuing this article.
The first method: using the MiniTool ShadowMaker program
Under normal circumstances, in case of system problems, the system image file is used to restore the computer to a previous date. Using professional backup software to create a system image is recommended.
MiniTool ShadowMaker software is an ideal solution for more accessible system backup and recovery.
This tool is compatible with all Windows 7, 8, 10, and 11. Using it, you can do many things, including file, system, partition,, and disk backup. Most importantly, it allows scheduling backups, incremental backups, and other actions.
As for PC recovery, this professional software enables you to enter WinPE (Windows Pre-Installed Environment) to restore your Windows 10 with a bootable media created by MiniTool ShadowMaker.
Make a backup in Windows 7, 8, 10 and 11
For example, you may have questions about the system image in Windows 7, 8, 10, and 11? How can I create a system image in Windows 10? We will answer these questions.
In a word, a system image is an exact copy of all system partitions used to restore your computer to the state it was in when the image was created. This image contains Windows 10 itself, necessary system-specific files, settings, and programs.
You can restore Windows 10 and 11 to a previous date more effectively using this image file.
Regarding the system backup operation, you must go through the following steps:
Step 1: Launch MiniTool ShadowMaker on your computer.
Step 2: Go to the Backup page; you will see that MiniTool ShadowMaker will automatically detect all System related drives in the current operating System in the Source section.
Therefore, you only need to choose a location to save the system image file. It should be noted that making a backup copy of the external hard drive is necessary.
Step 3: After completing the Backup settings, click Back Up Now to start backing up the Windows system image.

After a few minutes, the Backup operation ends. Again, if there is a problem with your Windows, the system image file will help you restore your computer to its previous state.
If you are still wondering how to restore your computer to a previous date, continue reading.
Roll back Windows to an earlier date.
In most cases, even though your Windows cannot boot successfully, you still decide to restore the system backup image stored on an external hard drive to the original system location.
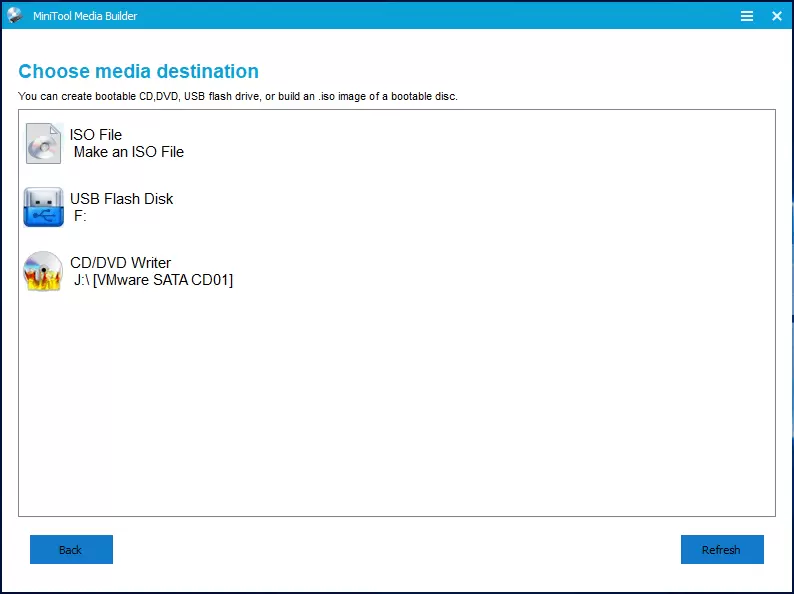
With MiniTool ShadowMaker, you can fully use the Media Builder feature. You have to do these two things:
1- First, go to the Tools tab, and create a bootable disc for CD or DVD, or flash drive with Media Builder.
2- Next, configure your computer in BIOS and ensure it starts from a bootable media.
Then you can do a system restore. Follow the steps below:
Note: In WinPE, some partitions’ drive letters differ from those in Windows. Therefore, according to a series of information such as backup version, partition size, and partitions in the Backup file, specify the Backup operation.
Step 1: After your computer is booted into WinPE, run MiniTool ShadowMaker. Then go to the Restore page, and you will see all the backup tasks listed here. Select only the items you need to restore.
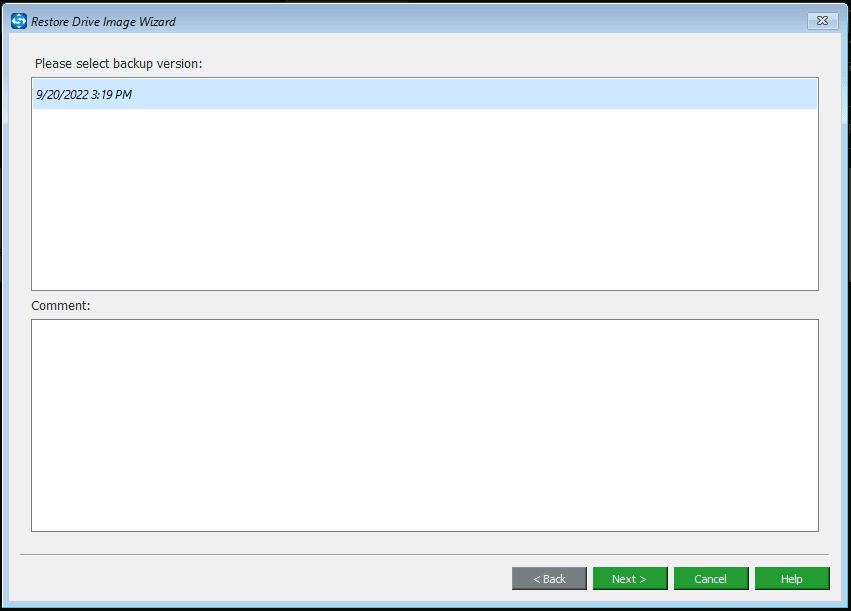
Step 2: You can choose the Backup version you want to restore.
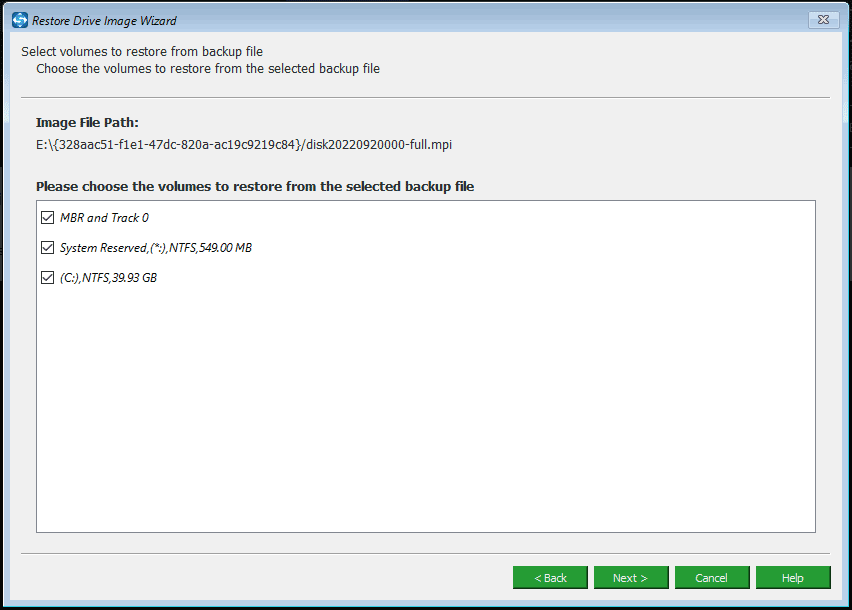
Step 3: All the partitions in the selected backup version will be shown here, and you will see that all these are checked by default. For system backup, all system drives must be checked. As for disk backup, you can uncheck the data partition you don’t need.
Note: MBR and Track 0 must be selected to ensure the System restore is successful. Otherwise, you cannot fix the computer to a previous date in Windows 7, 8, and 10.
Step 4: Then, select the desired disk for recovery in the window that appears. Please note that you cannot restore the Backup image to the hard drive containing the Backup files. Usually, the system disk is selected.
Then click Start to perform the recovery operation. A warning message will appear showing you which partitions will be overwritten by an image.
Note: MiniTool ShadowMaker permanently restores the image to the exact location as the original system partition. Therefore, selecting the system disk as the target disk is recommended.
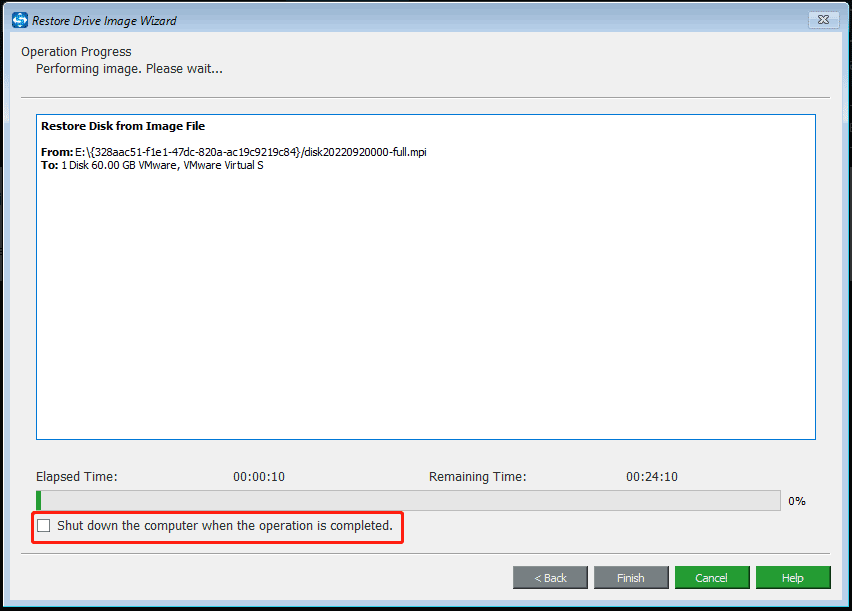
Step 5: In the next step, you will be directed to an interface showing the operation’s progress. This operation will take a few minutes. If you don’t like to wait, Shutting down the computer when the process is completed is required.
Now we will show you how to make a backup copy of your System and restore the computer to a previous date in Windows 7, 8, and 10 with MiniTool ShadowMaker. If you are looking for such backup and recovery software, download MiniTool ShadowMaker.
Method 2: Using a system restore point (recommended)
Using a system restore point that has already been created is another method to restore Windows to an earlier date.
Create a system restore point.
Windows allows you to create a restore point. With it, you can restore the computer to a previous date. The method is as follows:
Step 1: In Windows 10, enter System restore in the search box and click Create a restore point from the results list.
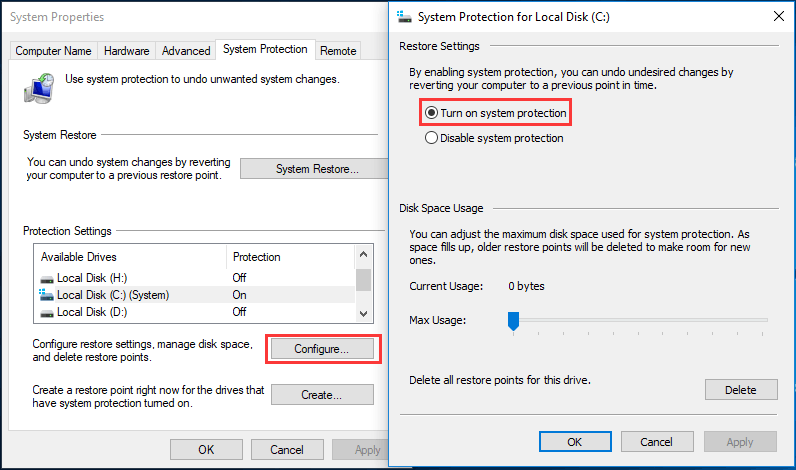
Step 2: In the System Properties dialog box, you must first enable system protection mode to create a restore point. Just click on Configure and check Turn on system protection. Then you can adjust the disk space used for system protection by dragging the blue handle.
Note: Old restore points will be replaced with newer ones as space fills up.
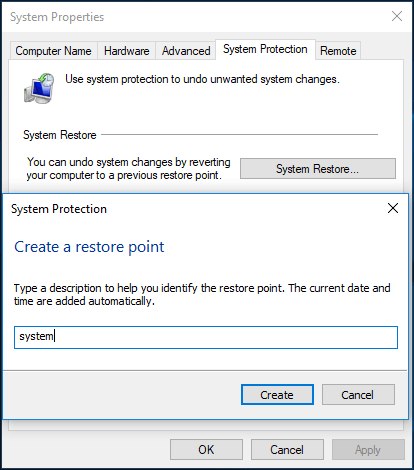
Step 3: Click Create to start the restore point creation process.
Restore Windows to an earlier date or time.
In case of problems with the System, you can use the created restore points to restore the computer to an earlier date. Just follow these steps:
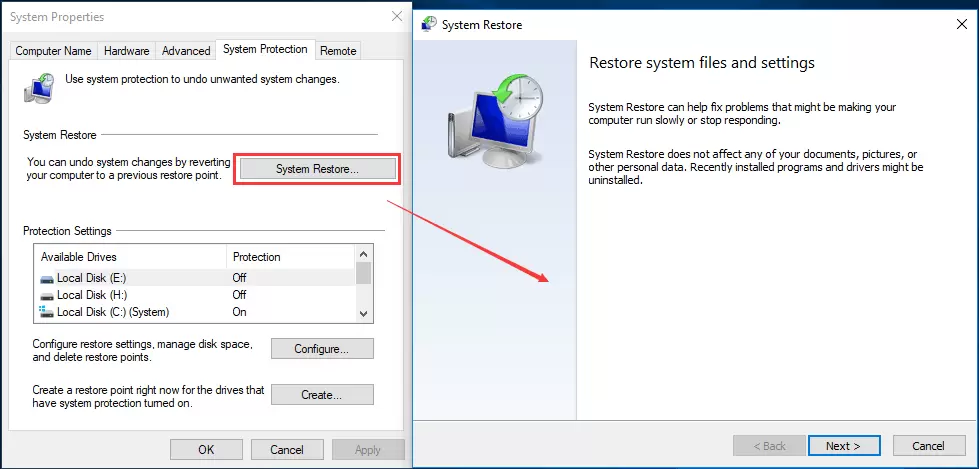
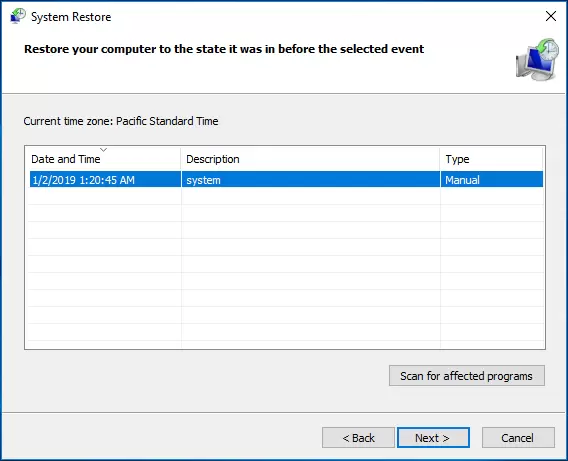
Step 1: Whenever you want to restore your computer using a system restore point, click System Restore on the System Protection tab to start the System Restore. Then click the Next button.
Step 2: The most recent restore point you created will be listed here. Just select it and click Next to continue.
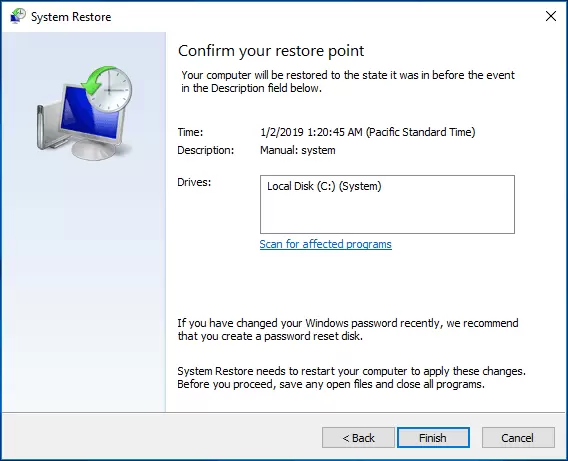
Step 3: Then, you need to confirm the restore point. After clicking Finish, a warning message will tell you that the recovery process cannot be stopped after it has started.
If your computer fails to boot, you cannot restore the System using the System restore point in Windows 7, 8, and 10. In this case, you need to enter WinRE.
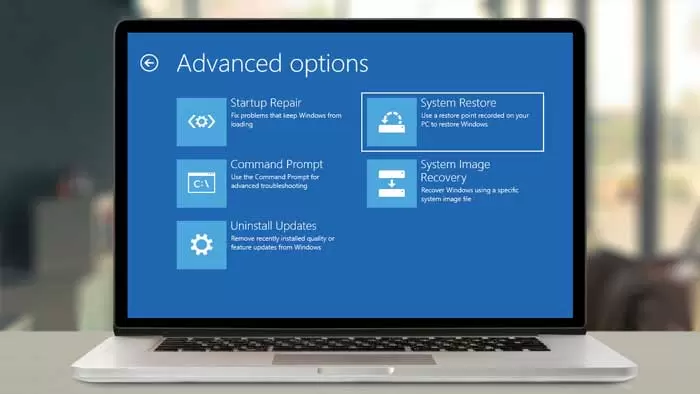
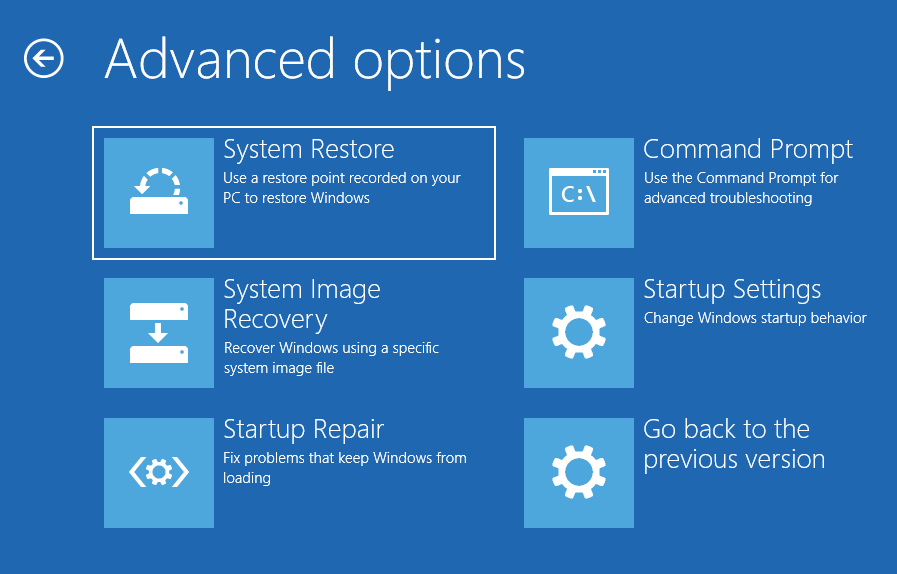
Step 1: Go to Choose an option > Troubleshoot > Advanced options > System Restore to restore the computer to a previous date in Windows 10.
Step 2: Tap on an account, enter the password, and click Continue.
Step 3: Then continue the System restore operation after a series of instructions to fix Windows 10 to the previous date.
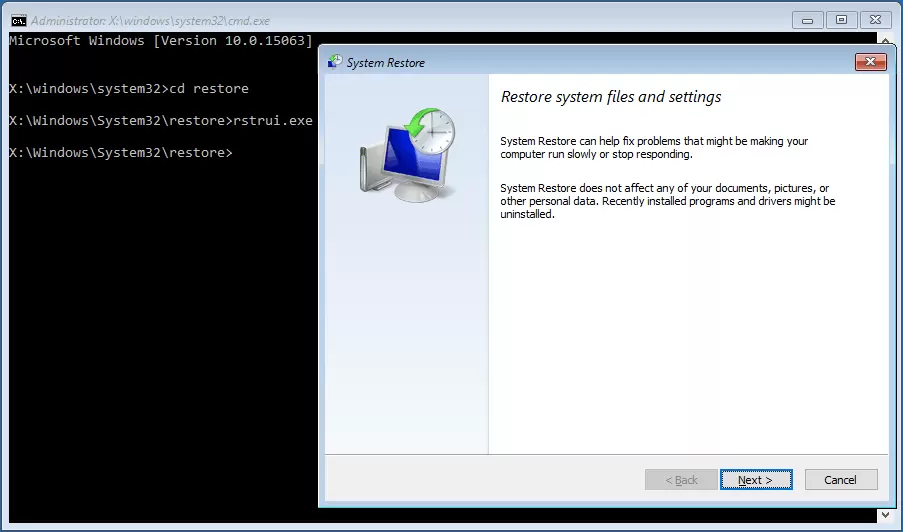
Note: If you are running Windows 7, but won’t boot, press F8 during startup, and click Repair your computer on the Advanced boot options page to enter WinRE. Then open the command line, cd restores and enter rstrui.exe until the System Restore window appears.
However, when you use a system restore point to restore your computer to an earlier date, your computer maygetg stuck on System Restore, and the System will not complete successfully.
Conclusion
One method is to use a restore point that you have created. Type Create a restore point in the search box, then click on System Properties and select System Restore to start the restore operation.