If You Are Looking For A Way To Lock Files And Folders In Windows 11, In This Tutorial, We Will Introduce You to Some Methods For This.
Windows uses BitLocker to encrypt files and folders to protect users’ data. If this feature is enabled in Windows, the entire drive is encrypted; if someone does not know the account password, they cannot access this data.
But some users prefer to lock only some of their sensitive and vital folders, or when they share their device with unknown people, their data and important documents cannot be accessed by these people because when the user logs in to System, the drive is decrypted. No data protection is done while working with the device.
However, Windows is still not equipped with any option to lock a file or folder by default, so many users are looking for a way to lock folders and files. It is interesting to know that although Windows itself cannot lock folders directly, using methods, you can get help from Windows security features such as BitLocker for this task or finally use external software.
This article will teach different methods of protecting folders and files using a password in Windows 11.
Encrypt folders in Windows 11 with BitLocker
Windows 11 cannot make password protect the folder because your account already covers your profile information. Still, you can use the virtual drive and BitLocker capabilities to create a password-protected drive (similar to a password-protected folder).
Step 1: Create a virtual drive
To create a virtual drive that acts as a password-protected folder, follow these steps:
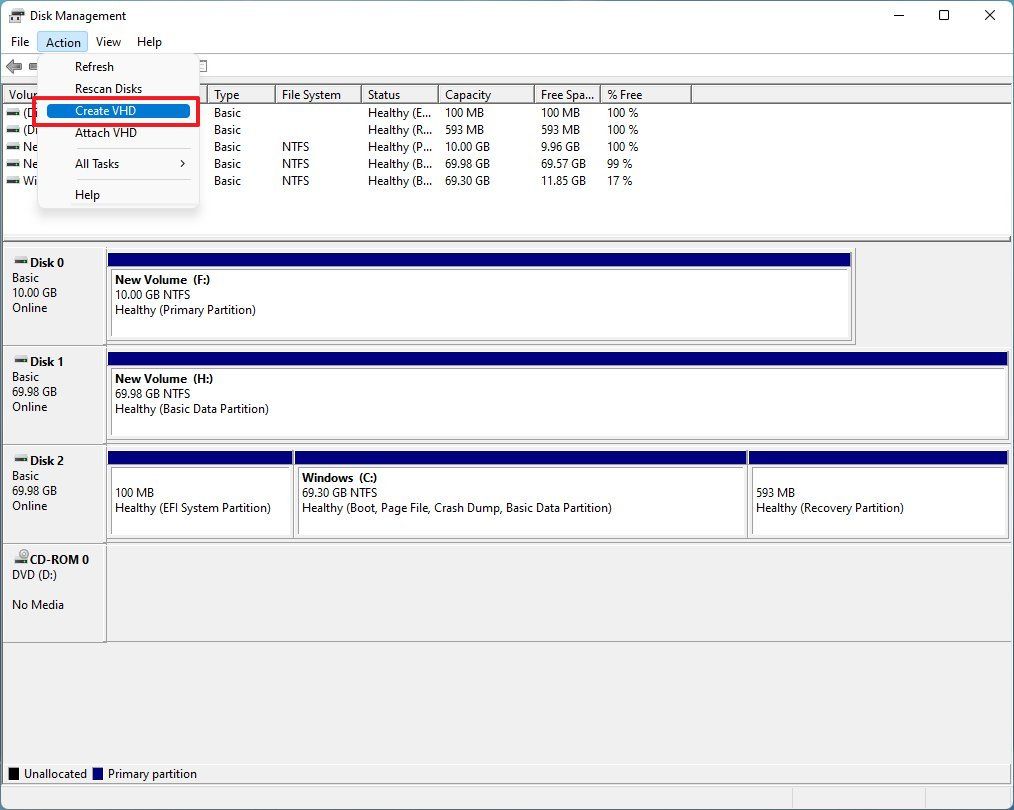
Search for Disk Management in the start menu and click on the result to open the program.
Click the Action menu and then the Create VHD option.
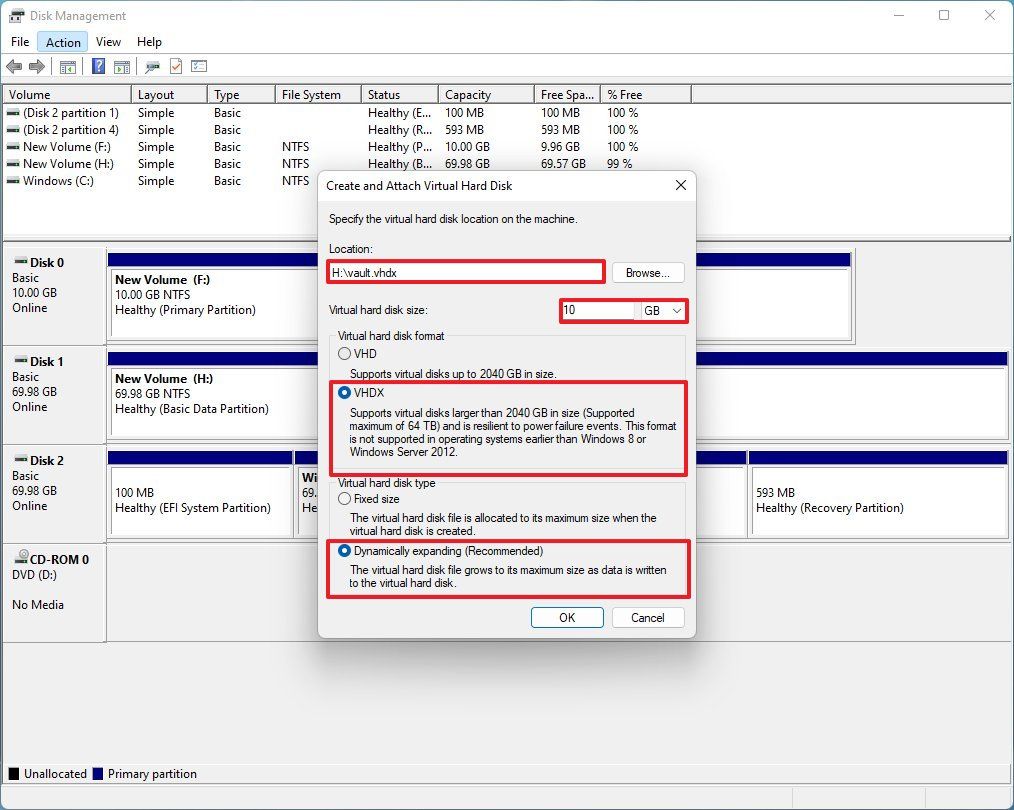
Click the Browse button to select a location to save the virtual disk.
Specify a name for the drive (for example, Vault) and click the Save button.
In the Virtual hard disk size section, specify the space you want to reserve for storage. For example, 10 GB, But you can use any amount of storage space based on the content you want to protect.
Optional: In the Virtual hard disk format section, select the VHDX option.
Select the Dynamically expanding option to allow the created virtual disk to grow in size only by saving files.
Click the OK button.
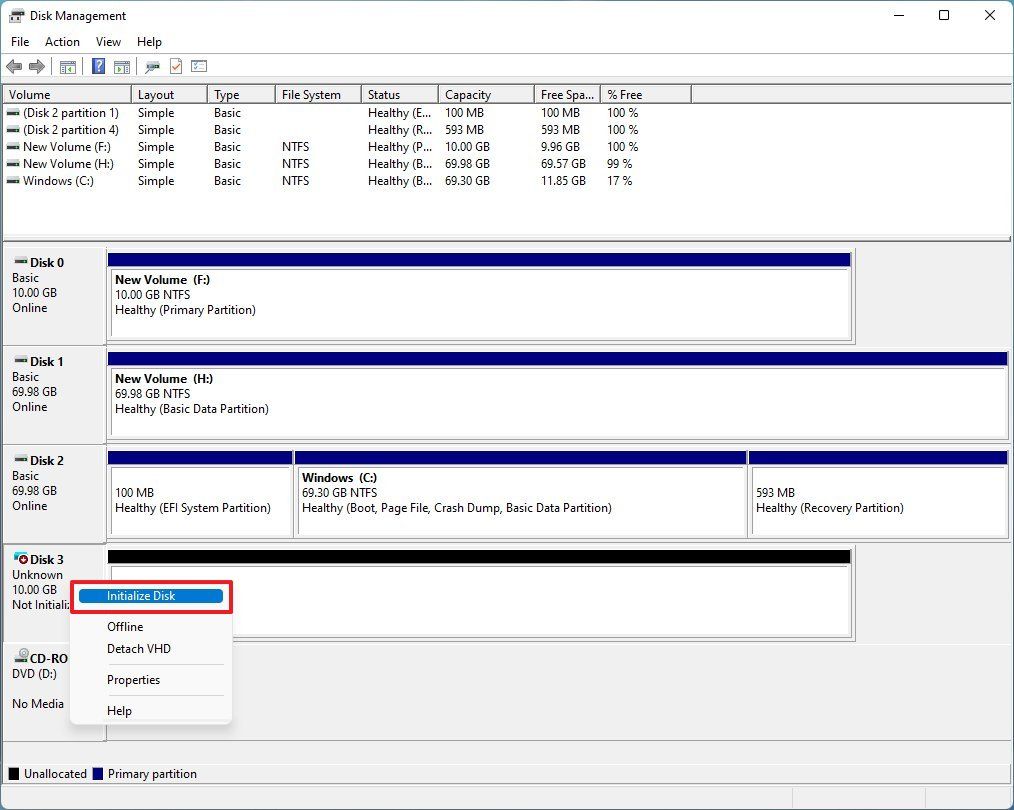
Right-click on the newly created virtual disk and select Initialize Disk.
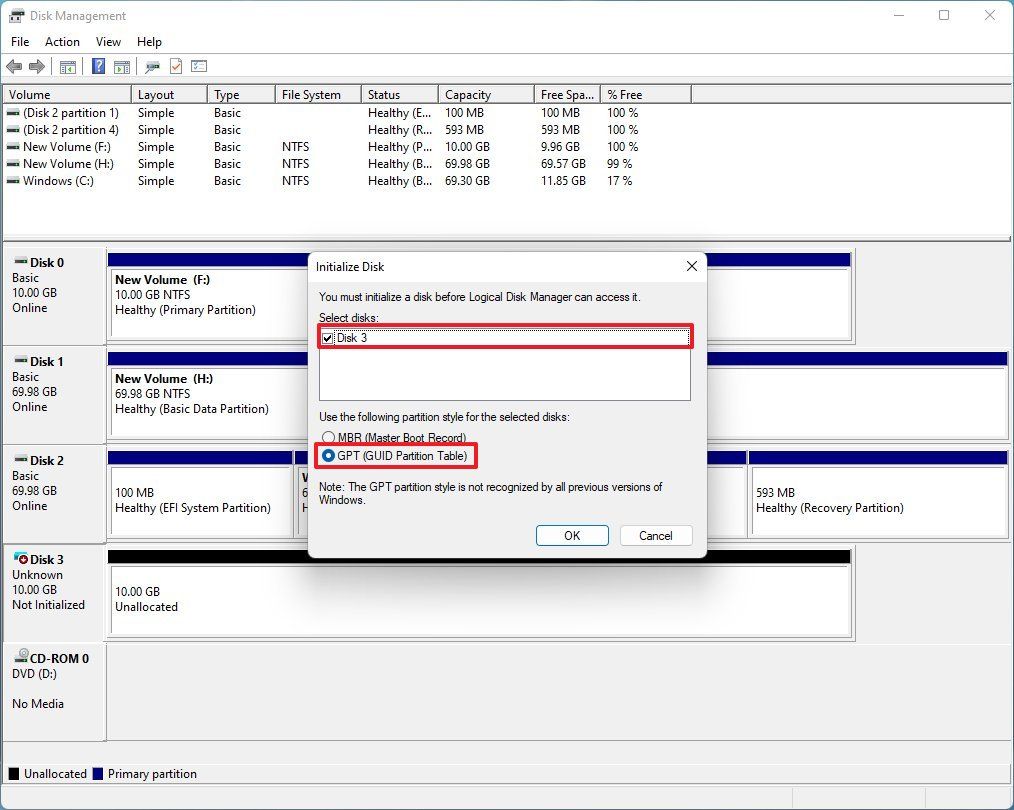
Check the newly created disk.
Select the GPT option.
Click the OK button.
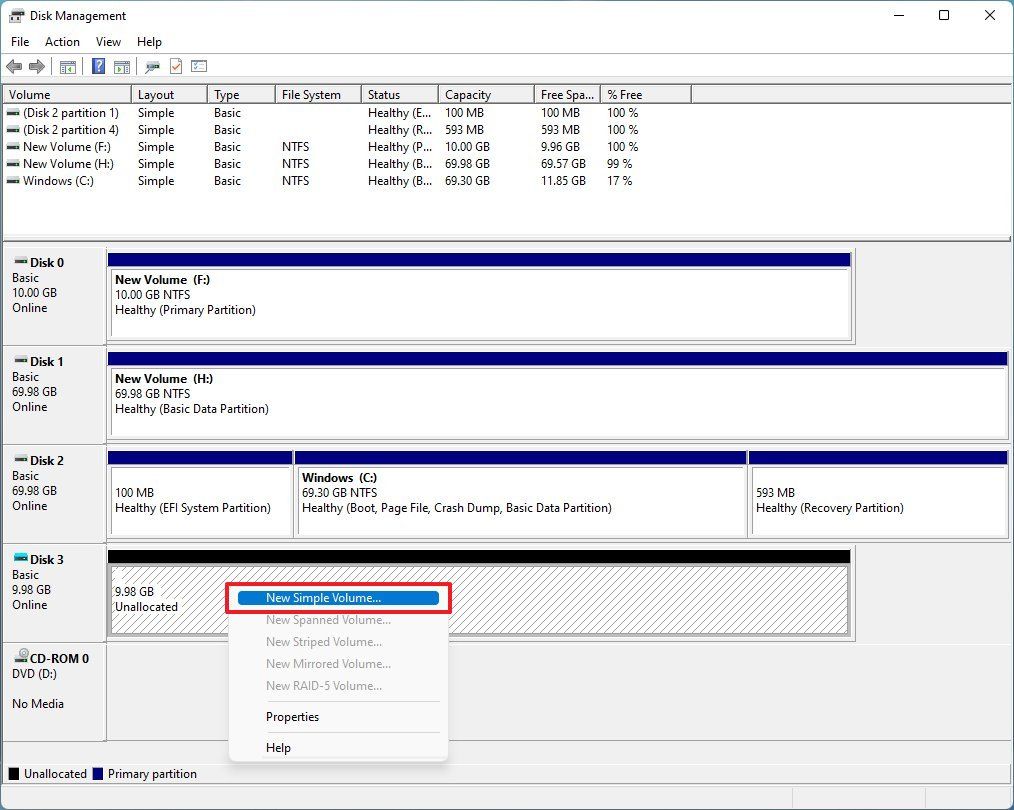
Right-click on Unallocated space and select New Simple Volume.
Click the Next button.
Use the default volume size settings.
Click the Next button.
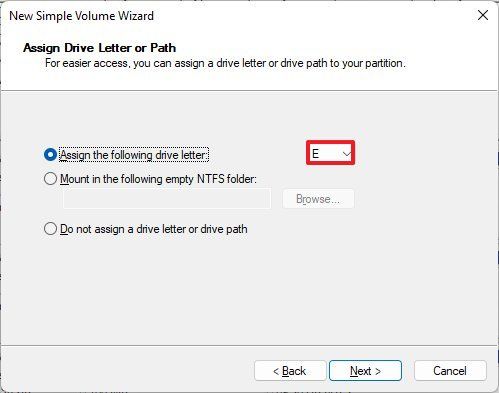
Use the drop-down menu. Assign the following drive letter to determine the drive letter.
Click the Next button.
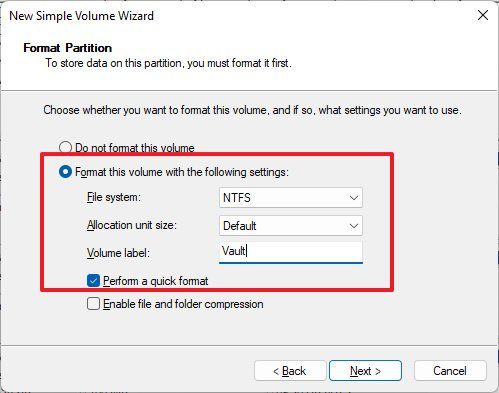
Select NTFS from the File system drop-down menu.
Select the Default option from the Allocation unit size.
In the Volume label field, type a descriptive name for the drive, for example, Vault. This name is different from the name you set for the virtual purpose at the beginning of the steps, and it will be displayed in the This PC section next to the other drives and partitions.
Check the Perform a quick format option.
Click Next and then Finish.
After completing the steps, the virtual drive will create. You can now use it as a folder to securely store files with BitLocker encryption.
Step 2: Encrypt virtual drive with BitLocker in Windows 11
To set up BitLocker to password protect your drive in Windows 11, follow these steps:
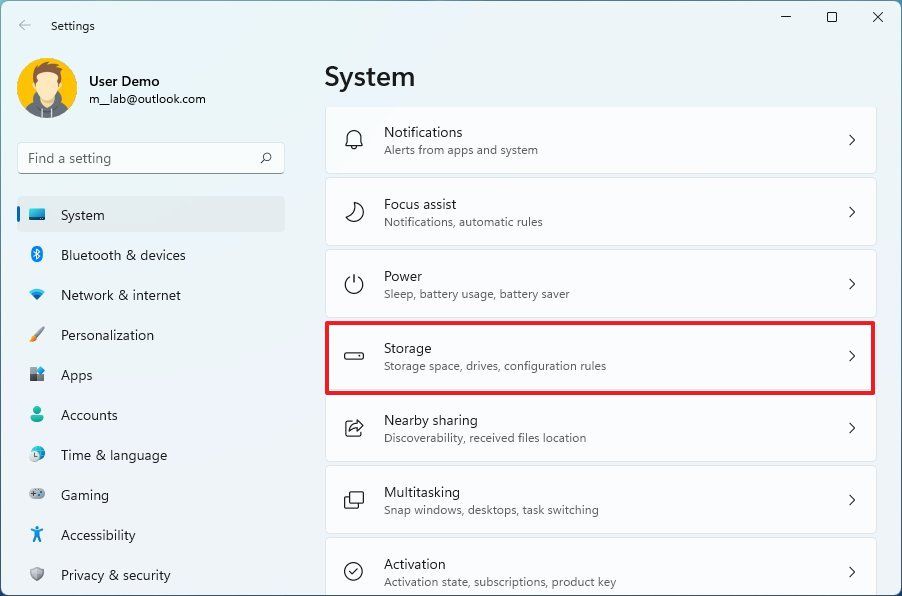
Open Settings. Click on System.
Click Storage on the right.
In the Storage management section, click on Advanced storage settings.
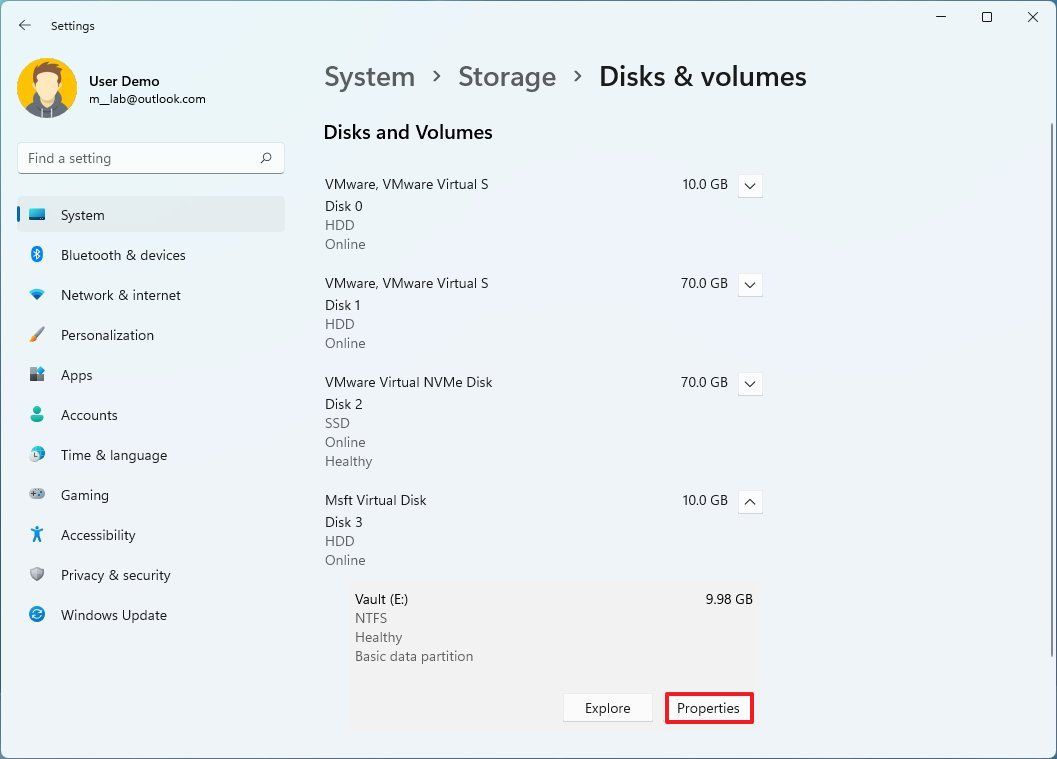
Click on Disks & volumes.
Select the virtual drive and click the Properties button.
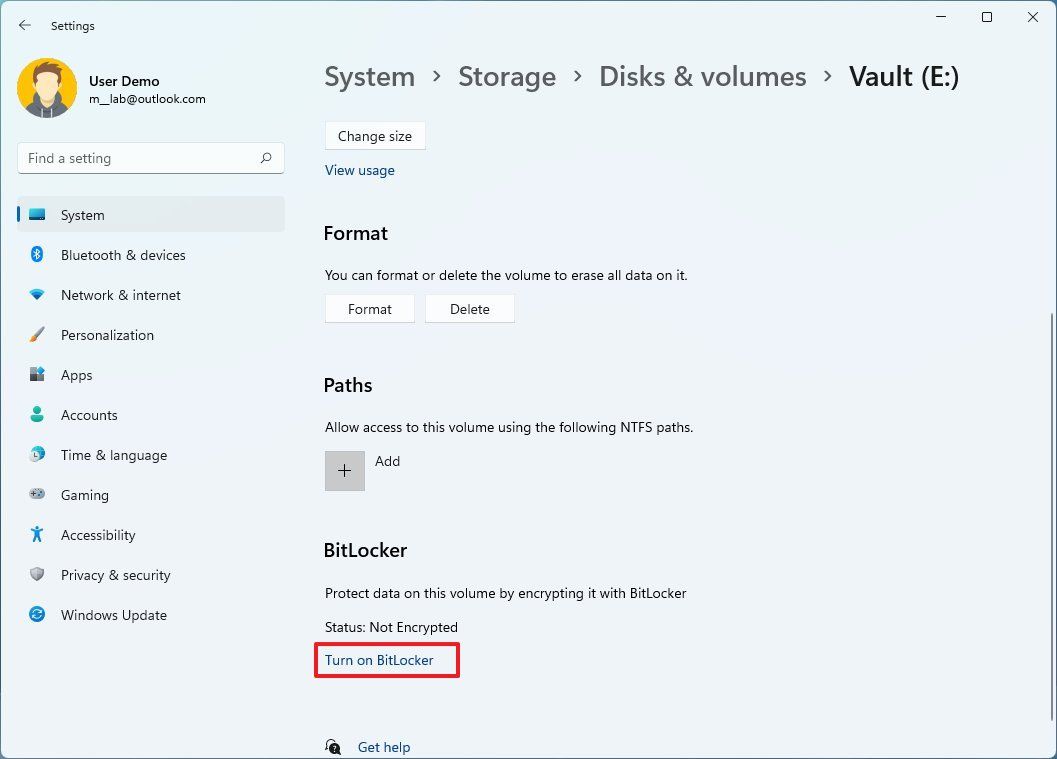
Click on Turn on BitLocker at the bottom of the page.
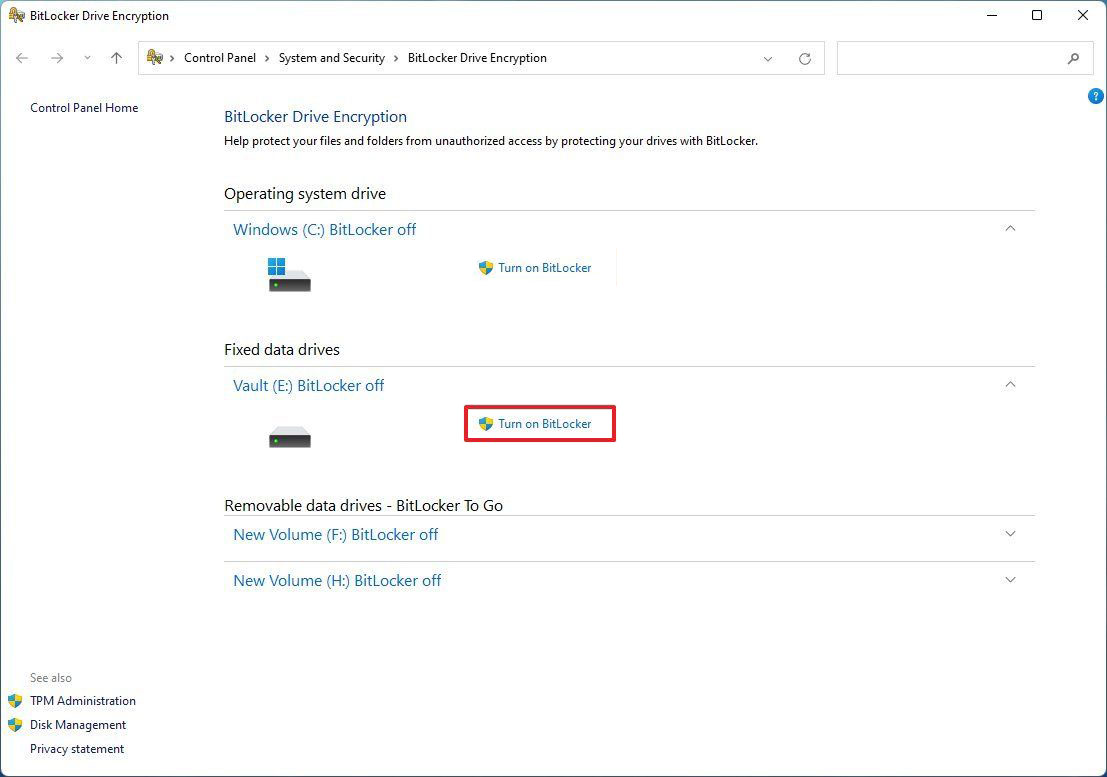
Select the virtual drive in the Fixed data drives section (here, Vault).
Click Turn on BitLocker.
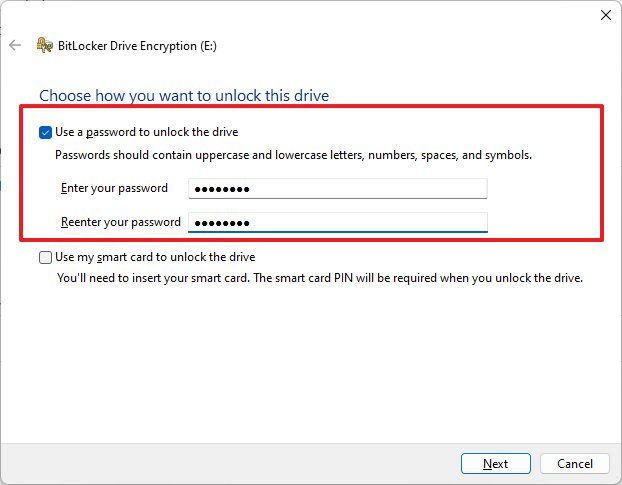
Check to Use a password to unlock the drive option and create a password to protect the folders inside the drive.
Click the Next button.
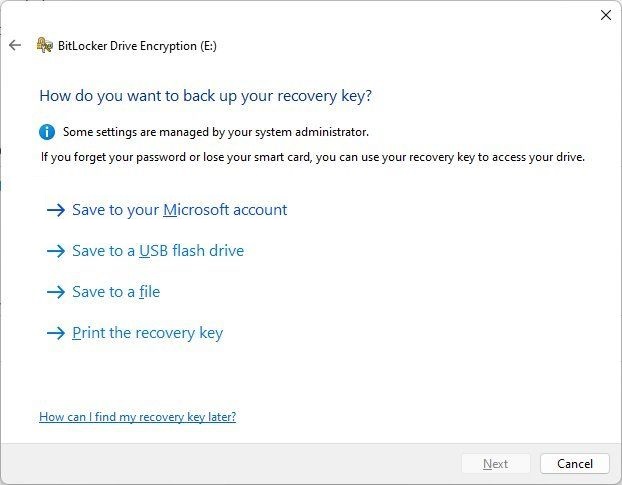
Choose an option to back up the recovery key if you forget the password; using a Microsoft account is the easiest and safest option. However, you can choose other options, such as saving to a USB flash drive, saving to a file, or printing a recovery code.
Click the Next button.
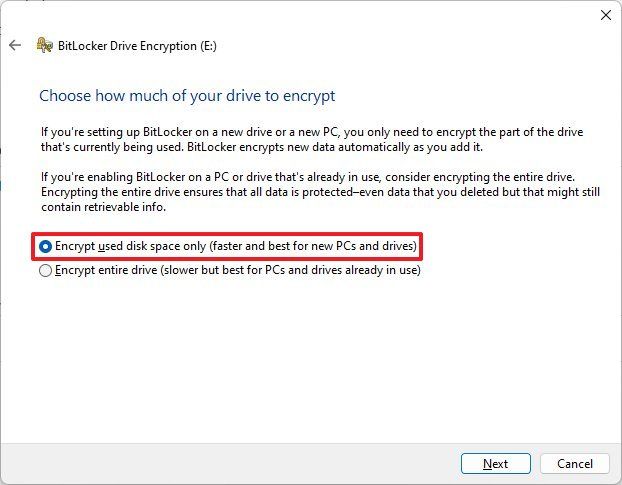
Select the Encrypt used disk space only option and click the Next button.
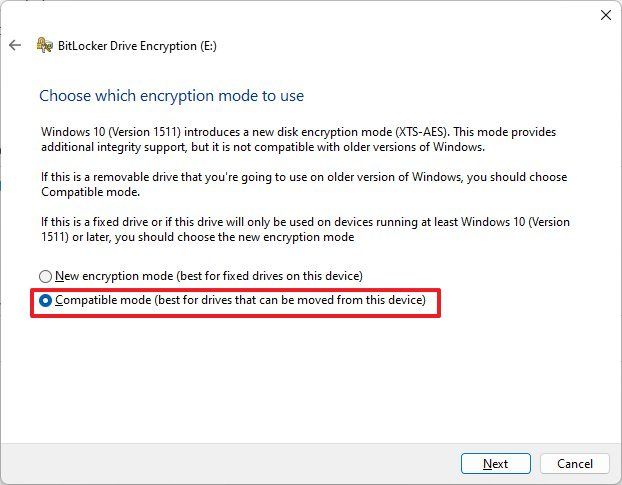
Select the Compatible mode option and click the Next button.
Click the Next button and then Start encryption.
Click the Close button.
After completing the steps, the virtual drive will secure with a password.
How to access a password-locked file
To open a password-protected folder in Windows 11, use these steps:
Open File Explorer.
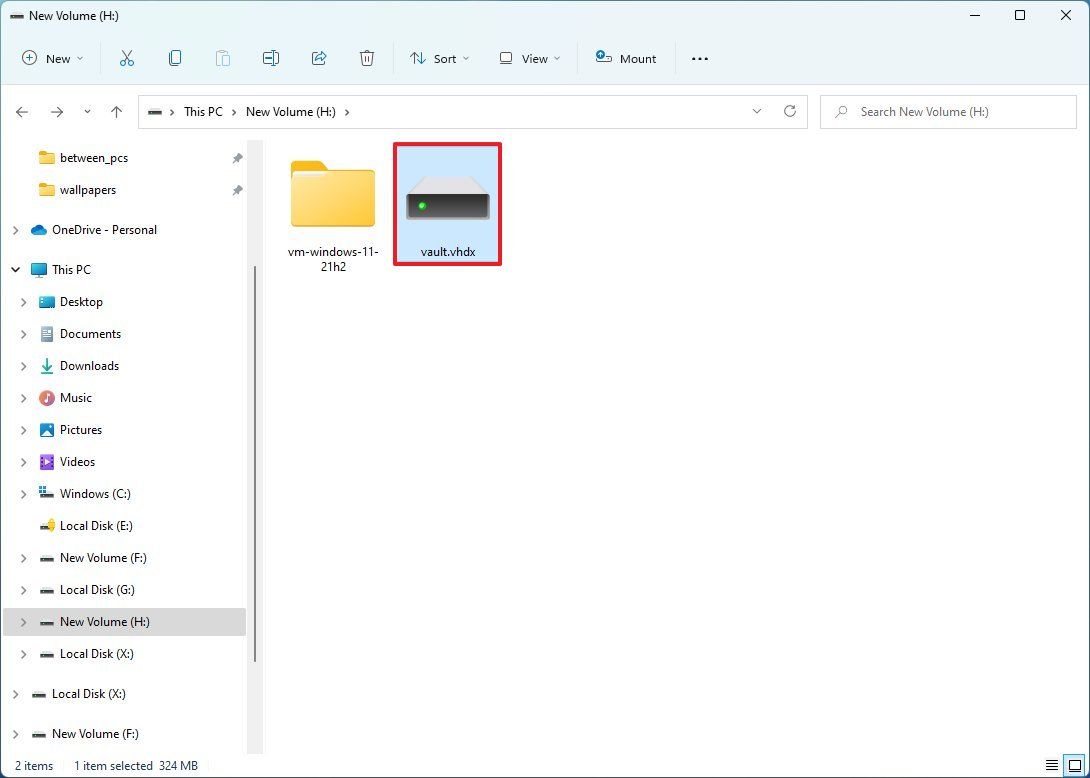
Open the folder that contains the Vault—vhdx file.
Double click on it to open it. If the message is not accessible and access is denied, do not worry because you are trying to open an encrypted file.
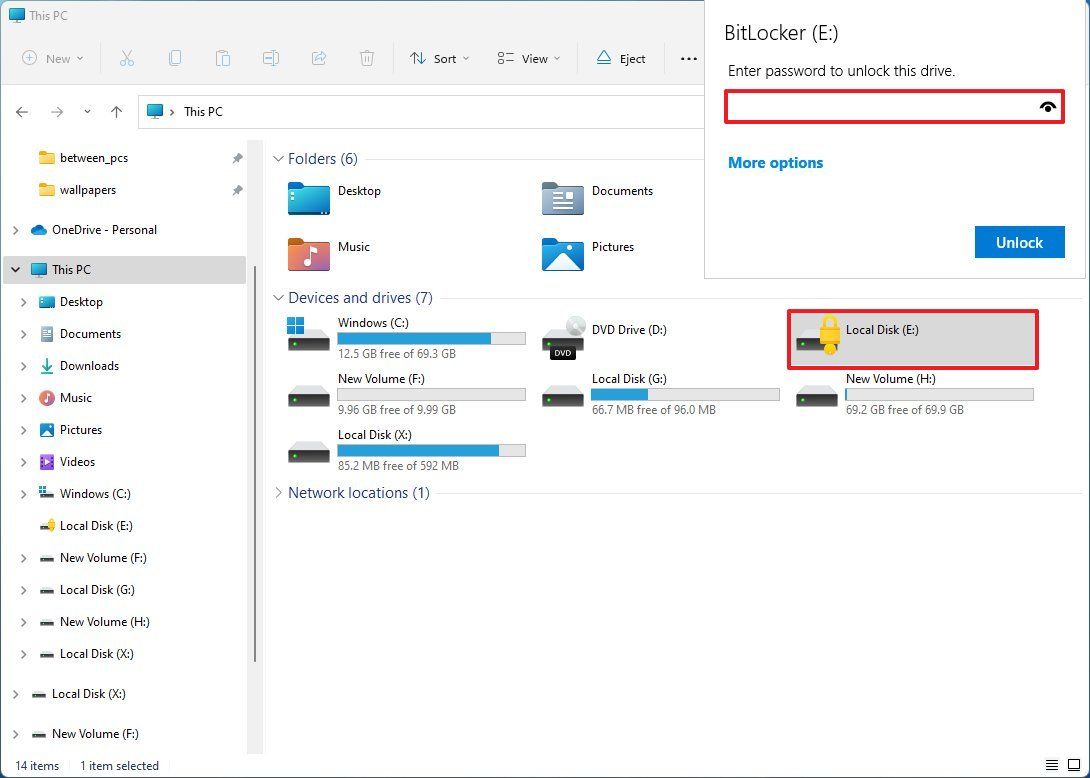
Click on This PC from the left navigation bar.
Double-click the locked drive to open the password entry page in the Devices and drives section.
Type the password and click Unlock to unlock the drive.
After completing the steps, the drive will open and allow you to add, modify and delete your sensitive files.
Locking folders with a password
To close and lock a folder with a password in Windows 11, follow the steps below:
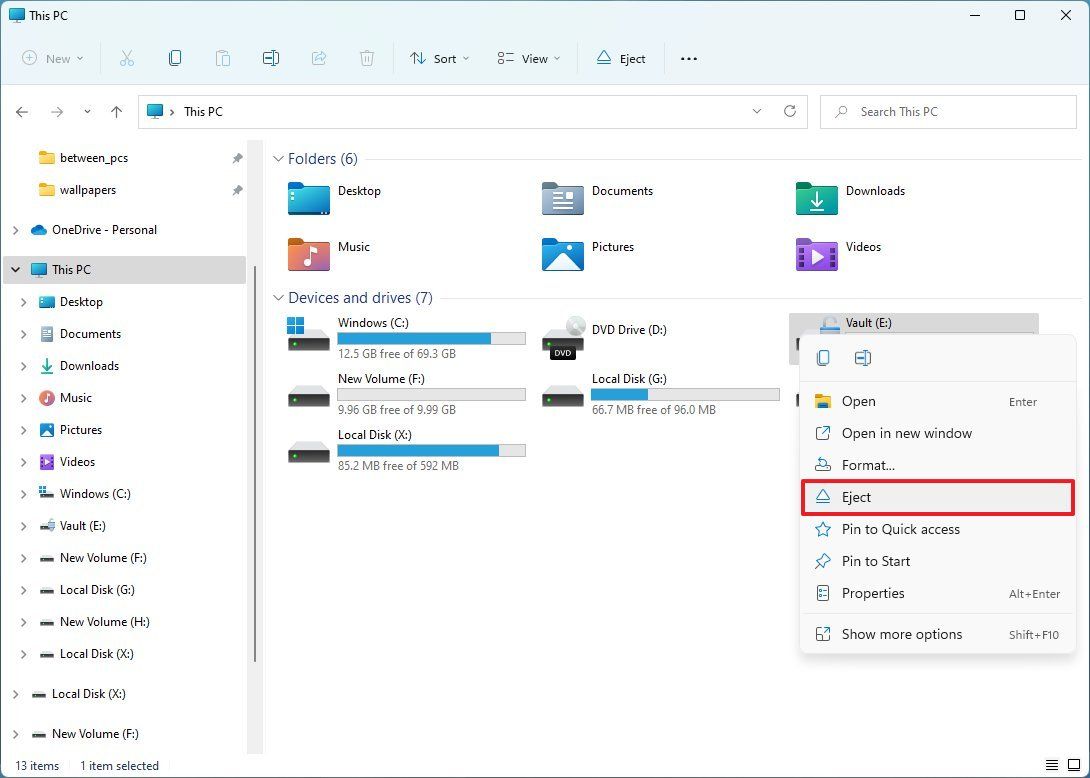
Open File Explorer. Click on This PC from the left navigation.
In the Devices and drives section, right-click on the drive with the unlocked symbol and select Eject.
After completing the steps, the folder (drive) will lock again, and you must use the password to open its contents again.
Encrypt Windows 11 files and folders using OneDrive
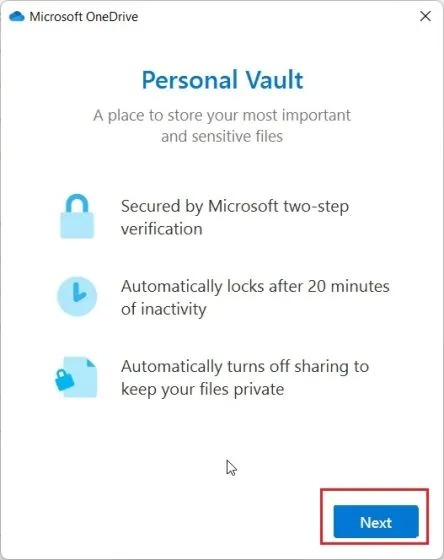
If you want to make password protect files and folders locally and in the cloud, we recommend using OneDrive. OneDrive supports a helpful feature called Personal Vault, Where you can store your important files, folders, and documents. Even if you don’t have a Microsoft 365 subscription, you still have the Personal Vault feature with a limit of three files.
Whenever you want to access Personal Vault content on OneDrive, you’ll need to enter a one-time verification code sent to your email. Only after entering the code can you access the encrypted files. Additionally, Personal Vault uses Bitlocker to encrypt stored files. Personal Vault is automatically locked after 20 minutes of inactivity. This great feature to save sensitive files and folders in Windows 11 is very useful.
Open the OneDrive app from the Start menu.
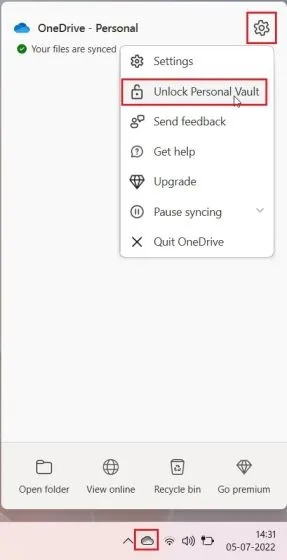
Click on the OneDrive icon in the taskbar.
Click on the Settings icon and select Unlock Personal Vault.
Click Next to set up Personal Vault in your OneDrive folder.
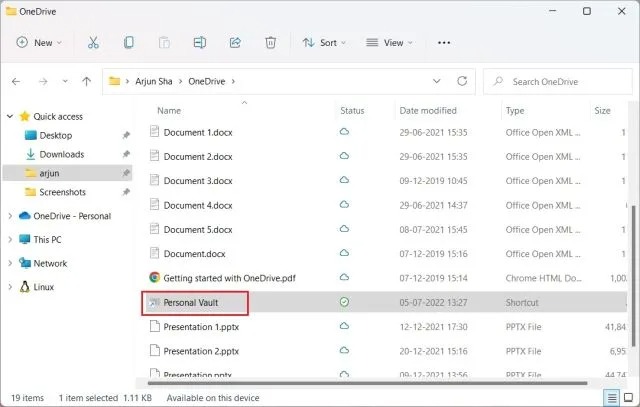
Open OneDrive from your user profile. You will find Personal Vault here. Run it.
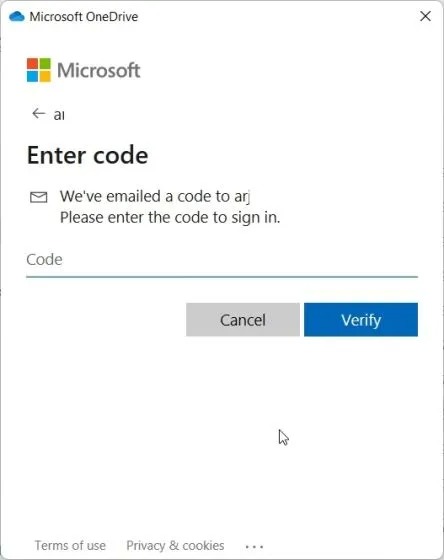
Now enter the two-factor authentication (2FA) code sent to your email account to allow access to the secure folder.
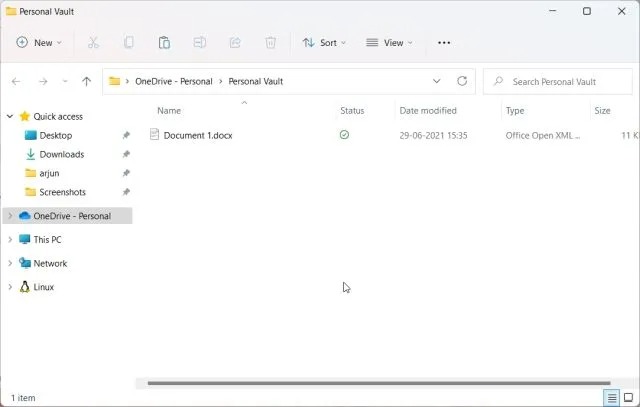
Here you can store all your sensitive files, documents, and folders.
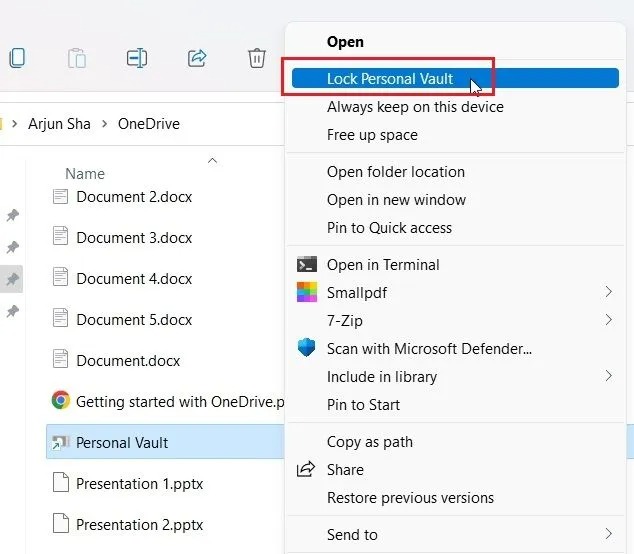
To lock Personal Vault, right-click and select Show more options > Personal Lock Vault to seal it.
It is how you can password protect Windows 11 files and folders using OneDrive. In addition, to keep this folder offline on your device, right-click on this folder once more and select the Always keep on this device option.
Folder encryption in Windows 11 with software
Another way to lock folders in Windows is to use third-party software. Now that Windows cannot lock folders, using this software can be considered the most straightforward way because there is no need to go through the lengthy steps mentioned in the previous sections, and there is no limit in this work.
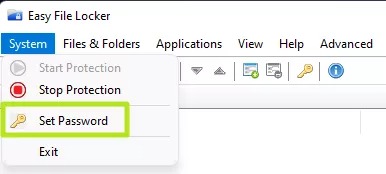
If you prefer installing software over using Windows’ built-in features, there are various software for this task that you can search. In this section, we have used Easy File Locker software, a lightweight and free tool that gives you precise control over what you protect.
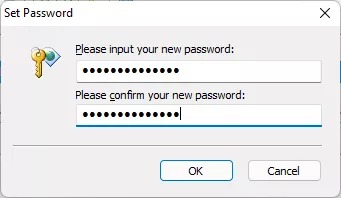
To use this software, you must set a password and select the file or folder you want to encrypt. After doing this, you can access the file’s contents by entering your assigned password.
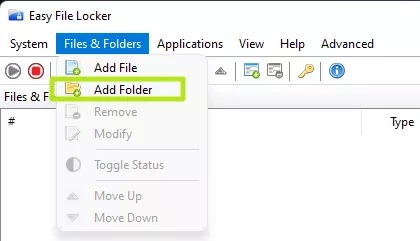
Select Add Folder from the Files & Folders menu. If you want to do this for just one file, you can choose Add File instead of Add Folder.
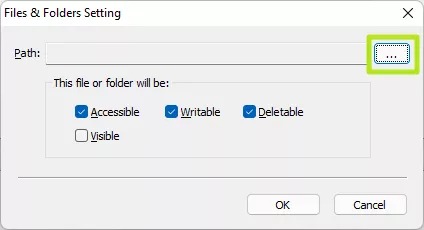
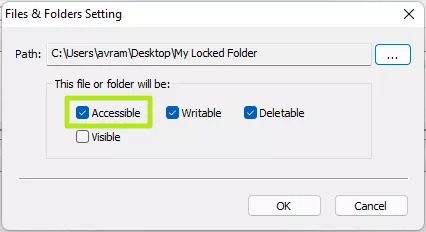
Select your folder or file by clicking the ” … ” button on the right side of the Path field.
Uncheck the Accessible option as well as the Writable and Deletable options. These settings refer somewhat to how the folder or file behaves when locked. So if these options are checked, anyone can read, write or even delete the files, even when they are closed.
If you want the file or folder icon to be visible after locking, enable the Visible option. If Visible is off, the folder or file will not be visible even if you show hidden files in Windows Explorer. We recommend allowing the file or folder to be visual, so you don’t forget where it is. After selecting, click on Ok.
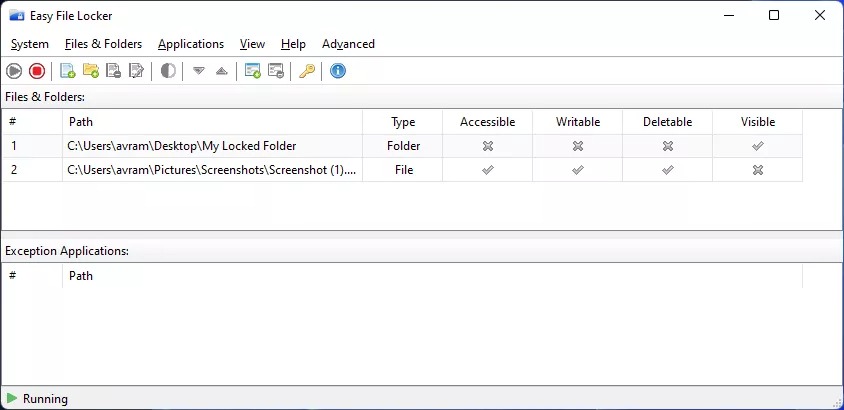
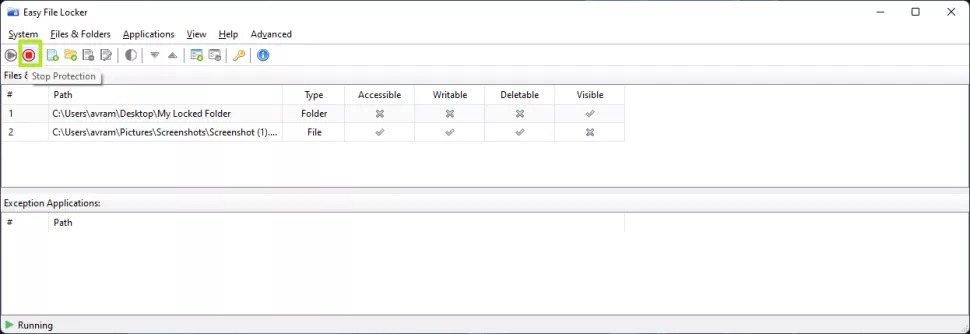
You will need to repeat steps 4 to 7 for each other folder or file that you want to password protect. Finally, you will see a list of all the locked items in Easy File Locker.
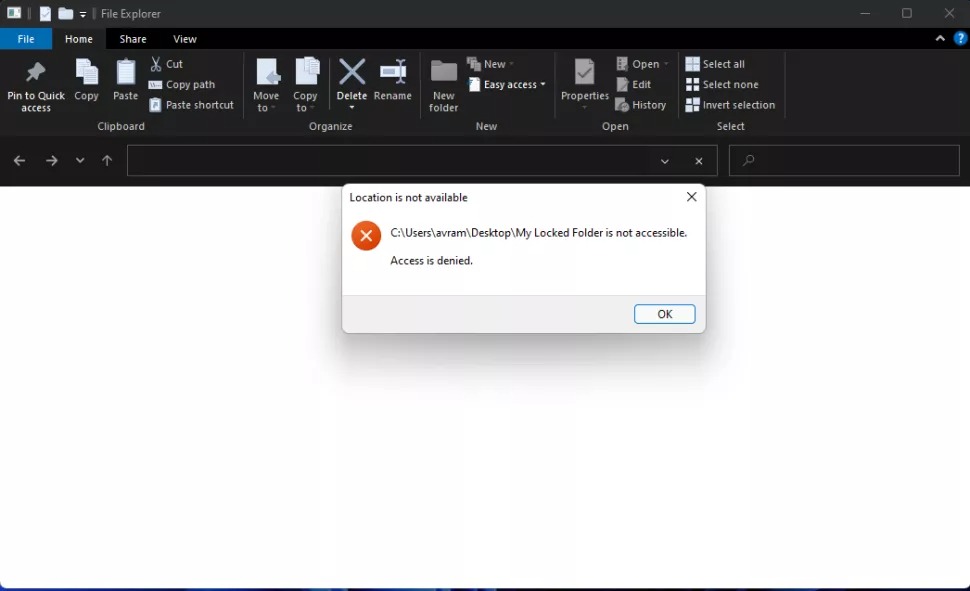
At this point, you can close the Easy File Locker app. You will see that your selected files and folders are locked. If you try to open one of your folders, assuming you have set it to be visible, you will get an Access is denied message, and access will not grant.
Unlock folders and files
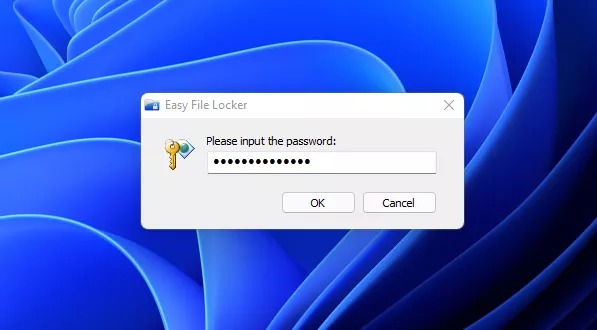
If you need to access the contents of a locked folder or file, you must temporarily disable the lock. Every time you want to view, edit or delete folders that are password protected in Windows 11 or 10, you should follow this procedure:
Launch the Easy File Locker app.
After setup, you need to enter your password.
Press the red stop button from the application toolbar. It will unlock all your files and folders immediately.
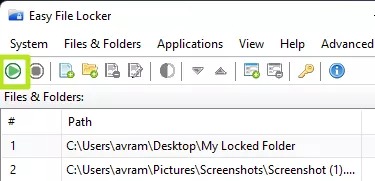
Click the green button to re-enable the lock after you finish editing or viewing files.
From now on, you have to repeat the mentioned steps to edit the locked files and folders. Also, if you want to disable encryption and remove your password from the program, select each of the files and folders listed in this program and click Remove from the Files & Folders menu. Finally, select the Set password option from the System menu to remove the password and click OK by leaving the fields blank.
***
We hope this article has been of use to you. If you encounter a problem with any encryption methods on folders and files or have a suggestion in this regard, share your experiences with other users and us.