


How to install Git on Ubuntu 20 (Ubuntu 20.04)
Installing Git on Ubuntu 20 can have many benefits; In simple terms, we will know Git as Version Control System (VCS). Git is called the most common control system in the world, it is a mature and active open-source project created and developed by Linus Torvalds in 2005.
Installing Git on Ubuntu 20 is necessary for most developers. It has many tasks; for example, you can download and use certain packages and also use it as a local server.
Many software project files are stored in Git repositories, and platforms such as GitHub, GitLab, and Bitbucket help facilitate software development project sharing and collaboration.
In this guide, we will examine how to install and configure Git on Ubuntu 20.04 server; We will explain how to install the software in the main way: through the internal package manager and making the necessary changes in the config, through the source; Each of these Git package approaches has its advantages for your specific needs; In the following, we will provide a brief and at the same time more complete explanation.
What is the meaning of Git, and what is its use?
Git is called a version control system (VCS) that you will be able to track the changes applied to the files more easily, for example, if you edit a file, Git can tell you exactly which of the has changed, who has changed it, and what is the main cause of the change.
One of the uses of Git is to coordinate tasks between different people working on the same project; Also; check the progress of the project over time by saving the Checkpoint; Or when you want to track the applied changes in an art or design file.
Gate is not the only current version control system; it can be said that it is one of the most famous; Knowing how to use Git can have a positive effect on your resume, it should be noted that most programmers use Git a lot.
Among other uses of Git, the following can be mentioned:
- Making changes and describing the changes in the list
- Suitable for group projects and creating interaction between members
- The possibility of reading and checking the records of the tank
- Update in local repository and merge it remotely with another branch
- Add tags to any software version
- Access to the Replace Changes section
Check Git availability before starting the installation
Git is probably already installed on your Ubuntu 20.04 server; You can check this on your server with the following command; You can find out about this by using the following code:
git –version
Note that if the output of the command matches the section below, it means that Git was already installed on your server:
git version 2.25.1
How to install Git on Ubuntu 20
Note that each of the methods provides you with different ways of installation; If you have not succeeded through the first method, proceed with the installation through the second method, also if each one shows you a specific error;
The first method
Installing Git from the source
The second method
Install Git with default packages
Installing Git from the source
In the first method, first use the Apt package management tools, in the order given by the following commands, to update your server’s package list:
sudo apt update
sudo apt upgrade
1. With the following command, we will activate the Git prerequisite packages to enable the necessary updates for the Git packages:
sudo apt install libz-dev libssl-dev libcurl4-gnutls-dev libexpat1-dev gettext cmake gcc
2. Next, create a directory and enter it by the following commands; This is the part where we are going to download and install Git:
mkdir tmp
cd /tmp
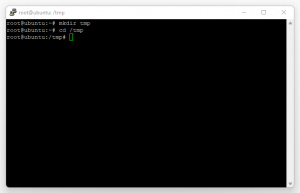
The output of the commands will be as shown in the image.
3. We will download the required file through the following command, and then in the next section, we will get the desired output using the Tar command:
curl -o git.tar.gz https://mirrors.edge.kernel.org/pub/software/scm/git/git-2.26.2.tar.gz

The output of the command will be according to the image you see.
4. Now open the Tar file using the following command:
tar -zxf git.tar.gz

The output will be the same as the image; the desired file will be opened automatically using the Tar command.
5. Through the inserted command, we will enter the new Git directory:
cd git -*
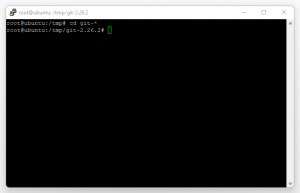
The output of the desired command is exactly the same as the image you see.
6. Now you will be able to apply the required settings through the following commands in the order entered and start the installation:
make prefix=/usr/local all
sudo make prefix=/usr/local install
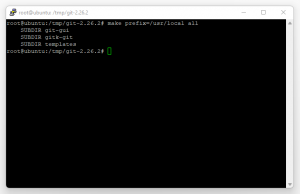
You can see the output image from the first command.
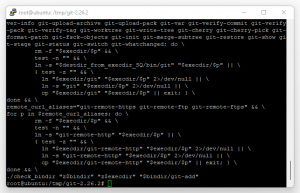
You can see the output image from the second command.
7. Now we’ll replace the process to use the version of Git we just installed:
exec bash
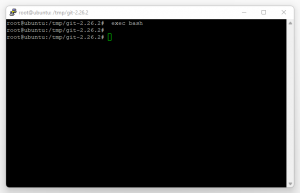
The output of the command will be the same as the inserted image.
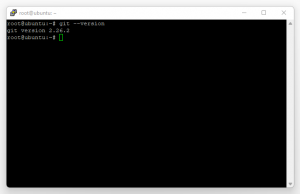
8. Now enter the following command to make sure that the desired Git package is installed:
git –version
The output of the last command will be similar to the following image:
Install Git with default packages
Similar to the first part that you saw in the initial method, we use Apt package management tools, in the order given by the following commands, to update our server’s package list:
sudo apt update
sudo apt upgrade
1. Now we can install and use Git by entering the following command:
sudo apt install git
2. Next, we can make sure that Git is installed by using the following command:
git –version
::: The output of the command is the same as the following section:
git version 2.25.1
Basic commands in Git for web developers
Some commands for developers may be necessary, in the following section we will tell some essential Git commands:
Gate configuration
git config –global user.name “Your Name”
git config –global user.email “youremail@domain.com”
Initialize the gate repository
git init
Commit files
git commit -m “Initial commit”