


How to install DotNetNuke template (4 steps)
After installing DotNetNuke (DNN) on your host, the next step is to install the DotNetNuke theme that you want to use as the skin and appearance of your website. In this article, we will guide you step by step with photos to easily install the template you want.
If you are a fan of the .NET framework, it should be said that DNN is a content management system that will meet almost all your needs in the field of web design. For example, with the help of DNN, you can easily design and launch all kinds of commercial and store, educational and laboratory, news or web application websites without the need for coding knowledge.
In the upcoming article, we will learn how to install the template in this DNN content management system.
How to install the .net nuke template
To install a template or skin on the DNN content management system, you must first install and run this CMS on your computer or host. We have already about how to install Dnn on the host . talked
Steps to install DotNetNuke template
You can easily install your DotNetNuke theme in four steps.
1- Download the desired template
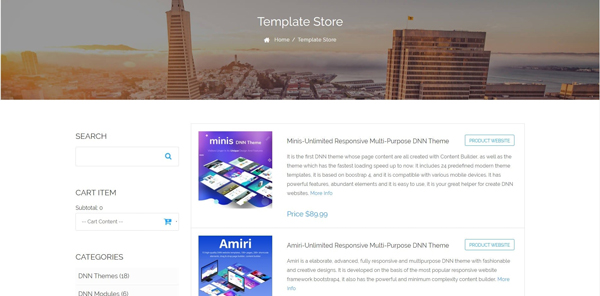
To download the template, you can refer to the official dnnsoftware.com website or different websites related to the specific templates you want. If you search, you will see many websites in this field. You can also find the DNN version of many famous WordPress themes. For example, the famous Porto template, which is very well known in the WordPress content management system, also has a DNN version that can be purchased and installed.
Of course, it should be kept in mind that the variety of templates in DNN is far less than in WordPress, and quality free templates for this CMS may not be abundant. Nevertheless, the template design for DNN is expanding at a high speed and has not performed any worse than its competitors.
2- Enter the DNN website
Log in to DNN as a host user (you set a username and password when installing DNN, remember them so you can log in to your website in DNN)
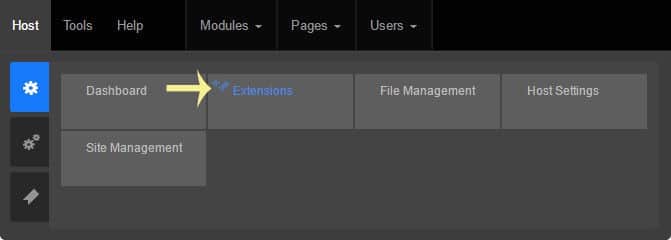
3- Enter the Extensions section
In the management menu in the Host tab, click on the Extensions option. Then Install Extension Wizard option (this option is clearly marked with blue color). select the
4- Upload the downloaded template
Upload the skin you downloaded here and the steps of the Install Extension Wizard step by step to install the skin. follow
So far you have installed a skin or template that you wanted, now you need to learn to familiarize yourself with some settings of the appearance of the website. Of course, it should be noted that these settings are very simple and you will easily learn how to work with the DNN content management system.
You can set the skin of a website in the following way:
Admin :: Site Settings :: Basic Settings :: Appearance.
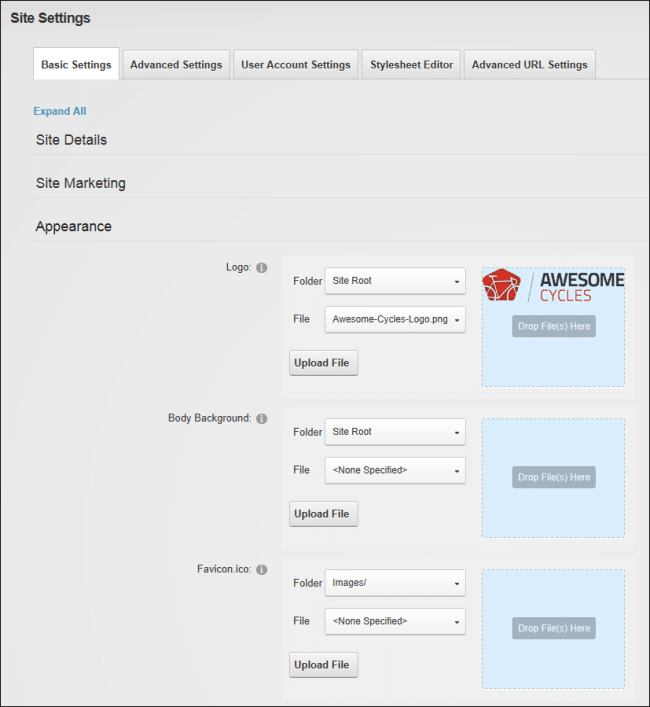
As you can see in the image above, skin settings in DNN are easy to apply, you just need to be curious and explore different parts of the platform. In the sections of settings that can be seen in the image, you can set the website logo, website background image and its icon.
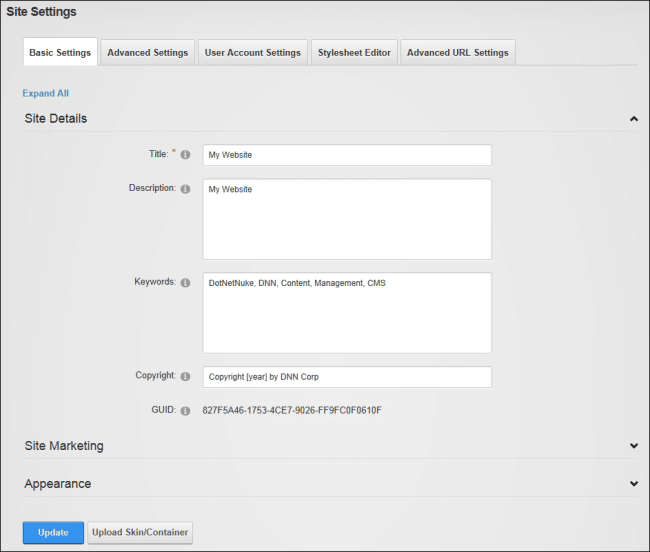
In the Site Details section of the same path, you can also define the main information of the website such as the title, keywords and description of the website. These items can be seen in the image below.
When you have several portals in the DNN content management system, you can choose the default template for all portals from this path.
Host :: Host Settings :: Basic Settings :: Appearance.
This path is also in the management menu in black color