


How to edit Header in WordPress – 3 Easy Methods
What is a WordPress header?
The header is the first element of your website that most visitors see. Typically, the header is where your site’s logo and the menu are located and are part of every page. If you don’t know how to edit the WordPress header, read this article till the end.
WordPress enables you to edit your site’s header in several ways. Almost every theme has a unique header design that you can customize manually. Also, you can use the set of tools the large WordPress community provides.
This article will show you four ways to edit the WordPress header, both with and without plugins.
If you need a strong and fast back-host to host your WordPress site, you can visit the hosting plans of Ded9.com.
1. Editing the header using the WordPress Customizer (customization)
The WordPress Customizer is a built-in tool that allows you to edit global elements of your website. You can use the Customizer to edit headers, footers, typography, menus, and other key aspects of your site.
To access the Customizer, go to your dashboard and click Appearance > Customize. The Customizer displays a menu of options on the left and a preview of your website on the right:
Note that you might use an active block theme if you don’t see the Customizer option in your dashboard. To edit the header of this type of theme, you must use the full site editor, which we will discuss in the next section.
In the Customizer, you should see an option for your header. Sometimes this option may be immediately visible, as in the example above. At other times, you may need to go to a submenu. For example, some themes put the header options in the Layout options or something similar.
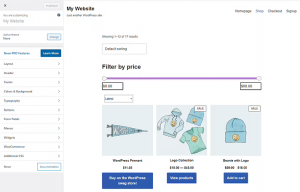
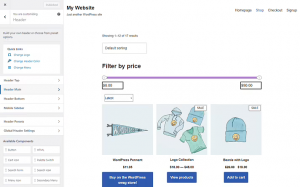
Once you’ve found your theme’s header options, the choices you see now depend on the theme you’re using. For example, our Neve theme includes options to change the logo, header color, and which menu is displayed in this section:
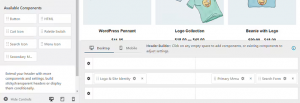
Neve also offers a collection of elements that you can add to the header using drag and drop functionality. Please select any elements in the Available Components section and drag them to the header rows at the bottom of the Customizer. Neve enables you to add up to three rows of elements for a header and place the elements in any position you want:
After configuring your header, save the changes to your template by clicking the Publish button at the top of the Customizer.
Note that any changes you make using the Customizer will only apply to your active theme. If you change themes, you need to edit the WordPress header again.
2. Using Full Site Editing
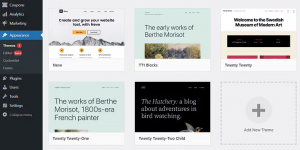
Full Site Editing is a newer feature that allows you to edit theme templates using the Block Editor. This only works for block themes, so it may or may not be available on your site.
To see if your theme supports full site editing, open the Appearance menu and look for the Editor option:
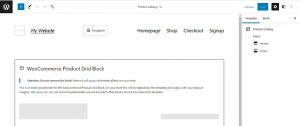
Select that option to open the Block Editor. This way, you’ll edit your theme templates instead of your pages or posts.
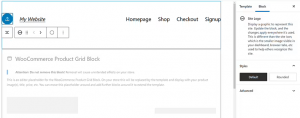
By default, the editor opens to the homepage template, which must include a header element:
Note that some blocks only appear as placeholders when using full-site editing. This is because this tool is not for editing individual blocks but for the entire layout.
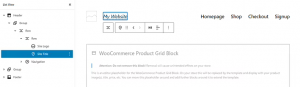
When editing the header, you have complete control over the blocks and elements that should be included. If you open the List View tool, you can see a breakdown of the blocks that the header currently contains:
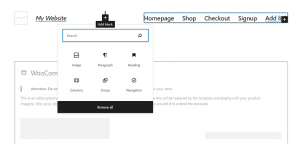
At this point, you can add or remove blocks from the header. To delete or edit an existing block, select it and use the context menu that appears on the screen when doing so:
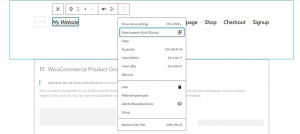
When you select a block, you can edit it using the Block settings menu on the right side of the screen. This menu usually contains style options and varies depending on the block you’re editing:
Select the Header element to add a new block and look for the plus sign icon. This button will open a menu that allows you to choose which block to add:
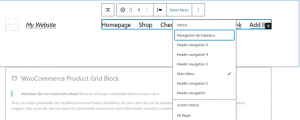
Another useful feature of the full site editor is that you can edit menus visually. To do this, select a menu using the navigation block. You’ll see the option to add new links, create a new menu, and switch between existing links:
When you are satisfied with your WordPress header changes, click Save. This will save the theme’s header format changes and automatically reflect them on your website.
3. Edit the header using the WordPress page builder
Some WordPress page builder plugins offer options to edit the WordPress header. For example, Elementor Pro includes a Theme Builder tool that you can access with a premium license.
If you don’t have access to Elementor Pro, you can use a free plugin like the Elementor Header & Footer Builder plugin on WordPress.org.

We’ll show you how to do this using Elementor Pro and its Theme Builder feature. In practice, Elementor Theme Builder works similarly to full site editing.
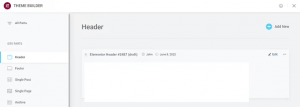
To access the Theme Builder, go to Templates > Theme Builder. Select the Header options in the SITE PARTS section and look for the templates on the right. There should only be one header template, and you can click the edit button next to it:
This will launch the Elementor editor. From here, you can choose to build the header using Elementor blocks or ready-made import templates. If you click on the folder icon in the editor body, you can see what header templates you have access to:
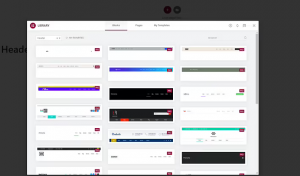
If you use Elementor, we recommend using these templates. Because it allows you to test several header styles, which you can edit by adding or customizing modules:
If you are unfamiliar with using Elementor, this page builder enables you to select modules using the menu on the left. You can drag these modules to your page, which will appear in a preview on the right side of the page.
When using the Theme Builder, you only edit a specific theme template. However, you can still use the full modules and configuration options that Elementor offers.
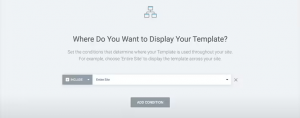
After editing the header template, save it using the Publish button. Next, Elementor prompts you to choose which pages the template will appear on:
Conclusion
Editing the WordPress header is easier than you might expect. This is because WordPress offers a wide range of options for customizing this element, from your theme’s built-in settings to page builders. All you have to do is find an option you feel comfortable using, and you can get to work.