

Windows 11 Updates Often Add New Features To The Operating System, Improving Performance And Fixing Previous Bugs.
By default, these updates are automatically downloaded and installed. Still, this issue is not to the liking of some users due to increased consumption and unexpected end of internet volume.
In addition, every released update usually has a series of known or unknown problems that do not affect the operation of most receiving devices, but, in a few cases, may cause bugs or errors in some systems, so that even Microsoft sometimes prevents the release.
General receives the update. Of course, in the last few years, updates have been organized so that they are checked during different phases of the release and, in case of any problem, prevented from entering the final release phase.
However, this group of users is looking for a way to temporarily or completely stop this process immediately after installing Windows.
Although there is no one-size-fits-all setting for Windows 10 and 11, there are several ways you can do this by following the steps in this tutorial to temporarily or permanently disable Windows updates.
Postponing updates
The first and easiest way to prevent automatic updates from downloading and installing is to pause updates. This option is available for Windows 11 Home and Windows 11 Pro. As the name implies, this is a quick way to prevent updates from happening automatically, but you can extend it.
To temporarily disable updates for Windows 11, follow these steps:
- Open Settings and click Windows Update.
- Click the Pause updates drop-down menu and select the number of weeks (up to five weeks) when you want Windows 11 automatic updates to be disabled.
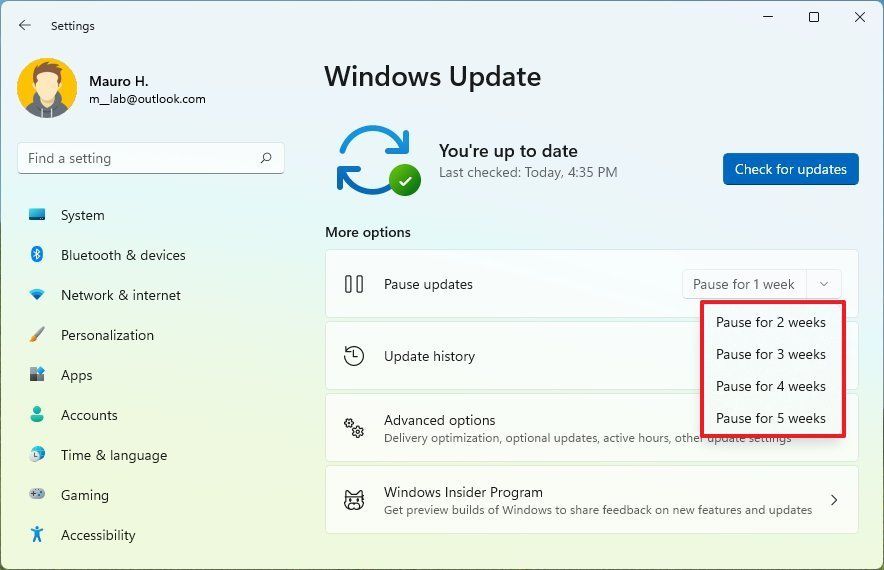

After completing the steps, Windows 11 will not download and install updates for as long as you specify in the settings. If you want to resume updates, click the Resume updates button on this page.
Stop auto-updating by restricting your internet connection
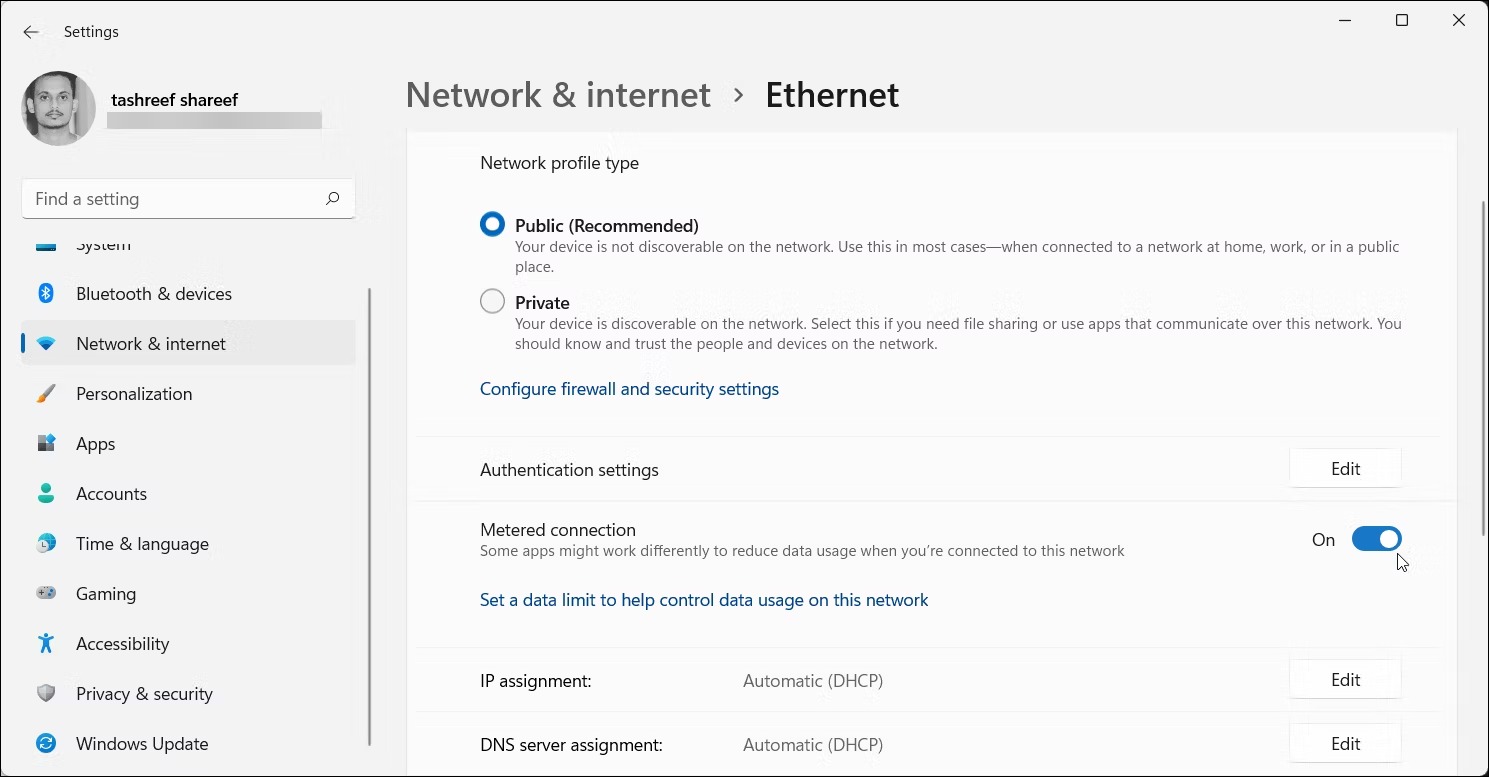
Another simple way to stop automatic updates in Windows 11 is to set your network connection to Metered. This helpful trick is also effective for Windows 10.
This way, Windows checks for available updates but does not download automatically to avoid imposing high data costs on a metered connection. This feature is configurable on any network, including Wi-Fi and Ethernet. For this job:
- Press Win + I to open the settings panel.
- In the left pane, open the Network & Internet section.
- Click Properties for your Wi-Fi or Ethernet network.
- Scroll down and enable Metered connection.

Disable updates through the registry.
The registry has always been a way to make custom changes to Windows. You can also use the registry to disable updates:
- Search Regedit in the Start menu. Click it to launch Registry Editor.
- Go to the following path:
HKEY_LOCAL_MACHINE\SOFTWARE\Policies\Microsoft\Windows
- Under the Windows key, check for the WindowsUpdate key. If not, to create a new key, right-click on the Windows key and select New> Key.
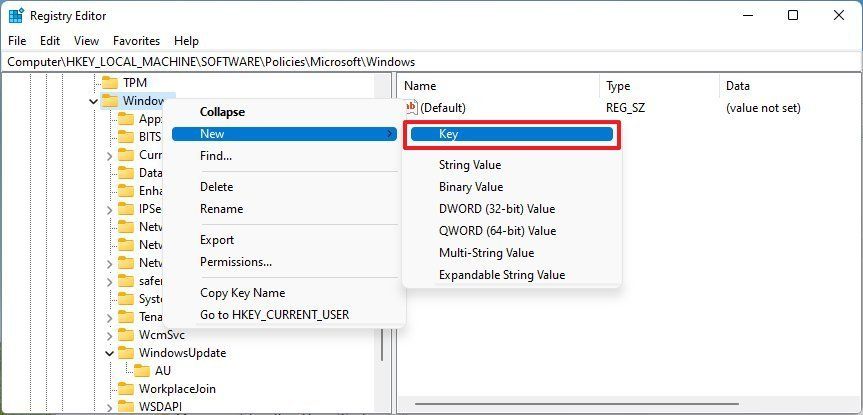

- Rename the key to WindowsUpdate.
- Right-click the new WindowsUpdate key and select New> Key to re-create a new key in the WindowsUpdate subset.

- Name the new key AU and press Enter.
- Right-click on the AU key and select DWORD (32-bit) Value from the New section.
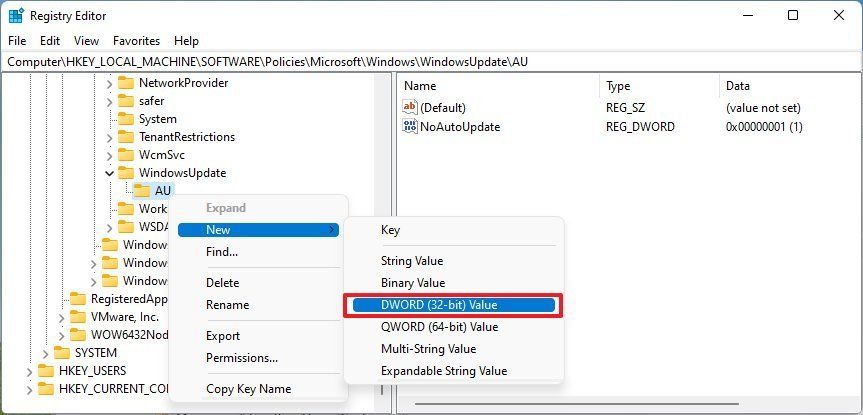
- Name it NoAutoUpdate and press Enter.
- Double-click the created password and set its value to 1.
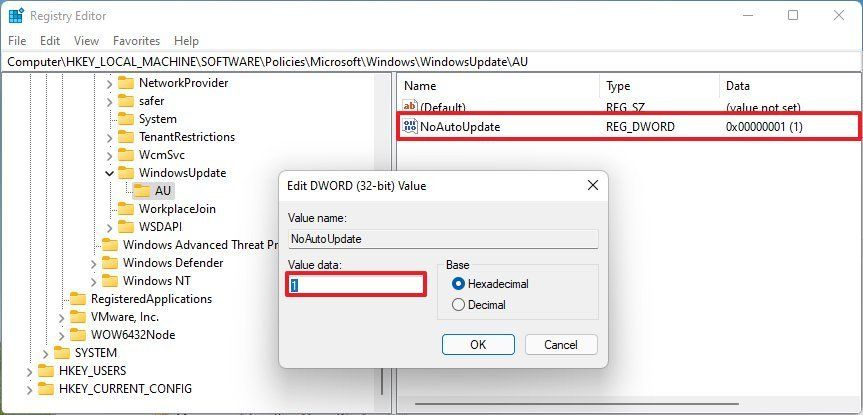
- Click OK, then restart the device.
After completing the steps above, the auto-update feature in Windows 11 will be permanently disabled. But you can still manually install updates from the Windows Update settings page.
If you want to undo these changes, use the exact instructions, but in the third step, right-click the WindowsUpdate button, select Delete, and restart the device.
Disable auto-update via Group Policy
In Windows 11 Pro and Enterprise, you can use the Local Group Policy Editor to permanently disable auto-updates or change Windows Update settings to decide whether to service your computer.
Use these steps to disable auto-updates via Group Policy in Windows 11 permanently:
- Search for gpedit.MSc in the Start search bar. Click it to launch Local Group Policy Editor.
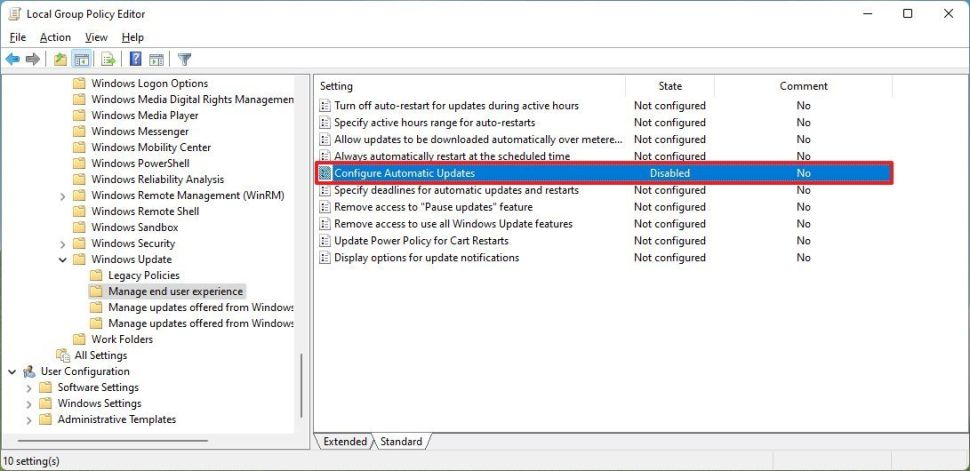
- Go to Computer Configuration> Administrative Templates> Windows Components> Windows Update.
- Double-click Manage end-user experience, then double-click Configure Automatic Updates in the right pane.

- Select the Disabled option to disable auto-updates in Windows 11 permanently.
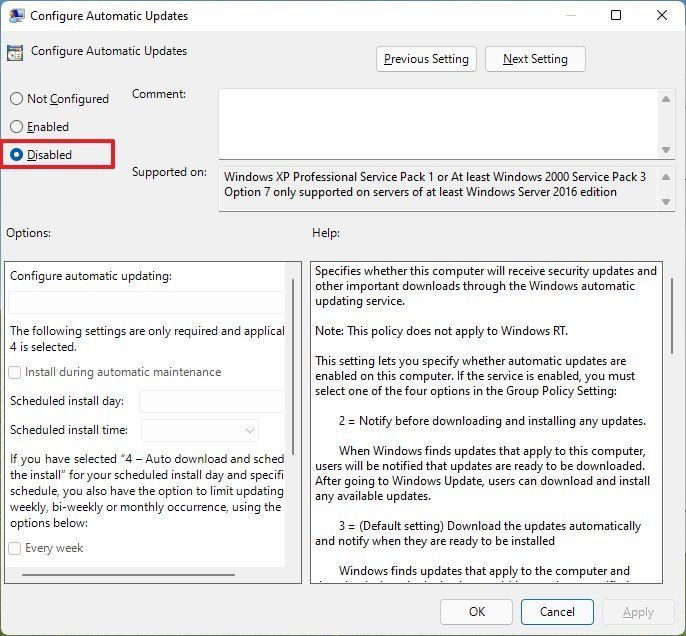

- Click the Apply button, then click OK.
After completing the steps, Windows 11 will automatically stop downloading and installing updates. You can manually install updates from the Windows Update settings page.
If you want to re-enable automatic updates, you can use the instructions above, but in the third step, select Not Configured instead of Configure Automatic Updates.
Disable updates using the Windows Update Blocker tool
Windows Update Blocker is a good program for blocking updates on Windows 10, and it also works well on Windows 11. This program gives the user more control over the operating system update behavior. Here’s how to use the WUBlocker tool:
- Go to the Windows Update Blocker page and download it.
- Unzip the zip folder and run the Wub.exe file; If your Windows is 64-bit, open Wub_x64.exe.
- In the window that opens, select Disable updates and click Apply Now.
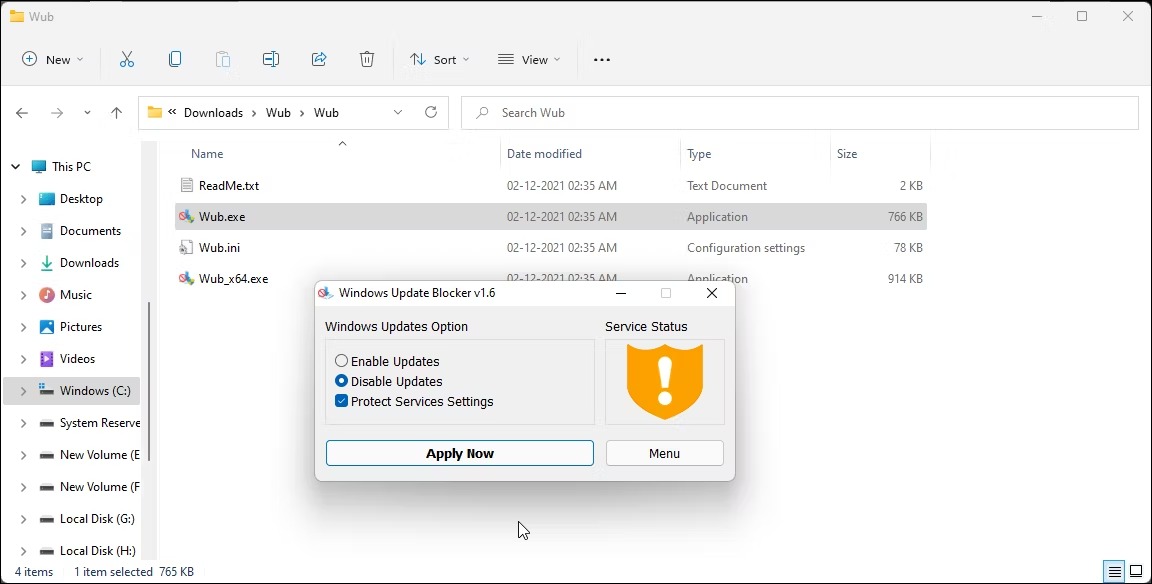

- After this, the service status will be green. Close the program and restart your computer.
We hope this article has helped you disable Windows 11 updates. If you have any questions or problems, please share them with the users and us.
FAQ
How do I pause Windows 11 updates?
Go to Settings → Windows Update → Pause updates, then choose the number of weeks you want updates paused.
How can I stop updates automatically using my internet settings?
Set your network connection as a “metered connection,” which blocks Windows from auto‑downloading updates.
Is it possible to permanently disable Windows 11 updates?
Yes — by using Registry Editor, Group Policy Editor (on Pro/Enterprise), or disabling the Windows Update service.