How to configure NIC Teaming in Windows Server
In Windows Server, from version 2012 onwards, there is a feature called NIC Teaming, which you can use to have load balance and increase fault tolerance in your server. A very powerful feature that allows us to combine several network cards on our Windows server. When we can do this, then we will have more bandwidth, and also if one of the communication links is cut, the connection between the server and the network will not be cut. In NIC Teaming, we can put up to 32 network cards in a team and integrate them.
Windows server is one of server operating sysytem designed by the Microsoft Corporation.
Windows servers are more powerful versions of
their desktop operating system and server is designed to efficiently handle corporate networking,
Internet/intranet hosting, databases, enterprise-scale messaging, and similar functions.
Microsoft has published Windows Server under that name since Windows Server 2003 launched in April 2003.
To create NIC Teaming, follow the steps below:
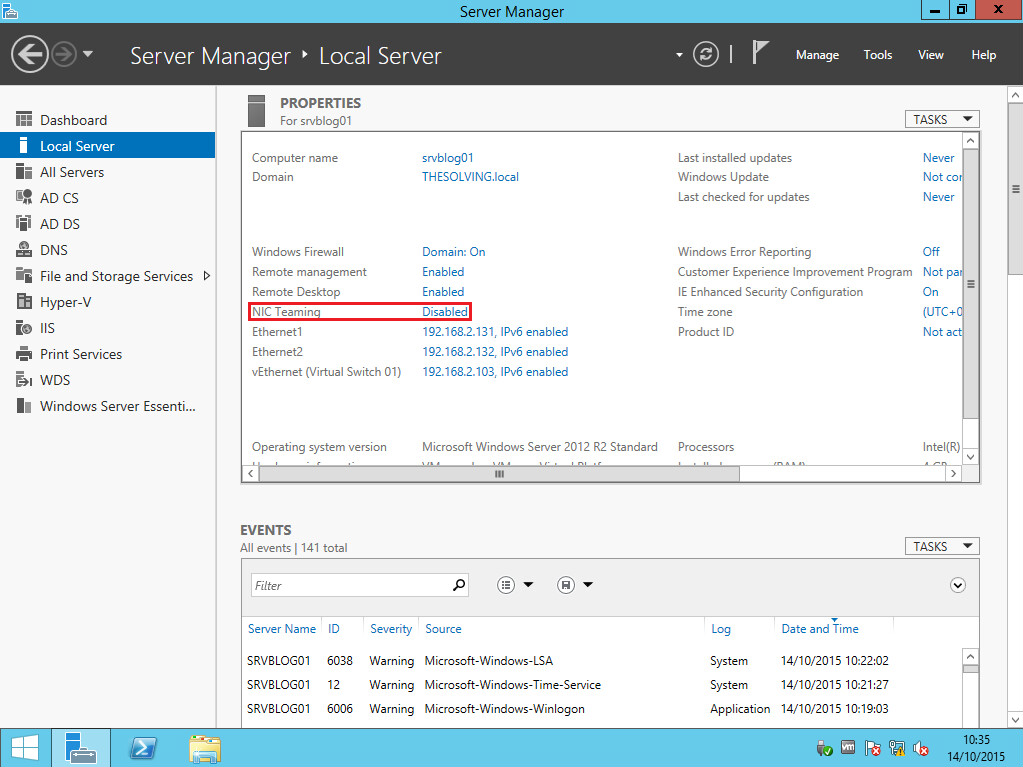
First, run Server Manager on your Windows server, click on Local Server from the list on the left, then click on Disable, which is placed in front of NIC Teaming.
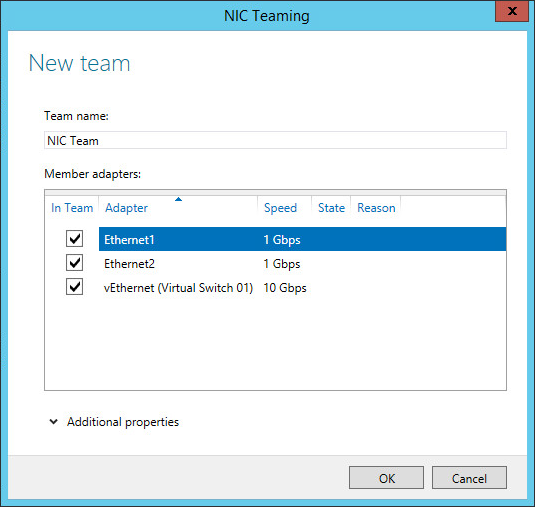
Click on New Team in the opened window as shown below.
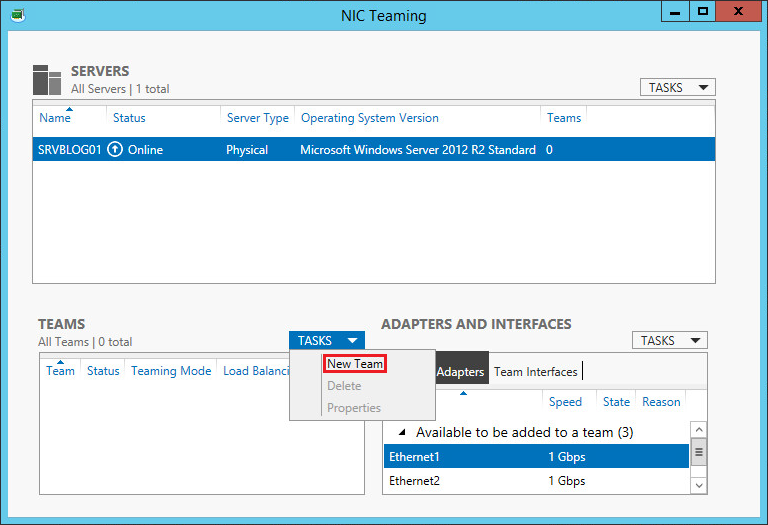
You will see a list of network cards connected to your server, select the network cards you want to put in a team. In the Additional Properties section, keep the default settings and click OK. Choose a name for your team in the Team Name field.
After completing the above steps, the relevant NIC Team is created.
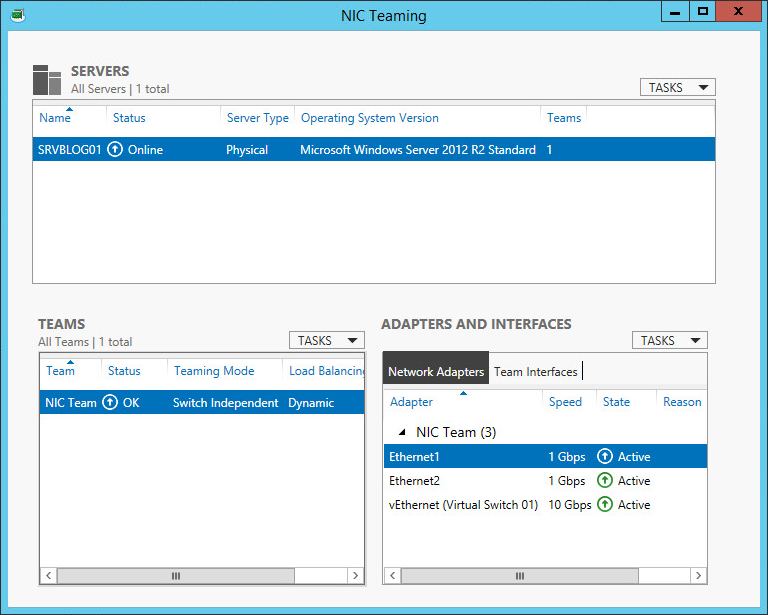
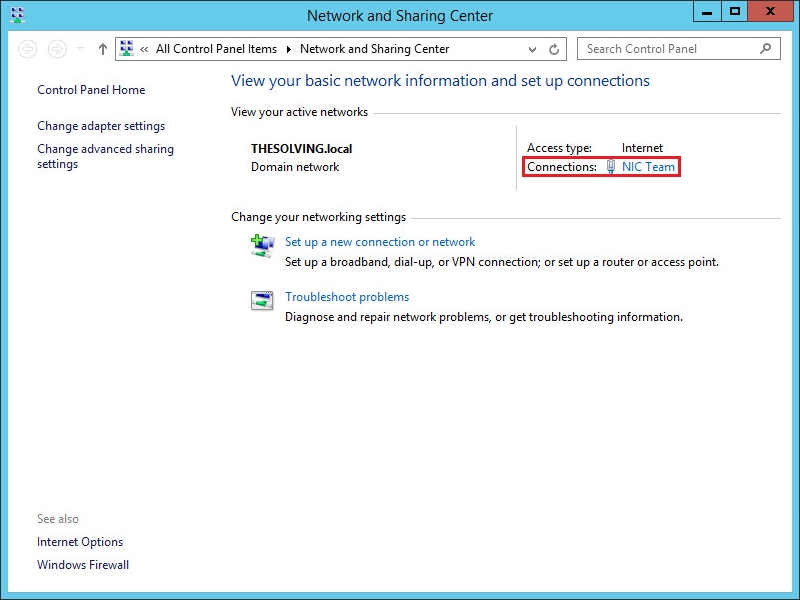
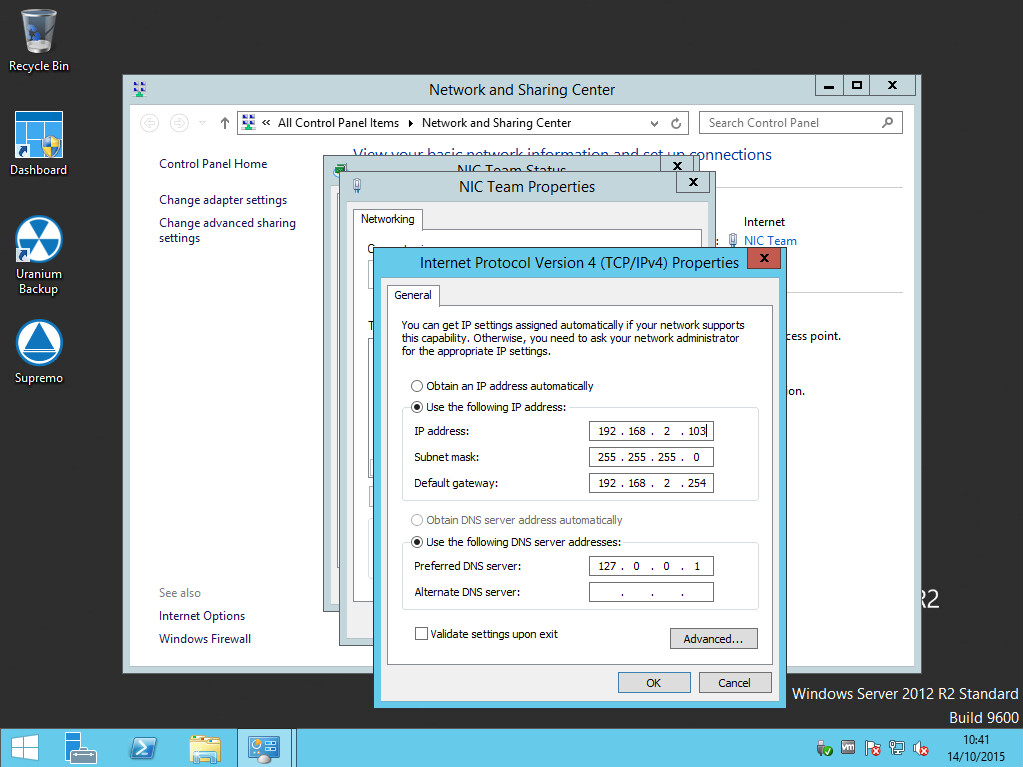
If you refer to the settings related to the network card in your server, you will see the network card with the name of the team you created; now, you can enter its settings and enter the IP address corresponding to your network on this network card. adjust.