How to compress files in C Panel
Compressing inside the host means that the contents of your host directories, which may contain the entire file and folder, instead of downloading them one by one, are first converted to a file and then to that file. Easily download it or move it to another path from the host. For example, imagine there are 500 photos in one of your host folders, and you decide to download them to have them on your computer, One way is to download those 500 photos one by one, which does not make sense at all, and the second way is to convert all the photos to a zip file and easily download that file, now we have the photo here. an example, but most of the use of compression is that when we want to transfer our site information from one host to another, we can easily convert all files and folders in the old host to a compressed file and then a compress file. Download it and upload it to another host.
To compress files in Cpanel, first, enter your site host by learning how to log in to C Panel host, and from the files section, click on file manager to enter the file management section. 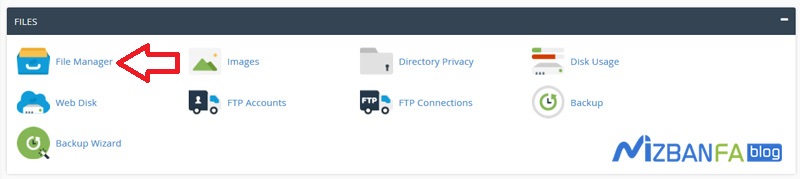 Well, now you are in the home path of your host file manager according to the image, and this is where the files are located in the structured folders of the hosts, so any change here may cause your entire site to crash, so you have everything you need to do to compress the file. All you have to do is enter the public_html path of your site first, because public_html is the main location of your site files, then click on the public_html icon
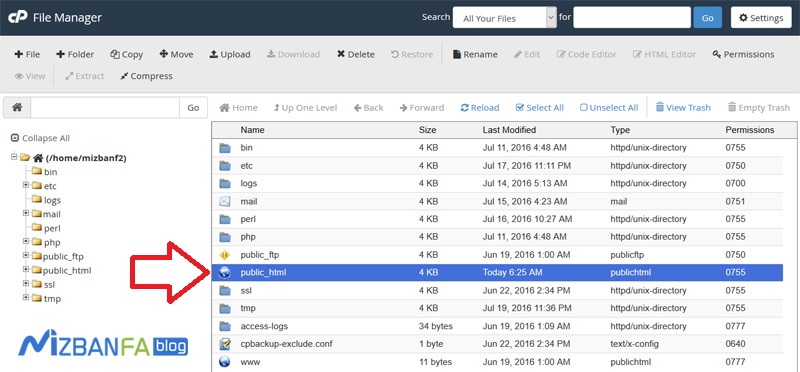
To enter this page.
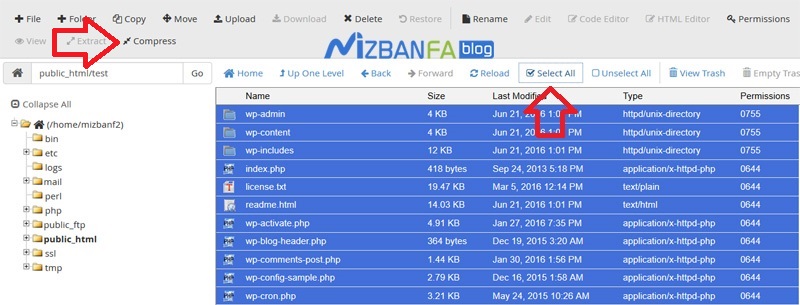
Well, we now enter the test folder and as you can see here we have a whole file and folder. 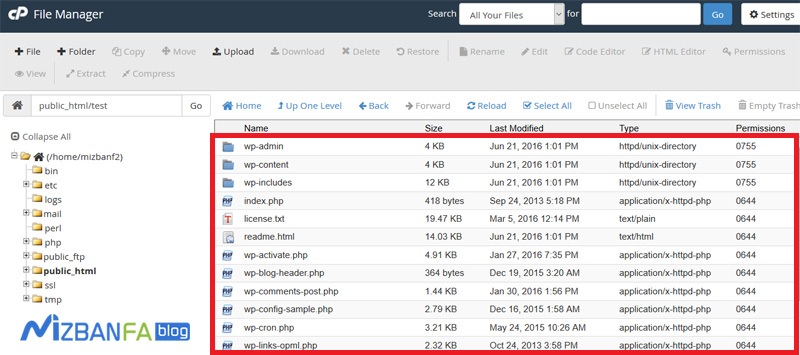
Once we have decided to convert them all to a file, to do this we first select all of them using the select all tool and now there are two ways to compress them:
- The first way is to click on the compress button from the top left.
- And the second way is to right-click on the files and click on a compress.

Compress files with a variety of formats in the C Panel
Well, as you can see, the compressed window opens for us, and the first is written Compression Type, which means that you select the compression format you want to compress the files, and there are four types of formats that we will introduce their use:
- Zip Archive: .zip is one of the most popular data archiving formats, a zip file may consist of compressing a large number of files and directories, and the zip format is one of the best compression algorithms that can be run in Windows We also usually use zip format to compress our files inside the host.
- Tag Archive: .tar is another format for archiving information, and a tar file may be the result of a large number of files and directories being compressed. It is considered Unix and this format is usually used to back up files inside Linux.
- GZiped Tar Archive: .gziped is one of the file compression formats inside Linux that can compress very large files to take up less space inside the host, in fact the gziped format to end the use of the format .gz and built-in replacement with gz.
- Bzip2ed Tar Archive: .bzip2 is one of the open source formats for data compression and it is used only for compressing single files and has different versions.
Well, now that we want to compress our file so that it can be opened inside our computer Windows, so we choose the zip format for this, 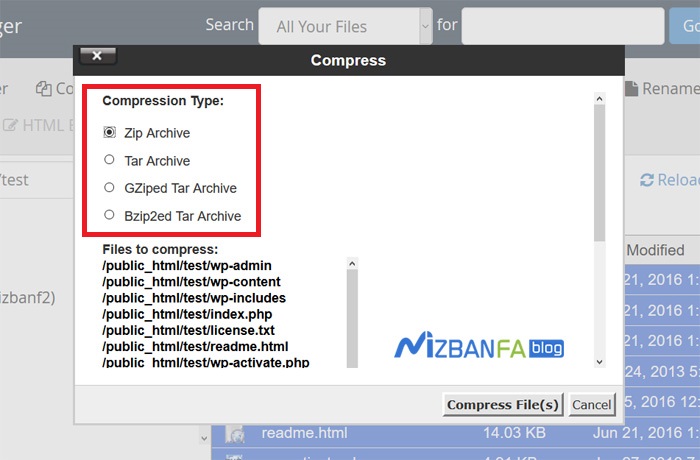 Because the zip format can be easily opened and used inside the computer and other platforms, then in the Files to compress section, the names of the files or folders that you want to compress are specified along with their current path, for example, here you can see the entire file and folder Given that we have decided to compress them all, if we go a little lower in this window, we will see the Enter the name of the compressed archive and click Compress, which means that after compressing these files and paths, What is the final name of the compressed file? For example, here it is automatically written after / at the end of wp-admin.zip, which means that the name of our compressed file becomes wp-admin.zip, also here you can see the final path of the compressed file that is written / public_html / test / wp-admin.zip, which means that the compressed file is located in the Public_html path and is in the test directory or folder.
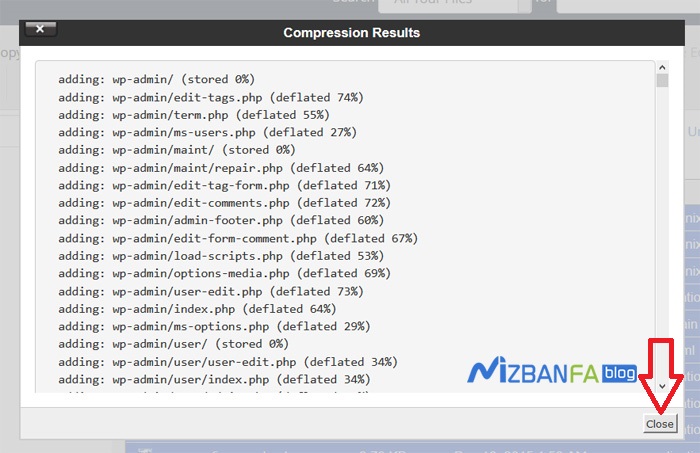
The interesting thing is that here we can also change the final path of the compressed file, note that in the routing inside Linux hosts / is used, so because we created a folder called files in the public_html path and we want to compress the file to Move there, then after the public_html slash, we remove the test phrase and write files to it. 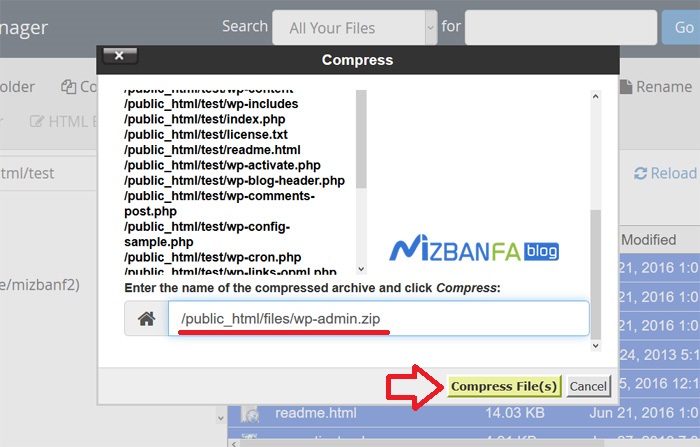 Finally, after compression, to view the compressed file, we must enter the public_html path of our host and then refer to the files directory. Now, to finalize the work, we click on the compress files button and wait for the compression operation to be completed and the compression results window to be displayed for us.