


How to build automatic response to emails in Host C Panel
Imagine you have a large website, and you receive a lot of emails every day, and your employees respond to them during office hours or other special times, and the problem is when users send you emails, they want to. The sooner they get a response to their emails, the less likely they are to know when you will be responding, and this will allow users to call your company’s direct phone after sending an email and ask if they have received their email. Did you receive it? And if you are answered in the affirmative, when will you respond to that email? With the ability to automatically respond to emails in Host C Panel, you are able to apply settings that as soon as your system receives the email, respond immediately to the user via email and say that your email was received, for example during office hours, within 72 The next hour the request will be checked and answered, the ability to automatically respond to emails may sometimes have many other applications and make your work easier, for example if you have a website or store service and services through the Internet You sell and all the users who email you have almost the same questions and requests, you can create a page of frequently asked questions inside your site and put buying guides from your site and set the automatic response so that as soon as Receive an email, send an automatic email to the sender and invite the user to enter the FAQ page of your website and find the answer to the question there, in any case, you are able to use this feature to create creative communication facilities for Provide your users, then continue this Join us for an instructional video.
How to build autoresponders by autoresponders tool in C Panel
To create an automatic response to emails, first, we enter the C-panel host of our website by learning how to log in to C-Panel, then we scroll down a bit and click on the autoresponders icon from the email section to enter the page. Set up auto-reply settings for C-panel emails. 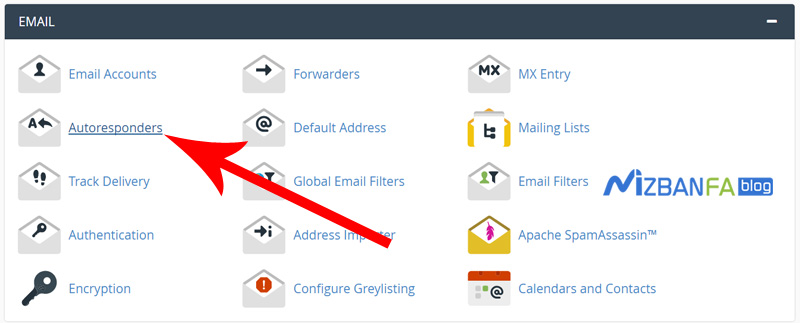 By the way, before setting up an automatic reply, you must have created an email account on your website. If you have not yet created an email address, how to create an email in C-Panel, watch the Click the blue add autoresponders button to enter the Modify / Add Autoresponder page.
 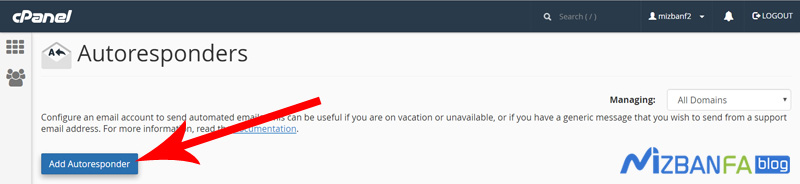 Now on this page, to create an automatic reply to emails, we have to complete all the fields and options in this section, which we will explain the use of each of them in order:
- Character Set From this section, we have to set our desired Unicode to display the text of the message sent to users correctly because Unicode utf8 is one of the best and most compatible Persian and English Unicodes. We usually do not change this section and add Stay on the same utf8.
- Interval In this field, we can specify a time per unit time. Its use is to prevent the sending of repeated automatic responses after receiving repeated messages from the user. For example, if we put the number 1 in this field, i.e., 1 hour, when A user sends us an email and the auto-reply sends him an email reply, up to 1 hour after receiving the first auto-reply, if the user sends another emails again, the auto-reply will not respond, then if after 1 The same user sent a new email again. An automatic reply will be sent to him. We will put the number 1 in this field.
- Email In this section, we have to enter the address of that email account from our website host, which we want to be automatically answered when someone sends an email to him. In this field, we only need to enter the prefix of our email address, i.e., the prefix before @ email address. So, we write info, which is the prefix of the email address we already created.
- Domain In this section, we must domain to be placed after the info prefix that we set in the previous field, and the email address is complete, we select the main domain address of our website, i.e., ir, then complete the email address, i.e., the previous field to This field was dependent, so the email address we want to respond to automatically was info@mizbanfatv.ir.
- In this section, we have to enter a custom name until the autoresponder for the sender of the email sends a reply email as the name of the sender of the email is displayed in the recipient’s inbox, so in this section, we enter the name of our website mizbanfatv we do.
- Subject In this section, we have to set the subject of the email, which we have to enter as desired, until the automatic reply to the email’s sender, the email will send the reply. In this field, we write as desired: We received your email.
- This message contains HTML. This option should be checked when the email we want to send to our users as an autoresponder is graphically designed by HTML, and the HTML code is placed in the text box because we want a message Enter simple. We do not check this option.
- Body In this part, which is the main task, we have to type the text that we want to be sent to users as a ready answer, but before doing anything, let us introduce you to some of the applications we can use in this box…
We can use a series of values inside the body box to create a feeling of more trust within users, which we will explain to you in order:
- % subject% If we enter this value in the body box, we can call the subject the user entered when sending the email into the box.
- % from% If we enter this value in the body box, we can call the name of the sender of the email when sending an automatic reply.
- % email% If we enter this value in the body box, we can call the sender’s email address when sending an automatic reply.
According to the explanations we gave about these cases, we will enter the C panel again to type the ready answer in the body box.
All right, we start to write a ready-made answer that we want to ask the user as soon as we receive the email. Before typing, because our message is Persian and the left panel is Chinese, press the ctrl + shift key combination. We tap inside our computer keyboard to more easily type the message from right to left.
Hello% from% dear

 Thank you for choosing us.

 We have received your email with the subject% subject% and we are reviewing your request, after completing the necessary checks, we will send the answer to the email address% email%.

 Thank you for your patience
After completing the text of the message, we will explain the rest of the parts to you:
- Start This option is related to the start time of the automatic response. If immediately selected, as soon as we set up this automatic response, it starts working and automatically responds to our users. Still, we can hope for a while if we select the custom option. Please set it to start auto-responding from that date, not as soon as you build the auto-responder in C Panel.
- Stop This option is related to the end time of the autoresponder, which, if never selected, will respond to our users’ emails until we delete this autoresponder, but if we select the custom section and select a date. , As soon as that time arrives, the automatic reply will stop automatically and will no longer respond to emails.
To finalize the creation of an automatic response for this account from the emails on our website, we click on the blue create/modify button. 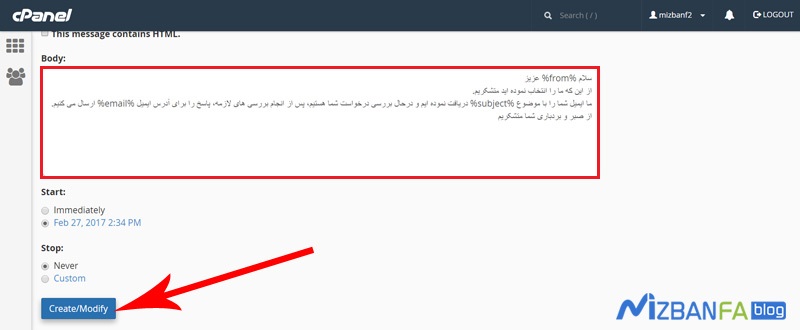 To see the green message, The autoresponder ” info@mizbanfatv.ir ” was successfully created. Just seeing this message means that the automatic response for this email account is created in the host panel of our website.
You should note that if you define an auto-reply to the email address that the email account has not yet been created in the C-panel host of the website, the emails sent to that address will be received by the C-panel autoresponder feature and will be deleted automatically. It is possible.
In the next tutorial video, how to set the default email address for receiving random emails in C-Panel , so join us and see more tutorials about C-Panel, most popular admin control panels . the Please visit www.mizbanfa.net or follow us on Twitter and use all our tutorials for free