
How to Create a Pages in WordPress
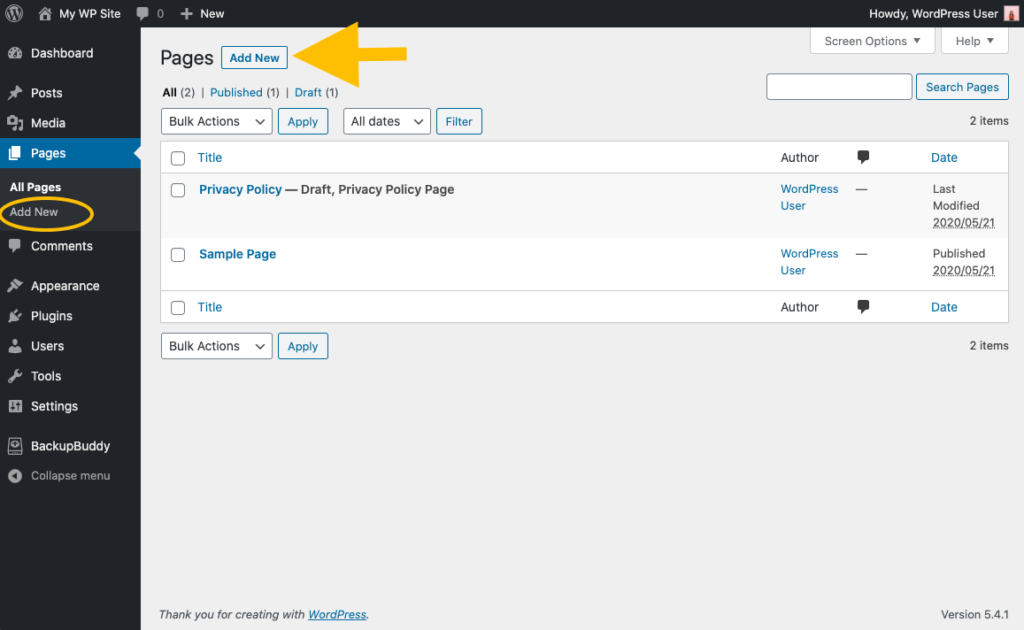
To get started adding a new pages to your WordPress site, find the Pages menu in the WordPress Dashboard Navigation menu. Click Add New.
Check Out last WordPress Tutorial !

You’ll now see the WordPress page editor. WordPress 5.0 introduced an entirely new editor with a new approach to adding content to your new page called the WordPress Block Editor. In the WordPress editor, each paragraph, image, or video is presented as a distinct “block” of content.

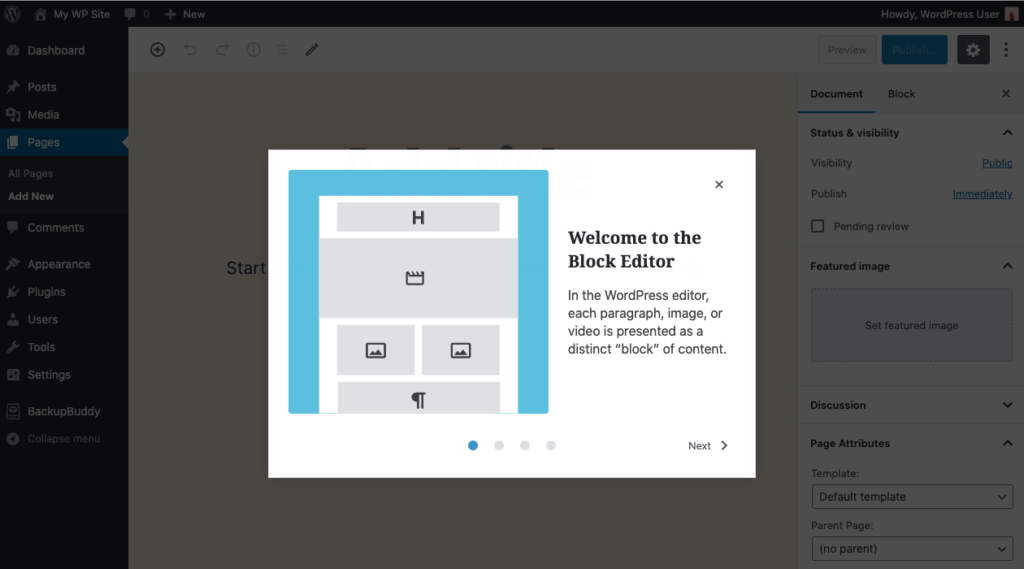
Each block comes with its own set of controls for changing things like color, width, and alignment. These will show and hide automatically when you have a block selected. All of the blocks available to you live in the Block Library. You’ll find it wherever you see the + icon.
Add Pages Title
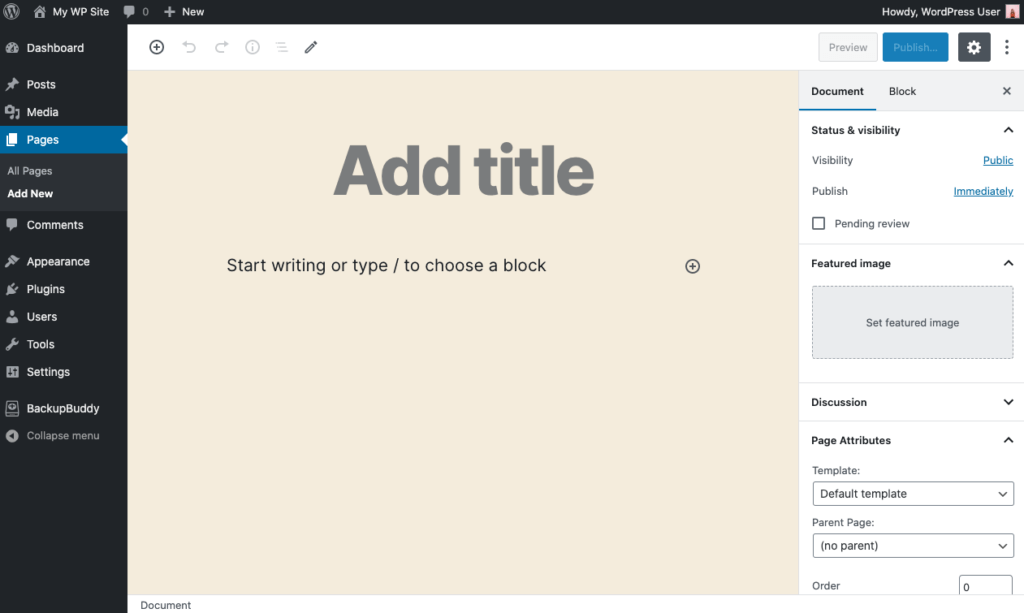
Next, add the title of the page, like About. Click the Add Title text to open the text box where you will add your title.
The title of your page should be descriptive of the information the page will contain. Choose a helpful page title.

Start Writing or Choose a Block
After you add your page title, it’s time to add some content. Content can be anything you choose … from text, headings, images, lists, videos, tables, and lots more.
To see the available blocks for your page, click the plus sign button at the top of the page.
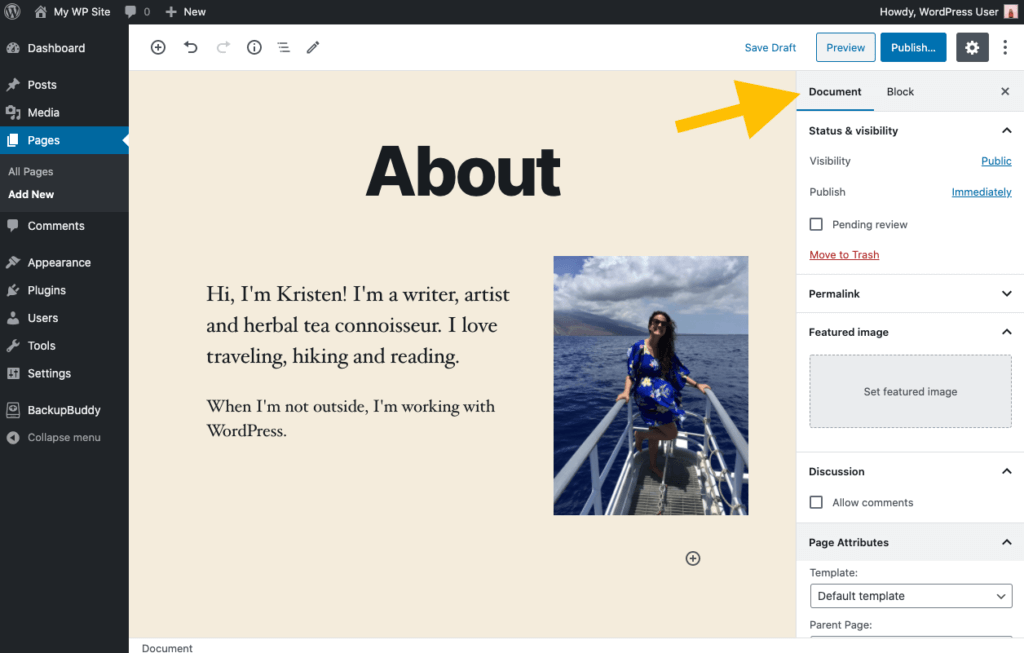
WordPress Document Settings
On the right side of the WordPress page editor, you’ll see Document settings for your page. This area contains some important settings for your page, so let’s go through them.

Satus & Visibility
The status and visibility section contains details about how and if your page is viewable.
Visibility allows you to select between three options
- Public – Visible to everyone
- Private – Only visible to site admins and editors
- Password-Protected – Make the page only viewable with a password you choose. Only those with the password can view this page.
How to Schedule When Your WordPress Pages Will Be Published


The Publish settings allows you to either choose “Immediately” or a date in the future for your page to be published.
If you want to schedule your page to be published in the future, you can use the time and date picker to choose your preferred publication time.
If you want your page to publish immediately, then leave this setting to Immediately. This means when you hit the blue Publish button at the top of the screen, your page will immediately go live.
Permalink
Permalink is short for “permanent link.” This is the field where you can customize the last part of the URL of your new page.
Featured Image
Depending on your theme, the featured image of your page may be used in several ways (like on your home page, for example, in a gallery-style listing of pages). Upload an image that “describes” your new page here.
Featured images are also used by social media platforms like Facebook and Twitter as the preview image for the page if you share a link to your new page.
Discussion
If you’d like to allow comments on your new page, you can enable them here. Otherwise, leave this setting turned off.
Page Attributes
The Page Attributes section applies a parent page and template to your new page.
- For the Parent section, you can arrange your pages into page hierarchies. For example, you could create this new page with additional pages under it. Or you could place your new page as a child page beneath an existing page.
- Template – Some WordPress themes have custom page templates, so the next Template section allows you to apply a template to your new page.
- The Order box allows you to order your page numerically. Pages are usually ordered alphabetically, but you can choose your own order by entering a number in this field.
Save Draft or Preview Your Pages
As you finish up work on your new page, you have a few options. Using the left-hand links at the top of the screen,
- You can Save Draft of the page, which will save the page and your work on it into a draft.
- To Preview the page one last time, click the Preview button. This will open a new tab in your browser where you can view how your page will look once it is live.
Publish Your WordPress Pages
Once you have finished adding content, sizing images and proofing your page, it’s time to publish! Preview it one last time and then click the Publish button.
You’ll be able to double-check your settings one last time before publishing.
Once you’ve published, you’ll see a confirmation that the page is new live, along with the page address. Click View Page or Copy Link to save your new page’s URL.